Learn How to Deploy Windows 10 Image via WinPE USB Disks
Want to know how to deploy Windows 10 (Enterprise) image via WinPE USB disk? This article provides you with a reliable software to do this. Click for more details.You’ll also find a detailed FAQ to address any additional questions on using WinPE for Windows 10 deployment.
By Sebastian Updated on October 28, 2024
Why deploy Windows 10 image via USB?
People back up Windows to prepare for emergencies. If something goes wrong, you can restore your Windows system image backup to return your computer to normal. You can also use the backed-up Windows image on another computer. USB drives are easy to find and affordable, even those with large storage, making them a convenient option for deploying a Windows 10 image to another computer.
Additionally, if the target computer lacks a CD/DVD drive, you can't install Windows 10 from a disc. Also, if the target PC isn’t on the same network as the source computer, network deployment isn't possible. Therefore, using USB drives is often the best solution. You can learn to deploy Windows 10 to multiple computers over the network using Windows 10 deployment tool
How to deploy Windows 10 via WinPE USB disk?
To perform deployment with only USB drives, there are several preparations you need to do.
📌Two USB drives larger than 16GB size, the bigger the better. One is for system image and the other is used as a WinPE bootable device.
📌Backup Windows 10 to a USB drive, and mark it as USB A in this tutorial. This cannot be done with Windows built-in backup utility because it will treat the USB drive as a “not valid backup location” for the system.
📌Professional backup & restore solution AOMEI Backupper Professional. It will assist you make the USB drive bootable and deploy the Windows 10 image even to different computers within clicks.
After all preparations are done, you need to download AOMEI Backupper on one regular work computer. Install and launch it.
Then make the rest USB drive the bootable device. Using the Create Bootable Media feature in AOMEI Backupper to create a WinPE ISO file there. Let’s mark it as USB B in the following context. Now learn how to deploy Windows 10 using a USB drive.

Deploy Windows 10 with USB via AOMEI Backupper
Step 1. Insert in USB B (bootable device) to boot the target PC. The embedded AOMEI Backupper will come into your sight right after a successful boot.
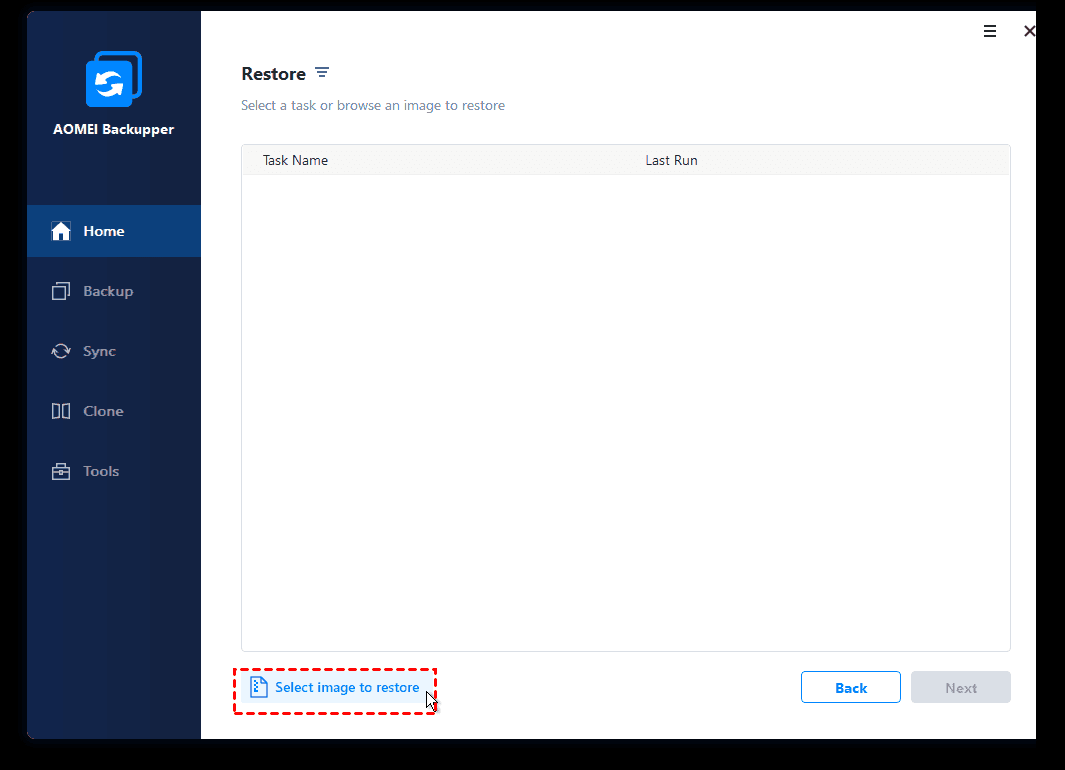
Step 2. Insert the USB A now into the target computer. Make sure it can be detected. Double-click the AOMEI Backupper Professional icon on the desktop. Click Restore. Normally it will auto-detect backup images. However, if the Windows 10 image does not show up, click Select Image File to navigate manually.
Step 3. Click Yes in the mini pop-up window to confirm.
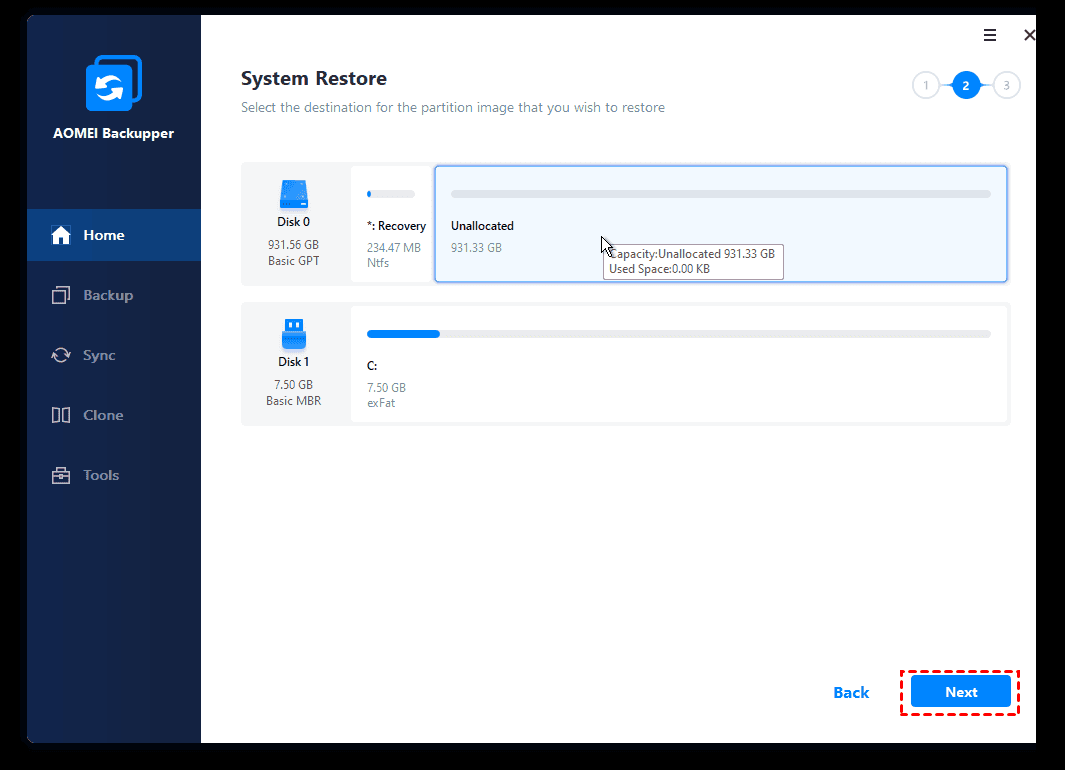
Step 4. Choose the right backup point here and click Next. And then select a destination path.
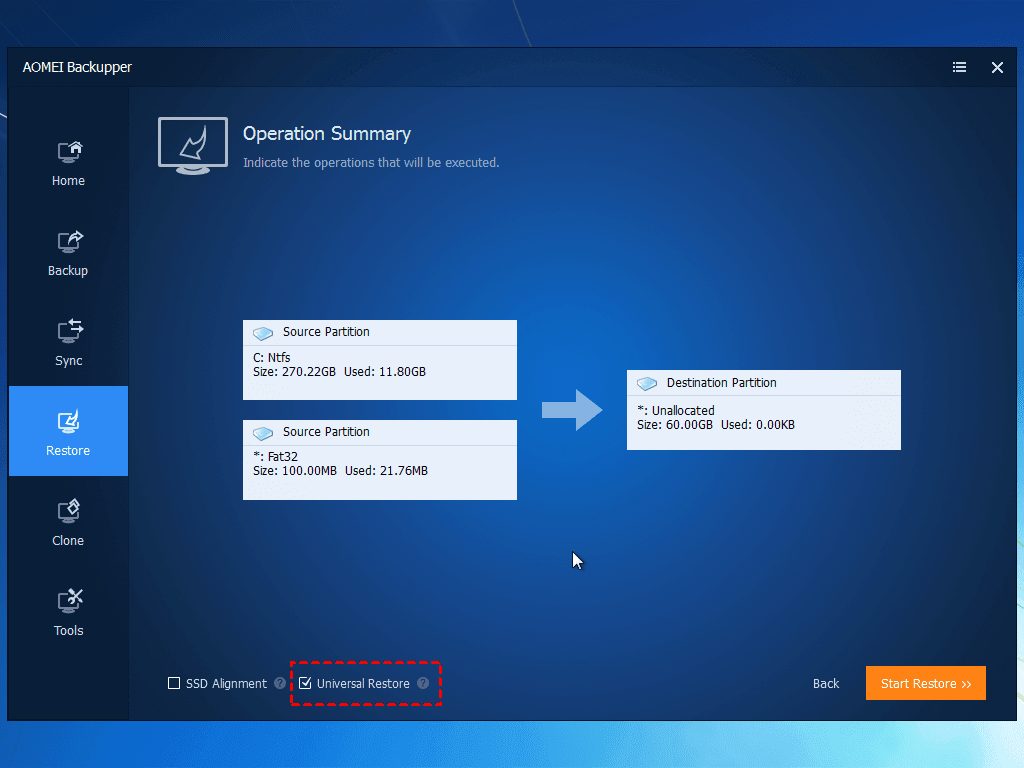
Step 5. Check out the operation summary. Remember to tick the Universal Restore box if the target PC has dissimilar hardware. Click Start Restore.
It is quite easy to solve the issue of how to deploy Windows 10 via WinPE USB disks with the help of AOMEI Backupper, isn’t it? So don’t go crazy when there is no LAN or CD drive on the computer. Nevertheless, if you do, this software is also helpful since it supports restoring Windows backup images over networks, such as NAS and shared networks.
In other cases, if you don't know how to deploy Windows 10 (Enterprise) images to computers on a large scale, you might as well check out specialized image deploy software AOMEI Image Deploy, even the free version supports deployment to 20 client PCs simultaneously.
Bonus tip: Deploy Windows 10 image without USB
Actually, using a WinPE USB disk isn’t the only way to deploy Windows 10 images to another computer. You can also deploy Windows 10 images from one computer to another over the network. The best enterprise backup software - AOMEI Cyber Backup can help you with Windows 10 deployment.
🚩It enables you to create a system image, disk image, or partition image for client Windows PCs.
🚩The created backup image can be restored to the original location or a new location.
🚩For regular backup, you can enable a schedule to backup changed data automatically.
🚩It supports full/incremental/differential backup methods.
Download this powerful enterprise backup software now to have a try!
Let’s say you have already created a Windows 10 system image with AOMEI Cyber Backup. Follow the steps below to deploy Windows 10 to the target computer.
Step 1. Run and log in to AOMEI Cyber Backup.
Step 2. Click Source Device > Windows > Add Windows Device to add the computer to which you want to deploy the Windows 10 image. You need to enter the IP address, username, and password of it.
Note: You need to turn on the target computer before you add it.
Step 3. Start Windows 10 deployment.
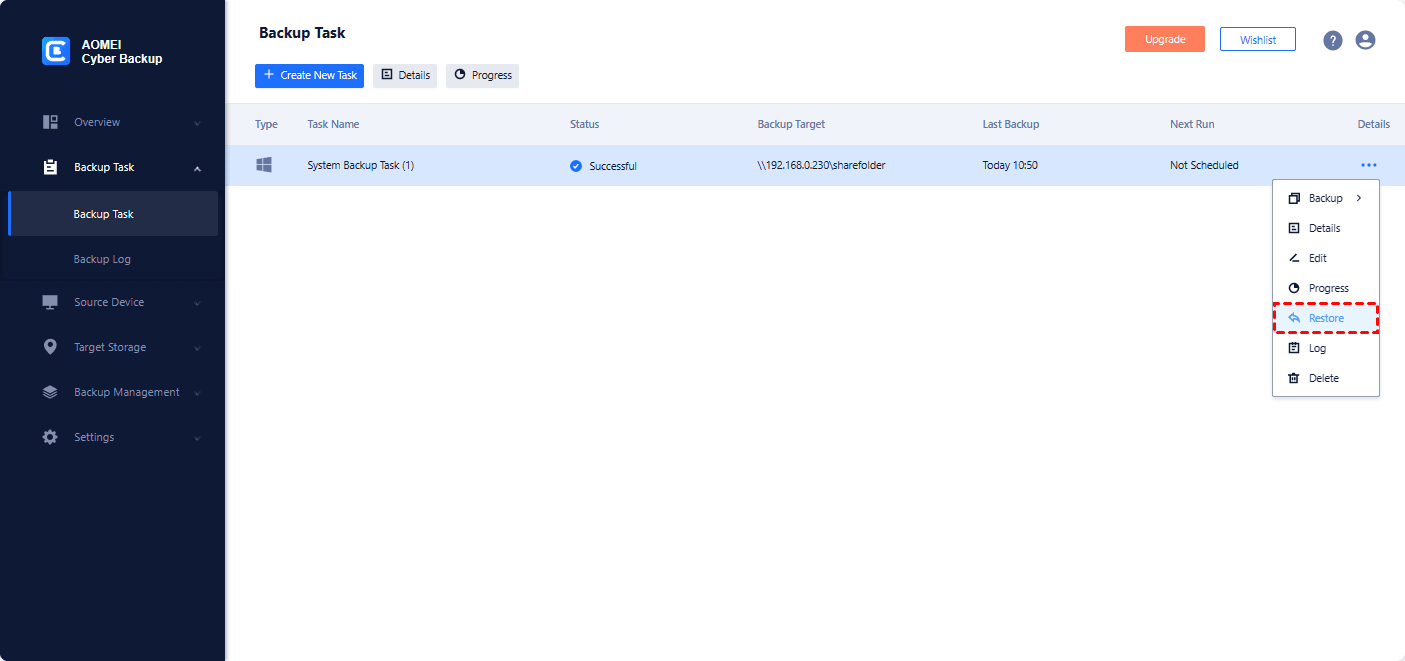
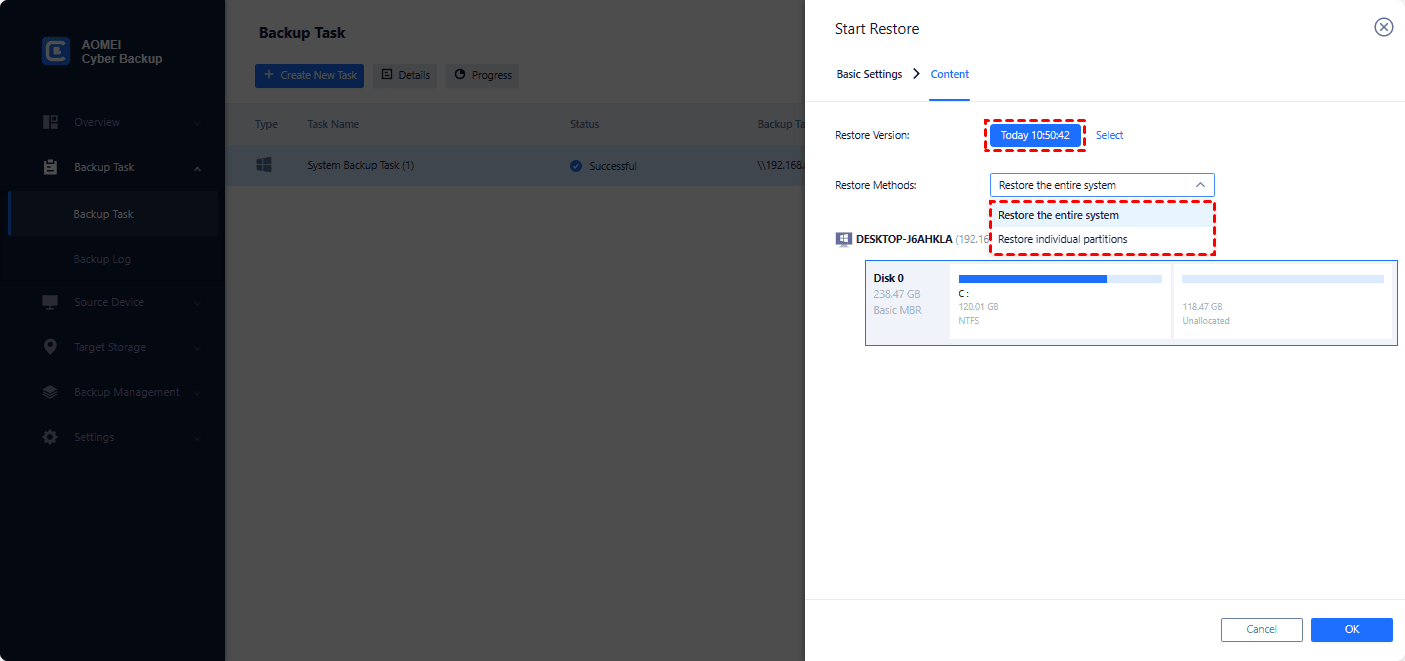
- Click Backup Task on the left menu bar and click the three dots icon on the system backup task you created before. Then select Restore.
- Select the restore content, including the restore version and restore method. Here I choose the latest version and Restore the entire system.
- Select the target location. Choose Restore to a new location and select the target device and target disk.
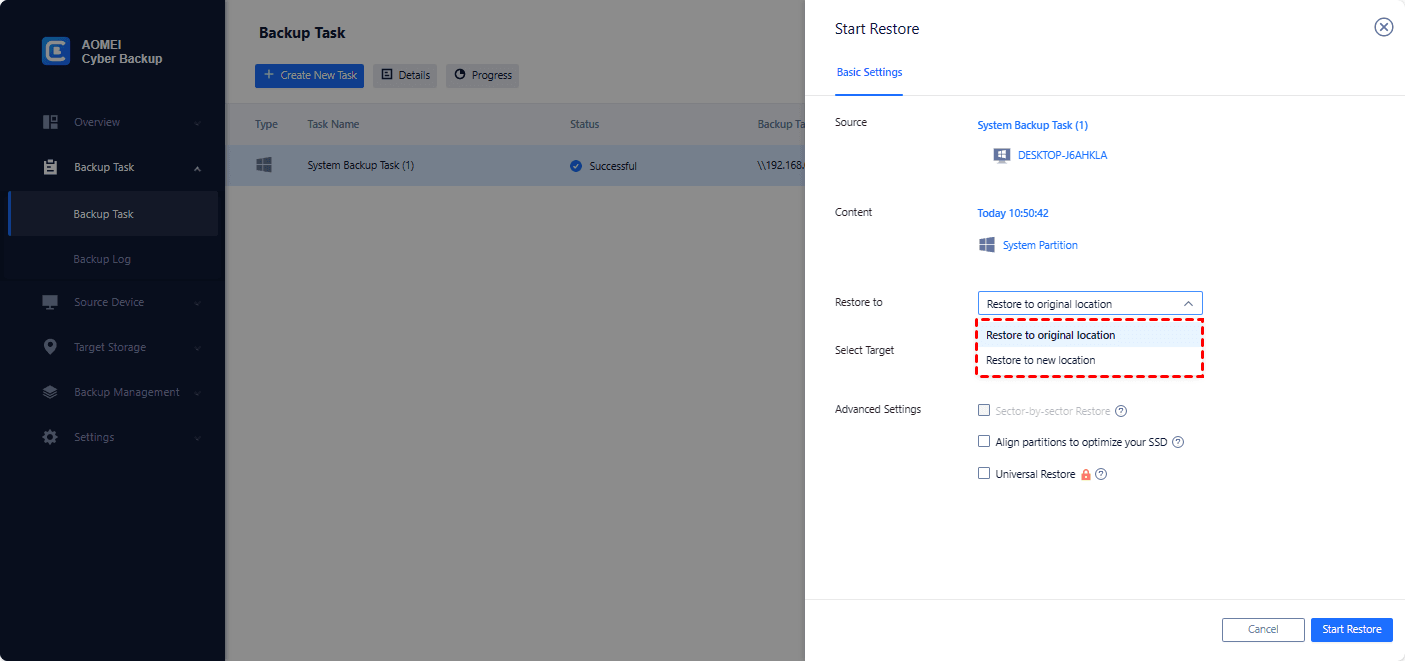
- Check the Universal Restore option to ensure a secure boot after recovery.
- Click Start Restore to launch the system recovery process.
Faqs about how to deploy Window 10 via WinPE USB disk
Q1: Can I deploy Windows 10 to multiple computers?
A1: Yes, once you create a bootable USB with Windows 10, you can use it to deploy to any compatible computer.
Q2: How do I troubleshoot WinPE boot issues?
A2: Ensure the USB drive is properly created and formatted. Check the BIOS settings to confirm the USB is the primary boot device.
Q3: Can I customize WinPE?
A3: Yes, you can add drivers, scripts, and applications to the WinPE environment to meet specific deployment needs.
To sum up
This article tells you how to deploy Windows 10 via WinPE USB disk easily with AOMEI Backpper. With its help, you can also migrate your data or OS to the new hard drives when you want to upgrade hard drives on your computer. It ensures data integrity and secure boot after cloning. Come and try this wonderful software!