How to Use System Restore on Windows 11 - All Things to Know
Do you want to know how to perform system restore on Windows 11? If your installed system or program update fails for some reason or causes a software conflict, you can restore your PC to a working state from the system restore point. Learn how to do this in this article.
By Jonna Updated on March 28, 2024
Why Need a System Restore on Windows 11?
System Restore is a Microsoft Windows tool designed to protect and repair your computer. It takes a "snapshot" of some system files and the Windows registry and saves them as Restore Points. In the event of installation failure or data corruption, system restore can restore Windows 11 to a previous working state without the need to reinstall the operating system. It repairs the Windows environment by restoring the files and settings saved in the restore point.

👉Best Free Backup and Restore Software for Windows 11
How to Create System Restore Point on Windows 11
System protection is OFF by default because it needs to reserve space on your hard disk and use system resources for real-time monitoring and saving system status. You need to enable it before you can create system restore points on Windows 11.
Enable System Protection on Windows 11
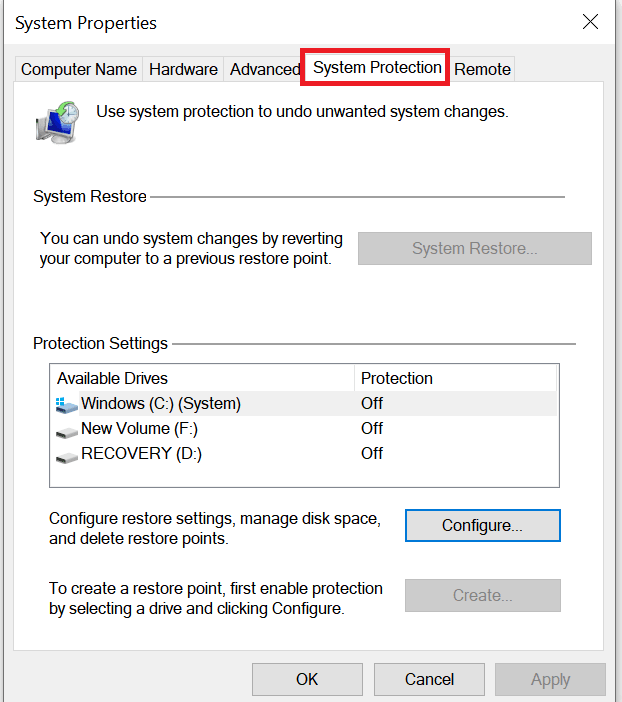
- Open the Start menu and search for Create a restore point. Click on the top result. This will open the System Properties window.

- In the System Properties window, click on the System Protection tab.
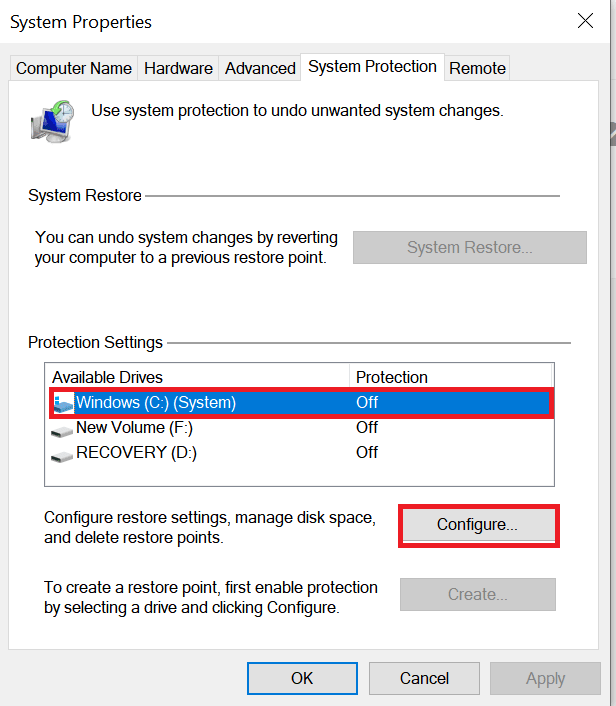
- Under the Protection Settings section, select the main System drive and click the Configure button.
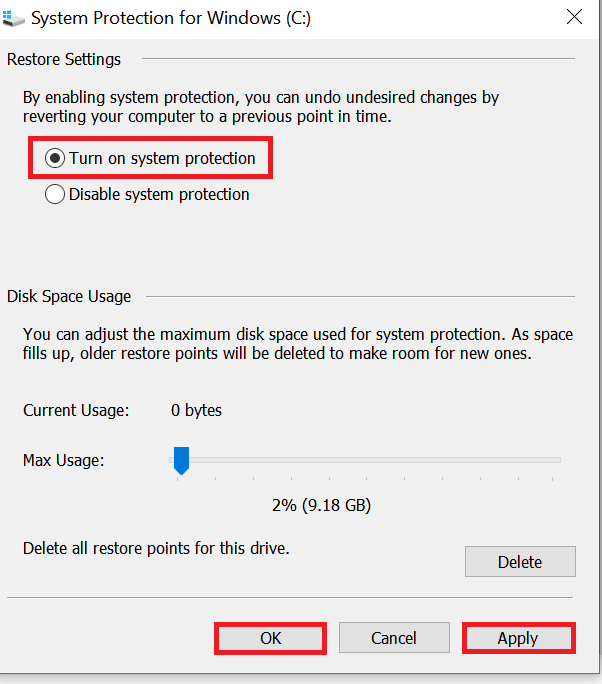
- From the available options, select Turn on system protection option. And then click on Apply and OK.
Tip✍:
Disk Space Usage: After enabling system protection, you may encounter the problem of insufficient disk space. To avoid this, you can adjust the maximum disk space used for system protection.
After completing the above steps, Windows 11 will automatically start creating restore points when new updates or specific system changes are made.
Create a System Restore Point Manually
For whatever reason, if you want to create a restore point yourself for Windows 11 system restore, you can follow the steps below.
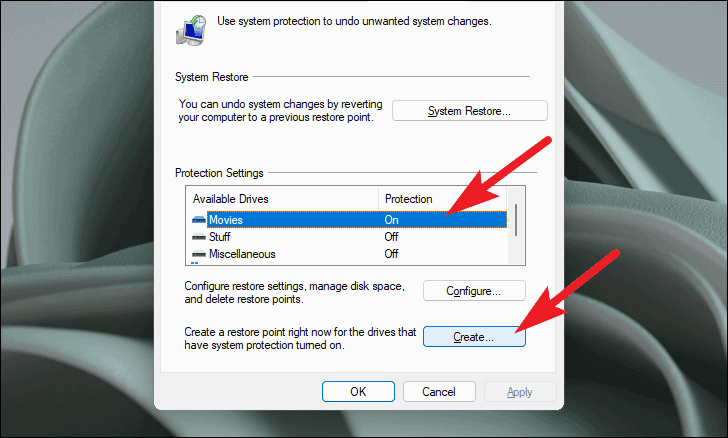
- Click on your preferred drive listed under the Protection Settings section on the System Properties window. Then, click on the Create button.
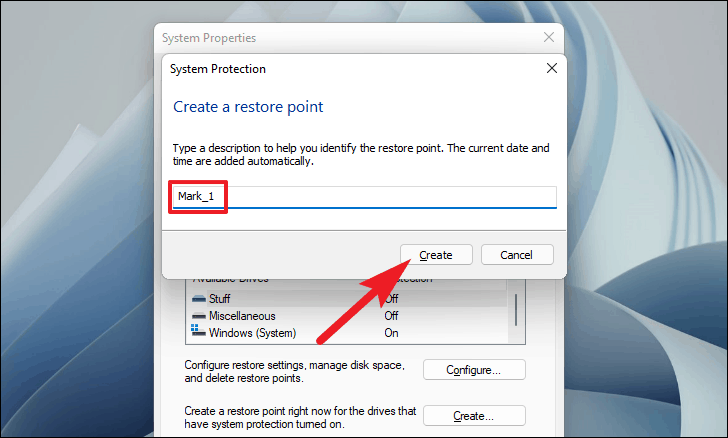
- After that, provide an appropriate name for this restore point; this will help you distinguish it from other restore points. Then, click on the Create button.
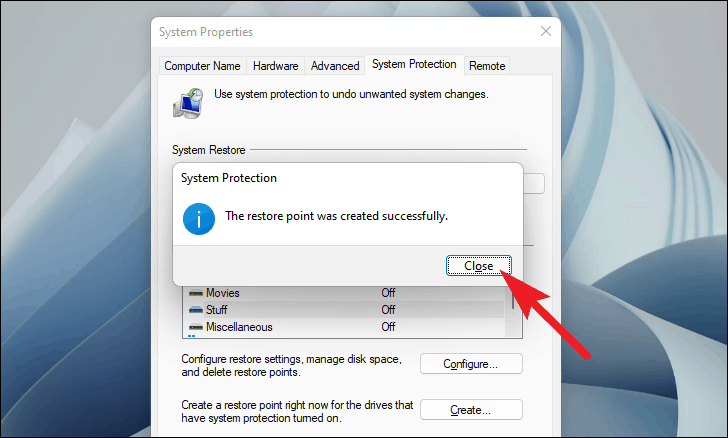
- It takes some time to create a system restore point, please wait for the process to run in the background. After successfully creating the system restore point, Windows will notify you. Click on the Close button to close the window.
When your PC has problems later, you can use the created system restore point to perform Windows 11 recovery.
How to Recover Windows 11 with System Restore Point
Now that you have created a system restore point for your Windows 11, it is also important to understand how to use this restore point to perform a Windows 11 restore if your computer starts to experience abnormalities. You can use system restore points to restore your PC in two ways, let's get started.
#1. If You Can Boot the System
If you can still log in to your machine and still be able to perform basic tasks, then this option is best for you. To restore Windows 11 to previous data, follow the steps below:
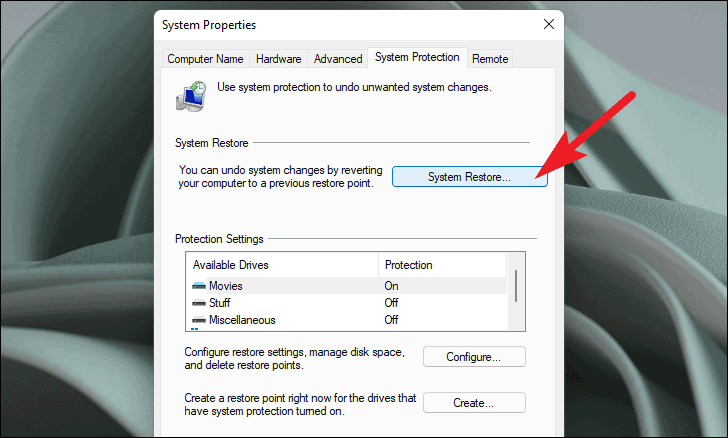
- Open System Properties window and click on the System Restore button.
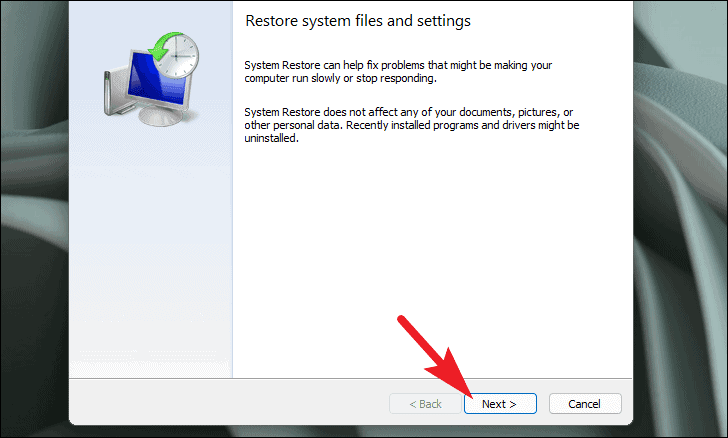
- This action will open a new System Restore window on your Windows PC. Click Next on the screen.
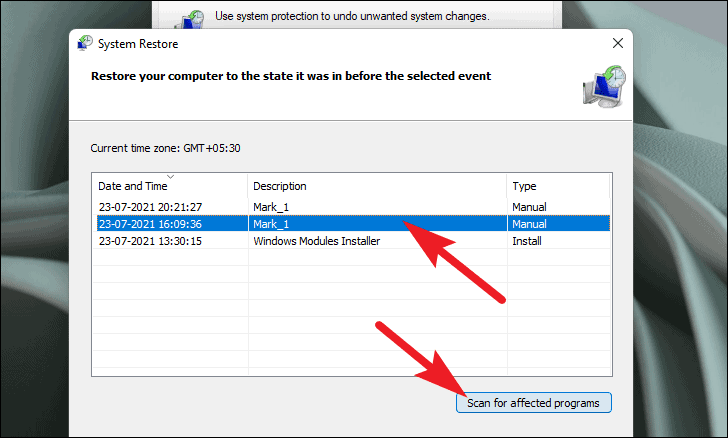
- Then, select the system restore point from the list. After that, if you want to view the programs/applications that will be rolled back, click Scan for affected programs. Then, click Next button to continue.
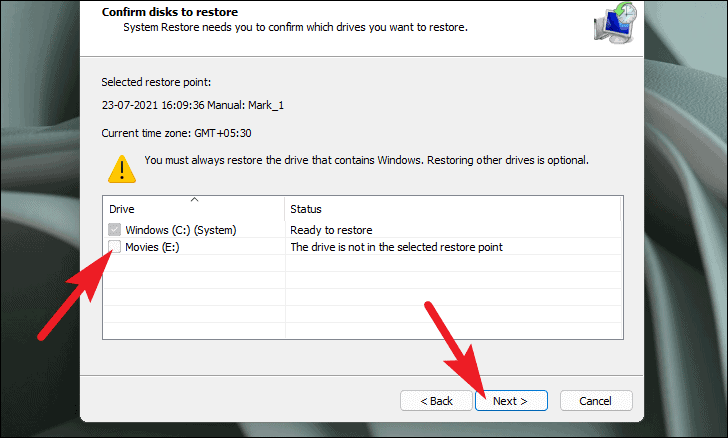
- If you have enabled System Restore for multiple drives, you can select it by clicking the check box in front of the drive in the list. Please note that you must always restore the drive that contains Windows.
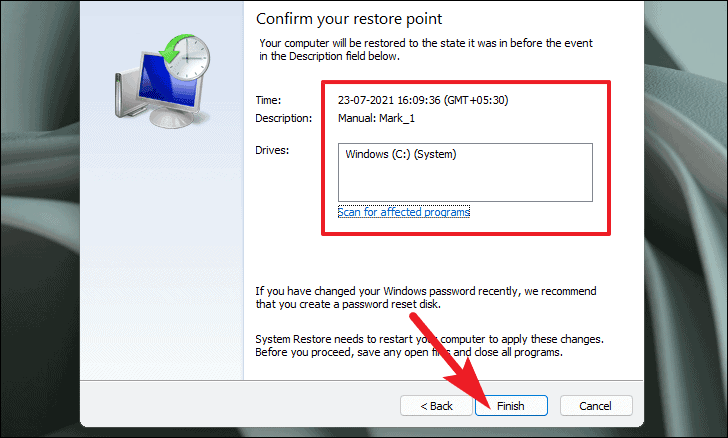
- After that, you will be able to see information about the Recovery Point from which you are recovering the computer. Read the instructions on the screen carefully, and then click Finish to start the System Restore process.
Your Windows 11 computer will now restart and restore your PC to its best working condition.
#2. If Windows 11 Won’t Boot
If you cannot log in or access the System Restore settings; you can still use the system restore point you have created to restore Windows 11 from boot. That is to use Windows Recovery Environment (WinRE) for Windows 11 recovery. You can follow the guideline below to learn how do I get into recovery mode in Windows 11 and how to restore PC to previous date on Windows 11:
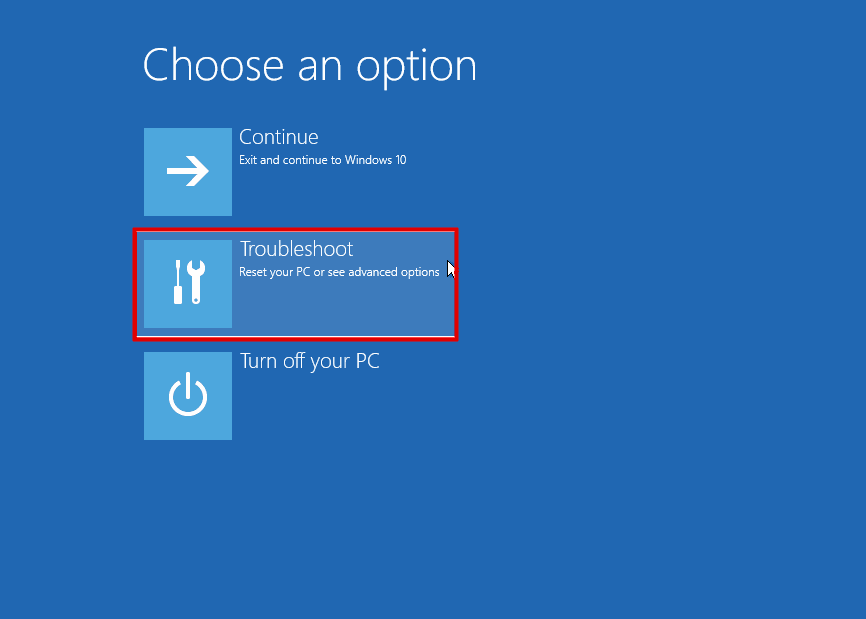
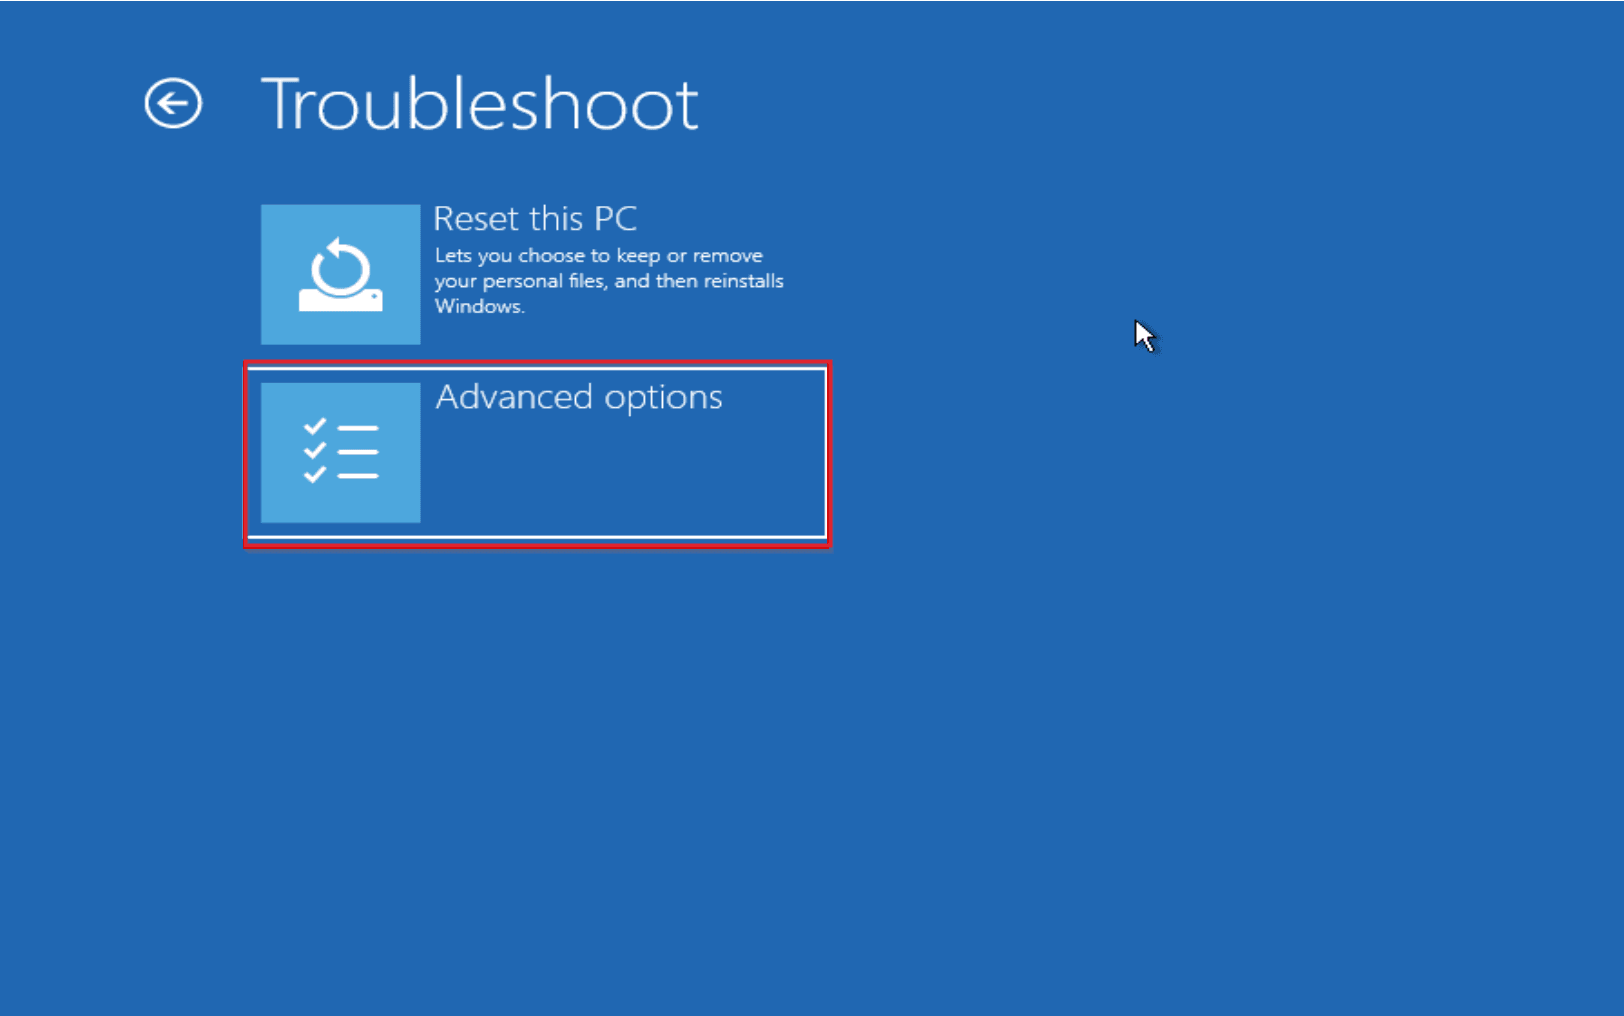
- When your computer is off, power it on, and turn it off as soon as the Windows logo appears. Repeat this three times, then you'll boot into WinRE. Click the Troubleshoot option in recovery environment.
- After that, click on the Advanced options from the Troubleshoot screen.
- Next, select System Restore from the list present on the Advanced options screen.
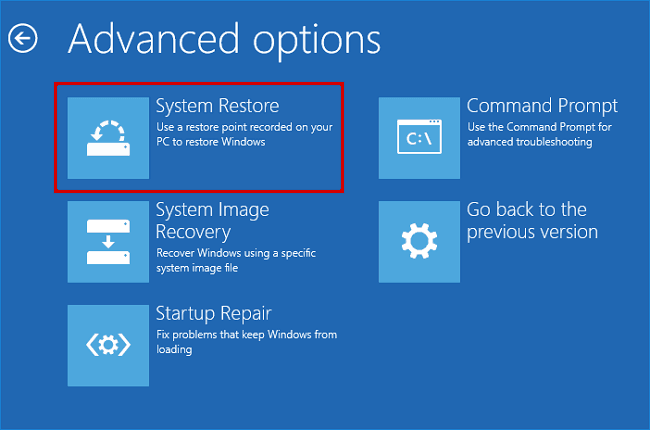
- After this, a System Restore window will appear on your screen. The remaining steps are the same as the step 2.3.4.5 in the previous case to perform a system restore on Windows 11 easily.
How long does the Windows 11 system restore take? Normally, it takes 30 to 45 minutes to complete. However, the restore process in our example took over 60 minutes to complete.
Best Free Backup and Restore Software for Windows 11
This is all the information for creating and using a system restore point on a Windows 11 PC. Although system restore points can be used to restore your system to an earlier point, some users report that they have encountered some problems when using System Restore on Windows 11. For instance, some users can’t create a restore point on Windows 11, or System Restore greyed out on Windows 11, etc.
Users do not want to spend a lot of time and energy to solve these problems. At this time, they want to find the best System Restore alternative to help them create system restore point. AOMEI Backupper Standard stands out from many third-party backup software. It is a powerful and comprehensive backup tool for Windows 11, 10, 8, 7, XP, Vista.
Also, the system restore point created by System Restore cannot always recover your computer from the problem, especially in the case of system file corruption, ransomware infection, or hard drive failure. But if you use AOMEI Backupper for system image backup, these problems can be solved easily.

- Powerful Free Backup Software: Create system images for various Windows versions (11/10/8.1/8/7/XP/Vista).
- System Image Backup for Restoration: Restoring Windows to a previous state using the system image backup.
- Create Bootable USB for System Restore: Enables easy creation of a bootable USB drive for WinPE, facilitating system restore.
- Comprehensive Data and System Protection: Offers a range of features including Backup, Clone, Sync, and Restore.
Backup Windows 11 using System Restore Alternative
You can refer to the following process to set up system backup tasks.
Step 1. Free download AOMEI Backupper Standard, install and run it.
Step 2. In the main interface, click Backup on the left menu and select System Backup on the right panel.

Step 3. The program will select the system and boot partitions by default as the source, you only need to select the backup destination. You can back up the system to an external hard drive, network attached storage (NAS), USB, or internal hard drive.

Step 4. (Optional) Then, you can click “Options”, “Schedule”, “Scheme” in the lower left corner to set up your system backup.
✹ Options: You can annotate the system backup to distinguish it from other backups, compress the system backup image file, split a large system image file into smaller ones, enable email notification to receive an alert after the system backup is completed, etc.

✹ Schedule Backup: You can specify the intervals in Schedule Backup to backup system automatically on a regular basis, such as Daily, Weekly or Monthly, Event trigger and USB plug in.

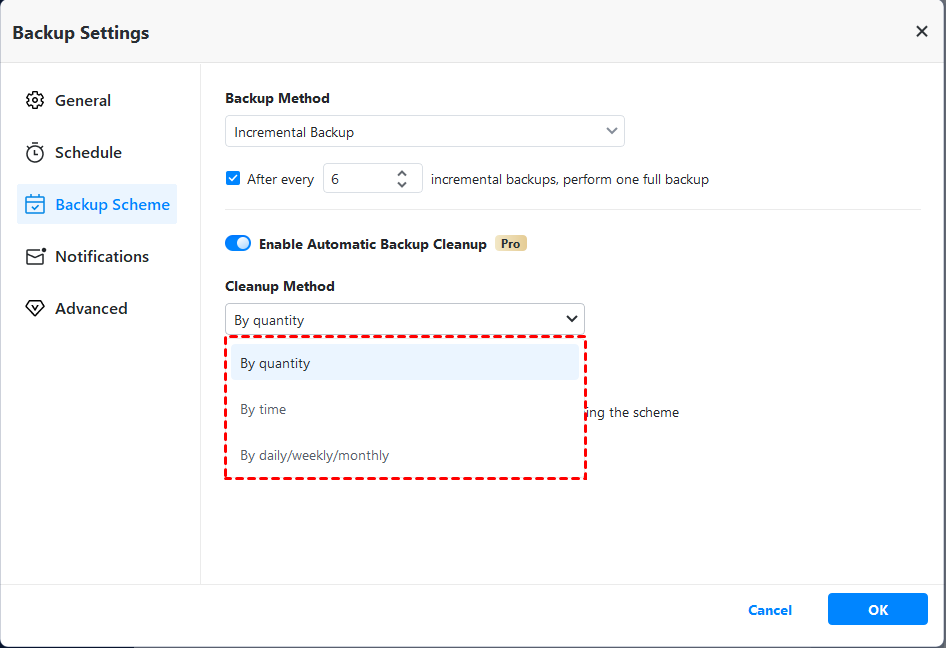
✹ Backup Scheme: You can set rules to automatically delete old backups so that you can remain the backup drive to has enough space (available at least in advanced version).
Step 5. After confirming the settings, click Start Backup to begin system backup in Windows 11.

Perform System Restore on Windows 11
After creating a system backup, if you encounter any problems in the future, such as installation failure or data corruption, you can use the system backup you created before to restore your computer to a working state. You just need to go to Restore -> Select Task to choose a system backup task created before.

Useful Tips for System Restore:
♨ In case you encounter more serious system problems such as system crash or disk failure, it is recommended that you create a bootable media in advance. You can use it to boot Windows 11 computer successfully and use the system backup software and the system backup image file to restore system to previous state.
♨ If you buy a new computer, you can use "Universal Restore" function (available in at least in AOMEI Backupper Professional) with a bootable media to restore system files on the new computer even with dissimilar hardware configuration.
FAQs on System Restore on Windows 11
Summary
After reading this article, you may know why system restore is necessary and how to perform system restore on Windows 11. You can use the System Restore function that comes with Windows to create a system restore point to help you restore Windows 11 to its previous working state. Or you can use more reliable third-party software - AOMEI Backupper to do this.
Comparing the two, the latter can help you solve more or more serious system problems. Such as Windows 11 start menu not working, Windows 11 taskbar not working after update, etc. With this freeware, you will never worry about system problems.
What's more, this tool is not just limited to system backup and restore; it is also a powerful cloning tool that can help you clone USB drive to SSD or clone Windows OS from hard drive to SSD without boot issue. Try it now!

