Fix “Sysprep Was Not Able to Validate” on Windows 11
This article describes how to identify the root cause of the "Sysprep was not able to validate" on Windows 11 and provides 6 corresponding methods. Simultaneously deploying images without SID.
By Ivy Updated on December 5, 2025
Sysprep Was Not Able to Validate on Windows 11
Sysprep is extremely strict about the “clean” state of generalization, throwing the “Sysprep was not able to validate your Windows installation” errors in the following scenarios:
- UWP apps or AppxPackage purge installed in Audit Mode
- Apps provisioned incorrectly or updated automatically
- Pending Windows Updates
- Unsupported system state, e.g., upgraded OS instead of a clean install
- Damaged Windows Store or provisioning packages
- Inactive or corrupted system image
Check the Setupact.log File for Culprits
After identifying the possible causes, it’s time to fix the “Sysprep was not able to validate your Windows installation” error in Windows 11. You check the log file to quickly find the culprit.
Step 1. Navigate to C:\Windows\System32\Sysprep\Panther\ and copy setupact.log & setuperr.log for review.
Step 2. Type cmd in the Start menu and select Run as administrator. Type:
findstr /i "error fail exception" C:\Windows\System32\Sysprep\Panther\setupact.log
-
/i: make the search case-insensitive.
-
Searches for the keywords: error, fail, exception.
Step 3. Look for entries referencing UWP AppXpackages, SIDs, pending Windows Update, services, drivers, or HRESULT codes.
How to Fix Sysprep Was Not Able to Validate (6 Ways)
Now, it's time to find the corresponding method and fix this error quickly.
#1: Remove Appx/UWP Package (Windows Store Apps)
Try this method if the log shows AppX or UWP package failure, such as MicrosoftWindows.Client.CBS, XboxApp, StateRepository, etc.
Step 1. Run cmd as administrator. In the Command Prompt window, list suspected packages, take client.cbs, run:
- Get-AppxPackage -AllUsers *client.cbs*
- Get-AppxProvisionedPackage -Online | Where-Object {$_.PackageName -like "*client.cbs*"}
Step 2. Remove installed or provisioned package, run:
- Get-AppxPackage -AllUsers *client.cbs* | Remove-AppxPackage -AllUsers
- Get-AppxProvisionedPackage -Online | Where-Object {$_.PackageName -like "*client.cbs*"} | Remove-AppxProvisionedPackage -Online
Step 3. Repeat for other entries (if there are). Reboot and try Sysprep again.
#2: Uninstall UWP Apps Blocking Generalization
Try this method if the log mentions Software licensing rearm failed, App cannot be generalized, State store failed to unmount.
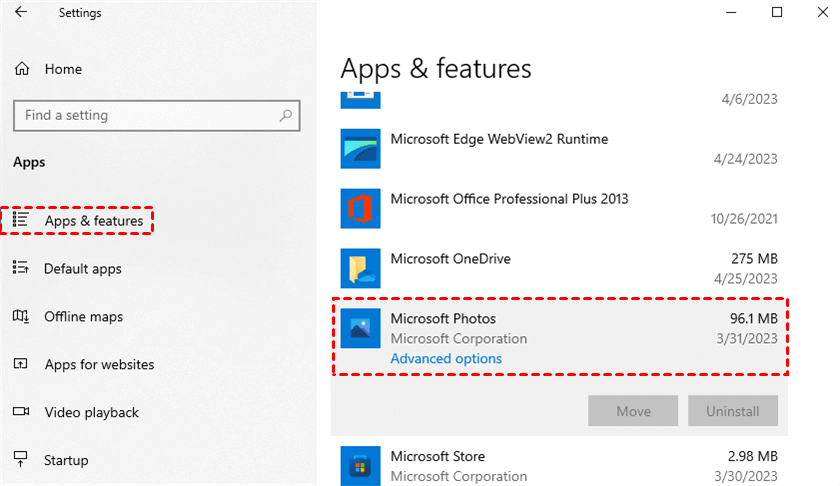
Step 1. Press Win+I to open the Windows Settings. Then, click Apps.
Step 2. In the Apps & features section, locate all the UWP apps and click Uninstall.
Step 3. Check leave behind installed services and scheduled tasks:
- Services: Type services.msc in the Start menu. Then, stop & disable suspicious services, uninstall the app if necessary.
- Scheduled tasks: Type Task Scheduler in the Start menu. Then, remove tasks created by problematic apps.
Step 4. For stubborn MSIX / MSI apps, run:
msiexec /x {ProductCode} /qn
#3: Clean Up Orphans User Profiles and Registry SIDs
Try this method if the log shows profile removal failures (e.g., Failed to remove user profile, ProfileList not valid, Could not load profile).
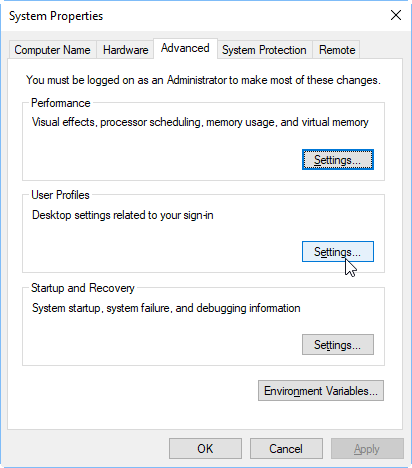
Step 1. Right-click This PC and select Properties. Click Advanced system settings.
Step 2. Scroll down to User Profiles, click Settings.
Step 3. Select unused profiles and click Delete.
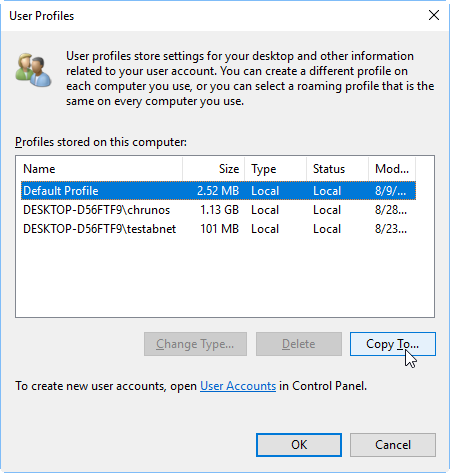
Step 4. Check C:\Users for stale folders and delete them.
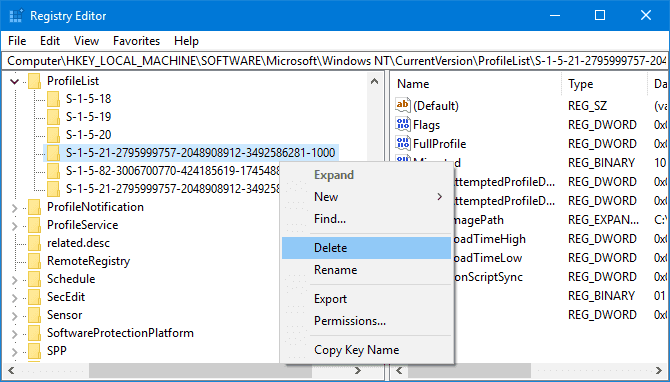
Step 5. Open Registry Editor. Go to the following path and click File > Export and save it as a backup copy.
HKEY_LOCAL_MACHINE\SOFTWARE\Microsoft\Windows NT\CurrentVersion\ProfileList
Step 6. Check the ProfileImagePath in each SID key unless you find the orphaned one and delete it.
#4: Clear Pending Update or Servicing Operations
Try this method if the log references pending.xml, Servicing operations are pending, CBS_E_PENDING.
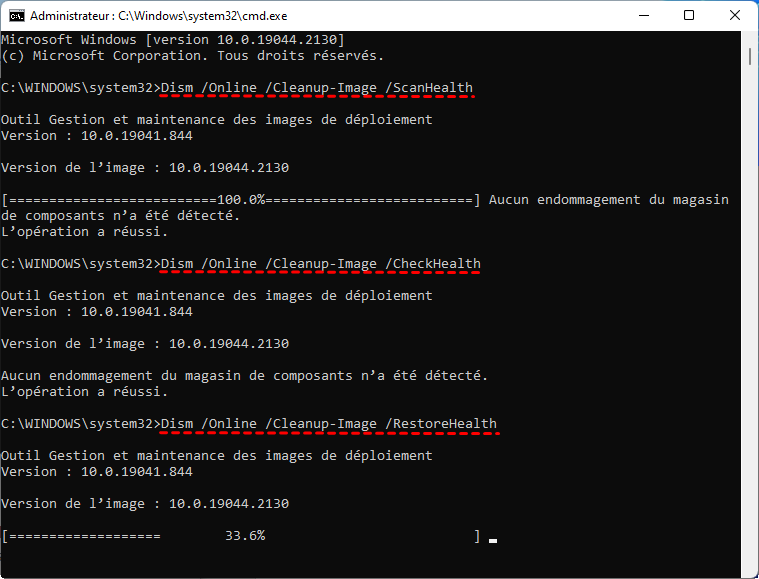
Step 1. Reboot first (required if updates are mid-process). Open Command Prompt (Admin) and run:
- dism /online /cleanup-image /revertpendingactions
- dism /online /cleanup-image /scanhealth
- dism /online /cleanup-image /restorehealth
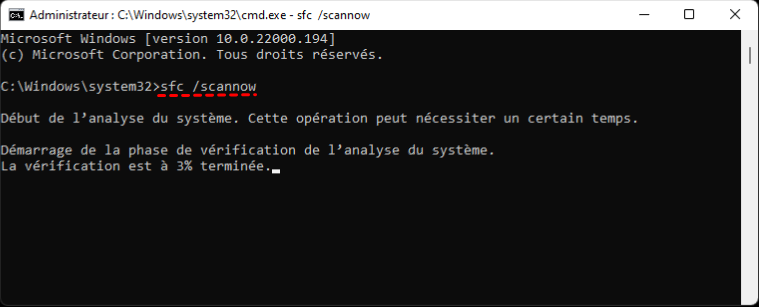
Step 2. Run sfc/scannow and press Enter.
Step 3. Open Settings >Update& Security and click Check for updates.
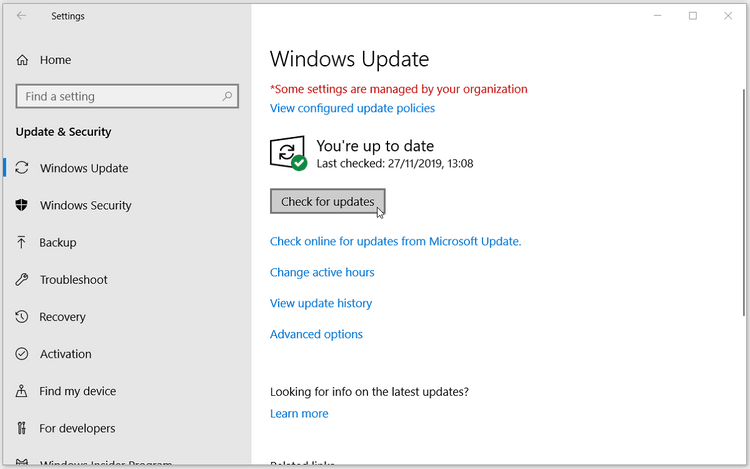
Step 4. Wait and click Install Now (if available). Restart when prompted.
Step 5. If pending.xml prevents progress and DISM cannot fix, run:
- takeown /f C:\Windows\winsxs\pending.xml
- copy C:\Windows\winsxs\pending.xml C:\Temp\pending.xml.bak
- ren C:\Windows\winsxs\pending.xml pending.xml.old
#5: Remove Drivers Blocking Sysprep
Try this method if the log references driver issues (e.g., Driver package failed validation, Inf is invalid, PnP sysprep provider failed, mentions oemXX.inf).
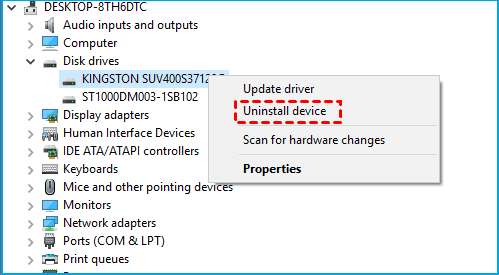
Step 1. Open Device Manager. Expand Disk Drives, right-click the device, and select Uninstall Device.
Step 2. Restart your computer to install the disk driver automatically.
Step 3. Open CMD as administrator. List and remove driver inf, run:
- pnputil /enum-drivers
- pnputil /delete-driver oem#.inf /uninstall /force
Step 4. Reboot and let Windows reinstall standard drivers automatically (if needed). Retry Sysprep.
#6: Reset Microsoft Store or Re-register AppX Packages
Try this method if the log shows Windows Store errors or StateRepository/AppX unmount failures.
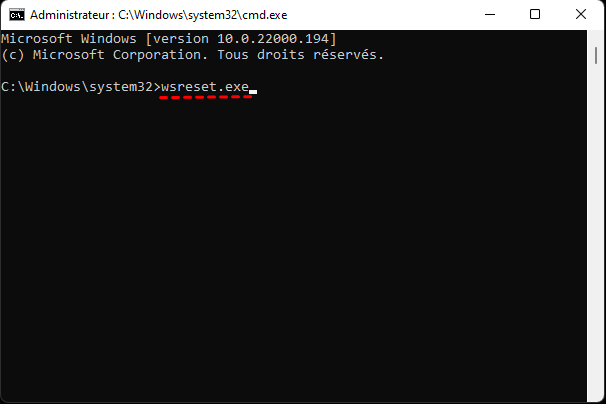
Step1. Run CMD as administrator. In the Command Prompt window, run WSReset:
wsreset.exe
Step 2. Re-register Store and built-in Appx packages, run:
Get-AppxPackage -AllUsers Microsoft.WindowsStore | Foreach {Add-AppxPackage -DisableDevelopmentMode -Register "$($_.InstallLocation)\AppXManifest.xml"}
Step 3. Reboot and test Sysprep.
How to Deploy Windows 11 Image to Different Hardware without SID
After fixing the Sysprep was not able to validate issue, you can continue to remove the SID using Sysprep and deploy Windows 11 image to different hardware smoothly. AOMEI Backupper Technician or TechPlus, a professional image deployment software, is indispensable in this process.
It’s fully compatible with Windows 11 and UEFI/GPT, and integrates all necessary features, such as System Backup, Create Bootable Media, AOMEI Image Deploy Tech, etc. This allows you to complete all tasks quickly and efficiently without extra software.
#1. Create Windows 11 Bootable USB to Start OOBE System
If you want to deploy system image to different hardware without SID, you must create a bootable USB in Windows 11 before running Sysprep. This is necessary to start a system shutdown by Sysprep.
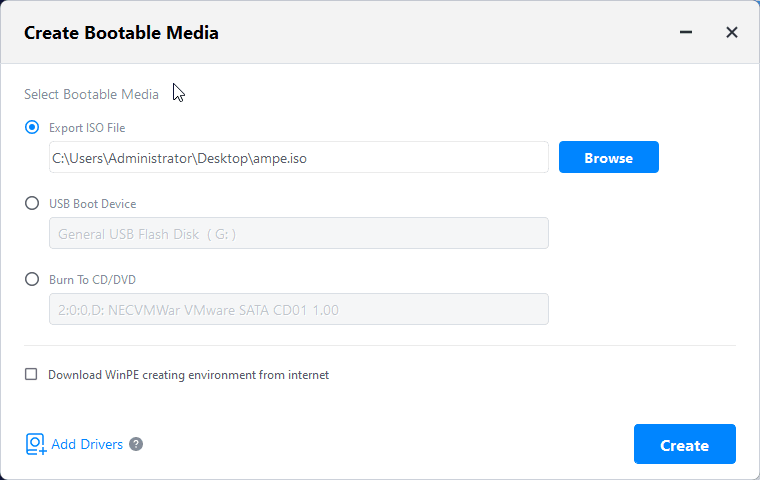
Step 1. Open AOMEI Backupper Technician after installing it. Then, go to Tools and click Create Bootable Media.

Step 2. Select USB Boot Device and click Create. It will automatically create a Windows 11 bootable USB drive.
#2. Remove SID using Sysprep to Create OOBE System
Now, you can start to remove SID using sysprep to prepare an Out-of-Box system in Windows 11.
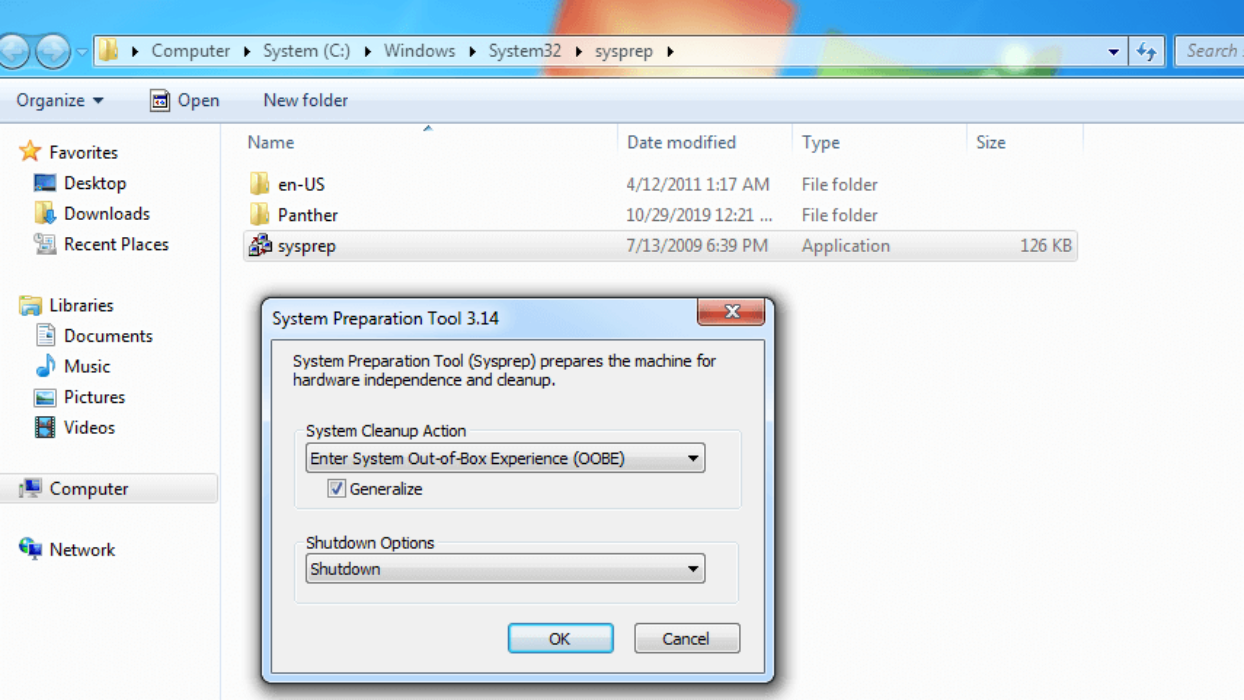
Step 1. Press Win + R and enter sysprep in the Run box to find Sysprep.
Step 2. Double-click to run Sysprep. Then, select Enter System Out-of-Box Experience (OOBE) and check Generalize below.
Step 3. Select the Shutdown option and click OK to remove the SID.
#3. Create a Windows 11 System image without SID
After Sysprep shuts down the system, don’t reboot it to access Windows before backing up. Rebooting will generate a new SID. Now, simply boot fromthe Windows 11 bootable USB and create a system image.
Step 1. Be sure the bootable USB and backup drive are connected. Restart your computer and press the BIOS key (e.g., F2, F10, F12, ESC, etc) to access the Windows recovery environment.
Step 2. Under the Boot tab, locate the USB drive and set it as the first boot option. Then, press F10 to save changes and reboot.
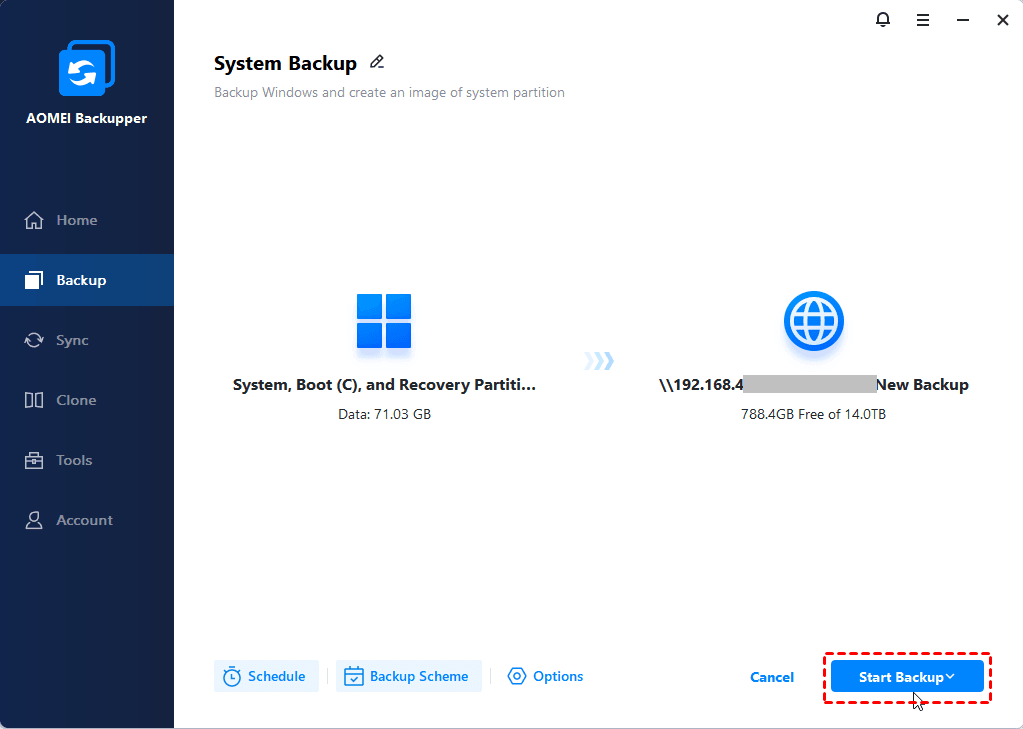
Step 3. After loading, you’ll see the AOMEI Backupper Technician interface. Under the Backup tab, click System Backup. It will select the system partition automatically.

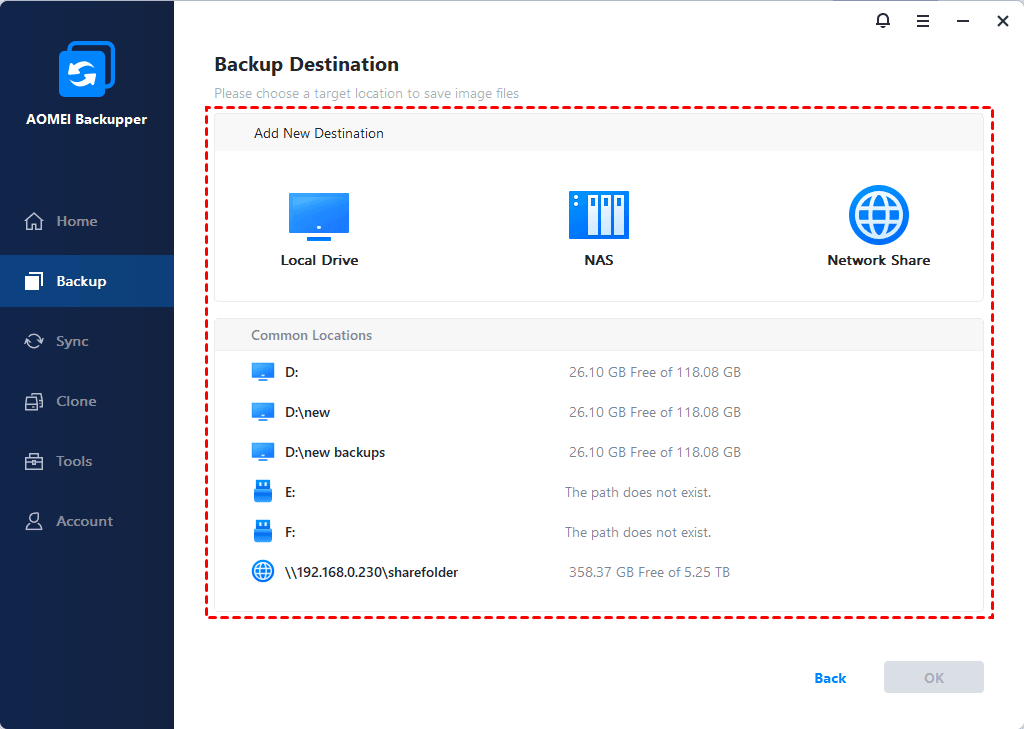
Step 4. Click the PC icon > NAS/Network Share. You need to enter the network or NAS path and click OK.
Step 5. At last, click Start Backup>> to create a Windows 11system image.
-
Click Disk Backup to backup the entire disk (if necessary). The deployment process will take longer.
-
It’s suggested to enable the Schedule for continuous backup, both to free up your hands and preserve multiple backup versions.
-
To automatically save space, enable compression, incremental backup, backup scheme, etc., especially for scheduled tasks.
#4. Set up Server and Client Computers
Step 1. Select one computer (preferably Windows 7 or higher) as the server and install AOMEI Backupper Technician on it.
-
The server computer can be any working PC or server
-
It’s suggested to install Windows AIK/ADK on the server computer if you are running a previous version of Windows 7, or Windows RE is missing.
Step 2. Ensure all the computers are on the same wired LAN segment. Meanwhile, verify on all client computers that:
- The network cards support Network/PXE Boot and are set as the primary boot device.
- The disk sequence numbers for deploying are the same, disk 0, for example.
- Remove all the other disks to prevent you from selecting the wrong one.
#5. Deploy System Image to Different Hardware
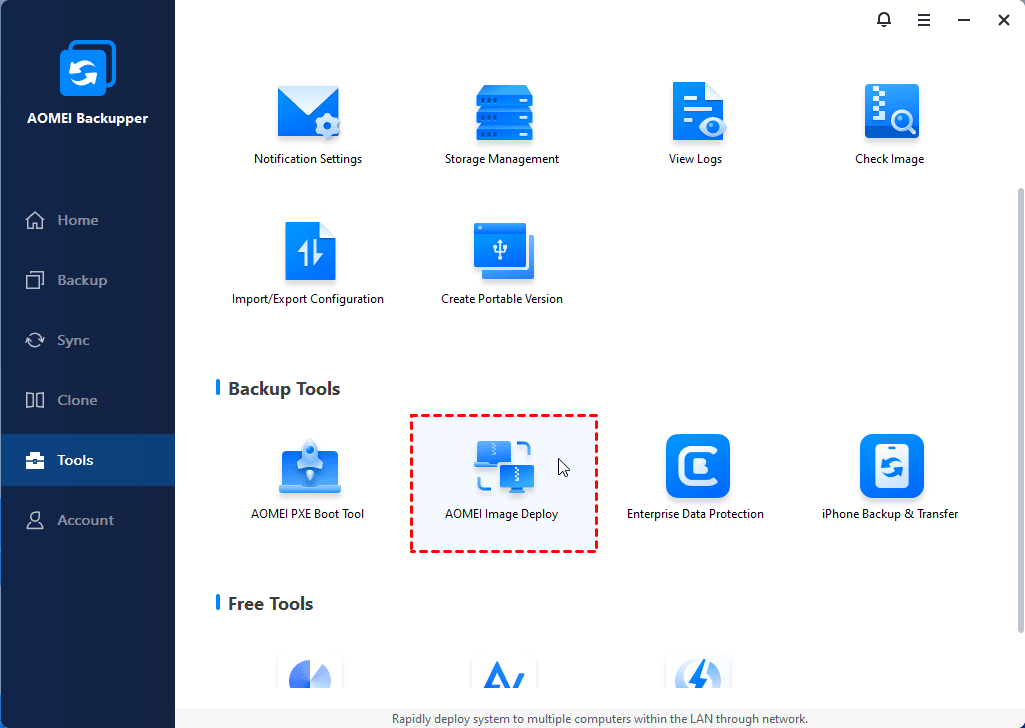
Step 1. Open AOMEI Backupper Technician on the server computer. Under the Tools tab, click AOMEI Image Deploy.
Step 2. Check Create bootable WinPE ISO or WIM automatically. Then, click Next.

-
“Enable DHCP” means to use the AOMEI DHCP server if there is no DHCP server on your LAN, so all client computers can boot normally.
-
“Create bootable WinPE ISO or WIM manually” allows you to add custom drivers to WinPE. Try it if WinPE fails to boot client computers.
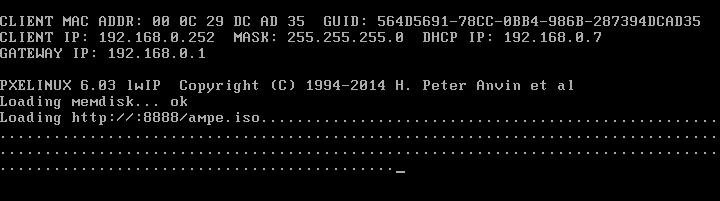
Step 3. Wait until the bootable WinPE is created. Power on all client computers to boot from PXE or network while receiving "The service has started, waiting for connect...".
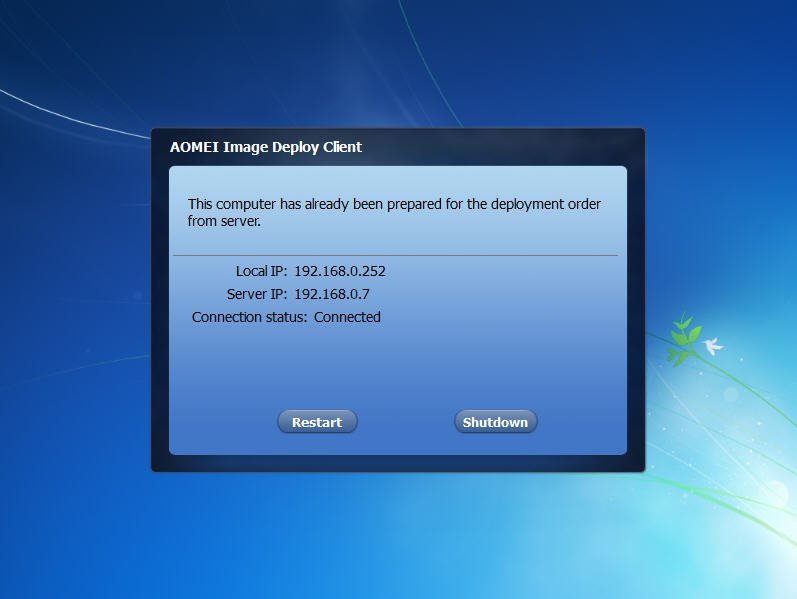
Then, you’ll see AOMEI Image Deploy Client, displaying local IP, Server IP, and Connection status.
Step 4. On the server computer, all the client computers are displayed in the AOMEI Image Deploy Technician interface. Check I confirm all the client computers which need to be deployed are online and click Next.

Step 5. Click Browse to select a system image. You need to click Add Network Share/NAS and enter the network or NAS path to access it.
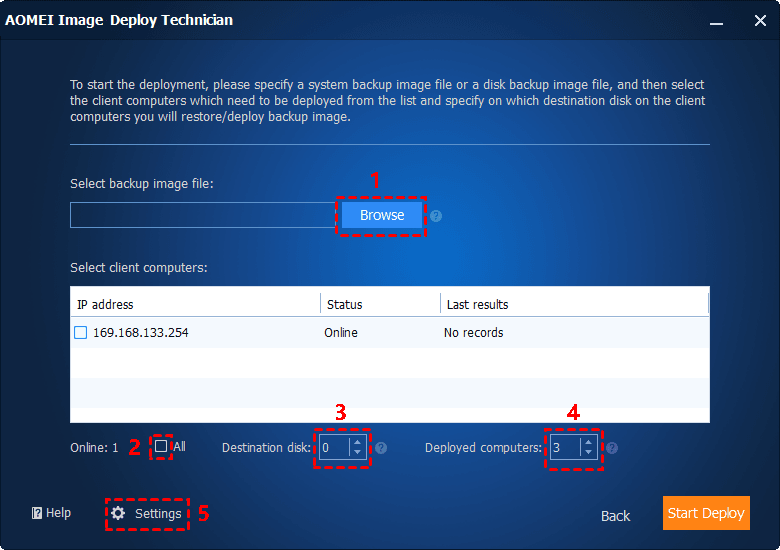
Step 6. Tick All to select all or manually select client computers for deployment, enter the disk number (probably disk 0), and set the number of deployed computers (3-5 computers is recommended). The more client computers, the slower the speed of the deployment will be due to the limited LAN bandwidth.
Step 7. Click Settings to set a unique name, batch preset IP addresses, or enable Universal Restore, especially useful for deploying images to different hardware. Confirm all the settings and click Start Deploy.
Conclusion
It’s frustrating to receive the "Sysprep was not able to validate" error on Windows 11, and fortunately, you can check the Setupact.log file to find the root cause and then try the corresponding method in this article.
Once resolved, you can deploy Windows 11 system images as needed. The professional image deployment software - AOMEI Backupper Technician is indispensable throughout this process, offering comprehensive support for all essential features to make image deployment easier and more efficient.

