How to Move AppData to Another Drive in Windows 11 Safely
Want to move AppData to another drive so as to release space on C drive? Here is a how-to guide.
By Lily Updated on February 26, 2025
Can we move AppData to another drive?
As we keep installing new apps on our computer, the AppData folder can get pretty big and end up taking substantial space on the C drive. To release space on C drive, you may want to change AppData location. Is it possible to do so? The answer is Yes but there are some risks. Common risks include abnormal Start menu or Taskbar, invalid shortcut keys, some malfunctioning programs…
Important: Create a system image before moving AppData👍
To ensure you can restore your computer to an earlier date when problems occur, it is necessary to create a system image before you move AppData folder. Here I’d like to recommend the best free backup software - AOMEI Backupper Standard to you.

-
It enables you to do System/Disk/Partition/File Backup as per your need.
-
You can backup Windows 11 to Google Drive, USB flash drive, external hard drive, and NAS device, etc.
-
The inbuilt Schedule Backup feature allows you to backup changed data automatically.
Download this freeware and install it on your PC now. To create a system image on Windows 11, please choose Backup > System Backup.

How to move AppData to another drive in Windows 11🔥
With a system image at hand, you can ease your mind to move AppData to another drive. Follow the instructions provided:
Step 1. Create a new user with administrator permissions
1. Press Win + R to open the Run dialog. Then type lusrmgr.msc and hit Enter to launch the Local Users and Groups console.
2. Right-click on the Users folder on the left pane and select New User.
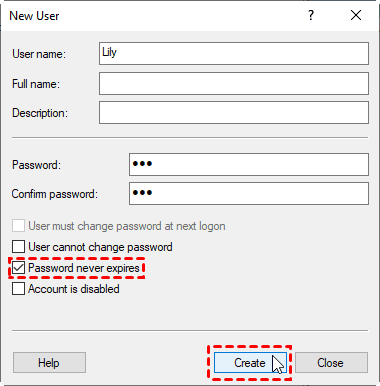
3. Enter a user name and password for the new user.
4. Uncheck User must change password at the next logon and then check Password never expires.
5. Click Create and then Close.
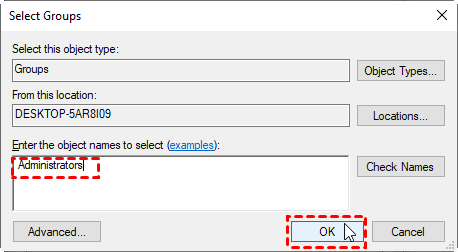
6. In the Local Users and Groups console, double-click the new user you just created. Select the Member Of tab and click the Add button.
7. Type Administrators in the object names box. Then click OK and Apply.
Step 2. Move AppData folder to another drive
1. Click Start > Administrator > the newly created user. Enter password for the new user to sign in.
2. Navigate to C:\Users in File Explorer. Click into the account you want to move AppData from.
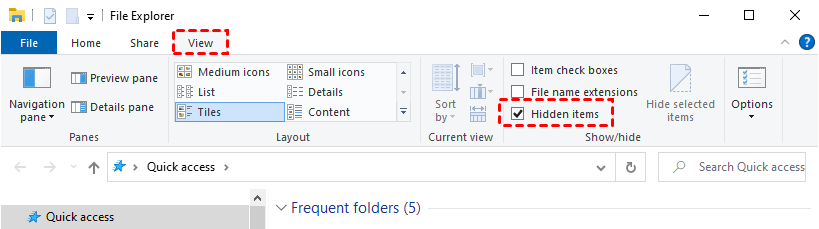
3. In File Explorer Ribbon, go to View and check Hidden items.
4. Cut the AppData folder and paste in the desired location (here I choose E drive).
- Check Do this for all current items and click Skip when you receive “Error 0x80070780: This file cannot be accessed by the system."
- Check Do this for all current items and click Yes to confirm moving the TBRES file type and other file types that give you a warning that they shouldn't be moved.
5. Navigate to the old AppData location and delete the old folder. It contains those files you skipped when moving the AppData folder.
Step 3. Create a directory junction
1. Press Win + R to open the Run dialog. Then type cmd and press Ctrl + Shift + Enter to launch Command Prompt as admin.
2. Type the following commands and press Enter after each:
cd C:\Users\Administrator\AppData
mklink /D AppData E:\AppData
Note: The parameter “/D” means to create a directory symbolic link. “AppData” is the name of your new symbolic link. “E:\AppData” is the path your new link refers to.
3. Close Command Prompt.
Step 4. Log back and troubleshoot
1. Log out of the new user and log back in as the default user.
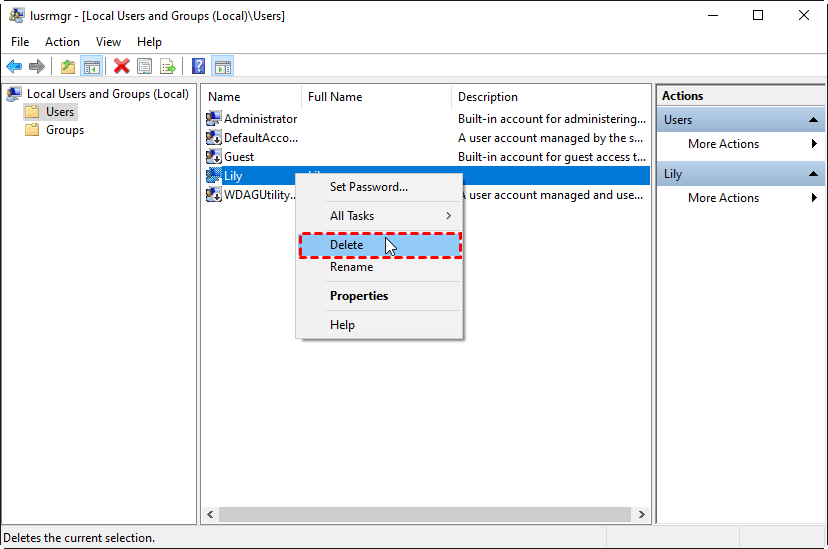
2. Open the Local Users and Groups console again. Click on the Users folder, find the user you created in Step 1, right-click on it and select Delete.
Note: The user’s files such as Documents, Downloads and Favorites won’t be deleted. However, you can choose to delete them manually.
3. Check your commonly-used apps to see if they can run normally. If not, you may fix broken packages via PowerShell. For example, to fix corrupted WindowsStore, you can:
- Press Win + R to open the Run dialog. Then type powershell and press Ctrl + Shift + Enter to launch PowerShell as admin.
- Type the following command and press Enter.
Get-AppXPackage *WindowsStore* -AllUsers | Foreach {Add-AppxPackage -DisableDevelopmentMode -Register "$($_.InstallLocation)\AppXManifest.xml"}
Notes:
● Replace the WindowsStore with the name of various UWP apps that break.
● It is recommended that you install new programs in the future directly in other drives so that their application data and cache will be in other drives, saving space on your C drive.
Bonus: What is AppData folder?
The AppData folder is a system directory that contains application-specific data and settings for programs installed on the computer. It is typically found in the C:\Users\Username directory. However, it is hidden by default to prevent accidental modification or deletion of crucial data.
The AppData folder is divided into three subfolders:
- Roaming: The Roaming folder contains application data that can "roam" between different devices if the user is signed in with a Microsoft account.
- Local: The Local folder holds application data that is specific to the local computer.
- LocalLow: The LocalLow folder is used for applications that run with low integrity levels. It is intended for applications that need limited access to system resources for security purposes.
Conclusion
That’s all about how to move AppData to another drive in Windows 11. The operation is feasible but there is a possibility that some of your apps break. To get prepared for possible errors, it is highly recommended to backup Windows 11 with AOMEI Backupper in advance. It allows you to backup the operating system or just crucial files.
What’s more, AOMEI Backupper owns the clone feature. You may use it to clone SSD to new SSD. Why not give it a shot?
FAQs about moving AppData to another drive
1. Will moving AppData affect all programs?
2. Can I move just certain subfolders within AppData (Local, Roaming, etc.)?
3. Can I move AppData back to its original location later?

