[Top 3 Ways] Backup Files to External Hard Drive Windows 11
You can easily learn 3 methods to backup files to external hard drive in Windows 11. They are built-in tool "File History", "Backup and Restore" and a free backup software "AOMEI Backupper".
By Lily Updated on August 28, 2025
Case: How Do I Backup Files in Windows 11 to External Hard Drive?
“I'm looking for a way to backup some files to an external hard drive. I started using software to backup most of my hard drive, but I also want to backup selected files to an external hard drive (around 500 GB). Are there any other options I should be looking into? I’m using Windows 11 by the way.”
– Microsoft Community
From this case, it is easy to see the user wants to find a piece of software to run Windows 11 backup to external drive. Luckily, this article will provide three solutions. Users can use the file backup function of the built-in software or the third-party software to solve this problem.
👉 How to Backup Files to External Drive in Windows 11🔥
👉 How to Backup Windows 11 OS to External Drive🔥
👉 Further Reading
👉 FAQs about Backing up Files on Windows 11
How to Backup Files to External Drive in Windows 11
This part will show you how to automatically backup files to an external hard drive in Windows 11. You can choose reliable backup software or the built-in tools that come with Windows.
1. Backup Files to External Hard Drive with Free Backup Software
While Windows 11 comes with some native backup tools, there are some minor drawbacks that cannot be ignored, such as File History drive disconnected, Windows 11 backup cannot add folder, File History not working, The system cannot find the file specified, and so on.
Therefore, you can choose a more secure and stable third-party file backup software. AOMEI Backupper Standard is a good choice, which can backup any files and ensure their security by compressing to an image file. Here are some advantages of it:

- It supports not only file backup, but also partition backup, system backup, and disk backup.
- You can write comments to your backups and set up email notifications.
- It offers different backup modes (intelligent sector backup or exact backup) and different compression levels (high/normal/low).
- You can backup your files at fixed intervals (daily/weekly/monthly) and choose a way to perform a scheduled backup, both full backup and incremental backup are available.
- It supports various storage devices, such as USB, HDD, SSD, etc.
- It has great compatibility with the operating system (Windows 7, 8, 8.1, 10, 11, etc.)
Step 1. Install backup software and connect the external disk.
Install AOMEI Backupper after downloading and open it. Connect the external disk to your computer and make sure it is detected.
Step 2. Select the “File Backup” option
Select "Backup" and then select "File Backup" from the right panel.

Step 3. Select the files or folders you want to backup
Click “Select Source” > "Add File" or "Add Folder", and then select the files or folders to be backed up.

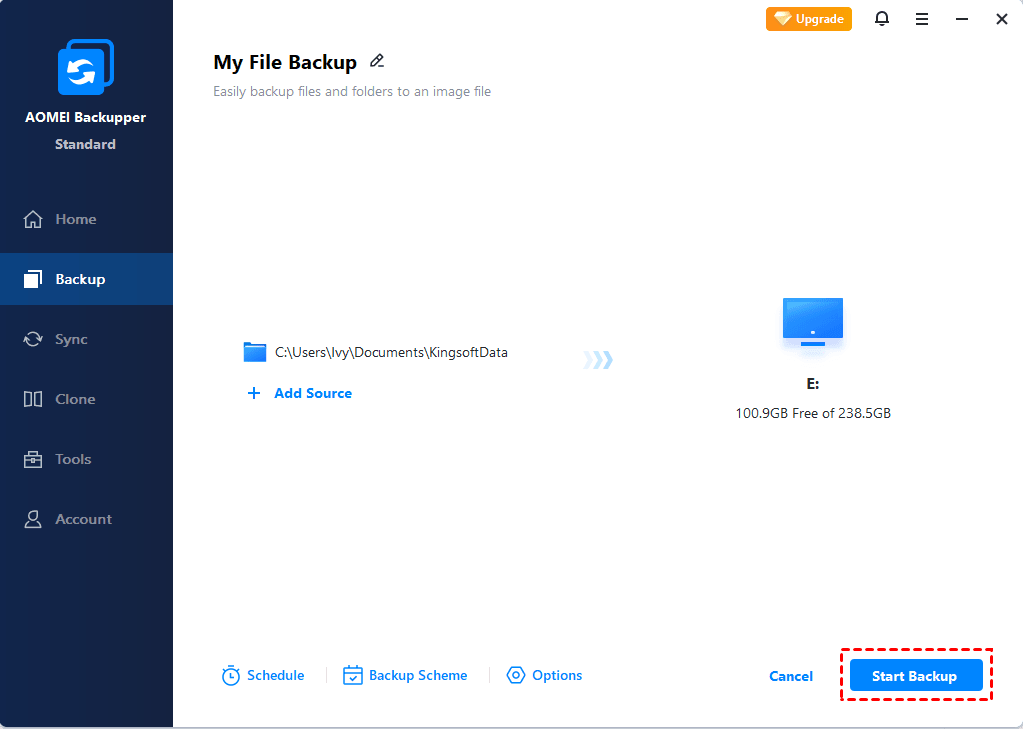
Step 4. Select backup destination
Choose the external hard drive as the backup destination.

Tips: You can choose "Options", "Schedule Backup" or "Backup Scheme" to get more settings.
Options: You can enable email notification, choose the compression level for the backup file and select the splitting way you want, etc.
Schedule Backup: You can set automatic backup on Windows 11 at fixed intervals, such as daily, weekly, monthly, or event triggers.
Backup Scheme: You can choose different backup methods: full/incremental/differential backup. Both of the latter methods can save you storage space on the target disk. But differential backup is only available after upgrading to AOMEI Backupper Professional. You can also delete old backups automatically so that you won't be bothered by insufficient disk space due to multiple backups.
Step 5. Run the backup task
Confirm your operation and click "Start Backup" to launch the backup process.
★ Extra Tip: How to Restore the Backup Using AOMEI Backupper
If you have lost your data, you can use the restore function of this software to restore your previously backed up files. Here are the specific steps.
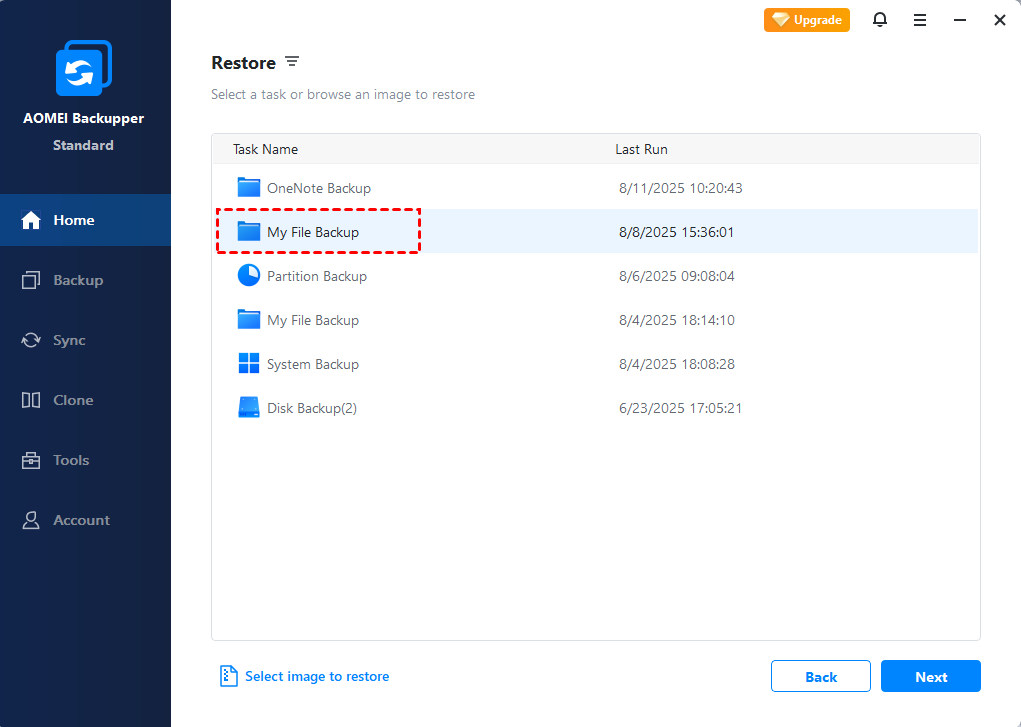
Step 1. Connect the external disk containing backup image first. Then open the software. Go to Home > Restore.
Step 2. Choose the backup that you want to restore in the Backup List and click "Next."
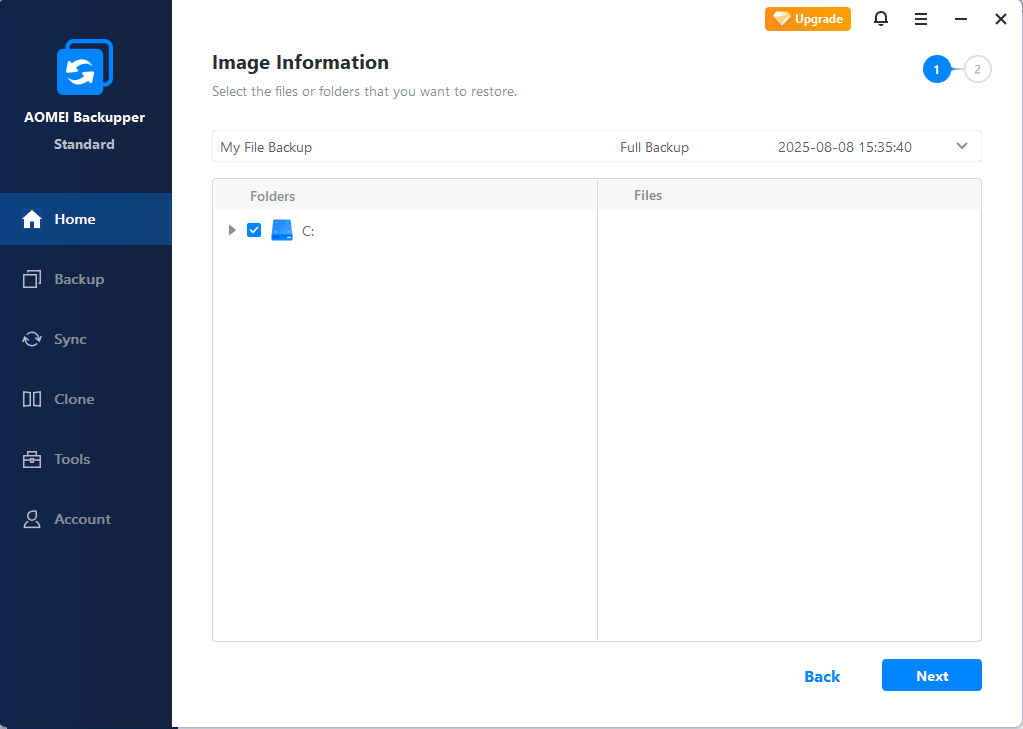
Step 3. Select the files or folders you need to recover and click "Next."
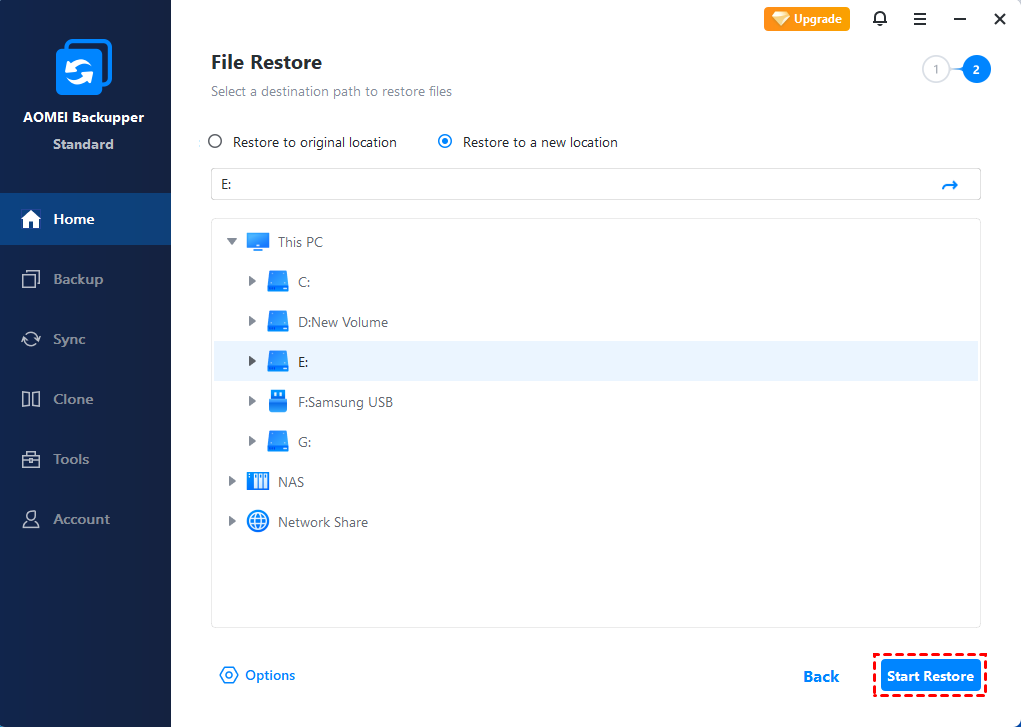
Step 4. You can choose Restore to original location, or choose Restore to a new location and specify the path you want. Then Start Restore.
If you are still interested in how to backup files on Windows 11 to external drive using File History or Windows 11 Backup and Restore, you can explore the following two methods.
2. Backup to External Hard Drive in Windows 11 with "File History"
You can use the built-in software File History to backup Windows 11 to external drive. It regularly backups files in the documents, music, pictures, videos, and desktop folders. Over time, you will have multiple backup copies. If the original files are lost, damaged, or deleted, you can restore them. You can follow the steps below.
Step 1. Connect an external hard drive to your computer first. Type and search File History in the Windows search bar, then click Open.
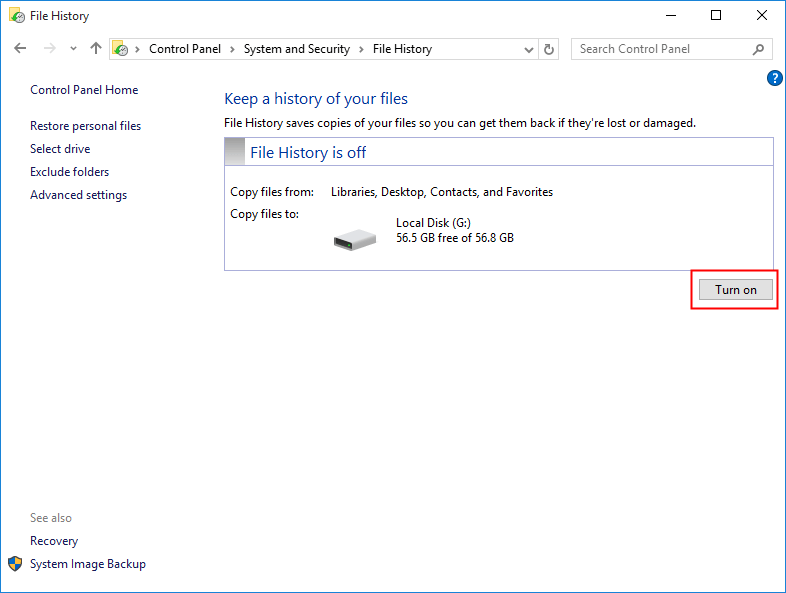
Step 2. File History will automatically select the external drive connected to your computer as the backup destination. Click Turn on to enable File History.
Step 3. If there are some folders by default settings you don’t want to back up, click Exclude folders to add the folders you don’t want to save copies.

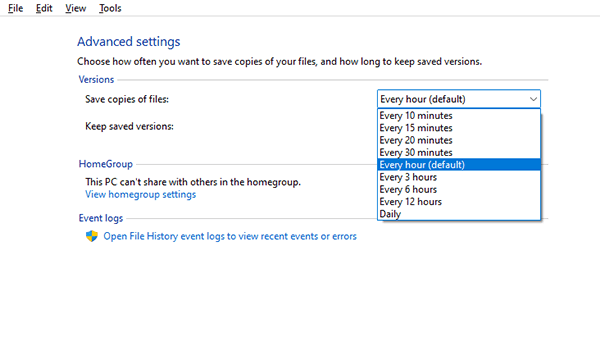
Step 4. Click Advanced settings to configure additional settings.
▶ Save copies of files: By default, File History backs up your files every hour, but you can change this setting. You have the different options of doing it from 10 minutes to 24 hours.
▶ Keep saved versions: It is set to keep backups forever by default, but you can change this setting to keep them from one month to two years before deleting them.
Tip: If you wish to add a folder to File History for backup, please right-click on the folder and select Show more options > Include in library > Create new library. File History will backup all folders in Libraries.
★ Extra Tip: How to Restore the Backup Using File History
To restore files from your external drive using File History, you can follow the steps below:
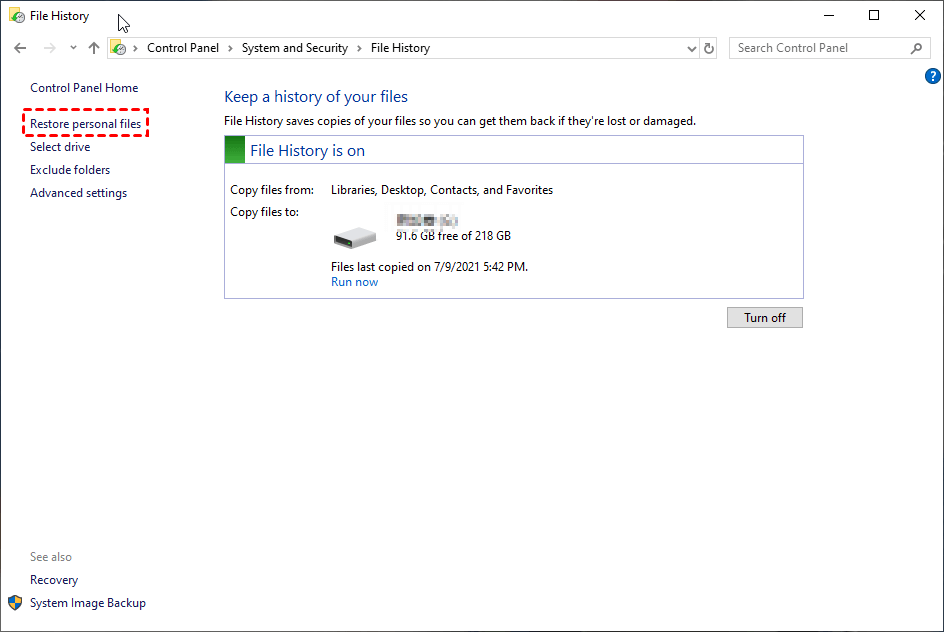
Step 1. Type and search File History in the Windows search bar, then click Open. In the pop-up window, select Restore personal files.
Step 2. Click the left or right arrows below to find the backup version you want to restore. Also, you can search the files in the search box.
Step 3. Click the "Restore button." you can also click the gear icon, and then select "Restore to."
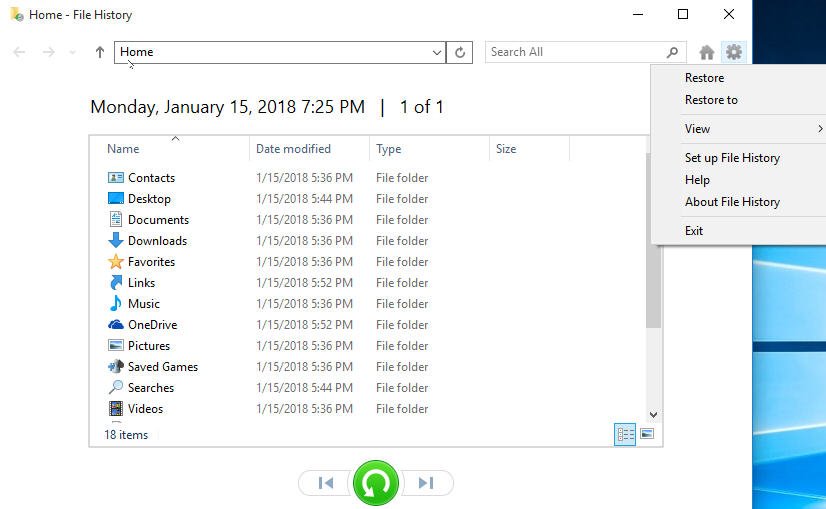
Tips:
♦If you want to restore to the original location, please click the restore button below.
♦If you would like to restore to a new location, you can click the gear icon, and then select "Restore to" to do so.
3. Backup Files to External Hard Drive in Windows 11 with "Backup and Restore"
You can also use another built-in tool - Windows 11 Backup and Restore for backing up files. It will backup data files saved in libraries, on the desktop, and in default Windows folders. These items will be backed up on a regular schedule. It can also create a backup image of your entire system, including the operating system, applications, and settings. Learn how to backup computer to external hard drive in Windows 11 below.
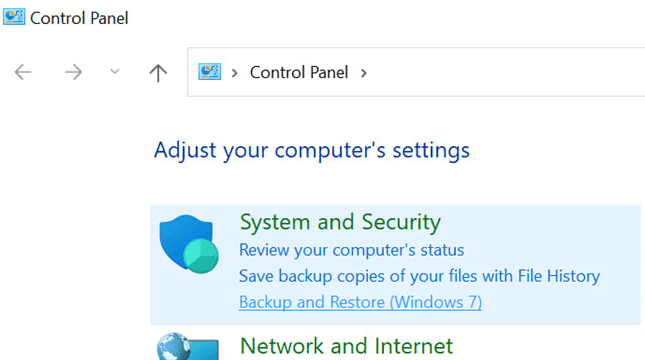
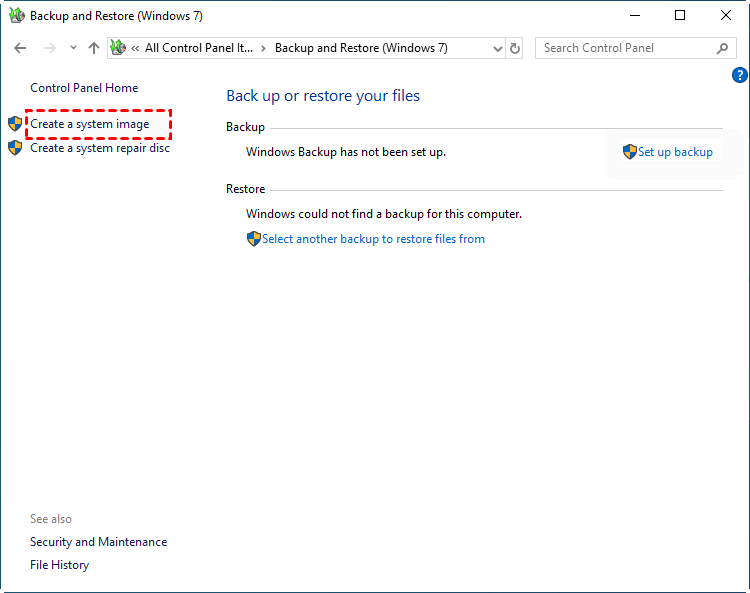
Step 1. Go to Control Panel > System and Security > Backup and Restore (Windows 7).
Step 2. Select the Set up Backup option under the "Backup" section.
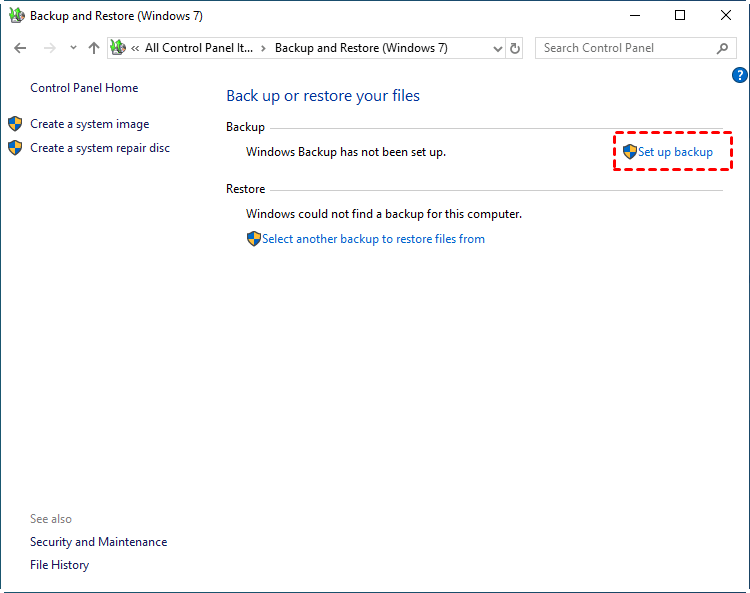
Step 3. If prompted, enter your admin password.
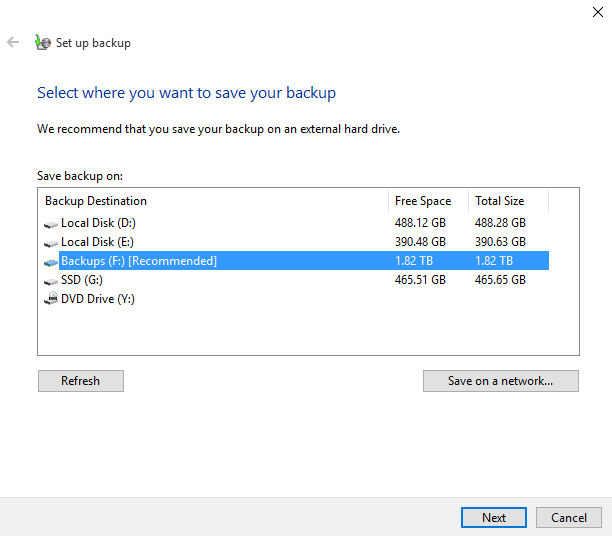
Step 4. Select your Backup Drive and click Next.
Step 5. Select Let Windows Choose option and click Next. It will backup files about users, such as files saved in libraries, on the desktop, and default Windows folders.
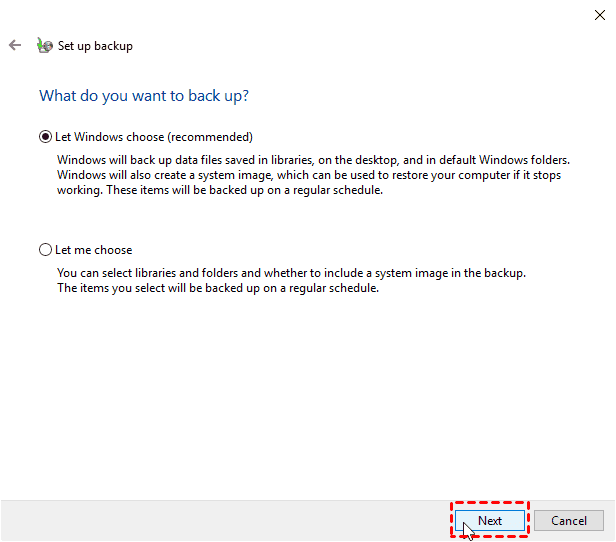
Note: You can choose the second option to select libraries and folders and whether to include a system image in the backup. The items you choose will be backed up on a regular schedule.
Step 6. Click Save settings and run backup button.
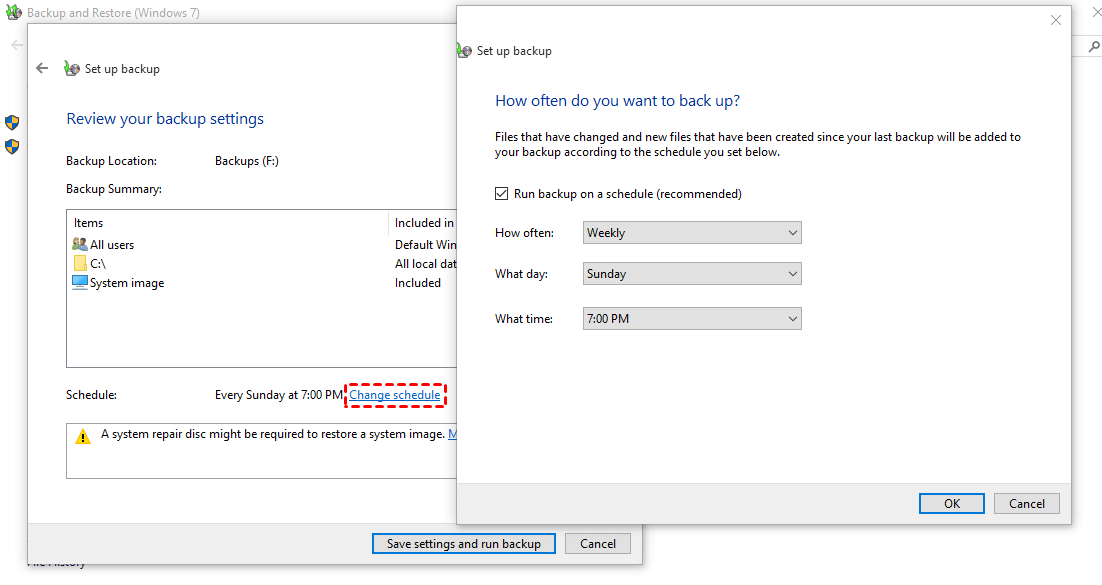
Note: By default, it will automatically backup files at every Sunday 7 p.m., but you can change this setting to suit your needs by clicking Change Schedule.
★ Extra Tip: How to Restore the Backup Using Backup and Restore
If you end up losing files, you can restore your files and data by following the steps below.
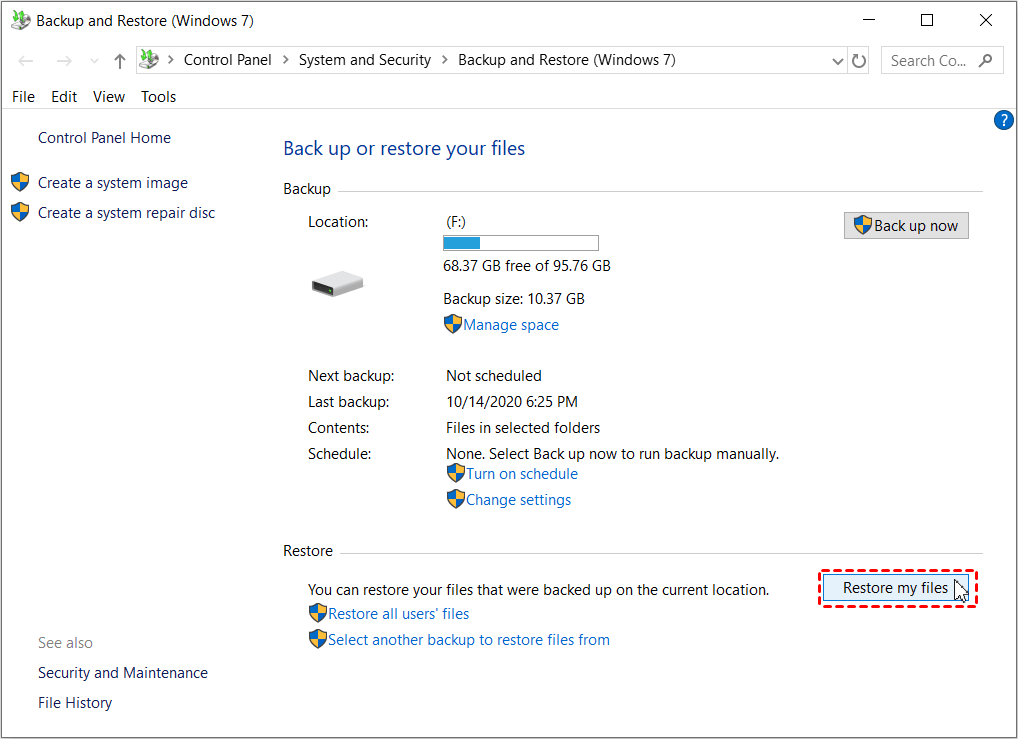
Step 1. Go to Settings > Update & Security > Backup > Backup and Restore (Windows 7).
Step 2. Click on Restore my files button under "Restore" section.
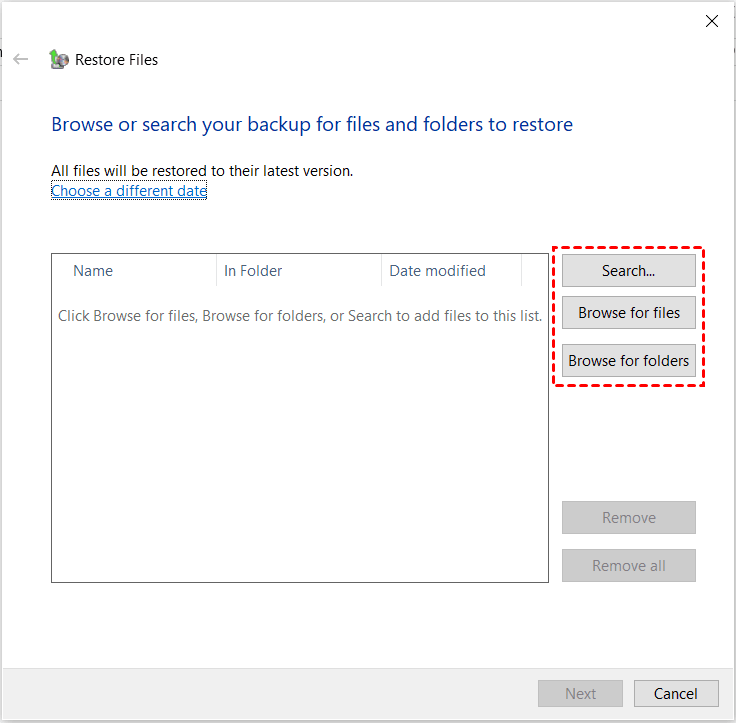
Step 3. Click Browse for folders button to select the Folders from the Backup that you want to restore. After selecting Folders, click Next to start the process of restoring.
- Browse for files: You can select the files that you want to restore and click add files.
- Browse for folders: You can select the folders you want to restore and click add folder.
- Search to add files: You can search directly to find the file or folder you need to restore.
How to Backup Windows 11 OS to External Drive
Besides files, it’s also important to create a full system backup. Learn how to backup Windows 11 to external drive via two easy ways below.
1. Backup System to External Drive via AOMEI Backupper
Step 1. Run AOMEI Backupper. Choose Backup > System Backup.

Step 2. Choose the external hard drive to save the system image and click Start Backup to execute the operation.

2. Backup OS to External Hard Drive with "Backup and Restore"
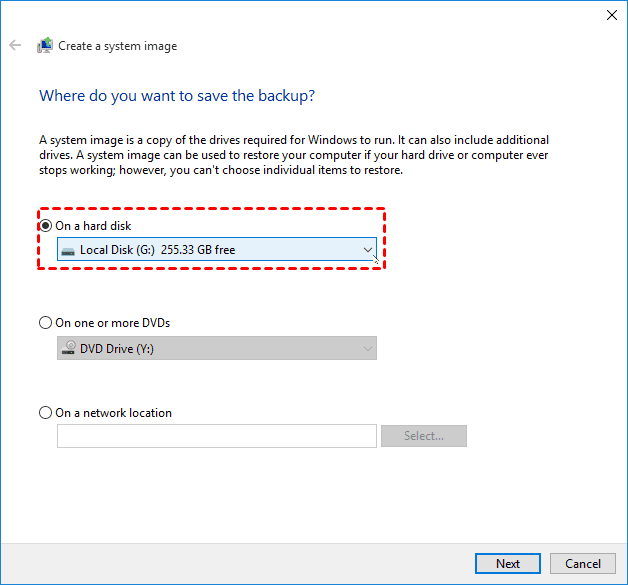
Step 1. Open Backup and Restore (Windows 7) and click the Create a system image option from the left pane.
Step 2. Choose your external hard drive to store the backup image and click Start backup to launch the process.
Further Reading
Why Backup Files to External Hard Drive in Windows 11?
Nowadays, more and more people need to store all kinds of files and data. However, as we all know, the more data there is, the greater the security risk of data loss. Therefore, it is very important to backup data in advance to avoid data loss. Well, why should you backup your files to an external hard drive? This article summarizes the following common reasons:
- Expand storage space
- Avoid data loss due to system crashes, computer viruses, malware intrusion, etc.
- Prevent important documents from being deleted by mistake
- Access files and data you want anytime and anywhere
Bonus: Best Enterprise Data Backup Solution
If you are an enterprise user who has multiple Windows 11 devices that need to be backed up, you can try the best enterprise backup software - AOMEI Cyber Backup. It offers you all-around enterprise data backup solutions:
- It enables you to create system/disk/partition backup for a bunch of Windows PCs from one central console.
- You are allowed to save backup images on a local disk, external hard drive, network share or NAS device, etc.
- You can schedule a backup task to run every day/week/month using the full/incremental/differential backup method.
Download this powerful enterprise backup software now to have a try!
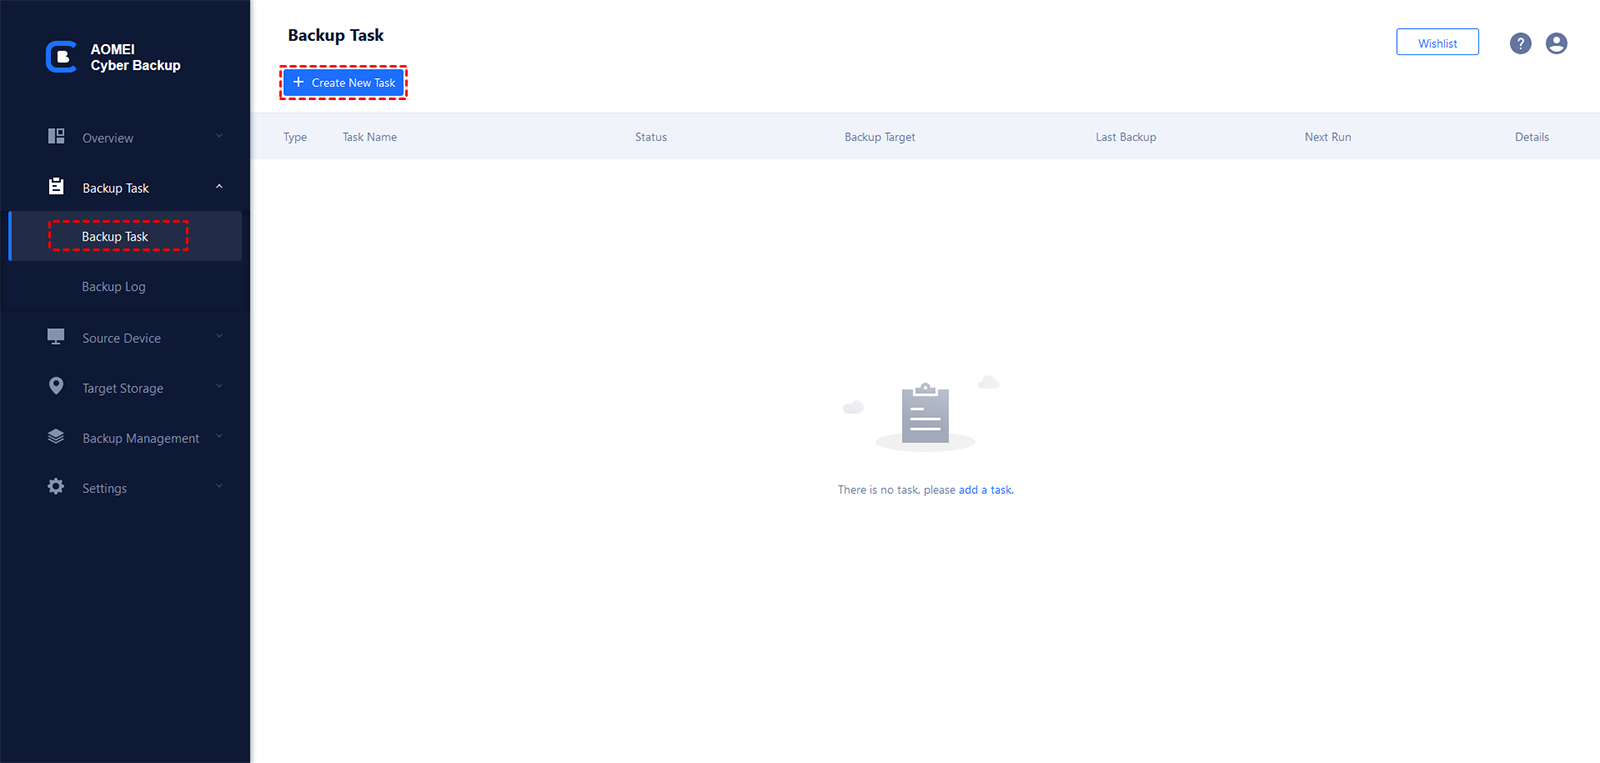
To make backups for client computers, just log in AOMEI Cyber Backup, and add the Windows device that you want to backup. Then click Backup Task on the left menu bar and select Backup Task > Create New Task.
FAQs about Backing up Files on Windows 11
#1. What is the difference between File History and Windows Backup on Windows 11?
File History is designed for backing up personal files, while Windows Backup provides a system image and additional options. File History is recommended for most users.
#2. Can I back up files to the cloud on Windows 11?
Yes, you can use cloud services like OneDrive or third-party solutions to back up files on Windows 11. OneDrive is integrated into the system and offers seamless cloud backup.
#3. What happens if my external drive is full during a Windows 11 backup?
Windows 11 will prompt you to free up space on the external drive or choose another drive for the backup.
#4. Does Windows 11 back up my entire system by default?
No, by default, Windows 11 focuses on backing up your personal files. You need to use additional tools for full system backups.
#5. What is the best way to backup files in Windows 11?
To backup specific files/folders on Windows 11, you can choose File History; to create Windows 11 system image, Windows Backup and Restore is a better solution. Or, you can use the all-in-one free backup software - AOMEI Backupper, to create system backup, disk backup, partition backup, or file backup to external drive, network drive, cloud, and various locations easily.
Summary
I believe that you have mastered three ways to backup files to external hard drive in Windows 11 by reading the passage. You can choose the built-in tool "File History" or "Backup and Restore", which comes with Windows system.
You can also choose the reliable and free file backup software AOMEI Backupper as well. To be honest, I prefer AOMEI Backupper, because it has all the features that the built-in tools have and offers other advantages.
- It can safely backup all kinds of files to external hard drive.
- For people who like doing schedule backups, it supports daily, weekly and monthly backup.
- It’s able to backup files to different devices (USB, HDD, SSD, network, cloud, etc.) in multiple systems (Windows 7, 8, 8.1, 10, 11).
- In addition to backup files, you can also backup boot disk, specific partitions or the Windows OS.
- Differential backup is available in advanced versions, which the built-in tool doesn’t support.
If you want to enjoy these features, download AOMEI Backupper now!

