Guide | Enable UEFI Secure Boot for Windows 11 Update
Enabling UEFI Secure Boot is one of the essential requirements for Windows 11 upgrade. This page gives a comprehensive introduction to UEFI Secure Boot and shows how to enable UEFI Secure Boot step by step.
By Lily Updated on August 14, 2024
What is UEFI Secure Boot?
UEFI (Unified Extensible Firmware Interface) Secure Boot is a safety standard aiming to ensure that the PC is only started with software trusted by the OEM (Original Equipment Manufacturer). It can help computers resist virus attacks and malware infections.
After enabling this setting, the computer will only load drivers with Microsoft certificates. Secure Boot detects tampering with boot loaders, key operating system files, and unauthorized option ROMs by validating their digital signatures. Detections are blocked from running before they can attack or infect the system.
Windows 11 requires Secure Boot to be enabled on the system to run the latest version. The most notable recent update is 22H2. This is the first major feature update Windows 11 has received since its release on October 5, 2021. Fortunately, Secure Boot is supported on a variety of systems. Read on to learn how to properly enable UEFI Secure Boot for Windows 11 updates.
Does your computer support UEFI Secure Boot?
Before you upgrade to Windows 11, you need to confirm whether your computer supports UEFI Secure Boot, or you may encounter the error saying “This PC must support Secure Boot” on Windows 11 installation.
You can view the motherboard production date to check for Secure Boot support. New versions of computer motherboards and branded computers produced after 2011 support UEFI Secure Boot mode, such as:
- Intel 7 series (B75, Z77, H77 and Z75, etc.)
- Intel 8 series (Z87, H87 and B85, etc.)
- AMD 9 series (970, 990X, 990FX)
- A-series motherboard (A85, A55, A75)
How to view the motherboard production date
1. Press the Win + R keys to open the Run window. Then, type “cmd” and press Enter.
2. In the pop-up window, type systeminfo and press Enter. You can see your computer information after a while, and the motherboard production date is listed after the BIOS Version option.

How to check Secure Boot state before Windows 11 upgrade
If your computer supports UEFI Secure Boot, you should then check whether Secure Boot is enabled. Here I list 4 ways to help you check Secure Boot state before upgrading to Windows 11.
Method 1: Check the System Information Tool
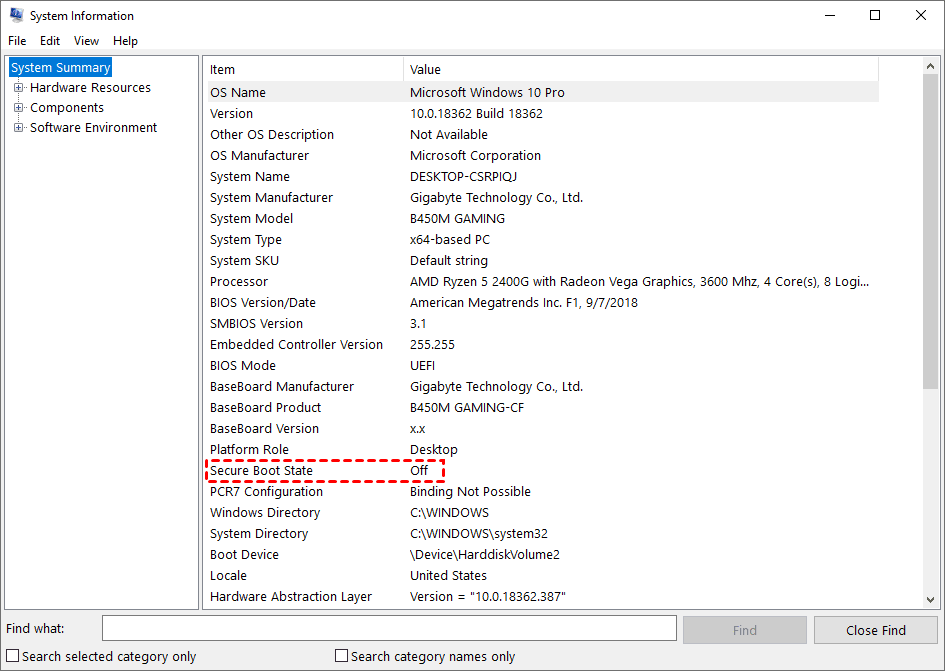
1. Press the Win + R keys to open the Run window. Then, type “msinfo32” and press Enter.

2. In the System Information window, click System Summary and find Secure Boot State on the right-side panel. If it reads On, then Secure Boot is enabled. If it reads Off, Secure Boot is disabled and you need to turn it on for Windows 11 update.
Method 2: Run CMD
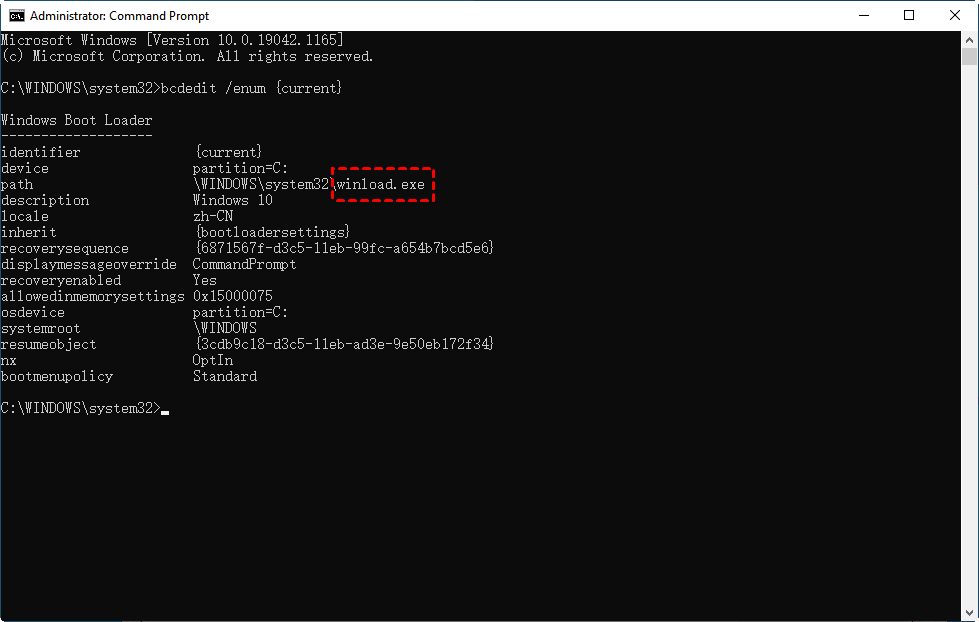
1. Press the Win + R keys to open the Run window. Then, type “cmd” and press Enter.
2. Type bcdedit /enum {current} and press Enter.
3. In the listed information, find path. If it shows winload.efi, then your Windows has enabled UEFI Secure Boot; if it shows winload.exe, your Windows has enabled Legacy boot mode.
Method 3: Use PowerShell Cmdlet
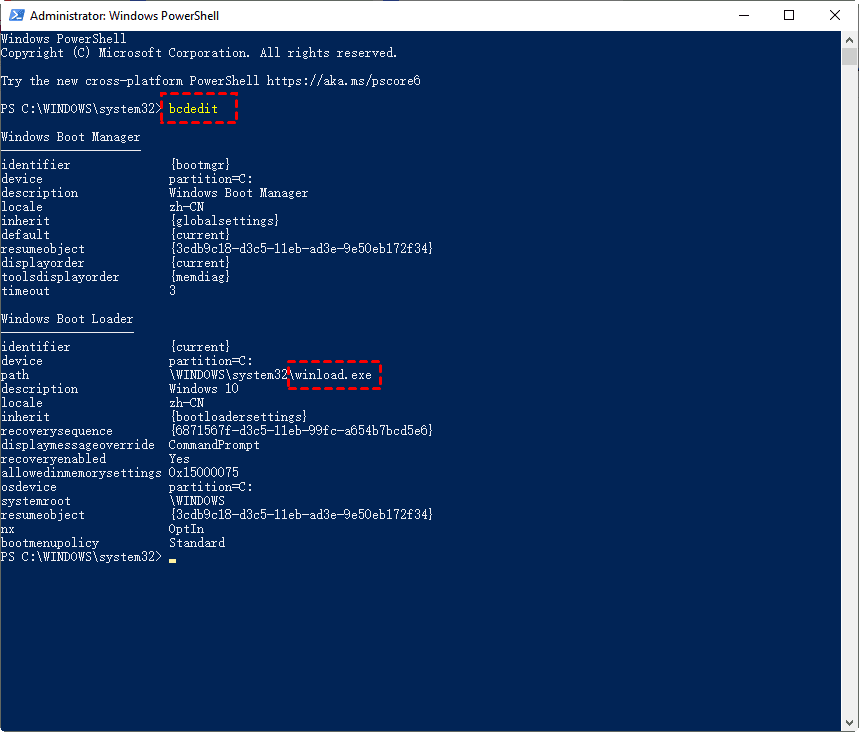
1. Navigate to Windows PowerShell from the Start menu. Then, right-click on it and select Run as administrator.
2. Type bcdedit and press Enter. Then find path and check it shows winload.efi or winload.exe as you do in Method 2.
Method 4: Check Windows Disk Management
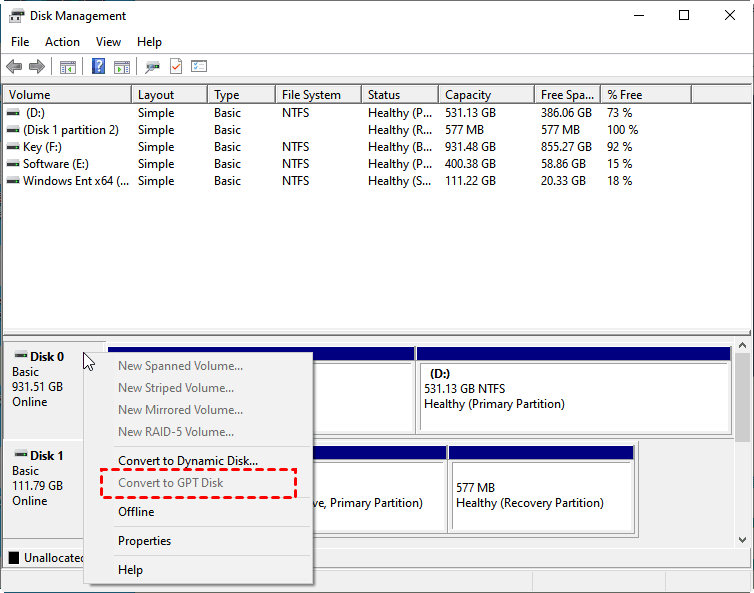
1. Press the Win + R keys to open the Run window. Then, type “diskmgmt.msc” and press Enter.
2. Right-click on Disk 0. If there is the Convert to GPT Disk option, then your computer is using Legacy boot mode; if there is the Convert to MBR Disk option, UEFI Secure Boot is enabled.
How to enable UEFI Secure Boot for Windows 11 update
If your computer supports Secure Boot but it is disabled, follow the guidance below to enable Secure Boot.
Note: After changing the Safe Boot state, you may encounter some hardware failures. You can easily solve this problem by disconnecting the inoperable hardware from the computer and then reconnecting it.
1. Restart your computer and press ESC/Delete/F1/F2/F10 while it is booting to enter BIOS. Then, click Boot and select Secure Boot.
Tip: Depending on the computer host, the keys to enter BIOS may vary.
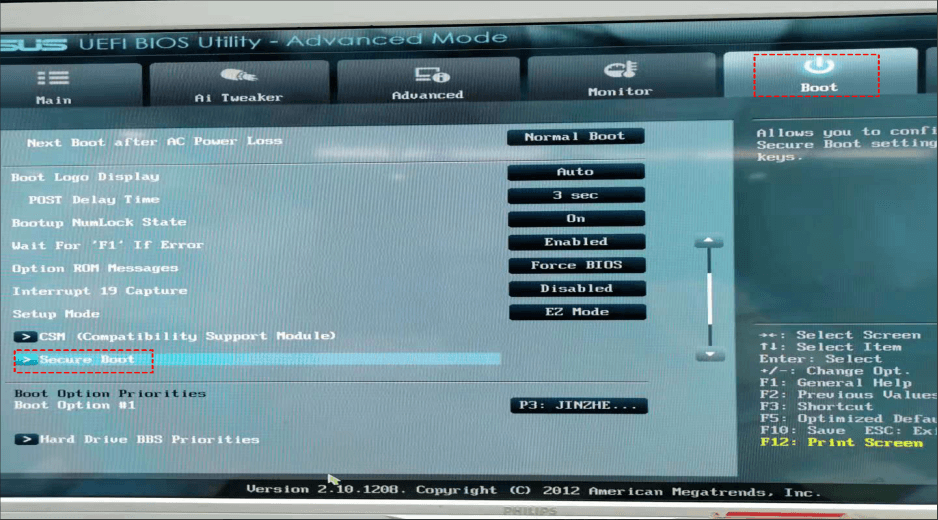
2. You can see the Secure Boot state reads “Disabled”. Click Key Management to continue.

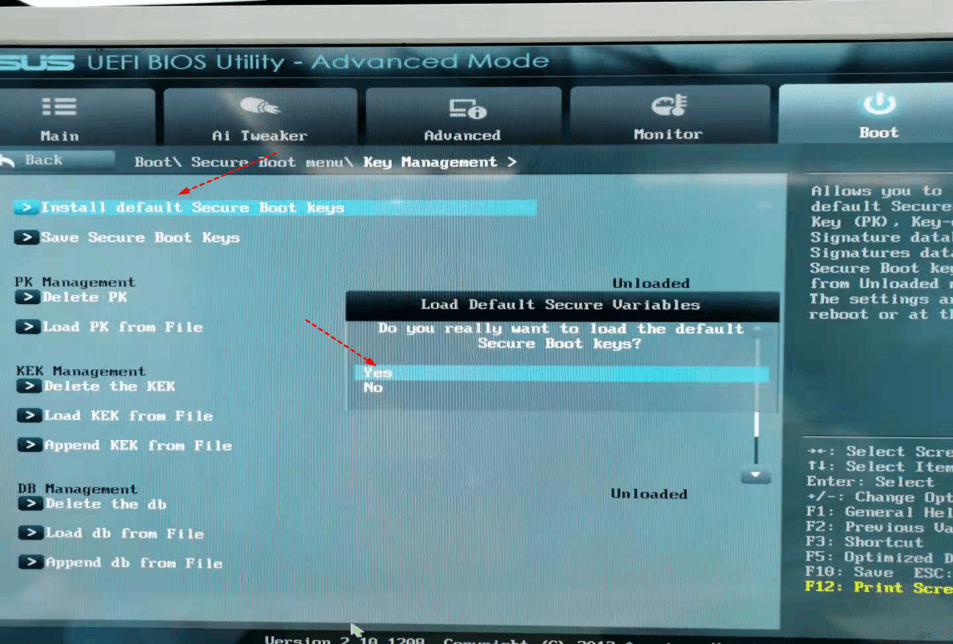
3. Select Install default Secure Boot keys and then Yes to turn on Secure Boot.
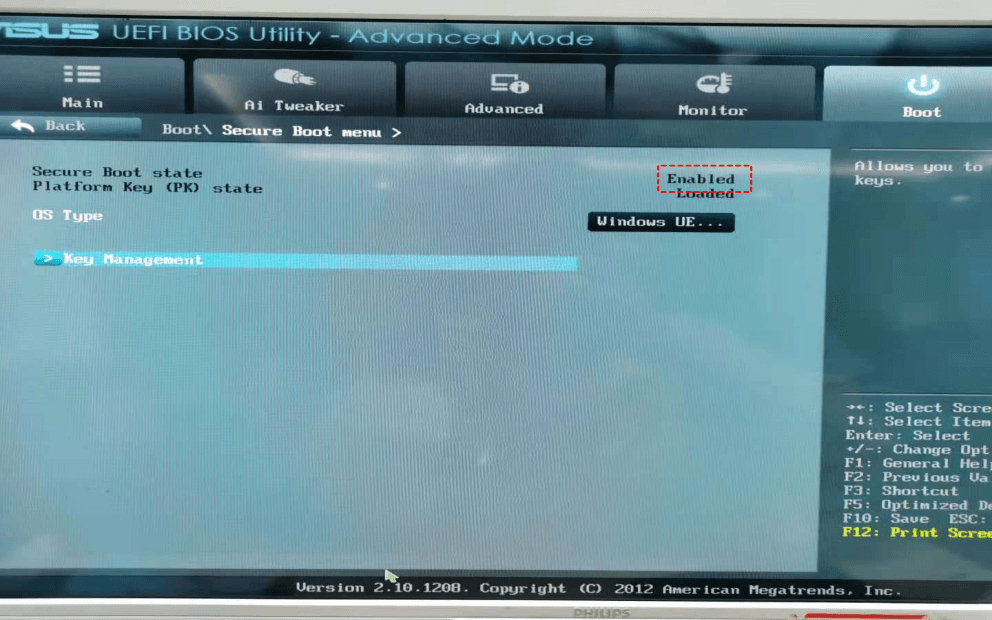
4. Finally, go back to the previous page and you’ll see the Secure Boot state reads “Enabled” now.
★ Use the installation disk to bypass UEFI detection
If your computer doesn’t support Secure Boot, you can boot from the installation disk to bypass UEFI detection. Follow the instructions below to realize Windows 11 Secure Boot bypass:
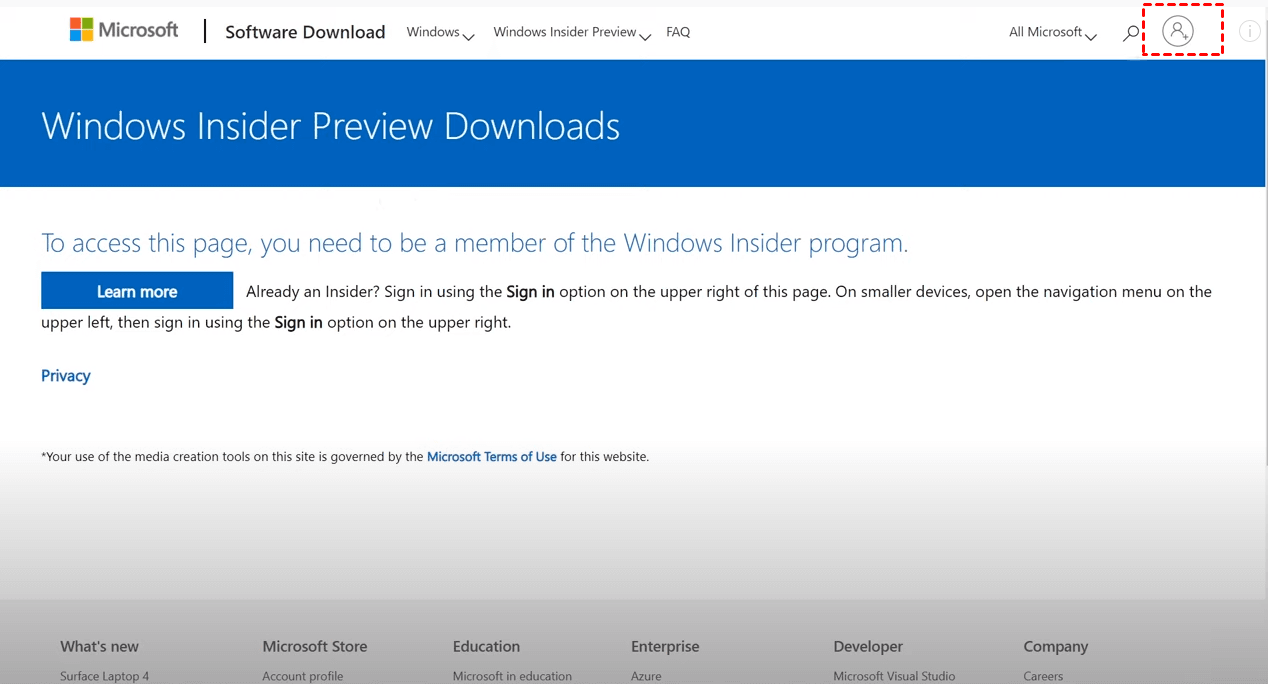
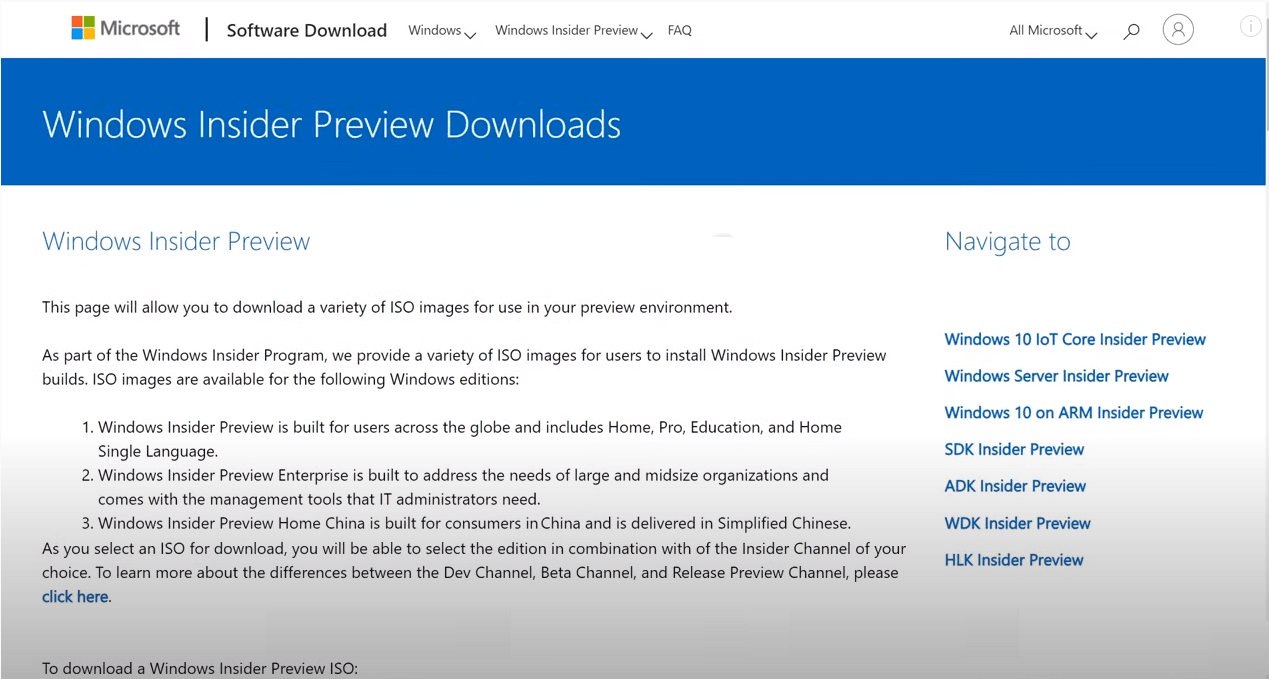
1. First, download the Windows 11 ISO file. You can download the Windows 11 Preview Build from the official website (Windows 11 official version has not yet been released). After entering the download page, click on the avatar in the upper-right corner to create an account. The process may be a bit slow. Please be patient.
2. After logging in with the created account, drag the page down, select edition and language to download the ISO file of the Windows 11 preview version.
3. Make an installation disk with the ISO file. You’ll need it to boot into the Windows 11 installation process.
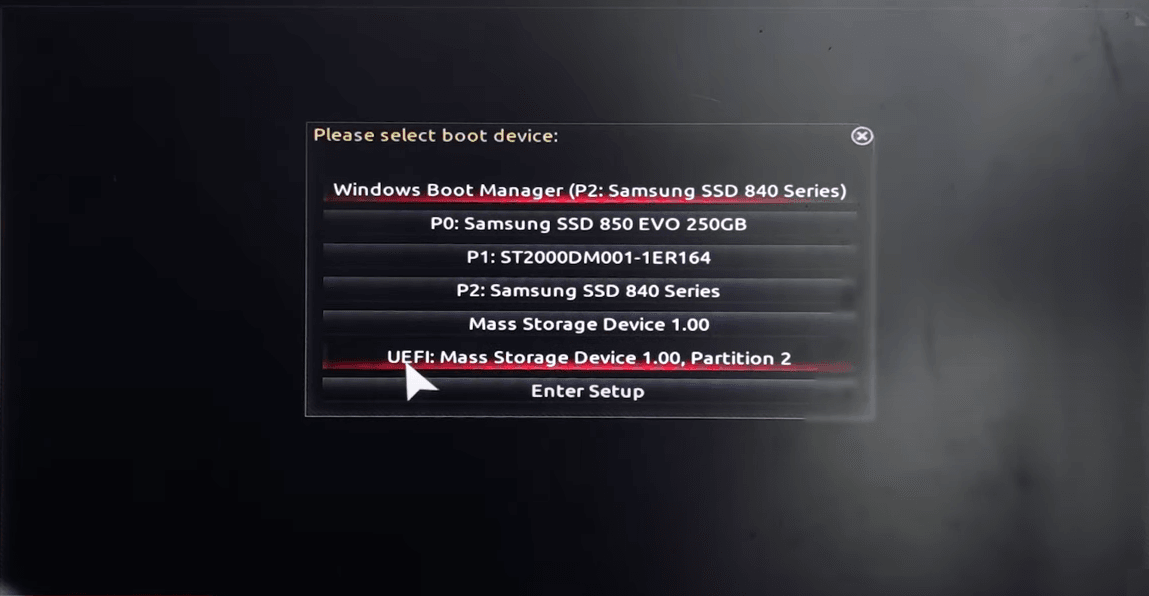
4. Connect the installation disk to the computer you want to install Windows 11 on. Continuously press a specific key (usually F8/F11/F12) while your computer is booting to enter BIOS.
5. After entering BIOS, select the installation disk to boot from it.
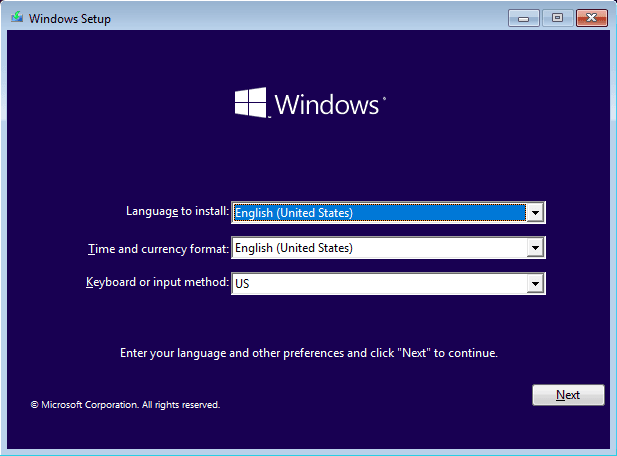
6. Wait for about 1 minute to enter the Windows Setup interface. Then, just follow the normal steps to complete the Windows 11 installation process.
Will UEFI Secure Boot affect computer performance?
Reading till now, some users may worry that enabling UEFI Secure Boot will affect computer performance. Ease your mind because it isn’t a problem at all. Enabling UEFI Secure Boot will only strengthen protection to prevent your computer from virus attacks. It has no effect on your computer performance.
Summary
This page has introduced UEFI Secure Boot roundly and offered 4 ways to help you check Secure Boot state. It also shows you how to enable UEFI Secure Boot for Windows 11 updates step by step. This can also prepare you for when you want to update to the Windows 11 22H2 update. We cannot predict what will happen after the update. To protect your system and data, it is strongly recommended that you back up your computer before updating.
If your computer doesn’t support Secure Boot, you can use the installation disk to bypass UEFI detection and then perform the Windows 11 installation task. If you have successfully enabled UEFI Secure Boot, congratulations, you are one step closer to upgrading Windows 11.

