How to Delete WindowsApps Folder on Windows 11 Safely
Many users wonder if it is safe to delete WindowsApps folder on Windows 11. Some of them found it impossible to delete the WindowsApps folder. Why does this happen? How to successfully delete this folder? Read this article to find out.
By Yuka Updated on August 28, 2025
Is It Safe to Delete WindowsApps Folder?
WindowsApps folder is a new folder introduced with Windows 8 to save Windows Store apps. Some users ask: Can I delete WindowsApps folder? There are roughly two different situations:
- If the WindowsApps folder is located in C drive (the system drive), you’d better not delete it. If you do need to delete the WindowsApps folder contained in the C drive, you must make sure that the applications it contains are no longer useful. Otherwise, problems may arise after the removal is complete.
- If the WindowsApps folder is contained on a drive other than the system drive, you can delete it at any time.
🌟 Note: Windows 11 has released the latest version - Windows 11 24H2. Get Windows 11 24H2 ISO download now to enjoy improved overall performance and user experience.
Deleting WindowsApps Folder on Windows 11 Safely
When some users deleted the WindowsApps folder on Windows 11, they experienced startup issues. Below is an example:
“I rename or delete the WindowsApps folder to perform a system restore. But I couldn't get the permission to rename or delete the folder so I deleted the files in the folder instead. Then I tried to boot and try the restore point again but now I get a black screen at boot, with the cursor with the spinning circle as if the PC were doing some thinking.”
Therefore, to help you successfully delete the WindowsApps folder without causing startup problems, you'd better backup your system and important files in advance. Keep reading to learn how to delete WindowsApps folder.
Part 1. Backup Your System to Prevent Any Startup Issues
AOMEI Backupper Standard is free backup software for all Windows PCs. You can use it to back up your system, disks, or files with a few clicks. It automatically selects the system partition and the boot partition so you never miss an important part of starting your computer.
In addition, you can use it to create a bootable media in advance. This tool can help you successfully boot your computer when you encounter serious problems such as system crash, and allows you to perform a system image restore created by AOMEI Backupper.
Next, I'll show you how to use this freeware to create a system image backup of Windows 11 before deleting WindowsApps folder.
- Click the download button below to install it on your computer. Launch this software and navigate to Backup -> System Backup.

✍ Tip: You can also choose Disk Backup to back up the entire disk on your computer. Or click Fie Backup to select individual files or folders to back up.
- Modify the task name to distinguish this system backup from other backup tasks. This program will select the system and partition by default as the source. Then choose a destination to store this system backup. You can backup to USB, external drive, network share, NAS, etc.

- Click Start Backup to begin system backup in Windows 11.

✍ Tips: There are three options in the lower left corner for you to customize the backup task.
✬ Schedule: You can set it to get the latest changes since the full system backup and protect your system continuously. You can specify the intervals to backup system automatically on a regular basis, such as daily, weekly, or monthly with an interval, or one time and event triggers.
✬ Backup Scheme: It enables you to choose a backup method from full/incremental/differential backup (Differential Backup is a premium feature in advanced editions).
✬ Options: You are allowed to compress the system backup image file and split large system image file into smaller ones under Advanced, enable email notification to get alert after the system backup is finished under Notifications, etc.
Part 2. Change the Owner of WindowsApps Folder and Delete
To delete the WindowsApps folder from a non-system drive on Windows 11, you must first remove the apps, restore the storage default settings, and then change some folder permissions to delete the folder successfully..
#1. Uninstalling Apps
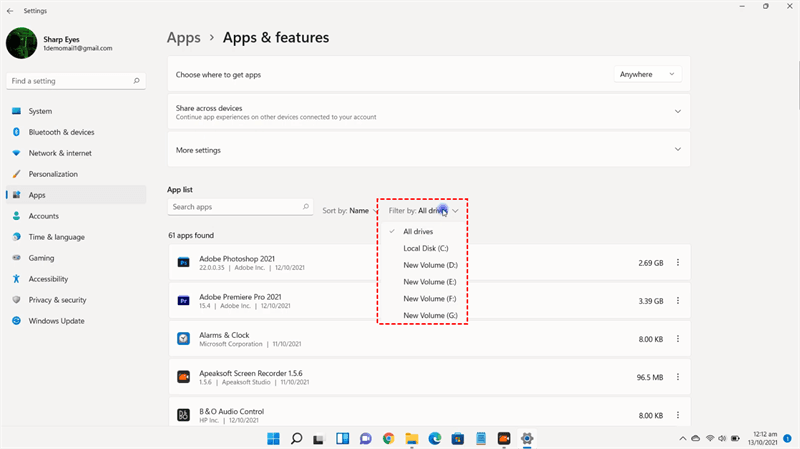
- Press Windows + I to open Settings and click on Apps -> Apps & features.

- Under the "Apps & features" section, use the Filter by menu, and select the drive containing the "WindowsApps" folder.
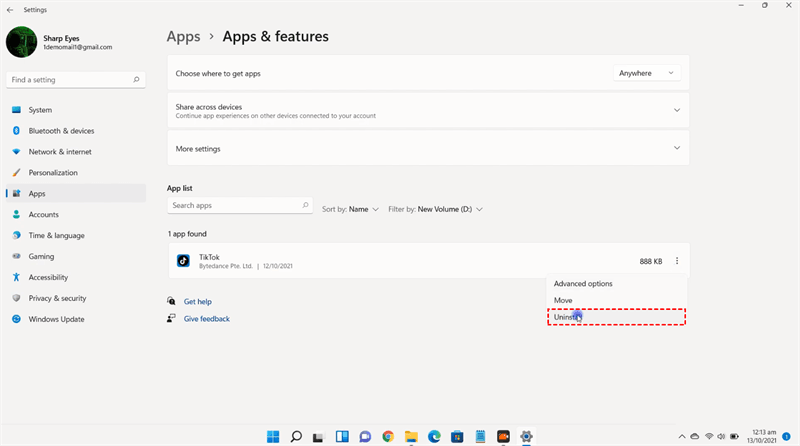
- Select the app and click the Uninstall button.
#2. Restoring default saved content settings
To restore the default settings to store new apps, use these steps:
- Change to the System -> Storage tab in Settings.
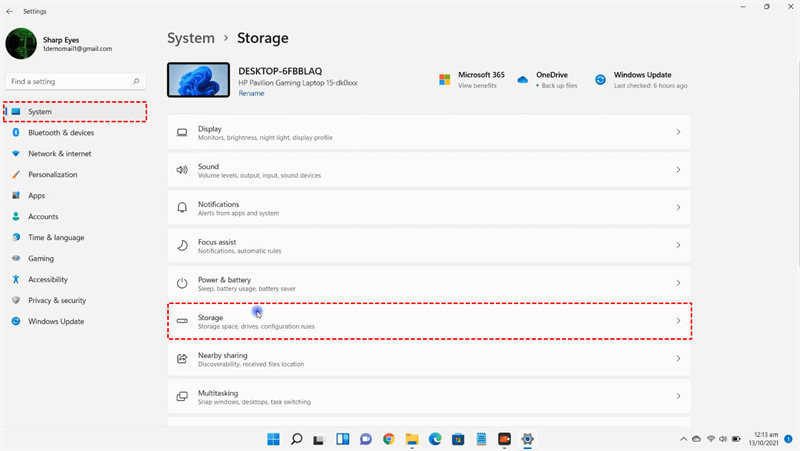
- Then click on Advanced storage settings -> Where new content is saved to change the location to save new apps.

#3. Deleting WindowsApps folder on Windows 11
To delete the WindowsApps folder on Windows 11, use these steps:
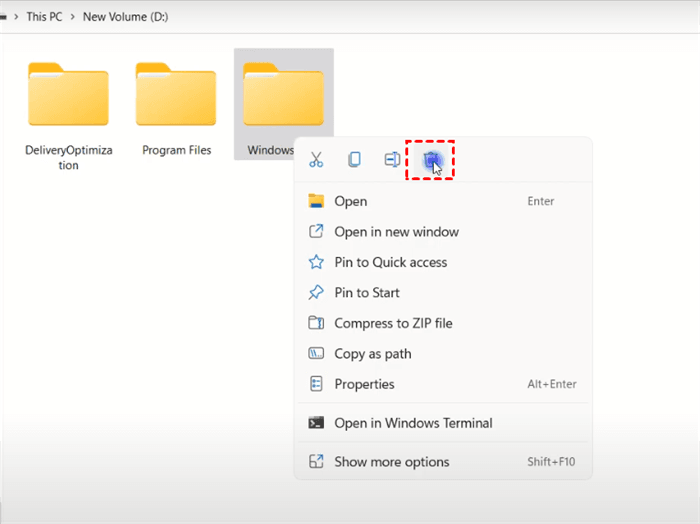
- Open File Explorer with Windows + E and navigate to the drive containing the WindowsApps folder.
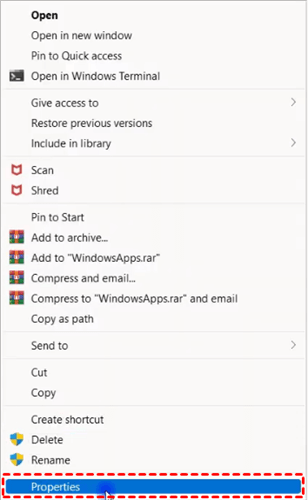
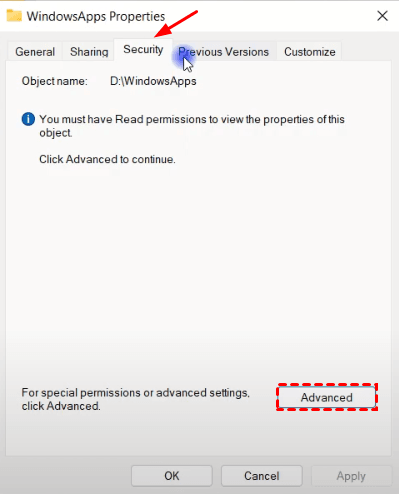
- Right-click the WindowsApps folder and select the Properties option.
- Then switch to the Security tab and click the Advanced button.
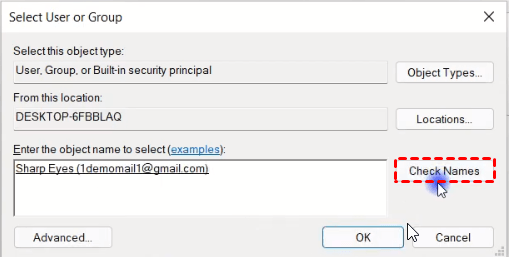
- Click the Change option to the right of Owner.
- Specify your account name (or the full email address associated with the account). And then click the Check Names button and OK.
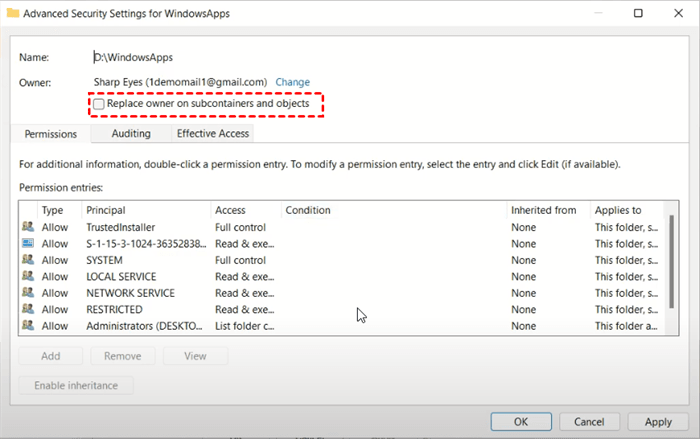
- Check the Replace owner on subcontainers and objects option. Then click Apply and OK button. Click the OK button again when the popup prompts you.
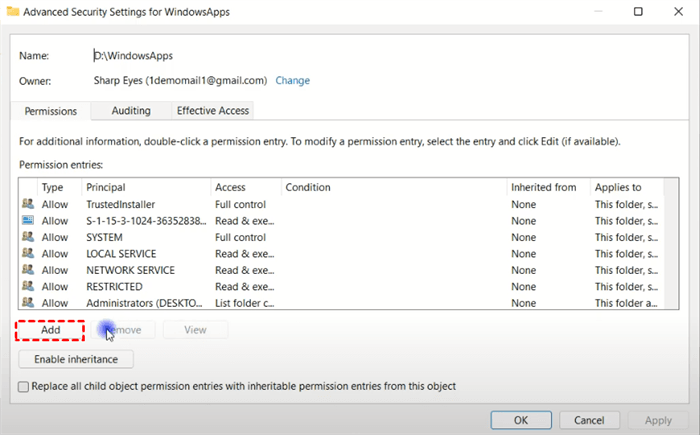
- Then click the Advanced button from the Security tab. Click the Change permissions button.
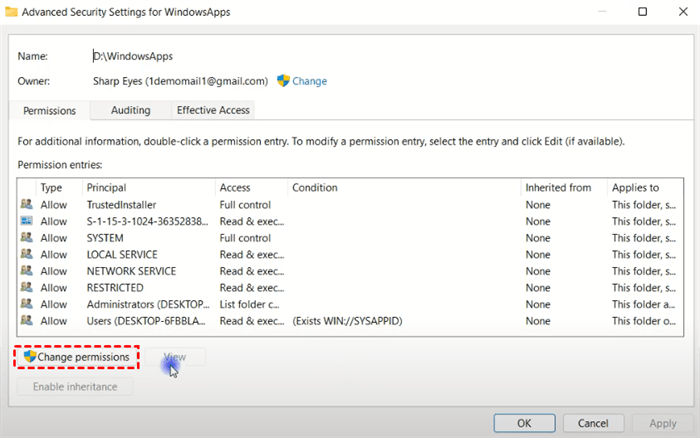
- Click the Add button.
- Click the Select a principal option.
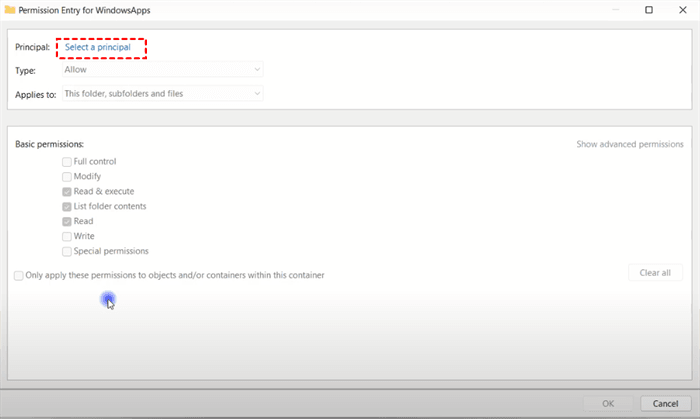
- Specify your account name (or the full email address associated with the account). Then Click the OK button.
- Under the Basic permissions section, check the Full control option.
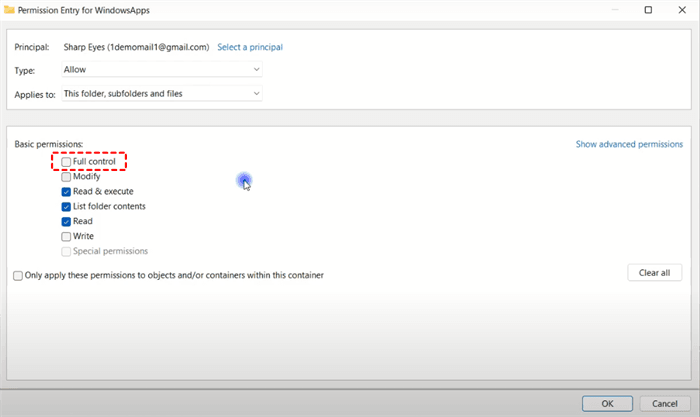
- Then click OK and Apply button to save these changes. Click OK to close Properties window.
- Then right-click the WindowsApps folder and select the Delete option.
✍ Tip: If you get a message trying to delete the folder, try one or two times again until the folder is deleted.
Final Words
After reading this article, you may know how to delete WindowsApps folder on Windows 11. But for your computer security, it is recommended to back up your Windows 11 system in advance. When something bad happens to your computer during the deletion process, you can use this system image backup to restore your computer to an earlier working state.

