How to Copy Windows 11 to Bootable USB (3 Cases)
Looking for solutions to make a copy of Windows 11 on a USB drive and make the drive bootable? Read this article carefully to learn 3 different ways.
By Lily Updated on August 28, 2025
Scenarios of copying Windows 11 to a USB drive
Nowadays, copying installed Windows to another storage device isn’t an uncommon thing any more. For example, you may transfer Windows to a new hard drive to expand storage space or clone OS to an SSD to optimize computer performance.
And there are some situations when you want to copy Windows 11 to flash drive:
- Create installation media with a USB stick so that you can install Windows 11 on other PCs from the bootable USB.
- Make a recovery USB drive with which you can reinstall Windows 11 from boot when a major issue occurs.
- Create a portable Windows 11 USB drive that allows you to run customized OS environment on different computers.
Then, how to make a Windows 11 bootable USB as you wish? Continue reading to learn the stepwise guides.
|
USB Type |
How to Create |
How to Use |
|
Windows 11 installation media |
Download the media creation tool from Microsoft...Full steps |
Install Windows 11 from the bootable USB drive (Details) |
|
Windows 11 recovery USB |
In the search box on the task bar, search for Create a recovery drive...Full steps |
Reinstall Windows 11 from the USB recovery drive (Details) |
|
Portable Windows 11 USB |
Run AOMEI Backupper, click Clone from the left panel...Full steps |
Run OS from the USB (Details) |
#1. Create Windows 11 installation media with a USB
Before you begin, make sure the USB drive you prepared has at least 8 GB storage space. Also, if it is not empty, backup files on USB flash drive in advance, or you’ll lose them. Then, follow the instructions below to create a Windows 11 installation USB:
1. Plug your USB drive into a USB port on your computer.
2. Download the media creation tool from Microsoft. Click the Download Now button under the “Create Windows 11 Installation Media” section.
3. Right-click on the MediaCreationToolW11.exe and select Run as administrator.
4. On the License terms page, select Accept.
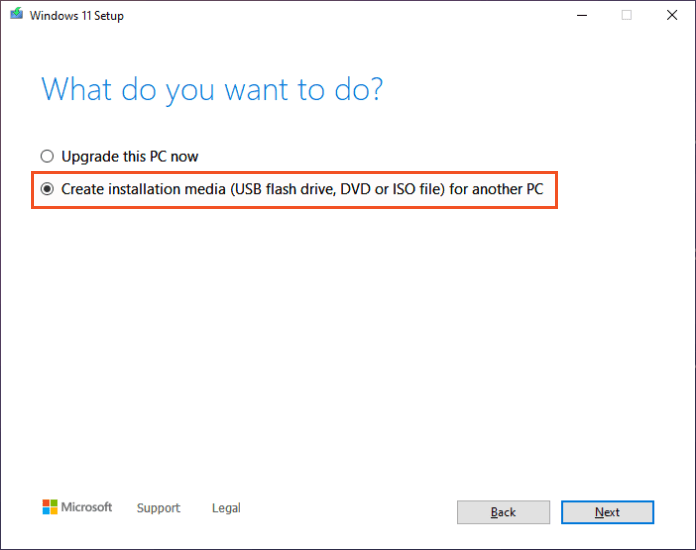
5. On the What do you want to do? page, select Create installation media for another PC, and then click Next.
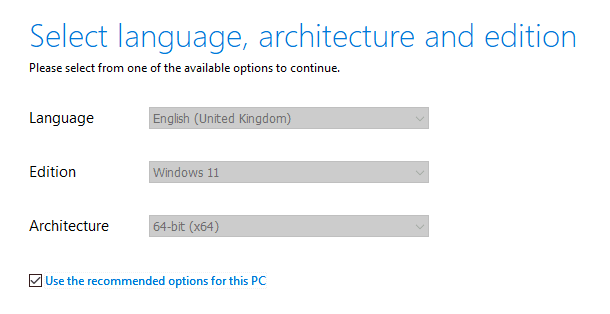
6. The Setup program automatically selects the language, edition, and architecture for Windows 11 according to your current Windows environment. If you want to change the default options, uncheck Use the recommended options for this PC and choose from the available options.
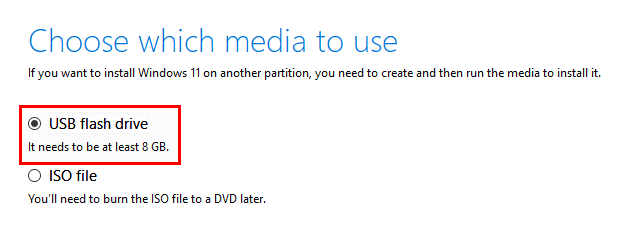
7. When prompted to choose which media to use, select USB flash drive and click Next.
8. You’ll see a list of removable drives available on your computer. Select the USB drive you just connected and click Next to begin Windows 11 installation media creation.
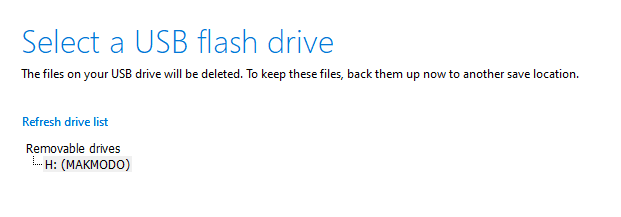
Tip: If you don’t see the USB drive you need, click Refresh drive list and try again.
Install Windows 11 from the bootable USB drive
1. Attach the USB flash drive on the PC where you want to install Windows 11.
2. Boot your PC and immediately press a certain key (usually F2, F12, Delete, or Esc) to enter BIOS.
3. Open the boot menu and set the USB drive as the first boot device.
4. Follow the Windows Setup wizard to clean install Windows 11.

WARNING: If your PC does not meet the Windows 11 minimum system requirements, it is not recommended to install Windows 11. If you insist, the PC will no longer be supported and won't be entitled to receive updates.
#2. Make a Windows 11 recovery USB for system recovery
The USB drive you use to create a Windows 11 recovery drive should be at least 16 GB. Also, use an empty USB drive because this process will erase any data existing on the drive. Here’s how to create a recovery drive in Windows 11:
1. Insert your USB drive into your PC. In the search box on the task bar, search for Create a recovery drive and then select it.
2. When the tool opens, make sure Back up system files to the recovery drive is selected and then select Next.
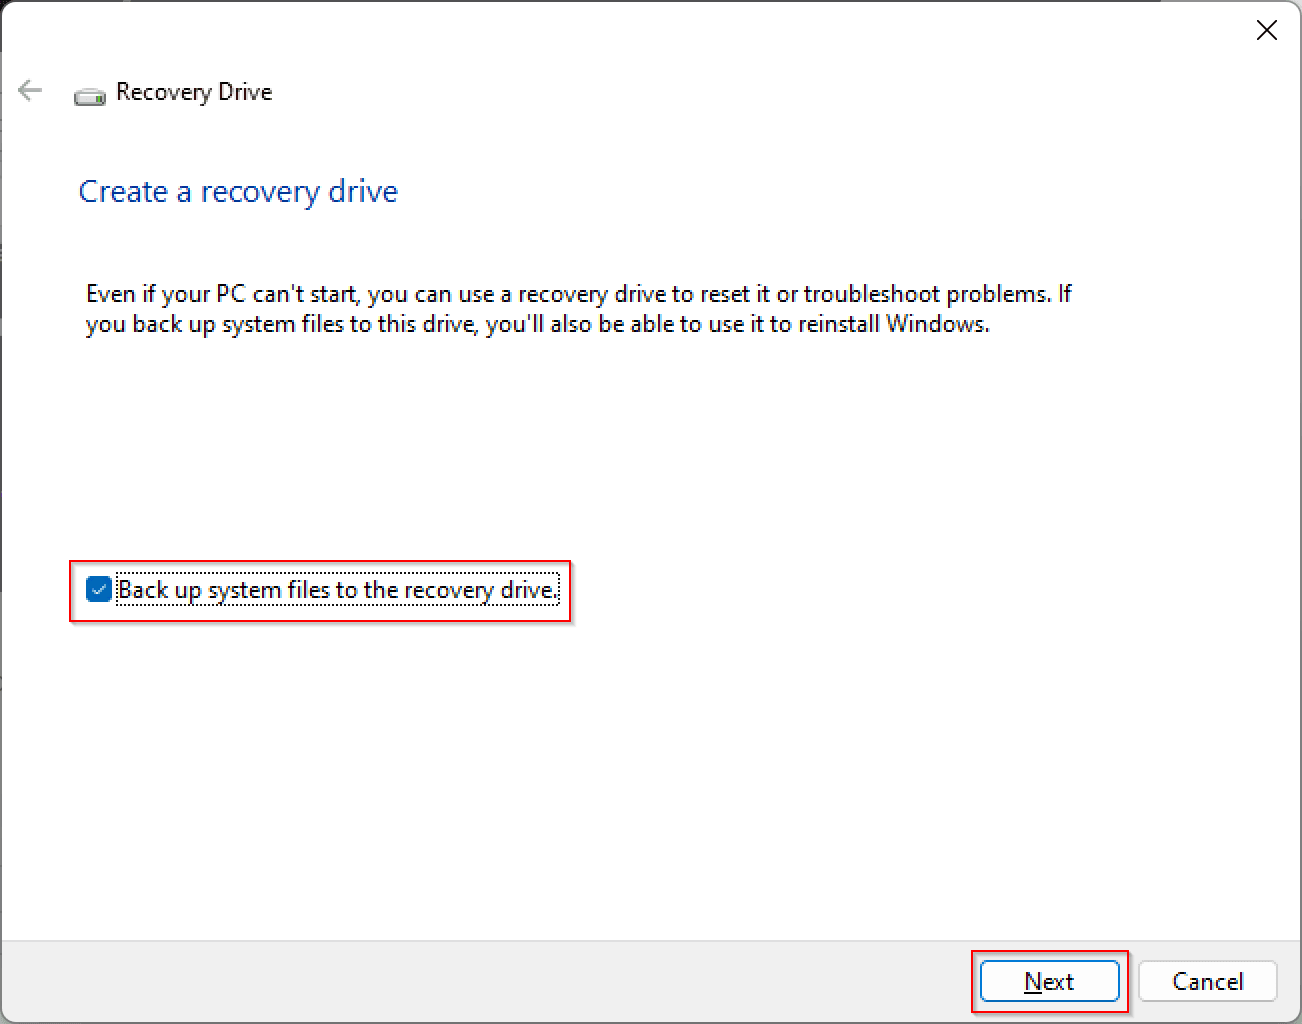
Note: Personal files and any apps that did not come with your PC will not be backed up.
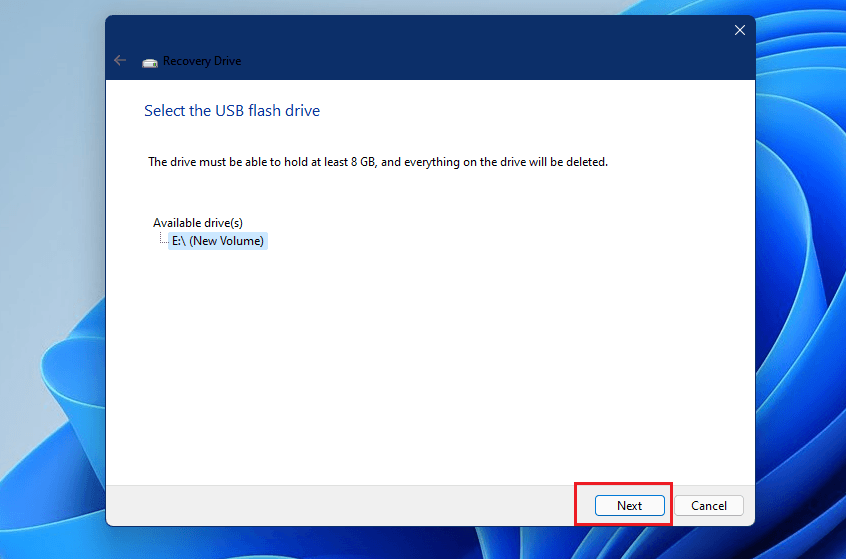
3. The tool will automatically search for connected USB flash drives. When your drive is shown on the screen, select it, and then select Next.
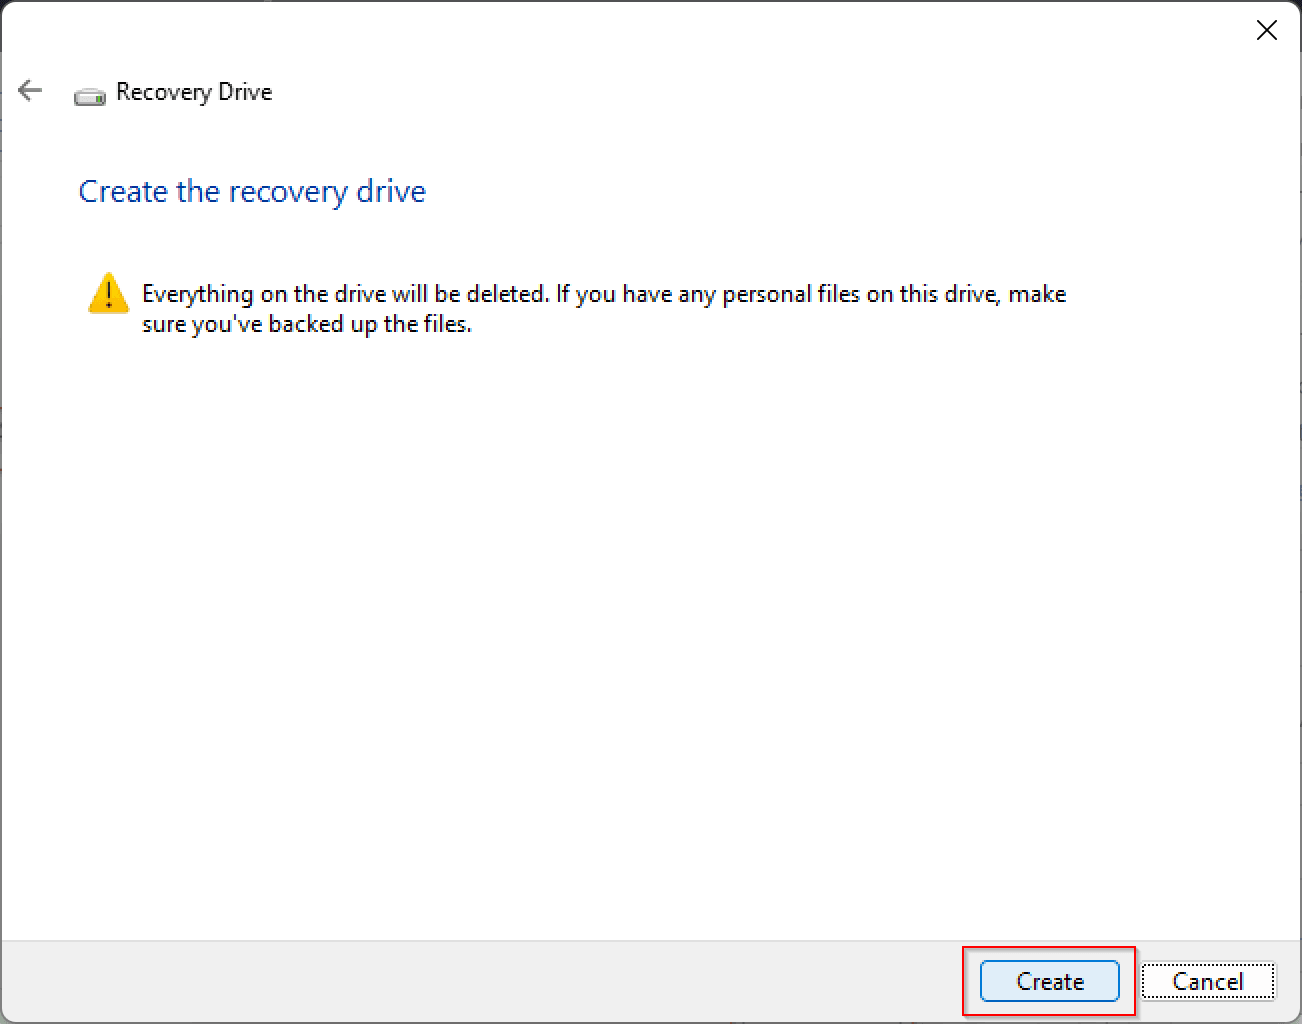
4. Read the warning message and click Create if you are ready.
Tip: Windows updates to improve security and PC performance periodically, so it is suggested to recreate the recovery drive annually.
Reinstall Windows 11 from the USB recovery drive
1. Connect the recovery drive to your computer and boot from it.
2. Choose your keyboard layout.
3. On the Choose an option screen, select Troubleshoot. Then, choose Recover from a drive and follow the on-screen instructions to reinstall Windows 11.
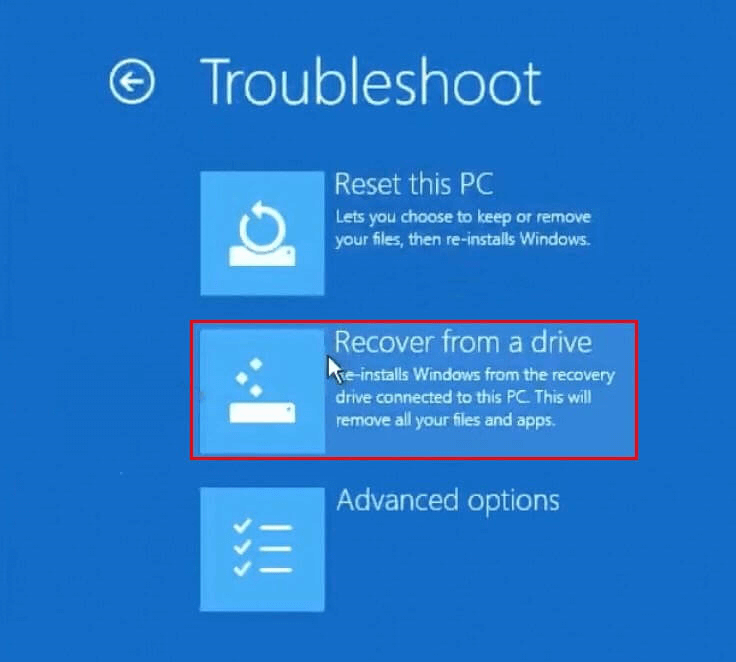
Tip: To use other recovery options like System Restore, Startup Repair and Command Prompt, you may go to Troubleshoot > Advanced options.
#3. Copy Windows 11 to a USB drive and make it bootable🔥
If you want to make a copy of Windows 11 on a USB drive so as to run your customized OS environment on different devices, you can turn to the best OS migration tool for Windows 11/10/8/7 - AOMEI Backupper Professional.

-
System Clone: Helps you copy OS to different storage devices, such as migrate Windows 11 to an SSD, HDD, or USB flash drive.
-
Disk Clone: Allows you to transfer everything from one hard drive to another, including OS, installed programs, and all the personal data.
-
Other clone settings: “Sector by sector clone” to make an exact copy and “SSD Alignment” to improve SSD read/write speed.
To create a portable Windows 11 USB drive using AOMEI Backupper, you need to do the following preparations:
- Make sure the target USB drive is big enough to hold all data on the system drives.
- Backup data on the USB drive if any. The clone process will overwrite the destination disk.
- Use a USB drive in GPT partition style for better compatibility with Windows 11. If your USB drive is an MBR disk, you may convert MBR to GPT first.
Learn how to copy Windows 11 to pendrive while ensuring secure boot as follows:
Step 1. Connect the USB drive to your computer and confirm it is detected by Windows.
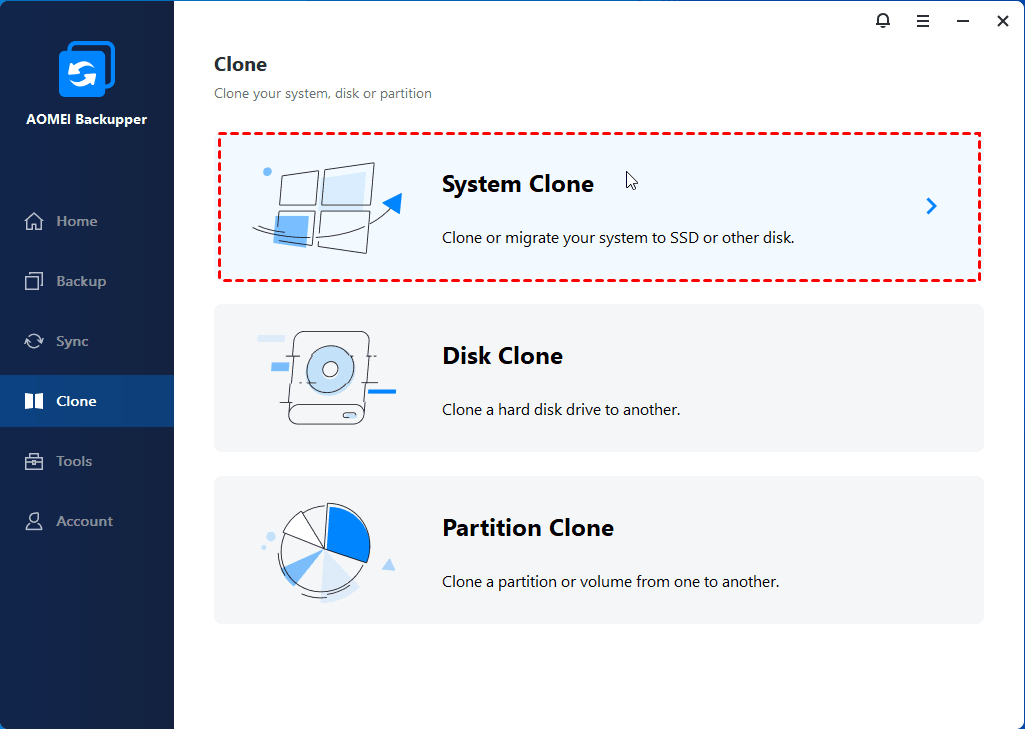
Step 2. Install and run AOMEI Backupper, click Clone from the left panel and select System Clone.
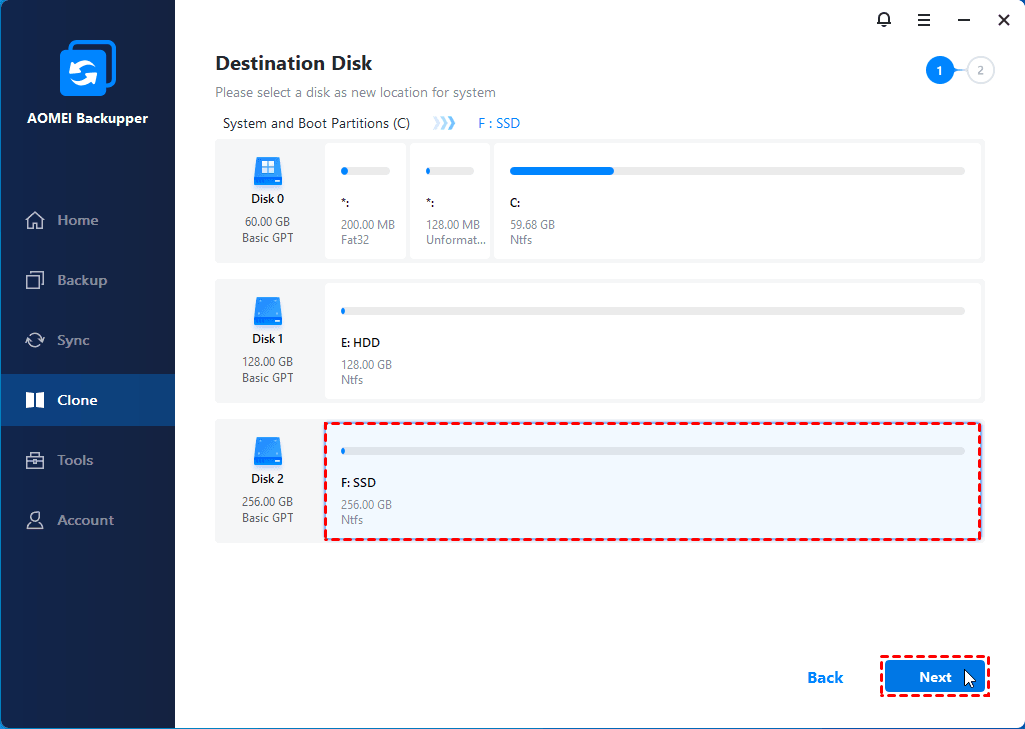
Step 3. The program will select system related partitions automatically. You just need to select the USB drive as the destination location.
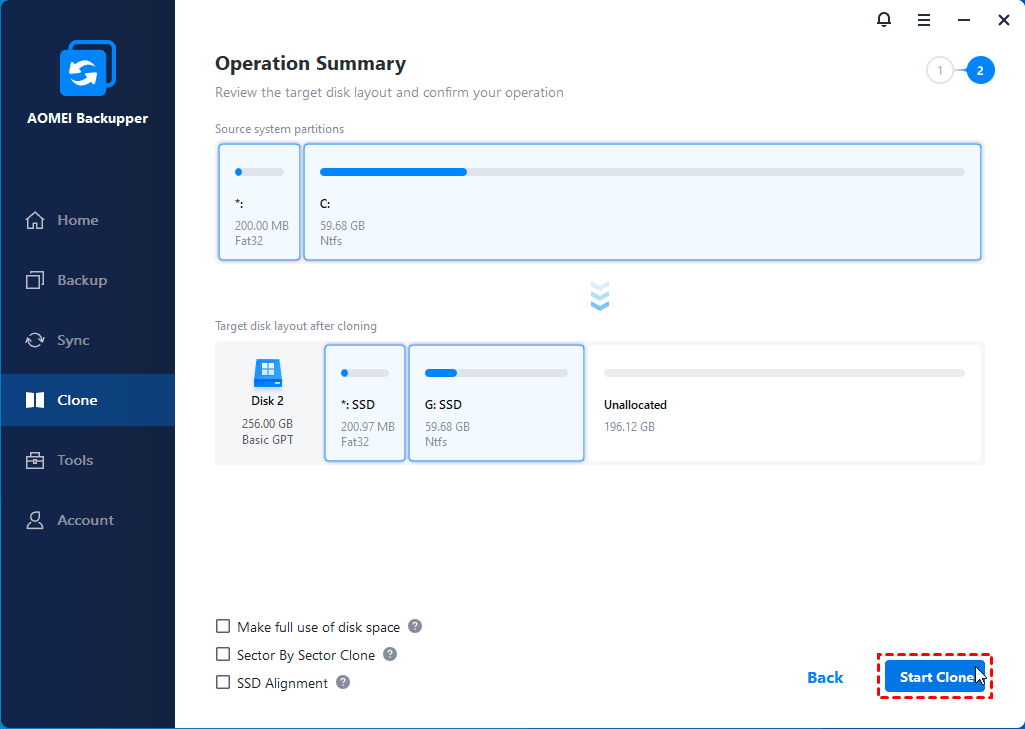
Step 4. Preview the operation to be executed and click Start Clone to proceed.
Boot from the cloned USB drive
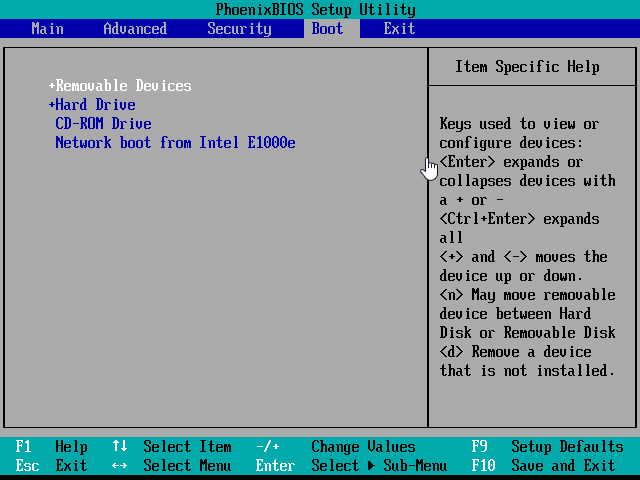
After cloning, the USB drive is self-bootable. To boot your computer from the cloned USB drive, just set the USB drive as the first boot device in BIOS. If you connect a GPT USB disk to a computer using Legacy boot mode, you should also change boot mode to UEFI to boot from the USB disk successfully.
Summary
That’s all about how to copy Windows 11 to a USB drive and make it bootable. Whether you want to create Windows 11 installation media, Windows 11 recovery drive, or clone Windows 11 to a USB flash drive, you can find the corresponding guide from this page.
Actually, AOMEI Backupper is not only powerful cloning software but also remarkable backup & restore software. You can use it to schedule automatic backup in Windows 11/10/8/7. For Windows Server backup, the advanced version AOMEI Backupper Server is applicable.
FAQs about copying Windows 11 to USB
1. Can I use Rufus to create a bootable USB drive?
Yes, Rufus is a popular tool. Select your USB drive, choose the Windows 11 ISO file, set the partition scheme, and click "Start."
2. How can I check if my USB drive is bootable?
You can check by attempting to boot from the USB drive on a compatible PC. If the installation/recovery/Windows screen appears, it’s bootable.
3. Will creating a bootable USB erase my files?
Yes, creating a bootable USB will format the drive, erasing all existing data on it. Make sure to back up any important files first.
4. What should I do if the USB drive isn't recognized during boot?
Check your BIOS settings to ensure USB booting is enabled, and confirm the USB is formatted correctly and properly connected.

