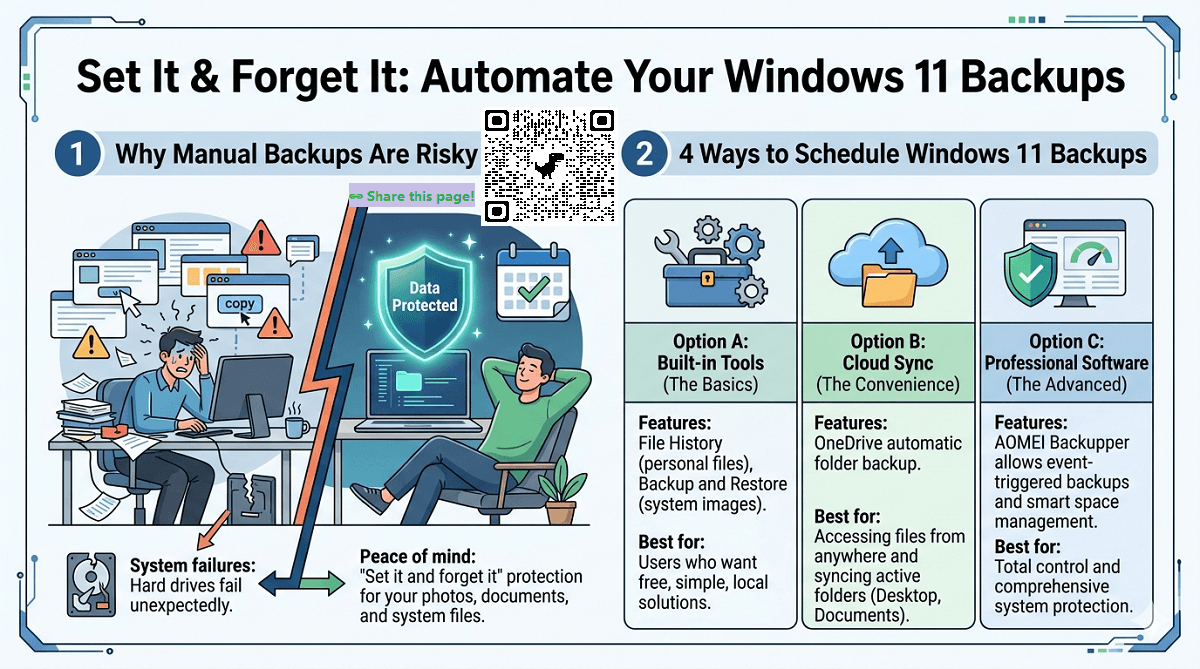
How to Schedule Automatic Backups in Windows 11 (4 Ways)
What is automatic backup? How to create automatic backups in Windows 11 efficiently? Find the top 4 solutions from this page.
By Lily Updated on May 25, 2026
To perform automatic backups in Windows 11, you’ll need reliable backup tools. It would be great if the backup tools can delete obsolete backups automatically to release disk space.
Luckily, the backup programs used in this page can not only help you create automatic backups but also manage disk space. Read on to get details.
🌟 To check more scenarios about backing up Windows, please refer to this complete guide: Backup Windows.
Perform Windows 11 auto backup with built-in tools
In Windows 11, there are three built-in backup tools you can use to schedule automatic backups. I’ll show you one by one. Also, reliable third-party backup software is offered to fill the gaps of built-in tools.
|
|
||||
|
Use Case |
Online file backup and synchronization |
Personal file backup |
System image backup and file backup |
Comprehensive backup solution |
|
Backup Scope |
Selected files or folders |
Selected folders |
Full system, selected files and folders |
Full system, disk, partition, file/folder |
|
Storage |
Cloud-based, 5 GB free (more for purchase) |
External drive or network location required |
External drive or network location required |
Local drive, external drive, network location, AOMEI cloud |
|
Automation |
Automatic syncing |
Incremental, automatic |
Scheduled backups |
Scheduled, incremental backups |
Method 1: Backup files to OneDrive automatically
OneDrive is a cloud service offered by Microsoft. It enables you to save your files and photos to cloud and access them from any device, anywhere. Follow the steps below to backup to OneDrive automatically:
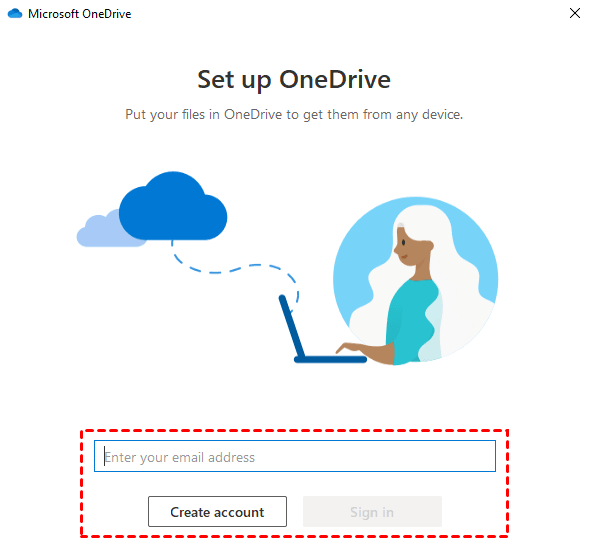
1. Type and search OneDrive in the Windows search bar, then click Open.
2. On the first page, enter your OneDrive account and click Sign in.
3. You should continue with the setup wizard. By default, your OneDrive folder is located in C:\Users\Username\OneDrive. If you’d like to save OneDrive files on another drive, click Change location to change it.
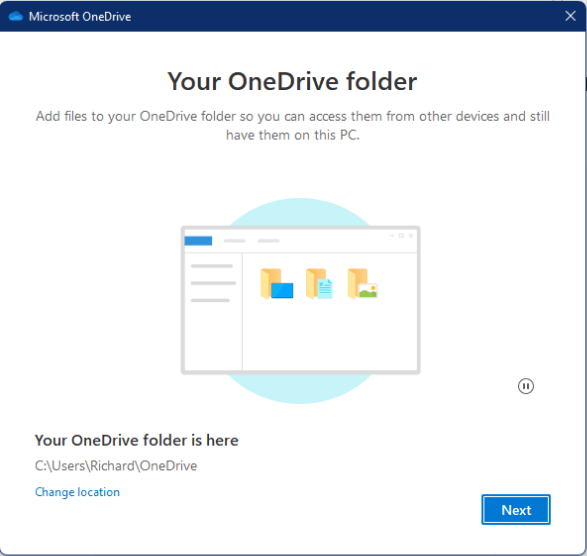
4. When you see “Your OneDrive is ready for you”, click Open my OneDrive folder to get to your OneDrive folder.

5. Drag and drop or copy and paste PC files/folders into the OneDrive folder, and they will be automatically synced to the OneDrive website.
✍ Tip: To sync changes from your PC to the cloud, you must edit files in the OneDrive folder. If you edit files in their original location such as the Documents folder, the changes won’t be synced.
Method 2: Auto backup user files via File History
File History enables you to backup files to an external hard drive or network share and restore them when the originals are lost, damaged, or deleted. Follow the steps below to create an automatic backup with File History:
1. Connect an external hard drive or USB drive to your computer properly.
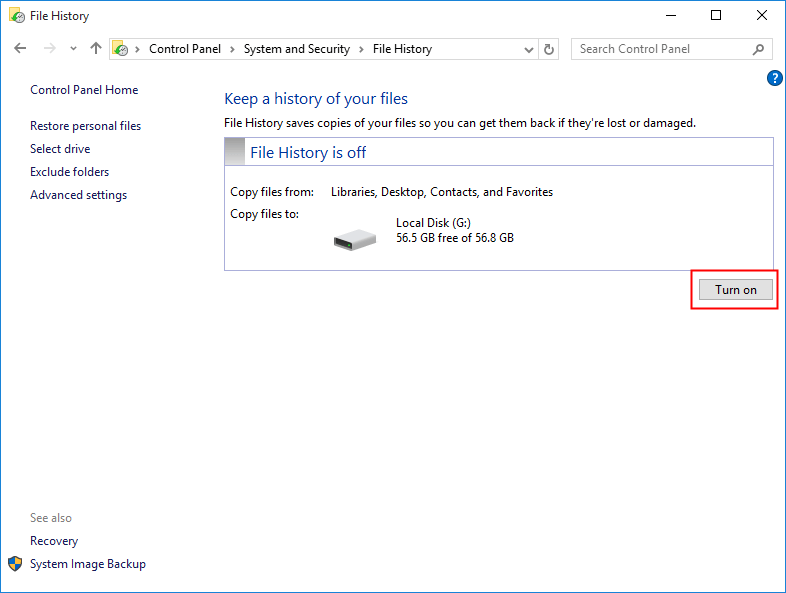
2. Type and search File History in the Windows search bar, then click Open.
3. File History will automatically select the external drive connected to your computer as the backup destination. Click Turn on to enable File History.
4. If there are some folders by default settings you don’t want to back up, click Exclude folders to add the folders you don’t want to save copies.

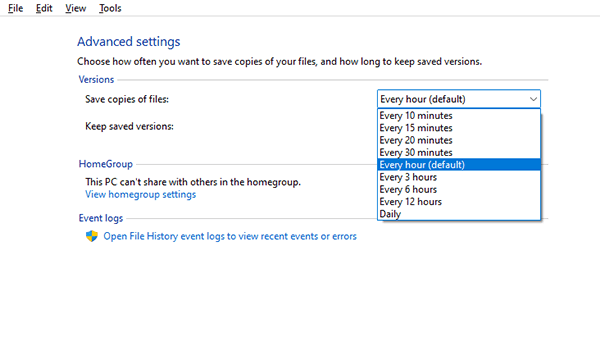
5. Click Advanced settings to configure additional settings.
● By default, File History runs incremental backup hourly. You can change it to every 10 minutes, every 3 hours or other frequencies based on your need.
● Normally, File History keeps your backups forever. You can have it delete backups older than one month, 3 months, 6 months and so on using the options offered in “Keep saved versions”.
💡 Note: If you wish to add a folder to File History for backup, please right-click on the folder and select Show more options > Include in library > Create new library. File History will backup all folders in Libraries.
Method 3: Backup system and files on a schedule
Windows 11 Backup and Restore can also help you create automatic backups. Besides backing up files and folders, Backup and Restore allows you to create a system image. Learn how to schedule an automatic backup using Backup and Restore as follows:
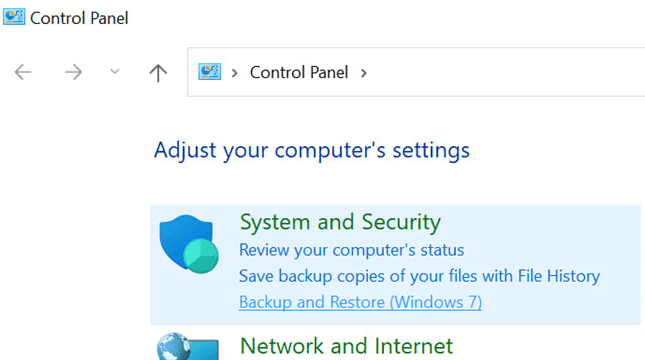
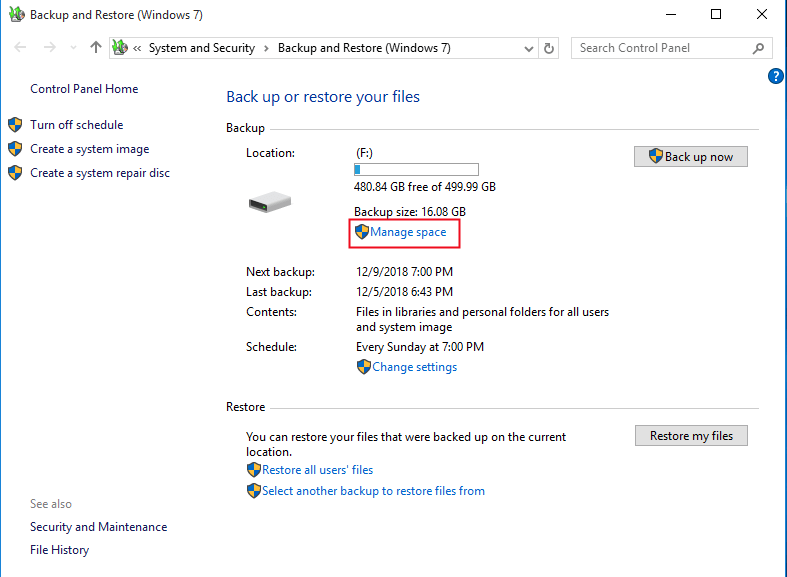
1. Type and search Control Panel in the Windows search bar, then click Open. Next, select Backup and Restore (Windows 7) under the System and Security field.
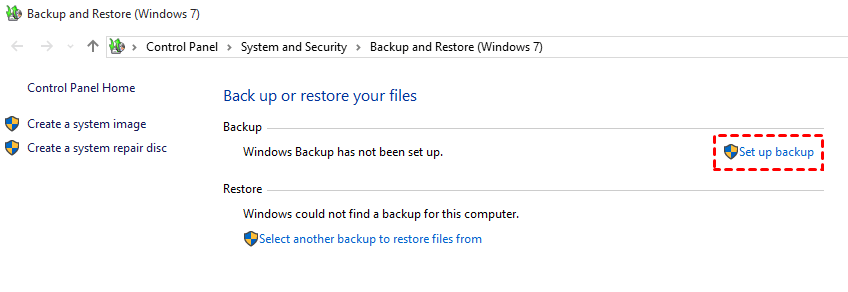
2. In the Backup and Restore window, click on Set up backup.
3. Select where you want to save your backup and click Next. You can choose a local/external hard drive or a network location.

4. Select Let me choose to create a custom backup and click Next.
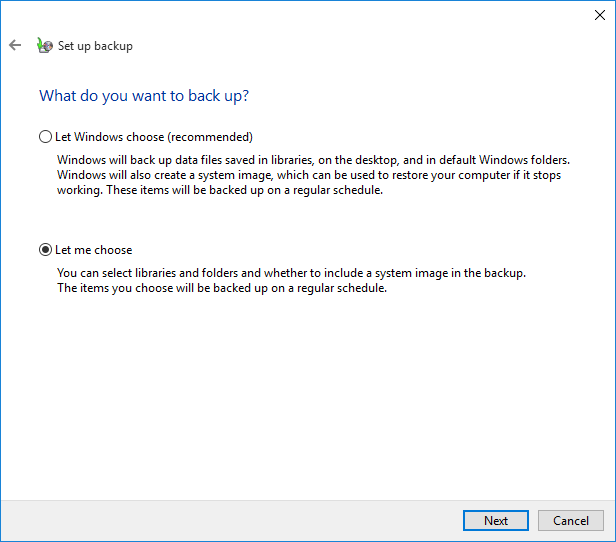
5. Select your desired items to be backed up and click Next. You can choose whether to include a system image in the backup as per your need.
6. Review your backup settings and click on Save settings and run backup.

✍ Tips:
● By default, Backup and Restore runs incremental backup every Sunday at 7:00 PM. Click Change schedule to set up a different backup schedule.
● To free up disk space taken by old backups, you can go to Backup and Restore and make use of the Manage Space option.
[Advanced] Best free automatic backup software for Windows 11/10/8/7
Apart from Windows built-in backup tools, I’d like to recommend another easy-to-use backup utility to you - AOMEI Backupper Standard. Following are the highlights of this software:

-
It offers different backup types to meet your different needs. They are System Backup, Disk Backup, Partition Backup, and File Backup.
-
It is embedded with the Schedule feature, which automatically backs up changed data based on the frequency you set.
-
It allows you to save backups to various locations, such as local disk, external hard drive, USB pen drive, and NAS device. You are also allowed to backup files to OneDrive, Google Drive, and Dropbox, etc.
-
It supports all editions of Windows 11, 10, 8.1/8, and 7.
Download and install this free automatic backup software. Then follow the instructions below to perform automatic system backup via AOMEI Backupper:
💡 Note: If you want to run Windows 11 schedule backup to external drive, please connect the external drive to your computer in advance.
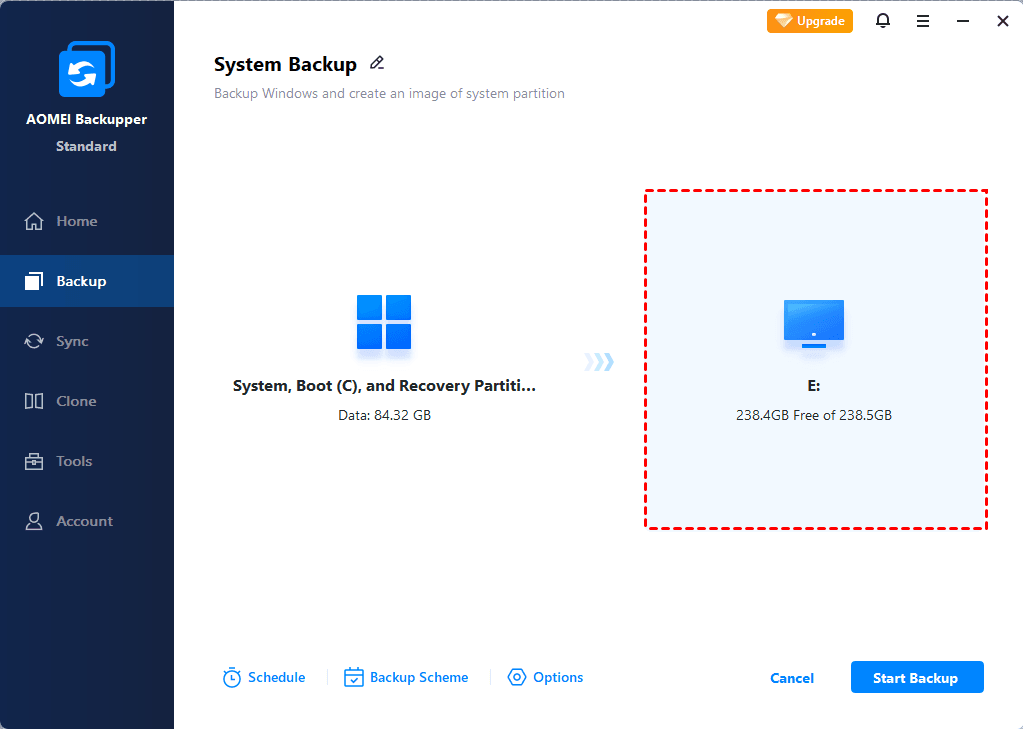
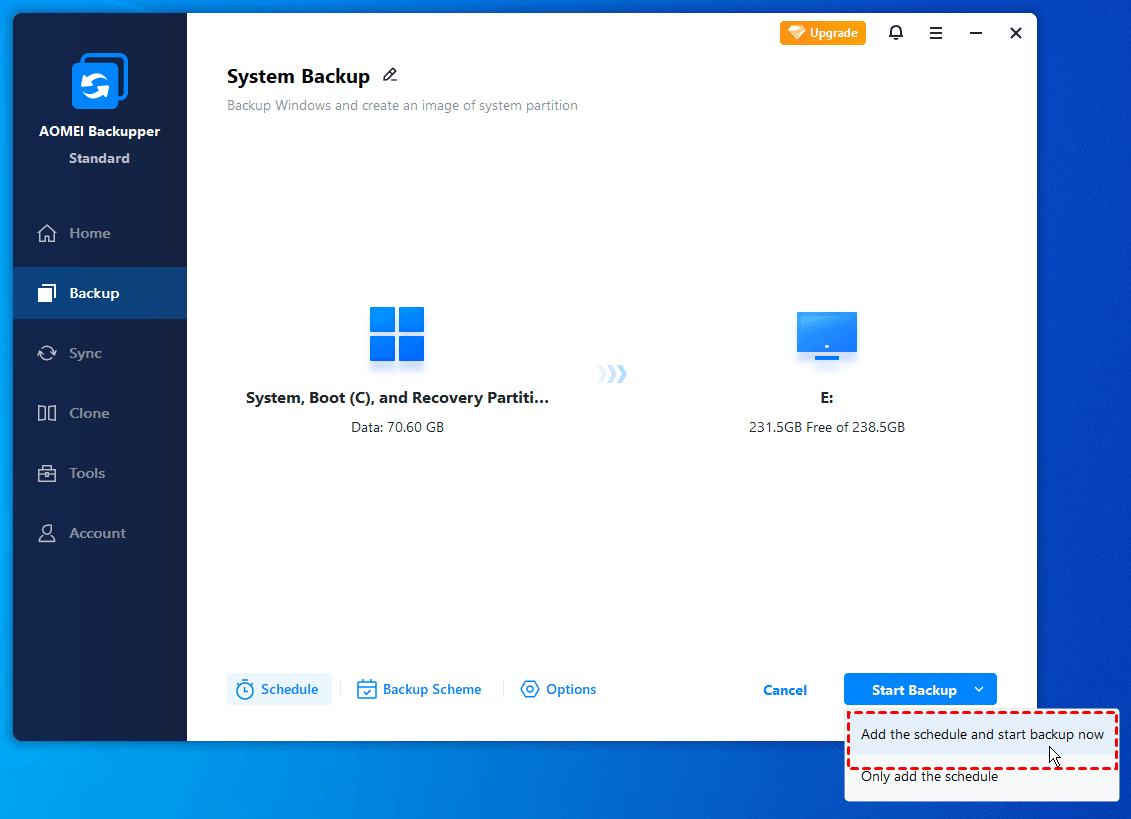
Step 1. Load up AOMEI Backupper, click Backup and select System Backup. To backup individual files/folders, you may choose File Backup.

Step 2. The program automatically chooses the system related partition(s) as the source data. Just choose a destination path to store the system image.
Step 3. Click Schedule in the left bottom. Then, turn on Enable Schedule Backup to choose a backup frequency for your backup - "Daily", "Weekly", "Monthly", "Event triggers", etc.

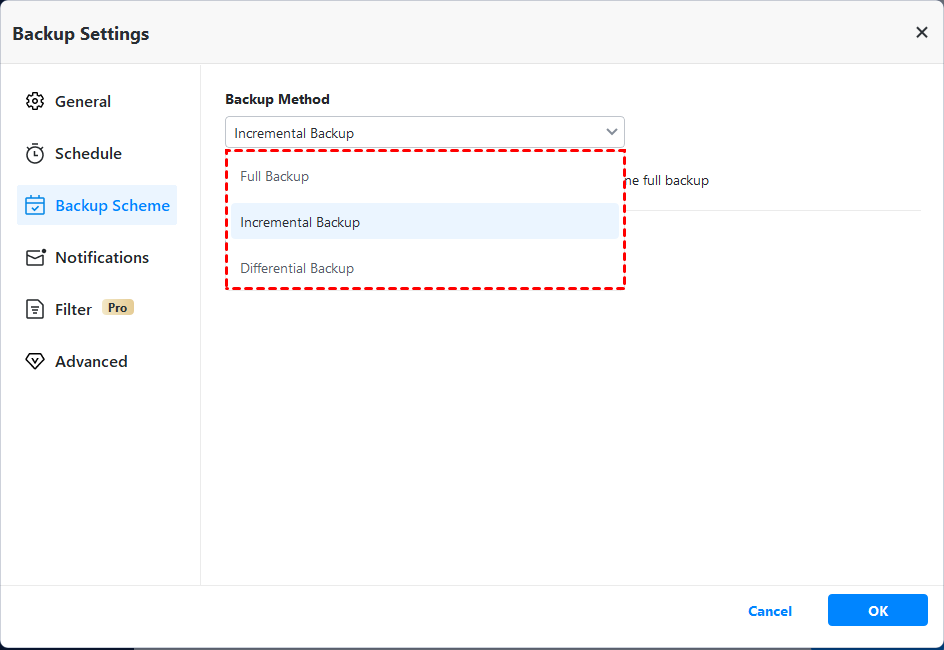
Step 4. (Optional) In the Backup Settings window, click Backup Scheme from the left panel. You can see “Incremental Backup” is selected by default as the backup method. If you’d like to use “Differential Backup”, edition upgrade is needed.
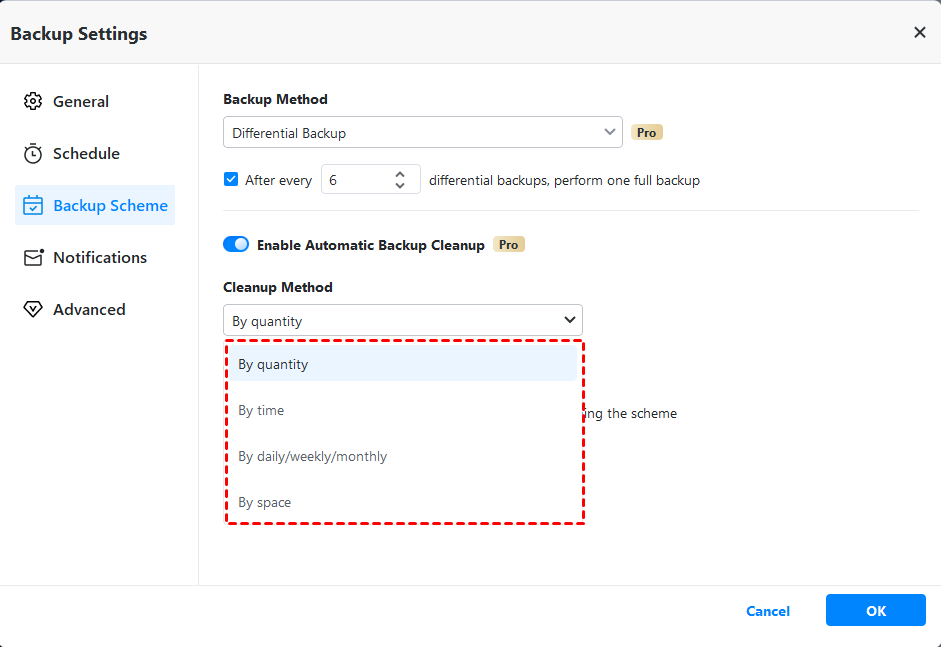
Also, Enable Automatic Backup Cleanup is available in higher editions. There are 4 cleanup rules available in total, including “By quantity”, “By time”, “By daily/weekly/monthly”, and “By space”. You may get different cleanup rules according to the backup method you choose.
Step 5. After all the settings, click Start Backup > Add the schedule and start backup now to proceed.
More details about automatic backup
Automatic backup, as its name refers, is a kind of data backup that runs automatically. Little or no human intervention is involved in the backup process. It is one of the best strategies to protect your system and files against software problems, hardware failure, and malware attacks, etc.
Advantageous as automatic backup is, you may encounter the “backup disk is full” issue after running automatic backups for a period of time. How to solve this problem effectively?
★ Solutions to backup disk full
1. Set automatic backups to run in the way of incremental or differential backup.
Incremental backup will only backup changed data since last full or incremental backup, and differential backup will backup changed data based on last full backup. Both of them can help to save disk space taken by backup images.
2. Manage backup space with the backup tool you choose.
FAQs about automatic backup on Windows 11
1. How often should I schedule backups on Windows 11?
The frequency of your backups depends on how often you create or modify files. For most users, a daily or weekly backup is sufficient. However, if you work with critical files that change frequently, you might prefer daily or even hourly backups.
2. Where should I store my scheduled backups?
It’s recommended to store your backups on an external hard drive, network location, or cloud storage. This ensures that your backups are safe even if your main system drive fails.
3. What happens if my computer is off during a scheduled backup?
If your computer is off or asleep during a scheduled backup, the backup will typically run the next time the computer is turned on. AOMEI Backupper even supports “Wake the computer to run scheduled tasks”.
4. Does automatic backup slow down Windows 11?
No, automatic backup doesn’t slow down Windows 11. Usually, automatic backups have minimal impact on performance, especially when scheduled during idle hours. Incremental backups also reduce system resource usage by only copying changed files.
5. Why is automatic backup important for ransomware protection?
Ransomware can encrypt documents, photos, databases, and even entire systems within minutes. Automatic backups provide:
- Data recovery capability without relying on hackers
- Business continuity after an attack
- Version history to restore uninfected files
- Reduced downtime and financial loss
Without backups, encrypted data may become permanently inaccessible.
Verdict: Backup your PC now
There are 4 free ways offered in this article to help you schedule automatic backups in Windows 11. You can choose one method that best fits your need. Compared with Windows built-in backup tools, AOMEI Backupper offers more advanced backup solutions, such as creating a disk image, compressing/splitting an image file, etc.
What’s more, AOMEI Backupper works as free system clone software for Windows 11. Try it now to discover more!

