Perform Shared Folder Synchronization in Windows 7 | 3 Ways
Don't know how to perform shared folder synchronization in Windows 7 or other systems? Continue to read this article and there are 3 methods.
by Ivy Updated on October 20, 2022
Is It Possible to Sync Shared Folders to My Laptop?
How to sync a shared folder?
Hi there, I have some folders shared to me but owned by someone else, for example, "UX Hub" and "Brand Hub" folders. Is it possible to sync these folders to my Windows 7 laptop? Thanks!
The answer is positive obviously. And I'll introduce you more about shared folder and multiple ways to perform shared folders synchronization in Windows 7.
What Is a Shared Folder?
Shared folder is a folder shared by the owner, or one of the folder that located in shared directory and can be accessed by other users within the local area network (LAN). You could create a shared folder according to the below steps:
1. Locate the folder that you want to share with others, right click it and choose Properties.
2. Click Share ... under the Network File and Folder Sharing.
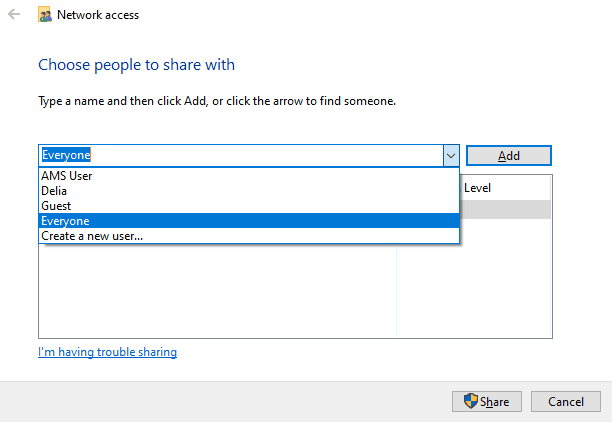
3. Type everyone, click Add and then Share to share it to everyone.
4. Go back to the Properties window, click Advanced Sharing... button.
5. Tick Share this folder, set the share name, number of users, comment and permissions, etc. And then, click Apply and then press OK.

How to Sync Shared Folder in Windows 7
There are multiple ways to sync network shared folders in Windows 7, whether you want to sync network files to local computers, servers, OneDrive, or other locations. Please check the following methods and select the one suitable for you.
#1: Sync Shared Folders to Local Computer
If you want to sync shared folders to Windows native, you have to enable offline files folder in Sync Center. It allows you to make network files always available offline and access them while working offline.
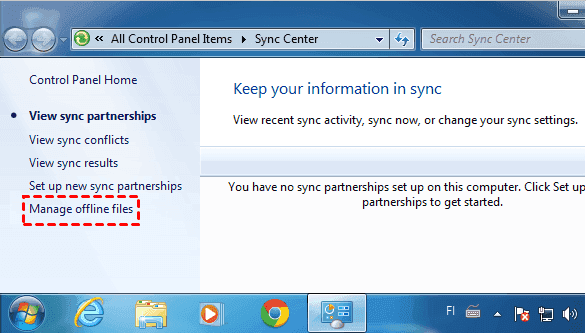
1. Input sync center to open the Sync Center, click Manage offline files at the left side.
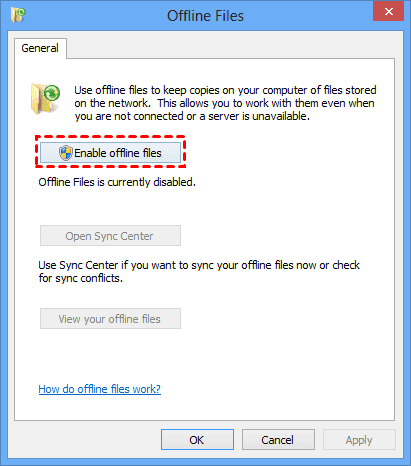
2. At the General tab, click Enable offline files. Then restart your computer to make it take effect.
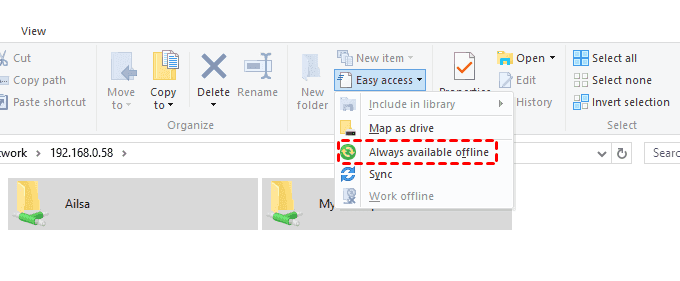
3. Type network path in Windows Explorer, for example: \\192.168.0.58, and click the Go to button to access network drive. Then, right-click the network drive folder, and select Always available offline.
★Notes:
✍All the shared folders will be copied to your current computer automatically. Generally, the Windows offline files location is C:\Windows\CSC (CSC stands for Client Side Caching).
✍ This feature is not available in the Windows Home version.
#2: Sync Modified Shared Folders to Network Drive
Some users may still want to sync changes from local computer to network drive via a shared folder. Be sure you have the edit permission to modify files in the shared folder and then sync them with the following steps:
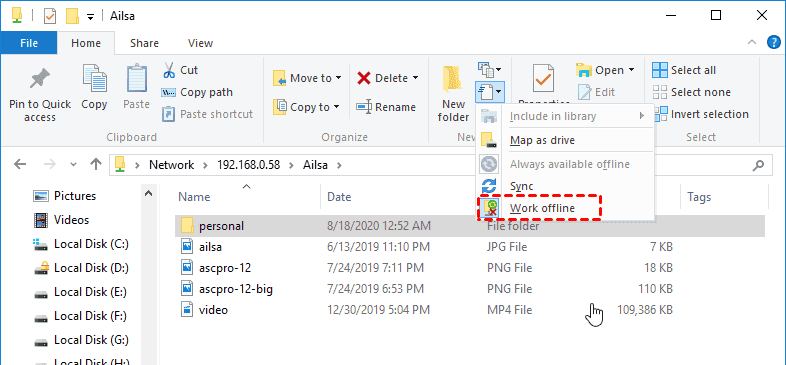
1. Input the network path in the Windows search box, for example: \\192.168.0.58, and press the Go to button.
2. Then, click Easy Access under the Windows Explore Home tab and choose Work offline to sync all shared folders to network drive. You can also select the Offline Files folder and click Work offline again on the toolbar.
★Note: If any changes made on Network drive, the changes will automatically be synced to the local disk.
#3: Sync OneDrive Shared Folder to Computer
Sometimes, you might want to sync OneDrive shared folders from your friends or colleagues to your computer. Here is how to perform OneDrive shared folder synchronization in simple steps.
1. Click the shared link from your friends or colleagues to open OneDrive shared folders, click Add to My OneDrive at the top.
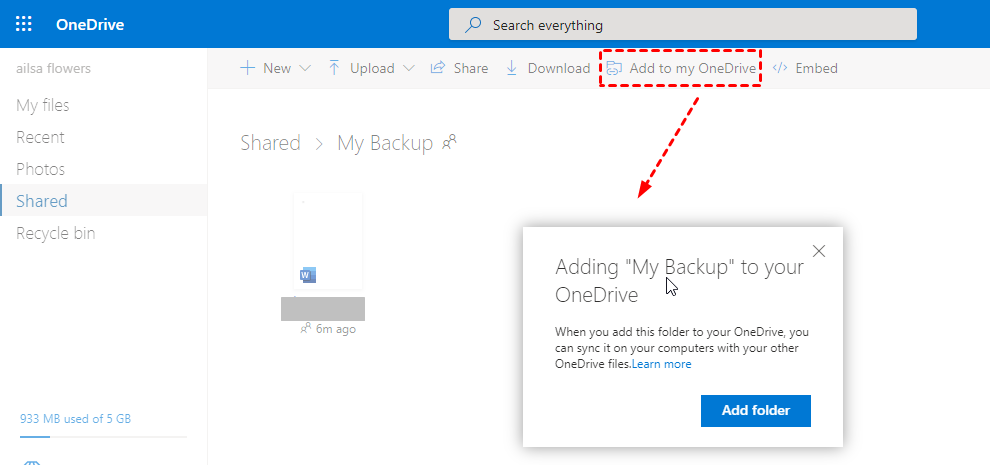
2. Click Add folder button to add the OneDrive shared folders to My Files on OneDrive.
3. Open and log in OneDrive desktop app that is installed in advance.
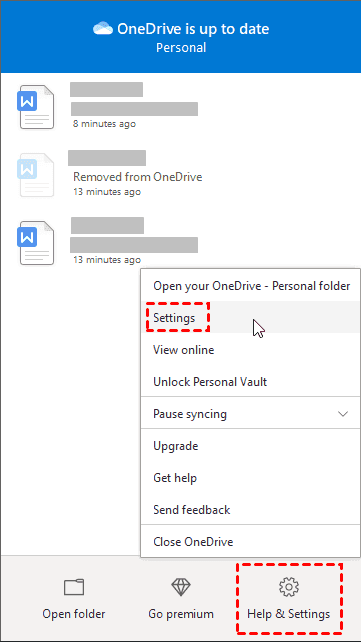
4. Click the OneDrive icon on the system tray > Help & Settings > Settings.
5. Press Choose folders button at the Account tab.
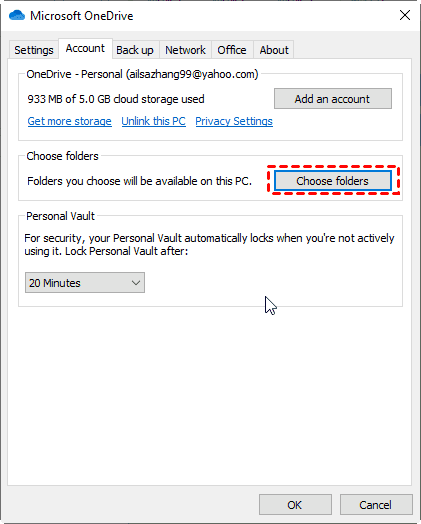
6. Select the OneDrive shared folder and click OK, it will be synced to your current computer.
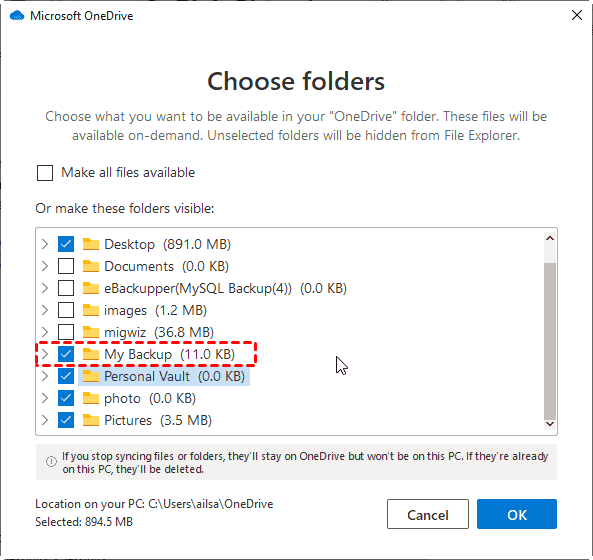
★Tip: If you have set the Make all file available option before, the OneDrive shared folder synchronization will automatically run.
#4: More Flexible Way to Sync Shared Folders in Windows 7
Besides, you still try one more flexible way to sync shared folder in Windows 7 or other systems. Not only sync network shared folder to local computer, network drive, or from OneDrive, but also to external drive, USB drive, cloud drives, NAS etc.
You need to use the best free folder synchronization software - AOMEI Backupper Standard for help. With it, you still can schedule sync shared folders automatically in daily, weekly, or monthly, thereby you don't need to worry about data loss due to forgetting to back it up.
Just follow the step-by-step guide to do shared folder sync to OneDrive in Windows 7 or other Windows systems. If you are running Windows Server 2003, 2008, 2012, 2016, 2019, including R2, please get AOMEI Backupper Server to enjoy.
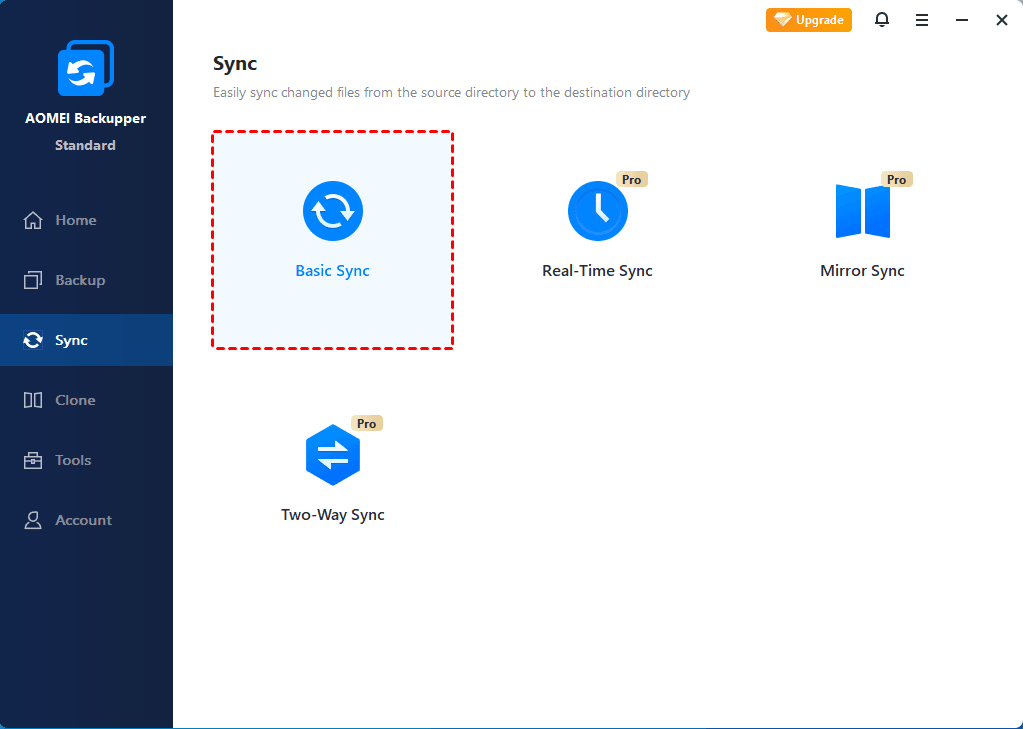
1. Launch AOMEI Backupper Standard, click Sync tab at the left side and then choose the Basic Sync.
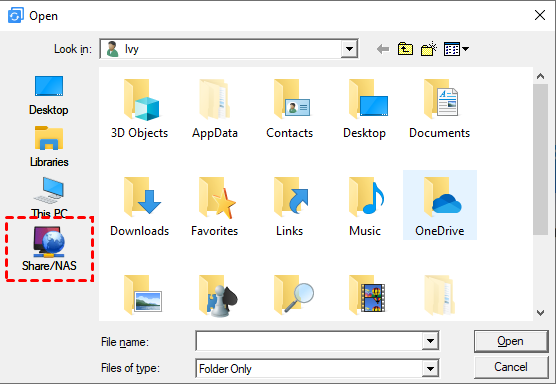
2. Click + Add Folder > Share/NAS.
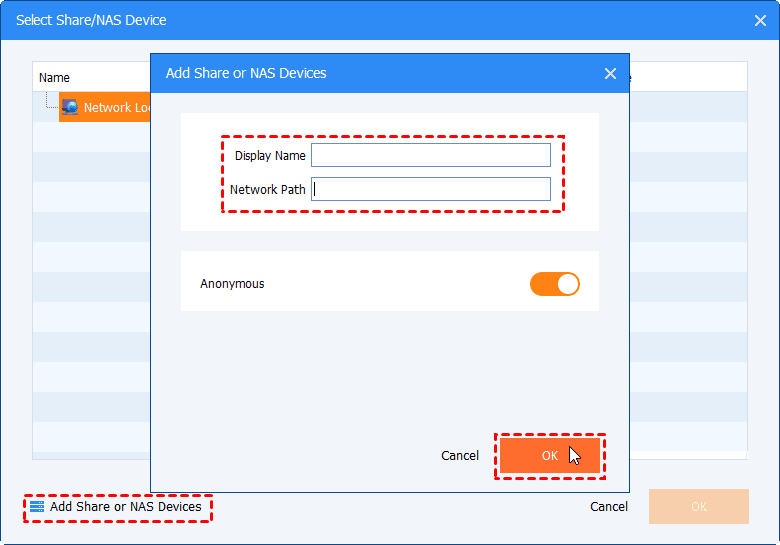
3. Click Add Share or NAS Devices, input the display name and the network path of network shared folder. And then, choose the shared folder in the network server.
4. Click the triangle and select one of the following options to add destination.
- Select a local path: It allows you to sync files to external hard drive like HDD or SSD, USB drive, etc. You need to connect it and be sure it's recognized before selecting them.
- Add Share or NAS Devices: It is able to add all the network paths as long as it has an IP address. And it can be a computer, server, network drive or NAS.
- Select a cloud drive: It is to sync local folder to OneDrive, Google Drive or Dropbox.

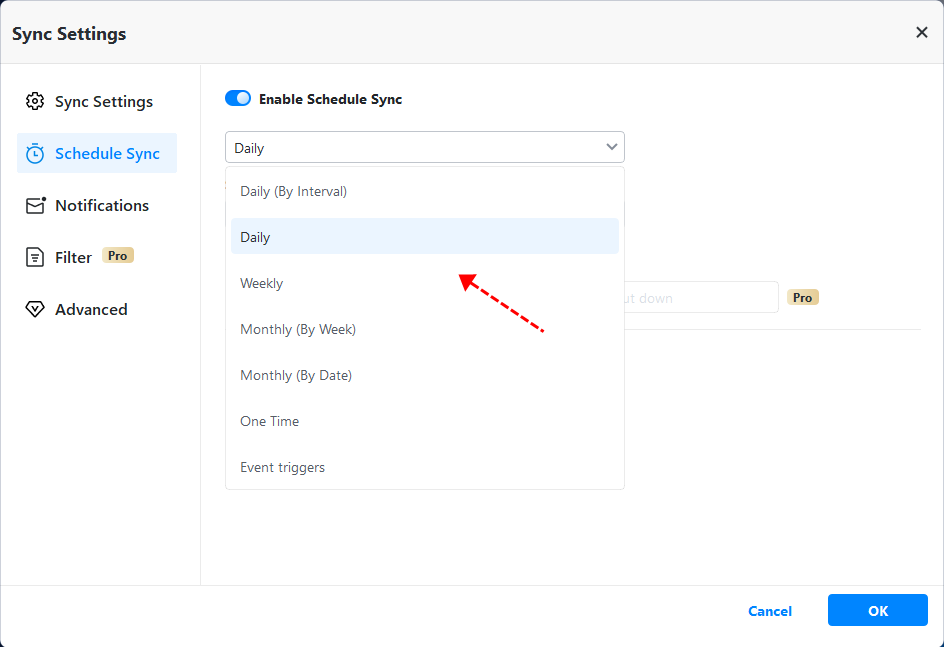
5. Click Schedule Sync and enable it, then select Daily, Weekly, Monthly. And press Start Sync >> to perform the shared folder synchronization automatically. Optionally, you could comment on the shared folder sync task to differ from others, get email or SMS alert after enabling email notification, run specified program or script before or after the sync, etc. with Options.
★Tip: There are some optional settings you could specify:
✍Except for daily, weekly, monthly, you still can rigger by System shutdown, system startup, user logon, user logoff (Event triggers) or copy files to USB drive automatically when connected with USB plug in feature. Both of them are available on the professional or higher version.
✍ In premium version, you can able sync files with Real-Time Sync, Mirror Sync, or Two-Way Sync.
All the above steps are applied to Windows 8, and Windows 10. After syncing the shared folder, you could use the folders and files like you used to.
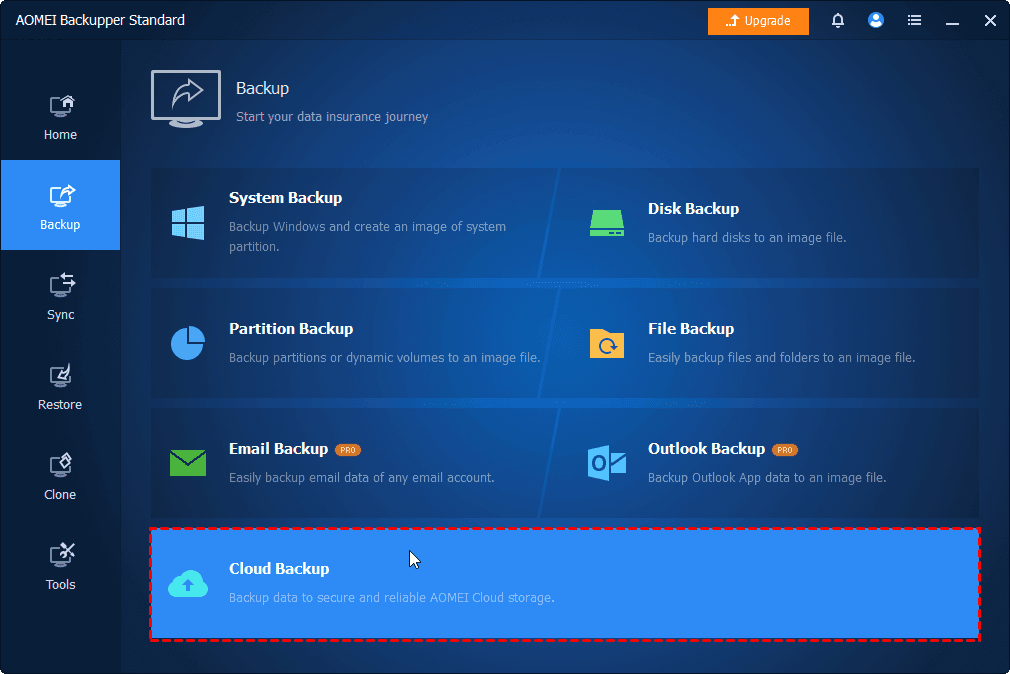
💜 Bonus tip: backup files to AOMEI Cloud
As cloud storage is becoming more and more popular, AOMEI offers users its own cloud - AOMEI Cloud. After you sign up for an AOMEI account, you can use 1TB storage for free within 15 days. Just click Backup > Cloud Backup to backup files to AOMEI Cloud.
How to Disable Shared Folders Synchronization in Windows 7
In general, you want to sync shared folder for data protection or file sharing, but sometimes you need to disable shared folder synchronization in Windows 7. This helps you free up space on your local hard disk by deleting offline files copy.
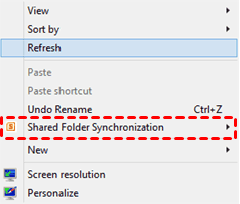
Also, there is another situation - you install Microsoft Office 2010 Pro or Pro Plus on your computer, and it adds a Shared Folder Synchronization feature automatically, which is not needed. Anyway, you can delete it if you don't want.
#1: Disable shared folder synchronization in Windows 7
1. Click Start > input Sync Center and hit enter to open Sync Center.
2. Select Manage offline files on the left panel.
3. To disable the feature, Select Disable offline files.
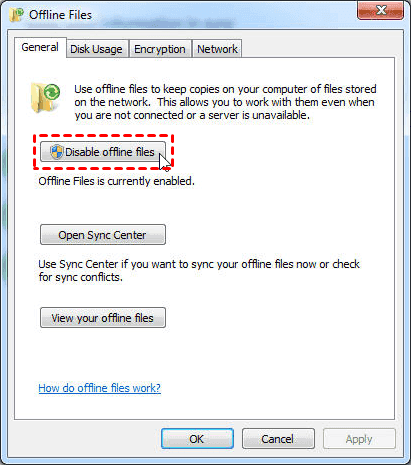
4. Then, select View your offline files to open all the Offilne Files Folder.
5. Locate all offline folders and files on the specified network drive and choose Delete Offline Copy.

By the way, If you want to use sync center in Windows 10, please type mobsync (the execute file to run Sync Center) in the search bar and press Enter.
#2: Remove Shared Folder Synchronization in Microsoft Office 2010
Some users want to remove shared folder synchronization in Microsoft Office 2010, but without easy way. Here I'll introduces you to a workable method.
1. Please input regedit in Windows 7 search box and press enter to open Windows Registry Editor.
2. Locate: HKEY_CLASSES_ROOT\CLSID\{6C467336-8281-4E60-8204-430CED96822D}
3. And delete the sub key {6C467336-8281-4E60-8204-430CED96822D} to remove Shared Folder Synchronization feature for Microsoft Office 2010.
As Microsoft Office 2010 will end on October 13, 2020 and there will be no extension and no extended security updates. You could upgrade to Office 365 to get more and use OneDrive to sync shared folders.
Summing It Up
In fact, there are multiple ways to perform shared folder synchronization in Windows 7, and all of them are applicable to other systems, even latest Windows 11. To enjoy different sync paths, either source or destination, or more advanced settings, such as, schedule sync, try third-party file sync software - AOMEI Backupper Standard.
If you are more concerned about data security, try its File Backup feature. You still can use it to backup shared folder just like in Sync feature. Besides, it still helps you minimize disk space from different angles, such as, backup only changed files with incremental or differential backup, delete backup images automatically with automatic backup cleanup, etc.

