How to Transfer Photos from iPad to External Hard Drive
This guide will show you all the methods that can help transfer photos from iPad to external hard drive on Windows, Mac, or even without computer.
By Lena / Updated on May 14, 2026
Apple iPad is a good photo shooting and photo post-processing device for professional or amateur photographers. The iPad Pro released in April 2021 features a new Ultra Wide camera with a 12MP sensor and a 122‑degree field of view, allowing you to take better-looking photos. Now they also add this camera in iPad 10th generation. So users can take photos with better quality and wider filed of view.

However, the storage space is limited and you need to delete some photos to free up space. So you are planning to first backup photos from iPad to external hard drive and then delete them from your iPad.
Here in this guide, we have listed all methods that can help you backup photos from iPad to external hard drive in different situations. Apply to all iPad models: iPad Pro, iPad Air, iPad mini.
Part 1. Easy and Quick Way to Transfer Photos from iPad to External Hard Drive
If you are using a Windows PC, the easiest way to import photos from iPad to external hard drive is to use one iPhone data backup & transfer tool - FoneBackup.
● It offers two backup ways: directly transfer photos to external hard drive & create a backup image for your photos which will take up less space.
● It lets you backup/transfer photos stored in Camera Roll and any other albums you created.
● It allows you to backup/transfer all photos in 1-click or only the selected photos as per your needs.
● What’s more, it also enables you to transfer photos from external hard drive to iPad easily without erasing any data on the device.
The following are the steps to backup photos from iPad to external hard drive.
Step 1. Download, install and launch FoneBackup > Plug in your iPad. (You may need to enter the passcode on iPad so that the software can access your device.)
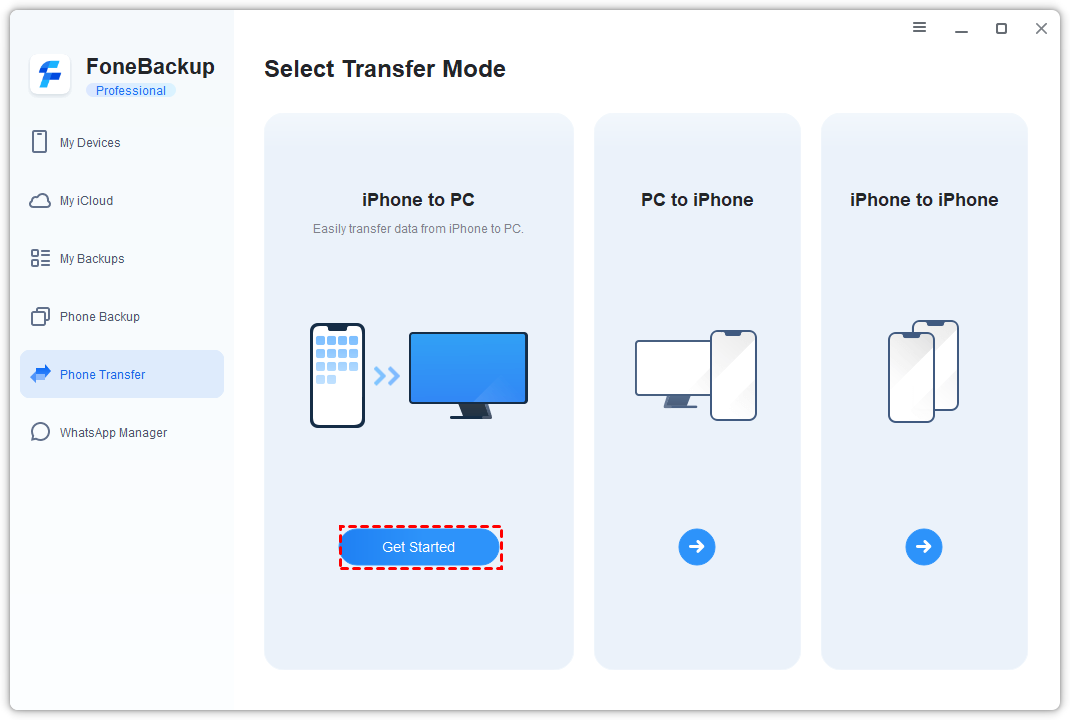
Step 2. On the Home screen, click Phone Transfer > Locate iPhone to PC option and click Get Started.
■ Note: If you want to create an image backup, click Phone Backup > Choose Selective Backup to make it.
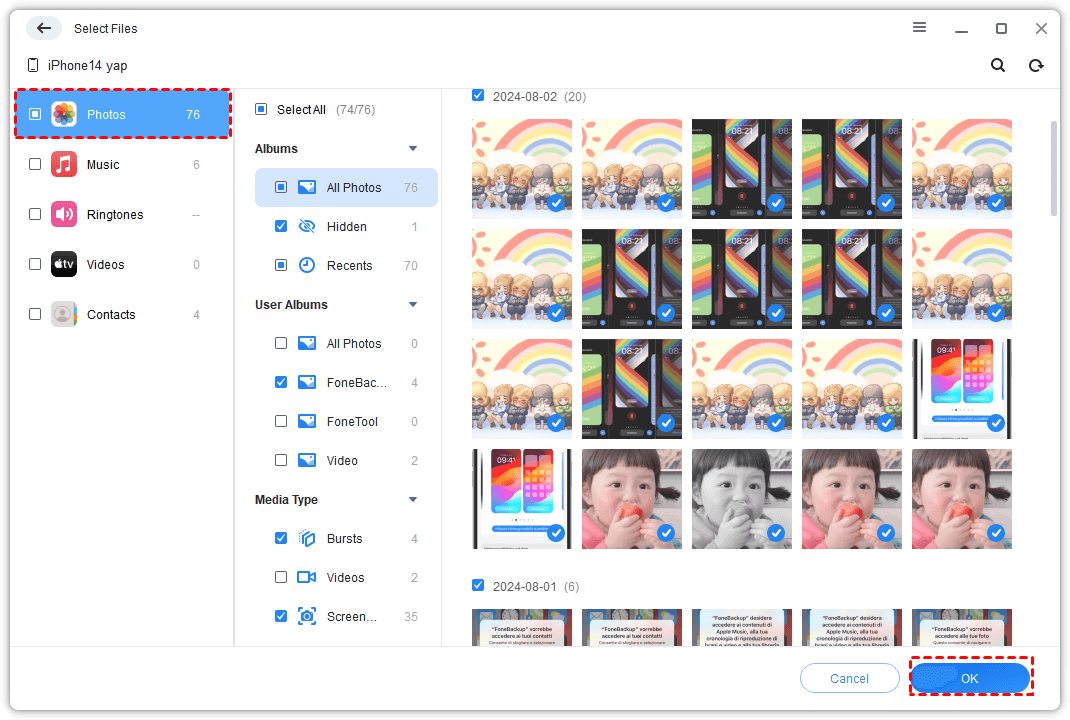
Step 3. Click the “+” icon > Choose the pictures you want to transfer > Click OK to continue.
Step 4. Select your external hard drive as the destination from Transfer Settings > Click Start Transfer to start.
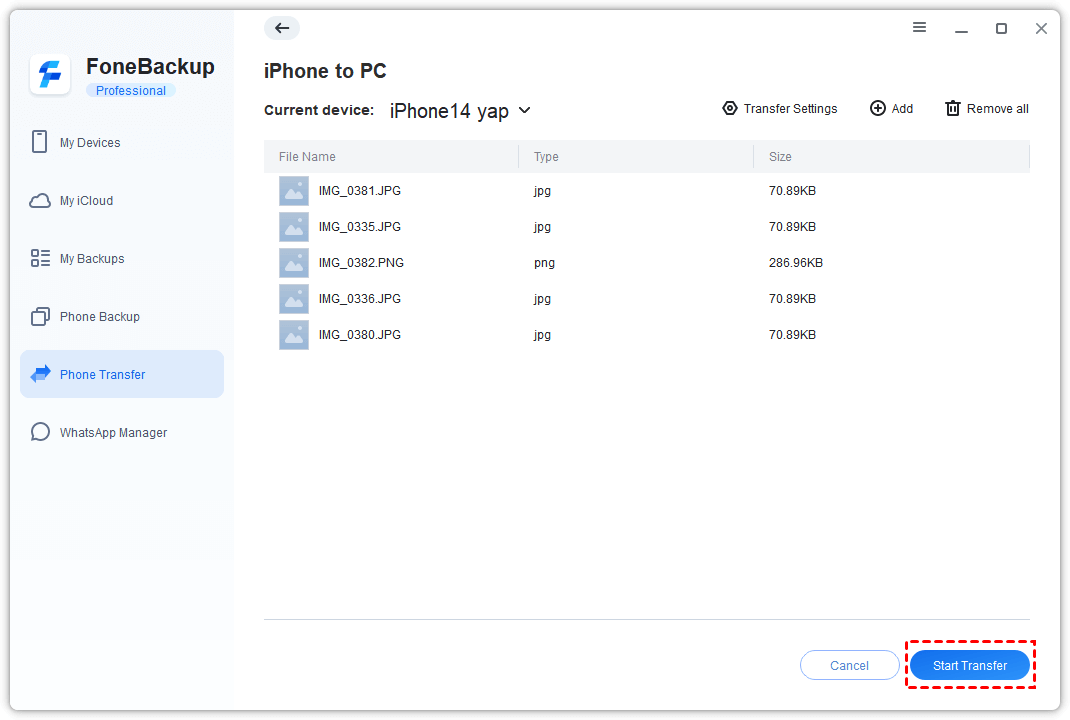
Step 5. Click OK when the transfer is completed.
Part 2. How to Transfer Photos from iPad to External Hard Drive without Computer
Since iPadOS 13, Apple makes it possible to directly transfer data from iPad to external drives. The external hard drive must be self-powered or you can use a powered hub or Apple’s Lightning to USB3 Camera Adapter.
Steps to Transfer Photos from iPad to External Hard Drive without Computer
Step 1. Connect your external hard drive to your iPad using a lightning-to-USB adapter, or another adapter/hub that supports your iDevice’s connector and the hard drive’s connector.
Step 2. On your iPad, open the Files app and tap Browse to check whether your external hard drive has been connected or not.
Step 3. Go to Photos app > Select the photos you want to transfer > Tap the Share button in the bottom left corner.
Step 4. You can tap the Options to select your photo options > If everything is OK, tap Save to Files > Choose your external hard drive as the destination > Tap Save.
Step 5. It will show a message to tell that it’s saving your photos to your external hard drive.

Part 3. How to Transfer Photos from iPad to External Hard Drive via Windows Explorer
Windows Explorer helps you transfer Camera Roll photos from iPad to external hard drive.
Step 1. Connect your iPad to computer via the USB cable.
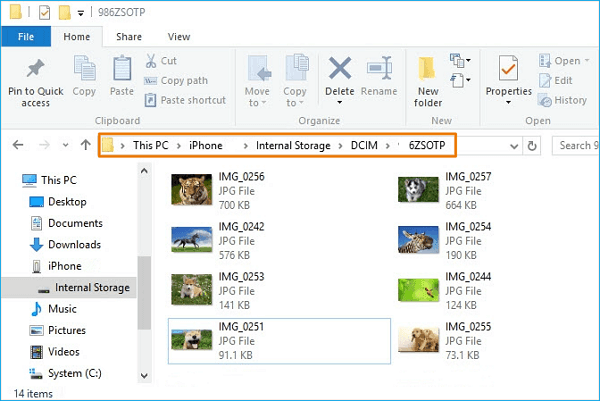
Step 2. Open This PC or Computer > Find your iPad under Devices and drives > Open your iPad.
Step 3. Go to Internal Storage > DCIM > Open the folder and you will see the pictures.
Step 4. Copy and paste the photos to your external hard drive.
Part 4. Transfer Photos from iPad to External Hard Drive on Mac
For Mac users as well as Windows 8/10 users, you can take advantage of Photos app to transfer photos from iPad to external hard drive. But it only supports transferring photos saved in Camera Roll.
Step 1. Run Photos app and plug in your iPad.
Step 2. Cick Import > Choose From a USB device.
Step 3. New photos will be selected for import by default and you should uncheck the photos you don’t want to transfer.
Step 4. Click Import Settings to choose your external hard drive as the destination.
Step 5. Finally, click Import Selected.

Conclusion
That’s all about how to transfer photos from iPhone to external hard drive on Mac or Windows PC. You can take advantage of FoneBackup, Windows Explorer or Photos app to transfer photos. If your iPad is running on iPadOS 13 and later, you can connect your external hard drive to your iPad and backup photos directly.