How to Transfer Photos and Videos from iPhone to PC [Guided]
This post will show you the top 4 ways to transfer photos and videos from iPhone to PC, with or without USB cable.
By May / Updated on May 14, 2026
How do I import photos and videos into Windows from iPhone?
My iPhone storage is about to be full, and videos are taking up too much space, transferring photos and videos from iPhone to PC can free up a lot of storage space. How do I transfer all my photos and videos from my iPhone to my computer?
- Question from Apple Support
Wondering how to transfer photos and videos from iPhone to PC? Luckily, there are 4 effective ways to accomplish this task. In this article, you'll learn how to easily copy iPhone photos to a Windows PC in a matter of minutes!
Way 1. Import iPhone photos and videos to PC via FoneBackup [Recommended]
If you have a large number of media files to import and want to transfer them to your PC without any obstacles, it is best to use a professional iOS transfer tool. We highly recommend you use the powerful and free FoneBackup.
This tool supports fast transfer of videos and photos between iPhone and computer without losing quality. You can export 46.04GB of videos from iPhone within 30 minutes. FoneBackup's transfer speed surpasses the vast majority of similar products.

- Intuitive interface with simple steps.
- Transfer full-resolution images without compression.
- Fast transfers, no internet connection required.
- Preview before fully or selectively transferring data.
- Supports pictures and videos in all sizes and formats.
Let's learn how to transfer photos and videos from iPhone to PC using best free iPhone to PC transfer software- FoneBackup:
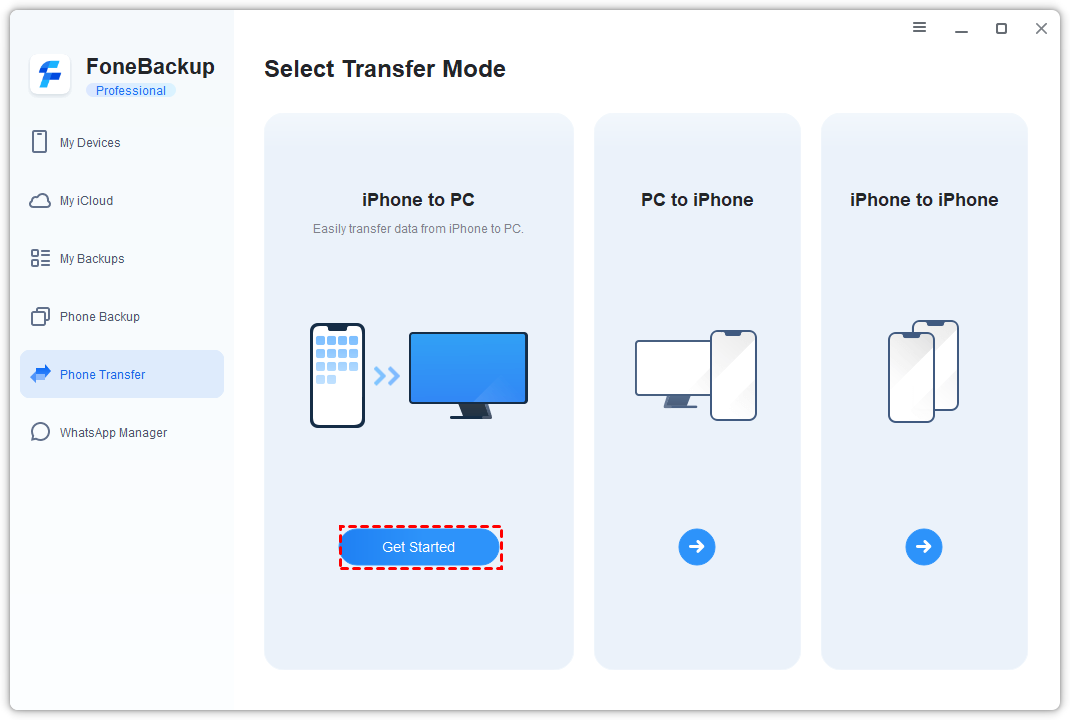
Step 1. Launch FoneBackup and connect iPhone to PC with USB cable.
Step 2. Select Phone Transfer on the home screen. Go to iPhone to PC and click Start Transfer.
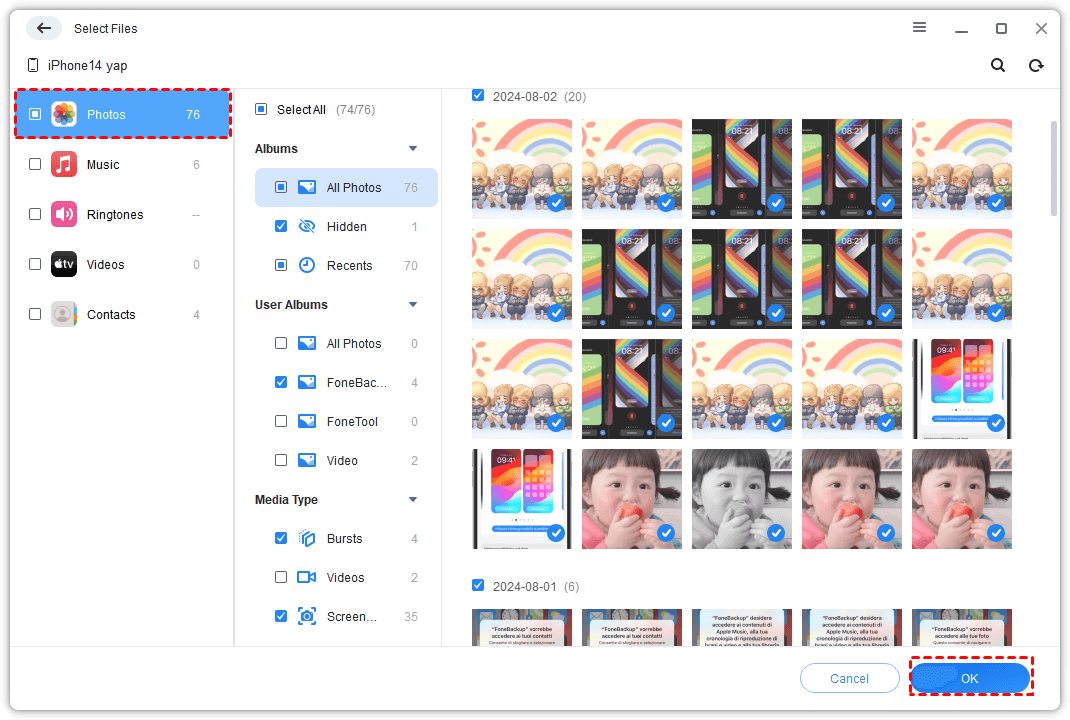
Step 3. Click the plus icon to preview and select photos and videos from iPhone. Click OK.
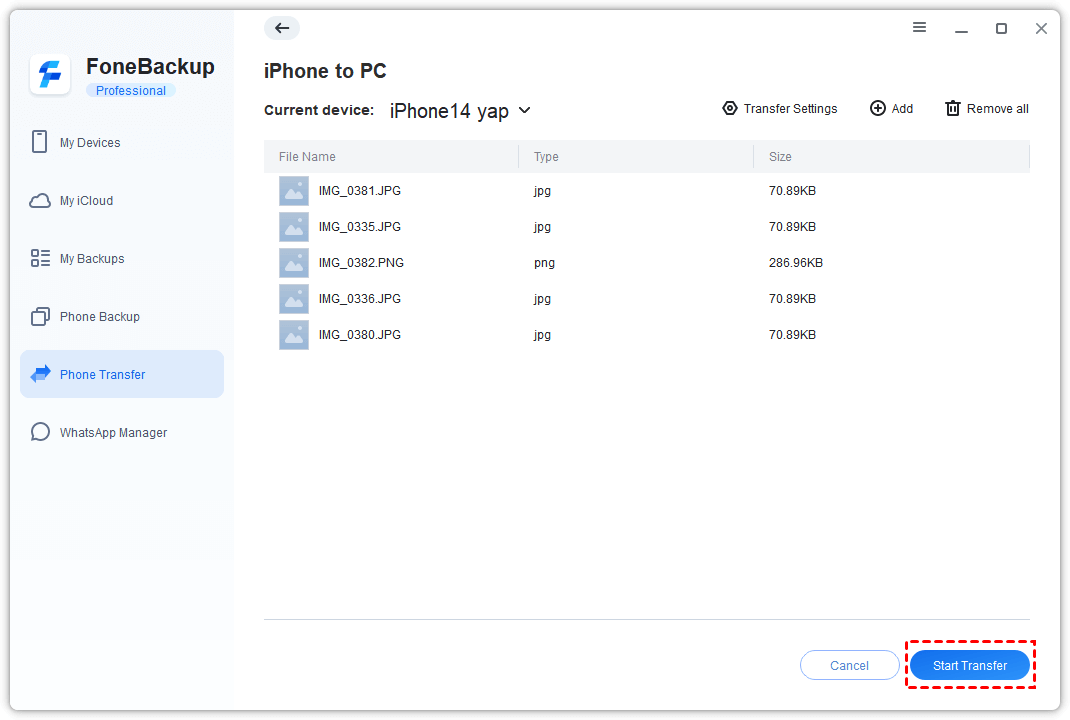
Step 4. Click Start Transfer > Choose a storage path > Click Transfer to export the selected photos and videos to PC.
Way 2. Move photos and videos from iPhone to PC with Windows Photos
Windows Photos is a built-in tool in Windows PC, which allows you to import photos and videos from iPhone to PC via a folder or USB device. And it will save the transferred data on the local folder.
Detailed steps to transfer pictures and videos from iPhone to PC with USB:
Step 1. Connect your phone and unlock it. Then click Trust and type the password if you are asked to Trust this computer.
Step 2. Click Import and select From A USB device after the Windows Photos pop up. Then, it will automatically detect your photos and videos on the iPhone, you just need to wait for a few minutes.

Step 3. Then, Click Import Selected to transfer all of your photos and videos. If you just want to transfer some of them, you can uncheck photos and videos you don’t want to export. Then, wait for the operation until it’s 100% completed and see these photos and videos on your computer.
However, the "Photos" app can encounter an issue like "can't import photos from iPhone photos". Then you can try other methods on this post.
Way 3. Transfer photos and videos from iPhone to PC with iTunes
Apple provides iTunes software helping you to backup data. You can use this tool to save photos and videos that uploaded on iTunes before. Although the official tool is often unstable and cannot selectively transfer pictures and videos, it is also the first choice for many users.
Let's learn how to copy all photos and videos from iPhone to PC with iTunes, using the following steps:
Step 1. Connect your iPhone to your computer, unlock it, and click “Trust This Computer” if needed. Then, download the latest version of iTunes and install it.
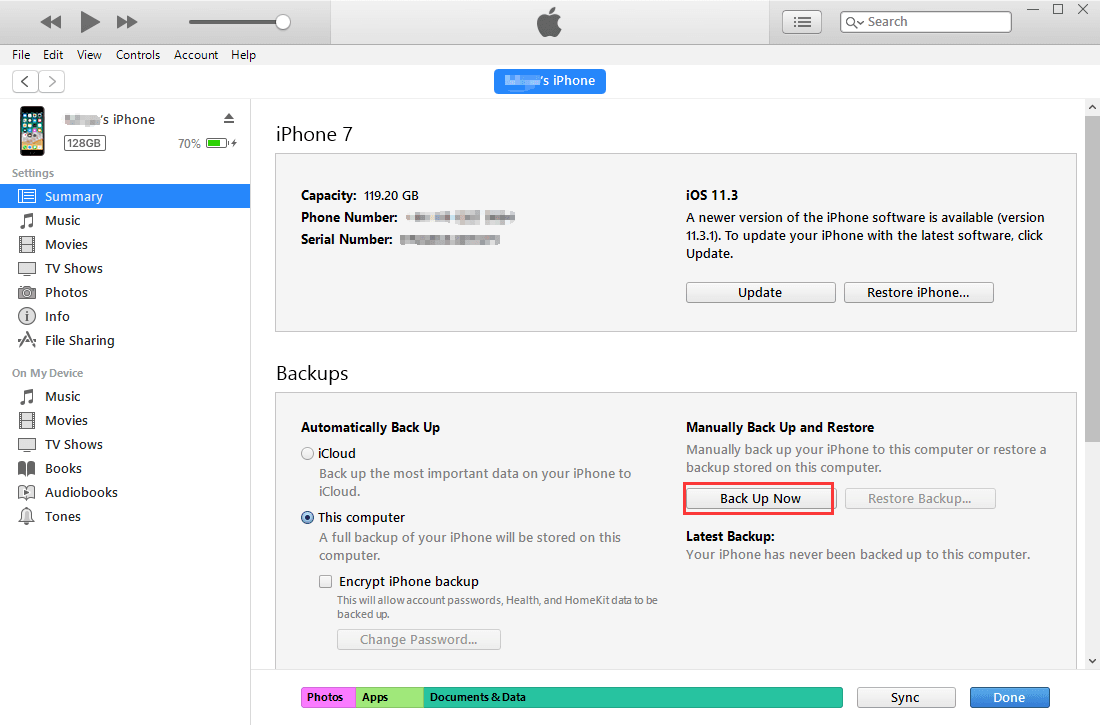
Step 2. Open your iPhone and click the iPhone icon to access the overview page.
Step 3. Click “Summary” and choose “This Computer” and “Back Up Now” under the Backups link. Then wait for the final result and click Apply and Done.
-
The backed-up data with iTunes is not accessible unless you restore them to another iPhone.
-
If you restore data to your iPhone, the existing data will be erased. If you need to restore your iPhone from backup after setup, you can turn to FoneBackup.
Way 4. Transfer videos and photos from iPhone to PC using iCloud (Wirelessly)
If you don't have a USB cable. You can use iCloud as a carrier to transfer data from iPhone to PC. iCloud is Apple's official cloud storage service, which can help some users transfer photos and videos from iPhone to PC wirelessly, even if it only provides 5GB storage for free.
#1. Enable iCloud backup
>> Go to Settings on your iPhone. Then tap Photos > Toggle on iCloud Photos to enable iCloud Photo Library.
Wait a while, your photos and videos will be synced to your iCloud storage. Now you can transfer images from iCloud to PC: download photos and videos to your PC with iCloud client or iCloud website.
#2. Download photos and videos to computer with iCloud client
Step 1. Download and install iCloud for Windows on your PC. Sign in your Apple ID.
Step 2. Check the Photos. And click the Options of it.
Step 3. Make sure the iCloud Photo Library and download new photos and videos to my PC are checked. Then click Done.
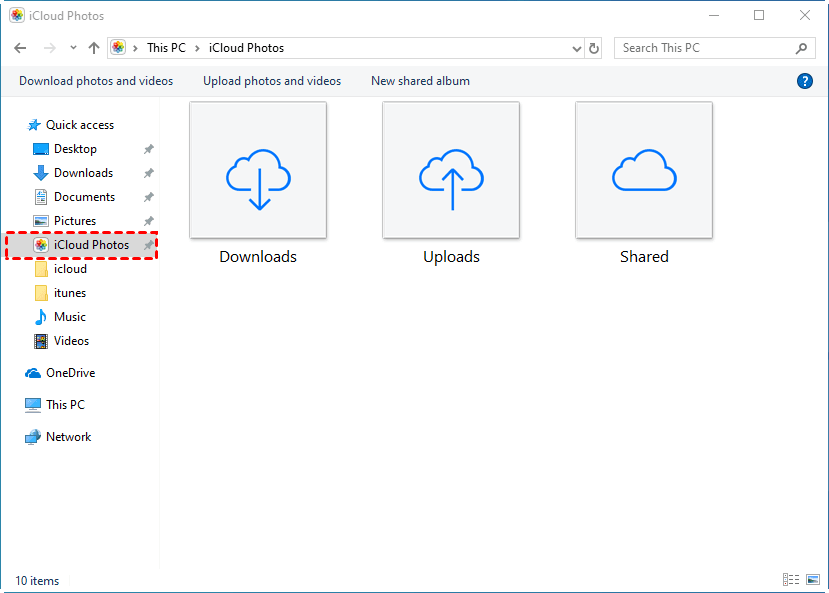
Step 4. Click Apply. Now you can open This PC. Here is a folder named iCloud Photos. Open it, you will see your iCloud photos and videos listed here.
#3. Copy iPhone photos and videos to PC from iCloud.com
Step 1. Go to iCloud.com on your PC.
Step 2. Sign in with your Apple ID. You may need to enter a 6-digit PIN if you enabled two-factor authentication.
Step 3. Choose the Photos once you log in.

Step 4. Now you can check all your photos and videos on your iCloud. Choose the ones you want to download. And click the Download icon to download photos to your PC.
FAQs on iPhone to PC photos transfer
If you're confused about how to move photos and videos from iPhone to PC, don't worry, here's a solution for you.
1. What is the fastest way to transfer videos from iPhone to PC?
FoneBackup is the fastest way to transfer videos and pictures from iPhone to PC on the market after we tested, and it can transfer 10G videos in a few minutes.
If you want to transfer videos from iPhone to computer instantly without a third-party tool, then you can copy videos directly via Windows Photos, but the transfer speed will be a bit slow.
2. How to transfer photos from iPhone to computer with USB?
There are three most effective ways to transfer photos from iPhone to computer with USB: third-party tools (such as FoneBackup), iTunes and File Explorer, you can click the link to go to see the detailed steps.
3. Why can't transfer photos from iPhone to PC?
You may have difficulties transferring photos from iPhone to PC due to various reasons, and you can try to resolve can't Import photos from iPhone to Windows issue:
Driver issues: Outdated or missing drivers on your PC can block your connection.
USB cable or port problems: A faulty USB cable or port may interrupt the transfer process.
Software conflicts: iPhone software is incompatible or conflicting with PC software.
Insufficient storage: If you run out of storage space, the data transfer progress will be paused.
Settings error: Incorrect settings on your iPhone or PC may prevent the photos from being transferred successfully.
Final words
Speaking of how to transfer photos and videos from iPhone to PC, you may feel a little tricky, because a few transfer tools can transfer both pictures and videos together. But now, you can use the professional iPhone transfer tool FoneBackup. With its useful features, you can complete the task in a very short time, preview data, and keep it intact.
Besides, FoneBackup is also an excellent iPhone backup software. You can easily backup iPhone to computer with it for free.