How to Sync iPhone Contacts to Outlook [6 Easiest Ways]
Do you know how to sync iPhone contacts to Outlook? Well, this post will show you 6 easy and useful ways to help you import iPhone contacts to Outlook with ease.
By May / Updated on May 14, 2026
Microsoft Outlook is one comprehensive tool that lets us receive and send email, manage contact information, keep a journal, schedule, and assign tasks. And now you need to export iPhone contacts to Outlook for further use. Tired of entering contacts one after another? Is there a one-click way to sync iPhone contacts to Outlook?
The answer is Yes! There are 6 different ways that can help you transfer iPhone contacts to Outlook. You can read first and then choose the most appropriate method for your situation. If you want to sync iPhone contacts to Outlook on PC, Method 2 is the best choice.
Way 1. How to Sync iPhone Contacts to Outlook with iTunes
iTunes is the default iDevice management tool and it offers an option that can help you export iPhone contacts to Outlook directly. Download the latest iTunes on your computer and follow the steps to see how to perform an Outlook sync contacts iPhone via iTunes.
If the Contacts sync is enabled iCloud, you should first go to your iPhone > Settings > [your name] > Find Contacts and turn it off.
Step 1. Connect your iPhone to your computer via USB cable. Usually, iTunes will launch automatically, if not, open it by yourself.
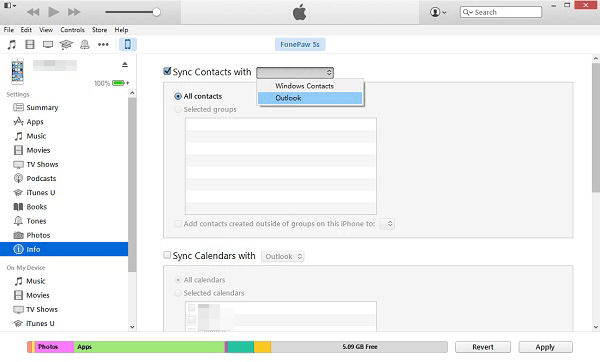
Step 2. Click the Device tab > Choose Info > Check Sync contacts with > Select Outlook.
Step 3. Click All Contacts if you want to sync all the contacts of the iPhone or click Selected Groups if you wish to sync only selected contacts from a group.
Step 4. Click Apply to export iPhone contacts to Outlook.
When the process is done, open Outlook and click the Contacts tab to check the transferred iPhone contacts.
Note: If you are using a Microsoft Exchange Server account and have more than 500 contacts, all contacts might not synchronize unless you use Cached Exchange Mode. You can click here to see how to turn it on.
Way 2. How to Sync iPhone Contacts to Outlook via FoneBackup
If you want to transfer iPhone contacts to Outlook without iTunes, you can let a third-party transfer tool help you achieve the goal, such as FoneBackup.
FoneBackup is one iOS data management tool for Windows PC users. It supports data transfer between iPhone and computer. You can let the tool help you export iPhone contacts to computer and then import contacts to Outlook.
Export iPhone Contacts to Computer
Step 1. Click the download button to get FoneBackup > Launch the tool and connect your iPhone to computer via USB cable.
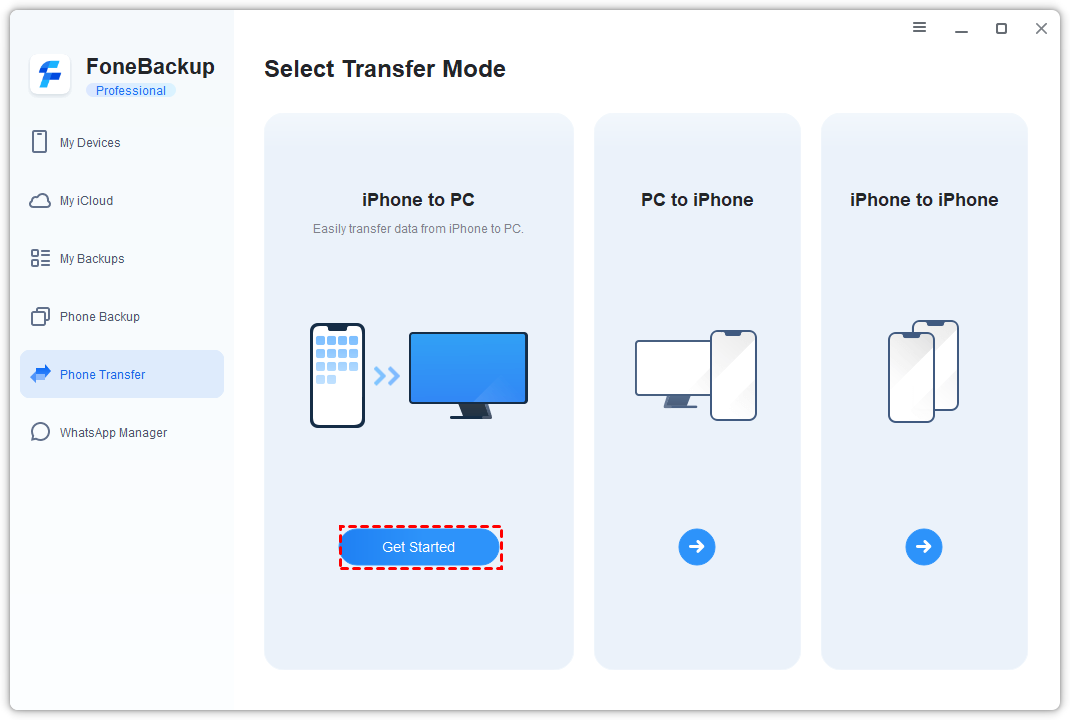
Step 2. Choose Phone Transfer on the left column and move your cursor to iPhone to PC, and click the Start Transfer button.
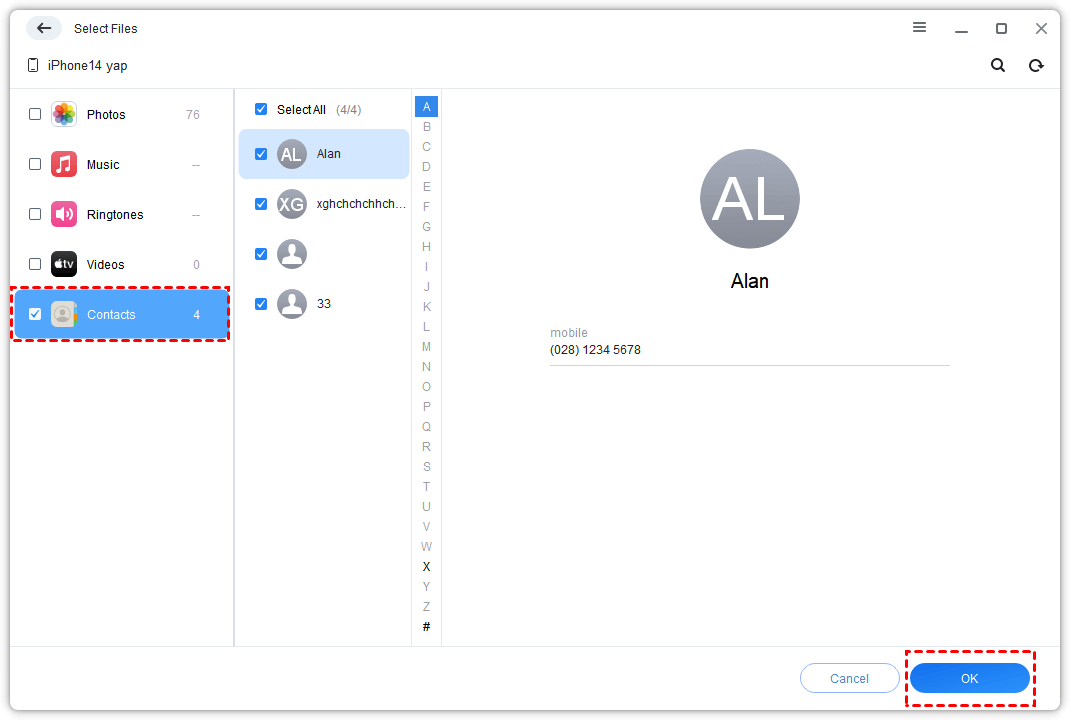
Step 3. Click Contacts > Select the contacts you need > Click OK to continue.
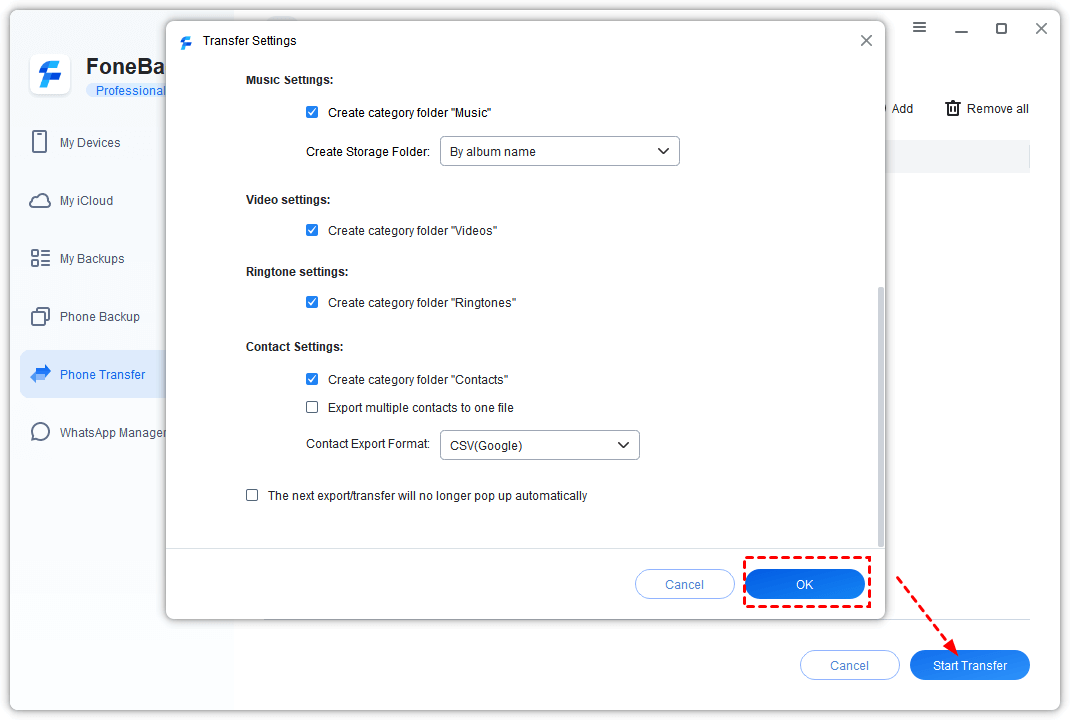
Step 4. You can click Transfer Settings to specify the storage path and the format to save the contacts > Click Start Transfer to start.
Import iPhone Contacts to Outlook
Once you have successfully transferred the contacts to your computer, you can follow the steps below to sync iPhone contacts to Outlook.
Step 1. Open Outlook on your computer > Go to File > Click Open & Export > Click Import/Export.
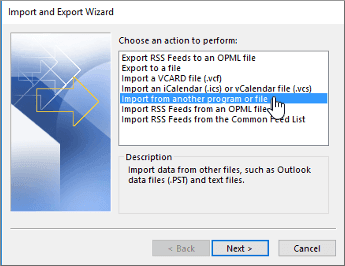
Step 2. In the “Import and Export Wizard”, select Import from another program or file and click Next.
Step 3. Choose Comma Separated Values and choose Next.
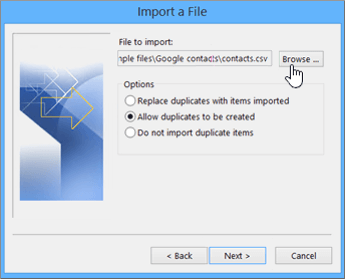
Step 4. In the Import a File box, click Browse to select the contacts file > Select one of the following options to specify how Outlook handles duplicate contacts > Click Next.
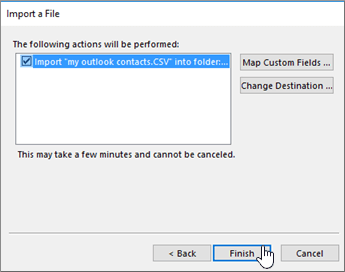
Step 5. In the Select a Destination folder box, choose the Contacts folder > Click Next > Click Finish to begin the import process.
When the Import Progress box closes, the transfer is complete. To check the contacts, you can choose the People icon at the bottom of Outlook.
Way 3. How to Import iPhone Contacts to Outlook via iCloud
If you have synced iPhone contacts to iCloud, then you can choose to first export contacts from iCloud and then import iPhone contacts to Outlook.
Export Contacts from iCloud
Step 1. On your computer, open a browser and go to iCloud. com > Sign in with your Apple ID and password > Choose Contacts from the list of provided services.
Step 2. On the Contacts screen, click the gear icon in the lower-left corner > Click Select All if you want to export all contacts. You can also use Shift or Ctrl to only select the contacts you need.
Step 3. Click the gear icon again > Choose Export vCard... to download the contacts to your computer.

Convert vCard to CSV
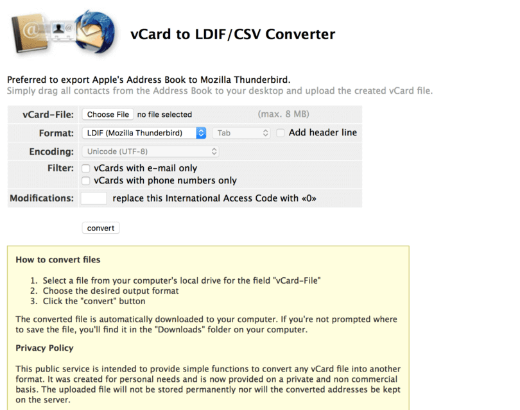
To import iPhone contacts to Outlook, you should first convert the vCard file to CSV file. Visit this website to convert vCard to CSV: https://labs.brotherli.ch/vcfconvert/.
Click the Choose File button to select the vCard file you just exported before and confirm other options:
- Format: choose CSV, choose Comma, and enable Add Header Line
- Encoding: choose Unicode (UTF-8)
- Filter: don’t change anything
- Modifications: don’t change anything
Import iPhone Contacts to Outlook
Follow the steps in Method 2 to sync iPhone contacts with Outlook.
Way 4. How to Sync iPhone Contacts to Outlook Using Settings
If you have Outlook app installed on your iPhone, then you can try this method to sync iPhone contacts with Outlook, here are the steps:
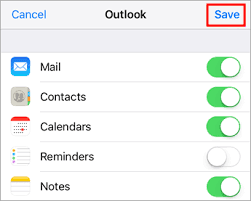
- In iPhone Settings: Tap Outlook > Turn on Contacts and Background App Refresh.
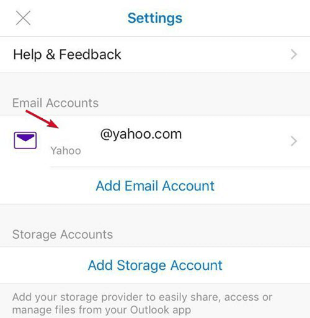
- In Outlook app: Go to Settings > Tap your email account > Turn on Sync Contacts.
Way 5. How to Sync iPhone Contacts to Outlook.com
This method is for anyone whose version of Outlook syncs with Outlook.com. If you are in a corporate environment, you may need to check with the IT department to see whether this option is available.
Step 1. Go to Settings > Scroll down and tap Accounts & Passwords > Tap Add Account > Choose Outlook.com.
Step 2. Enter your email address or phone number and tap Next > Enter your password, then tap Sign in.
Step 3. Tap Yes to allow iPhone permission to access your Outlook data > Turn on Contacts sync > Tap Save to confirm.
Way 6. How to Sync iPhone Contacts to Outlook with Exchange
If your company has an Exchange server, then you can choose to sync Office 365 contacts with iPhone via Exchange. This option may only be available if your iPhone is connected to your internal corporate network.
Step 1. Go to Settings on iPhone > Scroll down and tap Accounts & Passwords > Tap Add Account > Choose Exchange.
Step 2. Enter your email, user name, and password > Click Next.
Your iPhone will now contact the Exchange Server > Fill in the address of the server in the Server field > Finally, turn on Contacts sync to sync iPhone contacts with Outlook.
Conclusion
That's all about how to sync iPhone contacts to Outlook. If you want to transfer iPhone contacts to Outlook on PC, there are 3 workable ways. Method 2 is highly recommended as it is much simpler to follow. It can help you transfer selected contacts in the way you want.