iPhone SE Disabled Connect to iTunes? Ways to Unlock it
Your iPhone SE cannot be used when it displays “iPhone is disabled, connect to iTunes”. Just try the three ways in this guide to unlock your iPhone SE.
By Demi / Updated on May 14, 2026
iPhone is disabled, connect to iTunes
My iPhone SE has disabled itself and won’t accept passcode and says “iPhone disabled connect to iTunes”... How do you solve this issue?
- Question from Apple Community
The reason why iPhone SE line is popular is not only affordable but also for its security system. Your iPhone can be perfectly safeguarded by your screen passcode and Apple ID once set up.
However, everything has two sides. If you want to unlock your iPhone SE but enter the wrong screen passcode ten times in a row, you may end up getting an error message, saying “iPhone is disabled, connect to iTunes”.
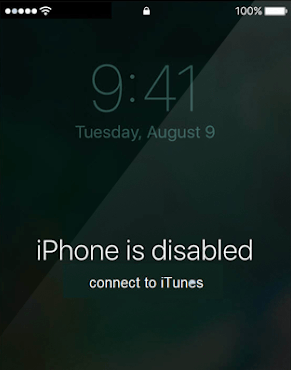
The message means your iPhone SE has been completely locked. In this guide, you can get three ways to help you out with or without iTunes when your iPhone SE shows the “disabled, connect to iTunes” message. You should be noted that you will lose everything from iPhone SE after unlocking it. Therefore, it’s suggested to fully backup your iPhone first.
Part 1. Fix “iPhone SE disabled connect to iTunes” with iTunes
Just as the error message tells you, you can connect your iPhone SE to iTunes and let iTunes help you fix out. Before trying either way below, please make sure you’ve updated iTunes to the latest version. Depending on whether you've synced iPhone SE to iTunes, you can restore it via iTunes or put iPhone SE into recovery mode.
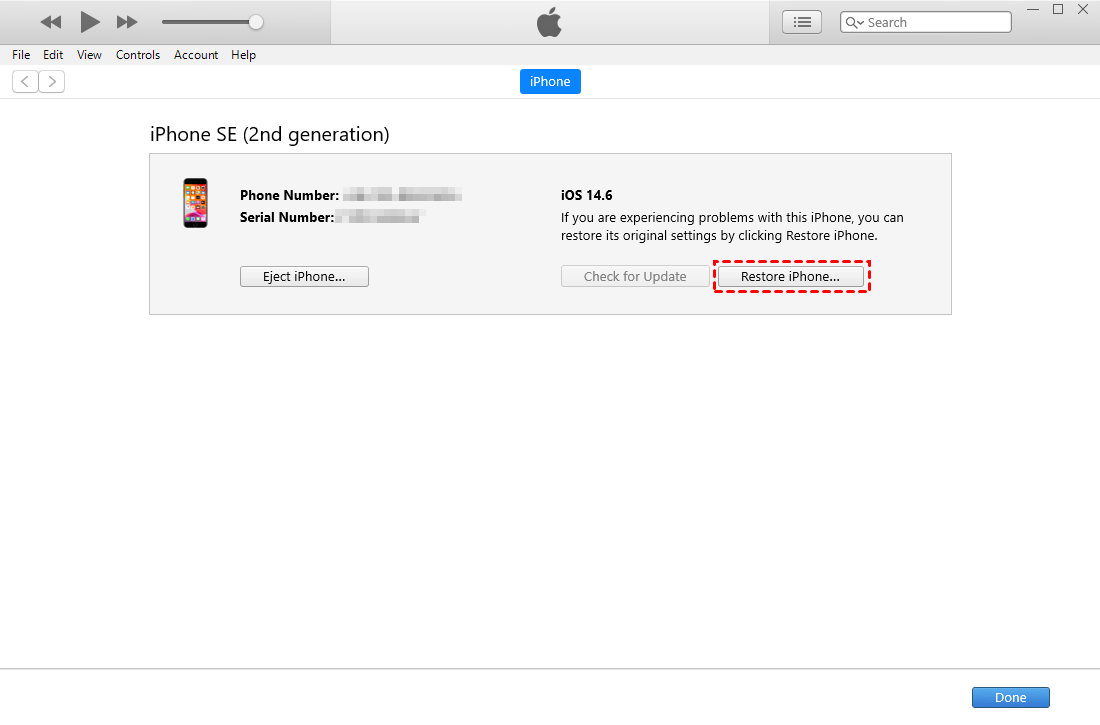
Way 1. Restore iPhone SE via iTunes
iTunes can help you restore your iPhone SE if you have backed up your iPhone SE recently. Follow the steps below to backup and restore your iPhone SE.
Step 1. Connect your iPhone SE to the computer with a stable USB cable > Launch iTunes.
Step 2. Select your iPhone SE at the top of the screen > Click Back Up Now.
Step 3. Click Restore iPhone to start resetting. It will take a few minutes to complete. When it is over, click Done, and restart your iPhone.
Way 2. Put your iPhone SE into recovery mode
The other way to unlock the disabled iPhone SE by connecting it to iTunes is to put your iPhone SE into recovery mode and restore it. The followings are detailed steps.
Step 1. Put your iPhone SE in recovery mode. The steps are kind of different depending on the iPhone SE you’re using.
For iPhone SE (1st Gen): Press and hold both the Home and the top buttons at the same time > Release both buttons when you see the recovery mode screen.
For iPhone SE (2nd Gen): Press and quickly release the volume Up button > Press and quickly release the volume Down button > Press and hold the Side button until you see the recovery mode screen.
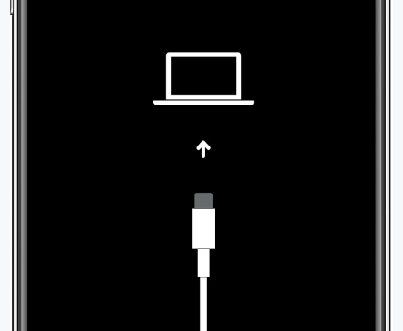
Step 2. Connect your iPhone SE to computer and open iTunes > Click the phone icon in the upper-left corner > When a prompt appears, click on Restore and wait for the process to finish.
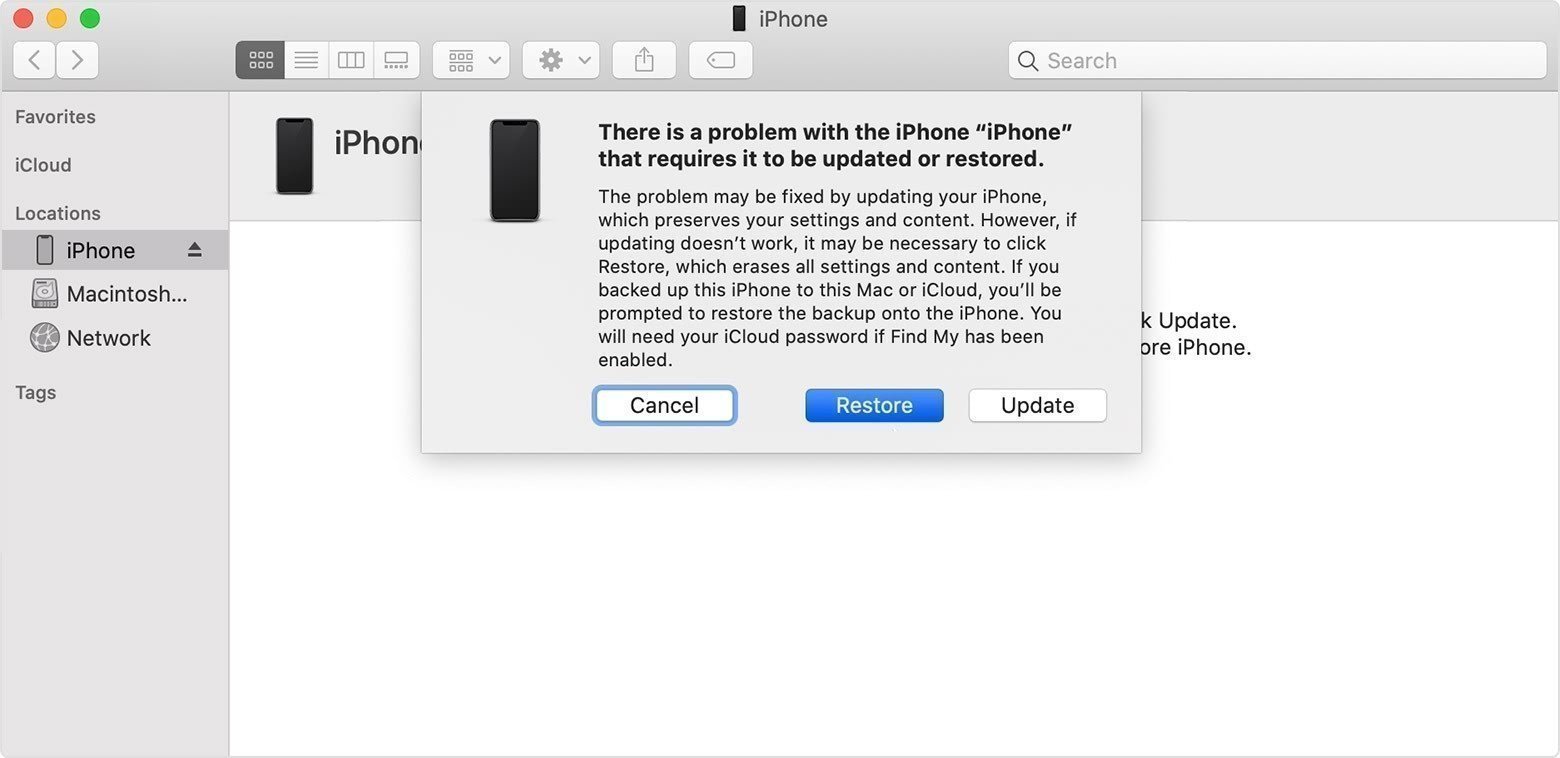
When it is finished, you can set up your iPhone as if it was new. While going through these setup processes, you’ll be offered the option to restore from a backup.
Part 2. Fix “iPhone SE disabled connect to iTunes” without iTunes
The only way to fix “iPhone SE disabled, connect to iTunes” error without computer is to make use of iCloud. But the way can only be available when you have previously enabled the Find My iPhone function. If not, try other ways in this guide. Here are the steps.
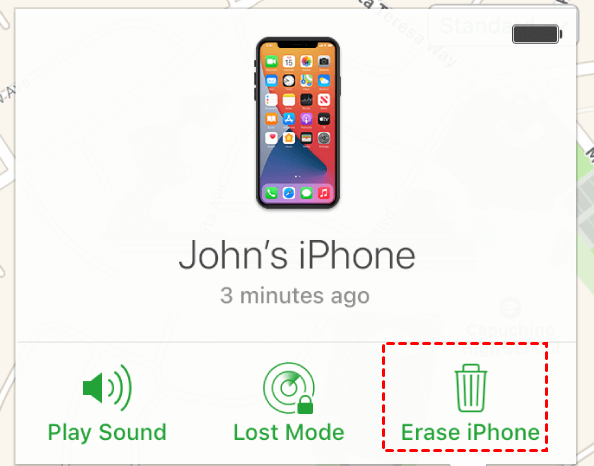
Step 1. Open a web browser and go to www.icloud.com/find > Log in your iCloud ID > Click Find My icon.
Step 2. Click All Devices at the top of your screen > Select your iPhone SE from the list.
Step 3. Click on Erase iPhone and wait for your iPhone to be unlocked.
Bonus: Backup and restore iPhone without data loss by FoneBackup
Even if you have backed up your iPhone SE to iTunes or iCloud before troubleshooting, you may lose data from iPhone SE more or less. To minimize data loss, a more professional backup tool - FoneBackup is recommended to you.
Compared with iTunes and iCloud, FoneBackup allows you to backup iPhone fully or selectively as per your need with no limitation of storage space.
Click the icon below to get the tool to regularly backup your iPhone to PC in three simple steps.
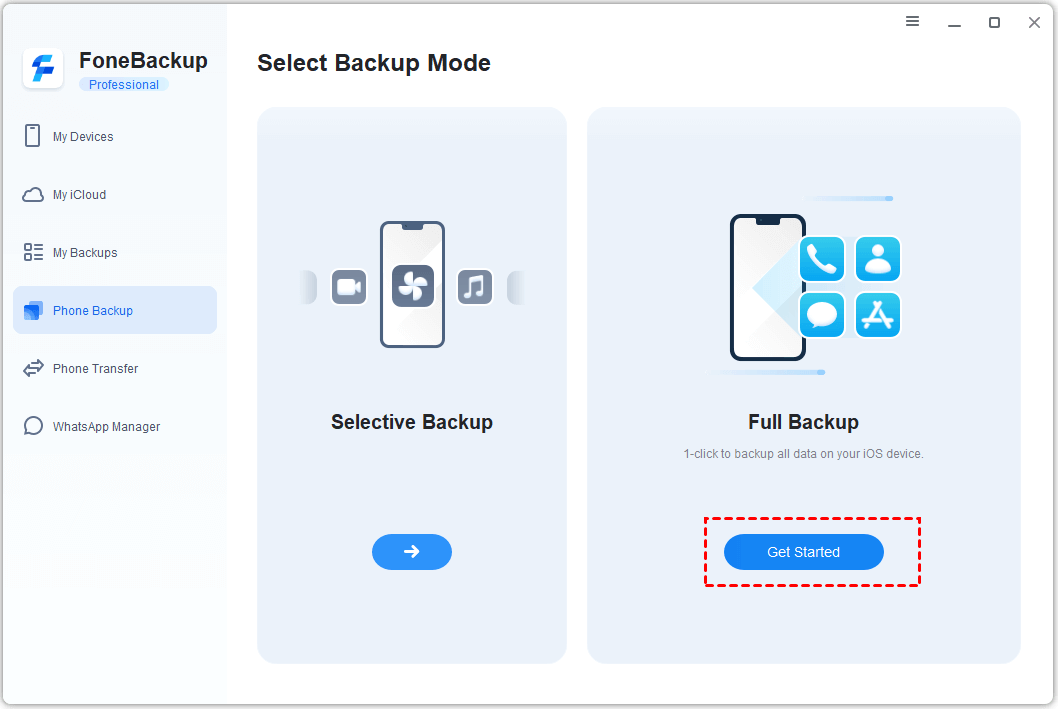
Step 1. Launch FoneBackup > Connect your iPhone SE to computer > Click Phone Backup on the left of homepage. And click Get Start under Full Backup.
Step 2. You can choose to enable Backup encryption to make your data private.

Step 3. You can click Backup Storage Path to select a destination to save your backup file > Click Start Backup and wait for it to finish.
To restore your full iPhone SE backup, connect your iPhone SE and launch FoneBackup. Go to Backup History to restore the backup.
You can also try the other backup function called Selective Backup to backup selective iPhone data to PC.
Conclusion
Hope one of the four ways in this guide can help you out when your iPhone SE shows “iPhone is disabled, connect to iTunes”. These methods are also workable on any iOS device. If this guide helps you, please share it with others.