


How to Perform SQL Server Auto Backup Every Day (2 Ways)
This tutorial offers two effective solutions to run SQL Server auto backup every day. Both SQL Server Management Studio and AOMEI Cyber Backup can help you make it.
By Delia / Updated on June 13, 2023
Need SQL Server auto backup
Microsoft SQL Server (MSSQL) is one of the most popular database servers. It can help enterprises create and maintain databases. You can also use it to analyze the data through SQL Server Analysis Services (SSAS) and generate reports through SQL Server Reporting Services (SSRS).

After creating databases with SQL Server, it is necessary to make an auto backup for the server, such as SQL Server auto backup every day. That’s because your data in the databases is at risk due to human errors, system errors, media failure and so on, and backup is taken as the most primary disaster recovery solution. Besides, business data changes frequently, so you need auto backup to save energy and administration cost. Then, how to perform SQL Server database automatic daily backup? Just keep reading.
Run automatic SQL database backup using SSMS
SQL Server Management Studio (SSMS) is a software application used for configuring, managing, and administering all components within Microsoft SQL Server. First launched with SQL Server 2005, it includes both script editors and graphical tools. Learn how to do scheduled automatic SQL database backup using SSMS as follows:
Notes:
◑ SSMS is available only as a 32-bit application for Windows. If you need a tool that runs on operating systems other than Windows, Azure Data Studio is recommended.
◑ If you are using SQL Server Express editions, the following method is inapplicable. You should try either SQL Server Management Studio Express or a Transact-SQL script to do database backup.
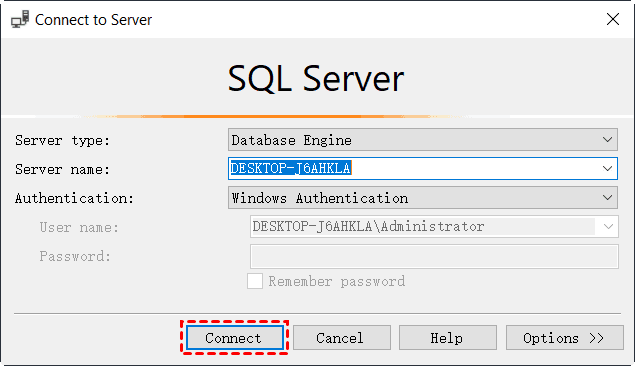
1. Download, install and run SQL Server Management Studio on your computer. Then, complete all fields in the Connect to Server window and click Connect.
2. Go to the Object Explorer window and make sure that your SQL Server Agent is running.
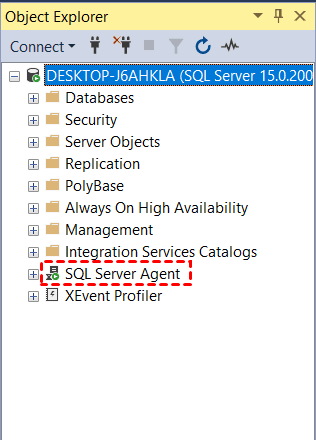
Tip: If it is shown “Agent XPs disabled”, press Win + R keys and type services.msc in the Run window. Then, start SQL Server Agent in the Services window.
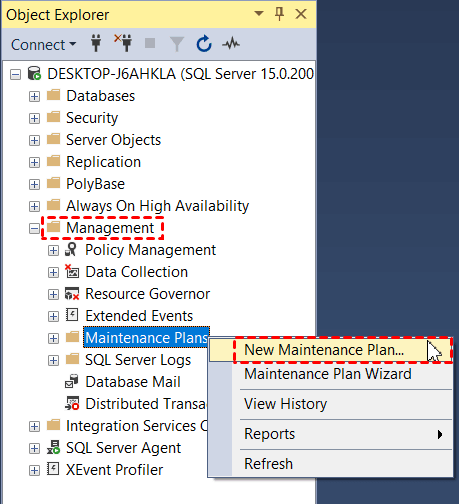
3. Expand Management. Then find the Maintenance Plan folder, right-click on it and select New Maintenance Plan.
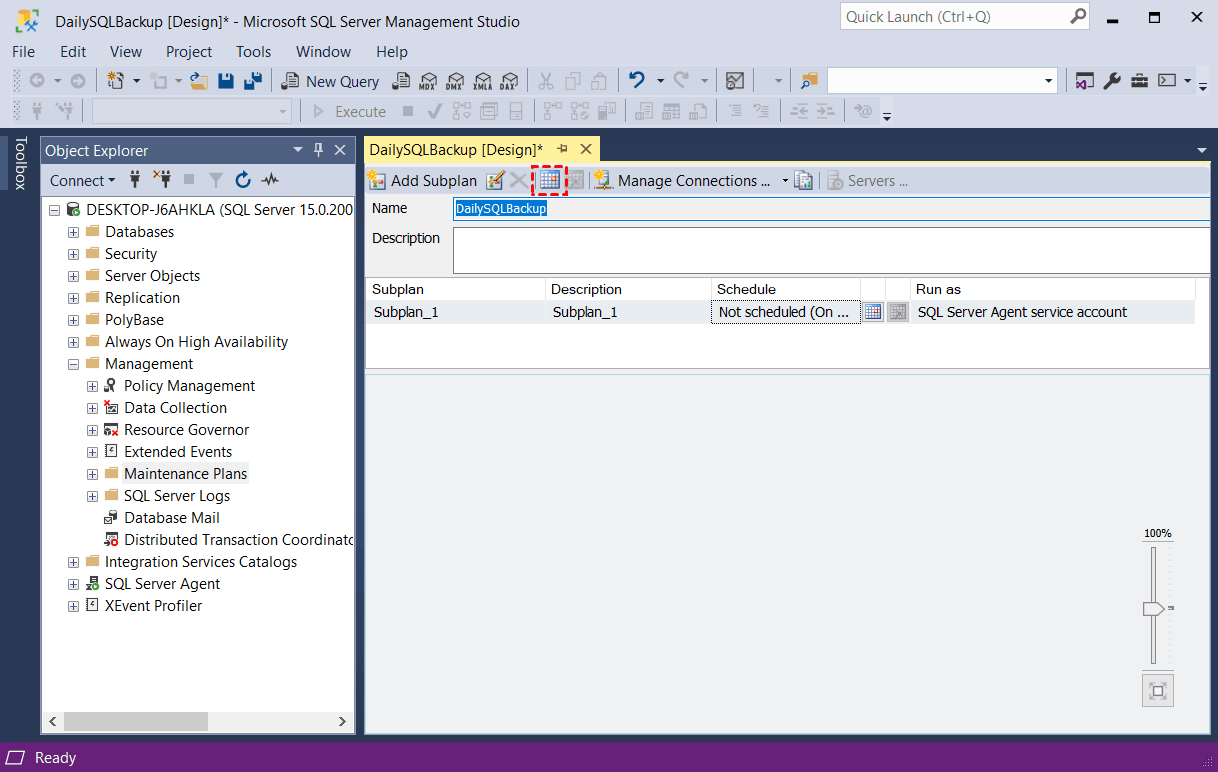
4. Enter a name for the new maintenance plan and click OK. In the Maintenance Plan Design window, press on the calendar icon at the top.
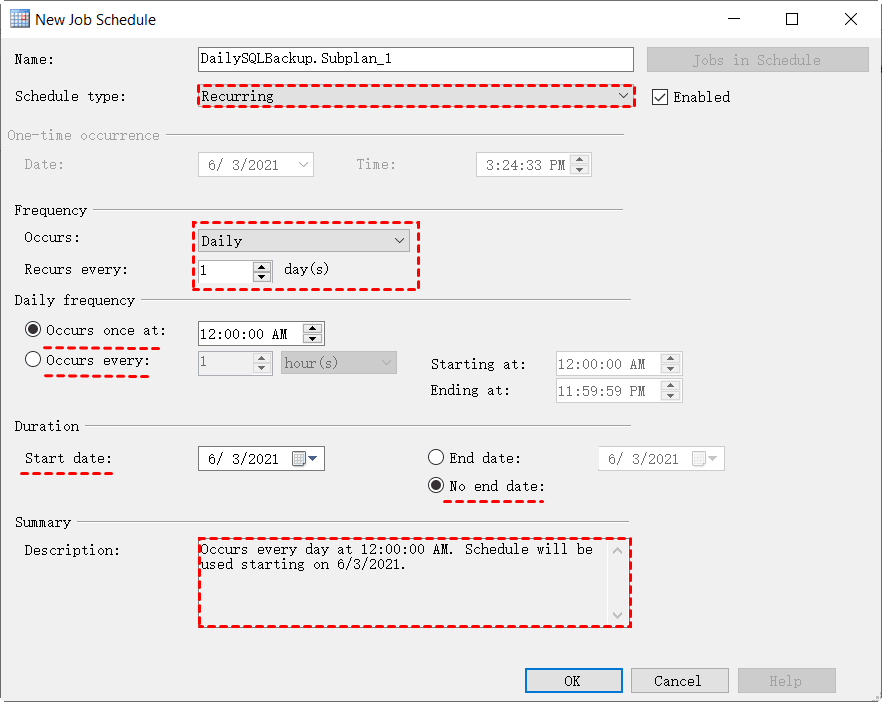
5. In the New Job Schedule window, configure SQL Server auto backup every day as follows and click OK to save your settings.
- Schedule type: Recurring
- Frequency: Occurs Daily, Recurs every 1 day
- Daily frequency: Occurs once or every “n” hour(s)
- Duration: Specify start date and end date based on your need
- Summary: Review your settings
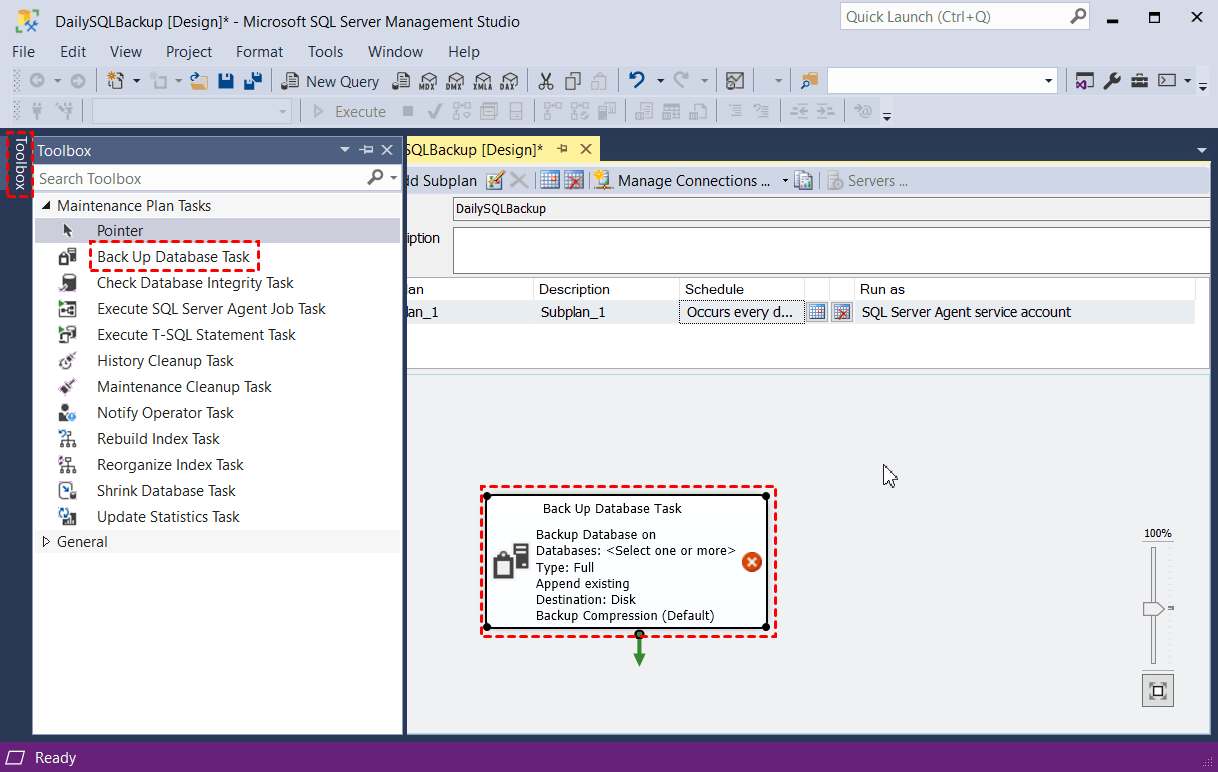
6. Click Toolbox in the left corner. Then, expand Maintenance Plan Tasks, double-click Back Up Database Task and the small pop-up window successively.
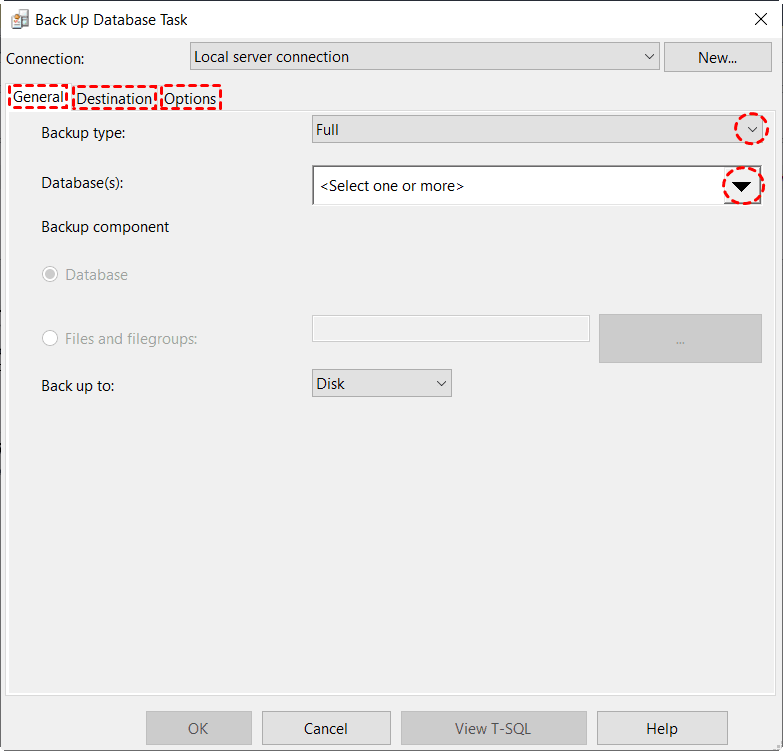
7. In the Back Up Database Task window, do the following settings and then click OK.
- Under the General tab: choose “Full” backup type, select one or more database to be backed up
- Under the Destination tab: you can keep the default location for the backup file (C:\Program Files\...\mssql\backup), specify another destination path, or your logical backup device in SQL Server.
- Under the Options tab: set backup compression, expiration time, encryption, etc.
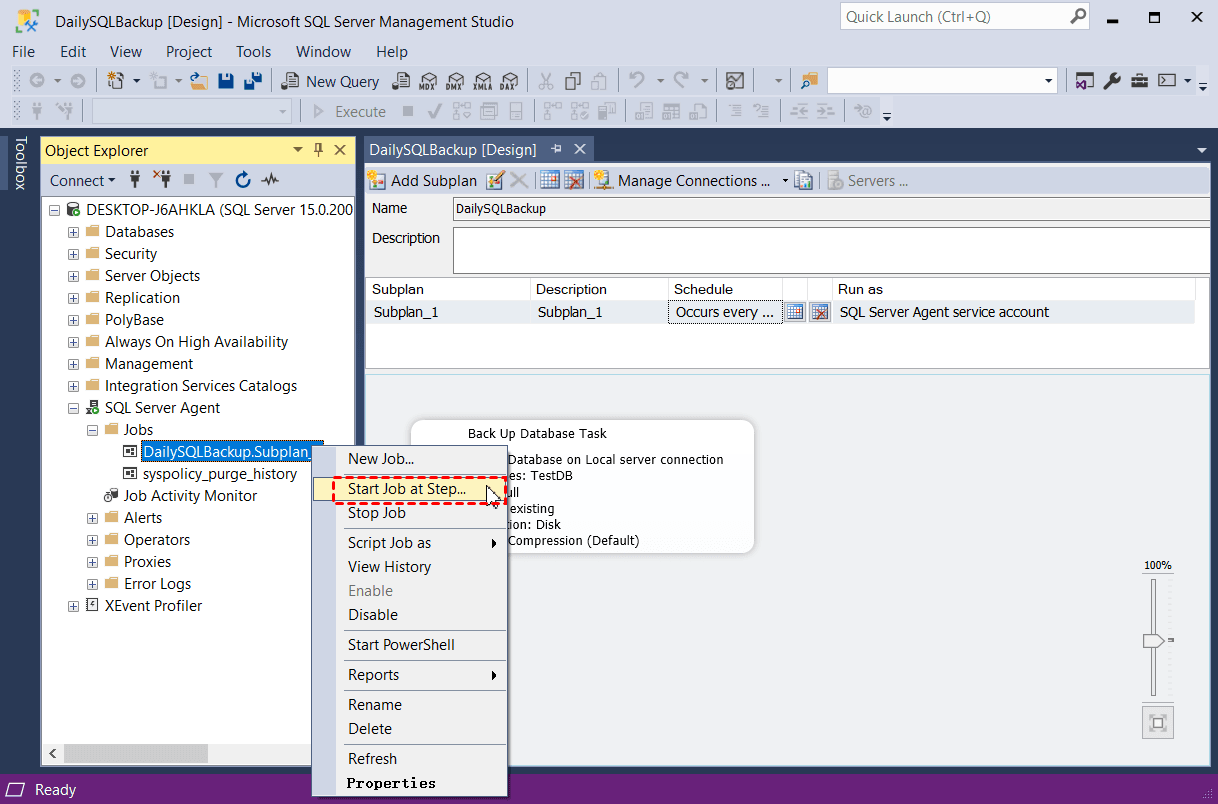
8. Go to Object Explorer > SQL Server Agent > Jobs. From there, you’ll see a job created automatically according to the Maintenance Plan you just created.
Tip: If the job is not created automatically, you can go to the Maintenance Plan Design window and press Ctrl + S to save the maintenance plan first.
9. Right-click on the newly-created job and select Start job at Step… to test the maintenance plan you’ve created. After the job is executed successfully, you can go to the backup location to check the backup file.
Perform SQL Server daily backup via AOMEI Cyber Backup
AOMEI Cyber Backup is also an easy-to-use SQL auto backup software worth trying. You can benefit a lot from its following features:
◉ It offers SQL Server Backup which is used to backup multiple instances on any PC/Server on the LAN.
◉ It enables you to create auto backup tasks using the Schedule feature. There are 4 schedule modes available: Once, Daily, Weekly, and Monthly.
◉ It supports backing up databases on SQL Server 2022/2019/2017/2016/2014/2012/2008(R2)/2005.
◉ It can be installed on both Windows Server (Windows Server 2008 and above) and Windows PC (Windows 7 and above).
Download this 30-day free trial to experience all its features:
Before you create backup tasks with AOMEI Cyber Backup, you should:
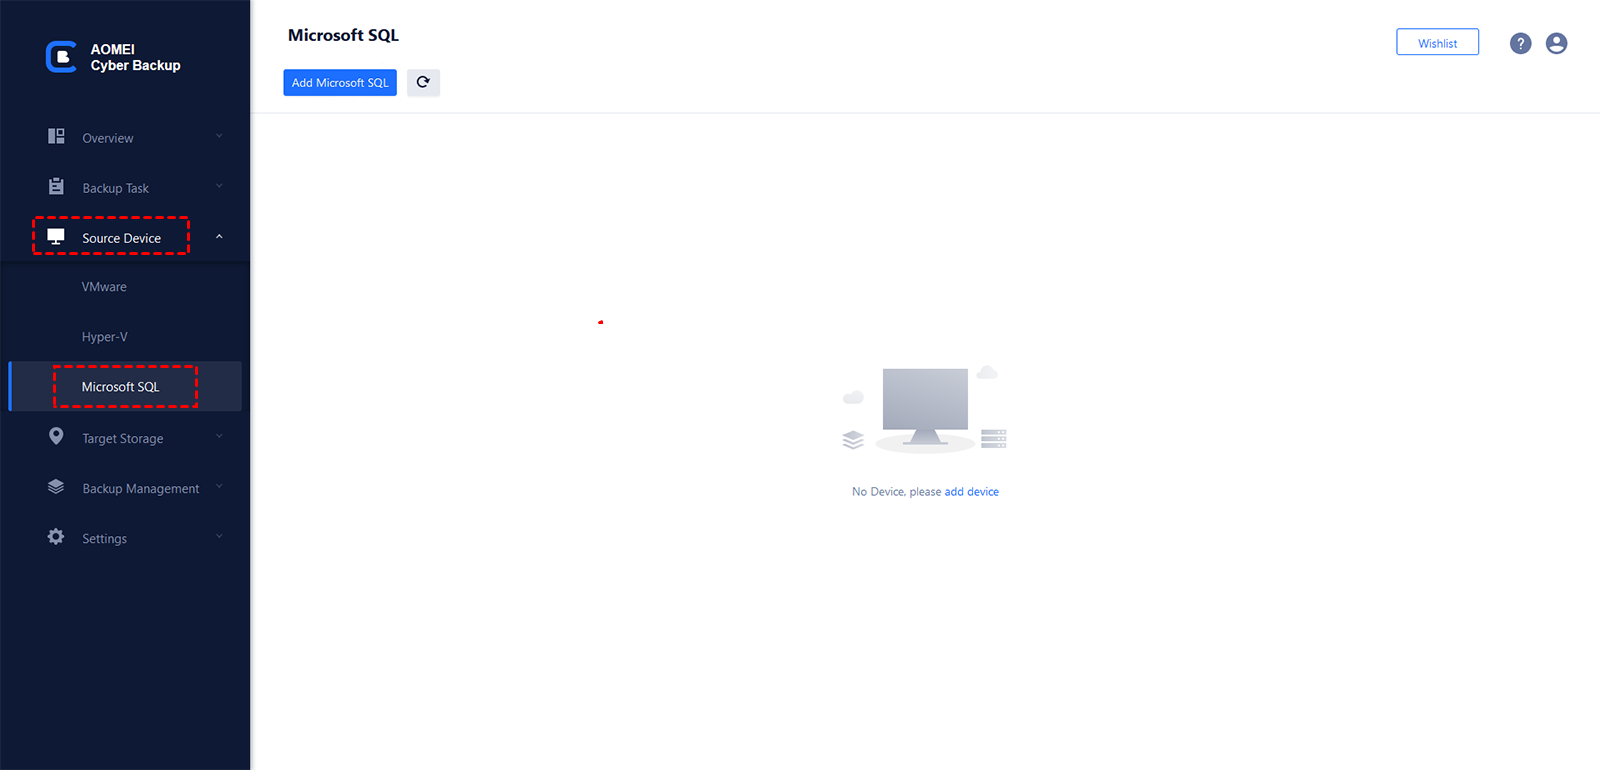
- Run the downloaded .exe file to install AOMEI Cyber Backup, and launch its main interface. Click Source Device -> Microsoft SQL -> Add Microsoft SQL.
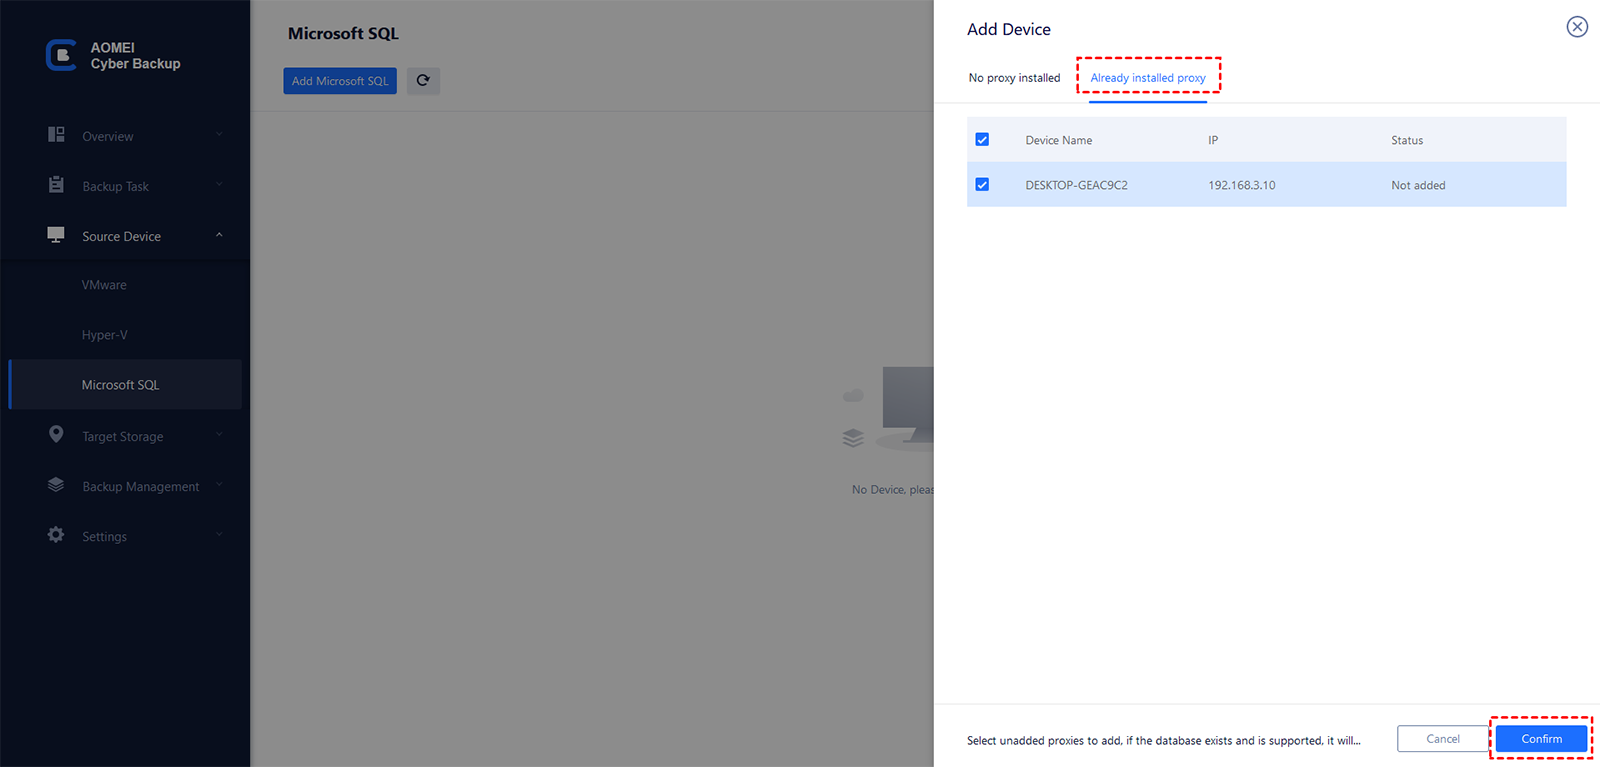
- Choose Download proxy program or Copy link to download the Agent program and install it on the device with SQL Server installed. Then, click Already installed proxy to select the device.
- Next, click
 -> Authentication to validate the database instance. You can choose Windows Authentication or SQL Authentication.
That's it, now you can perform SQL Server auto backup every day via AOMEI Cyber Backup with the following steps:
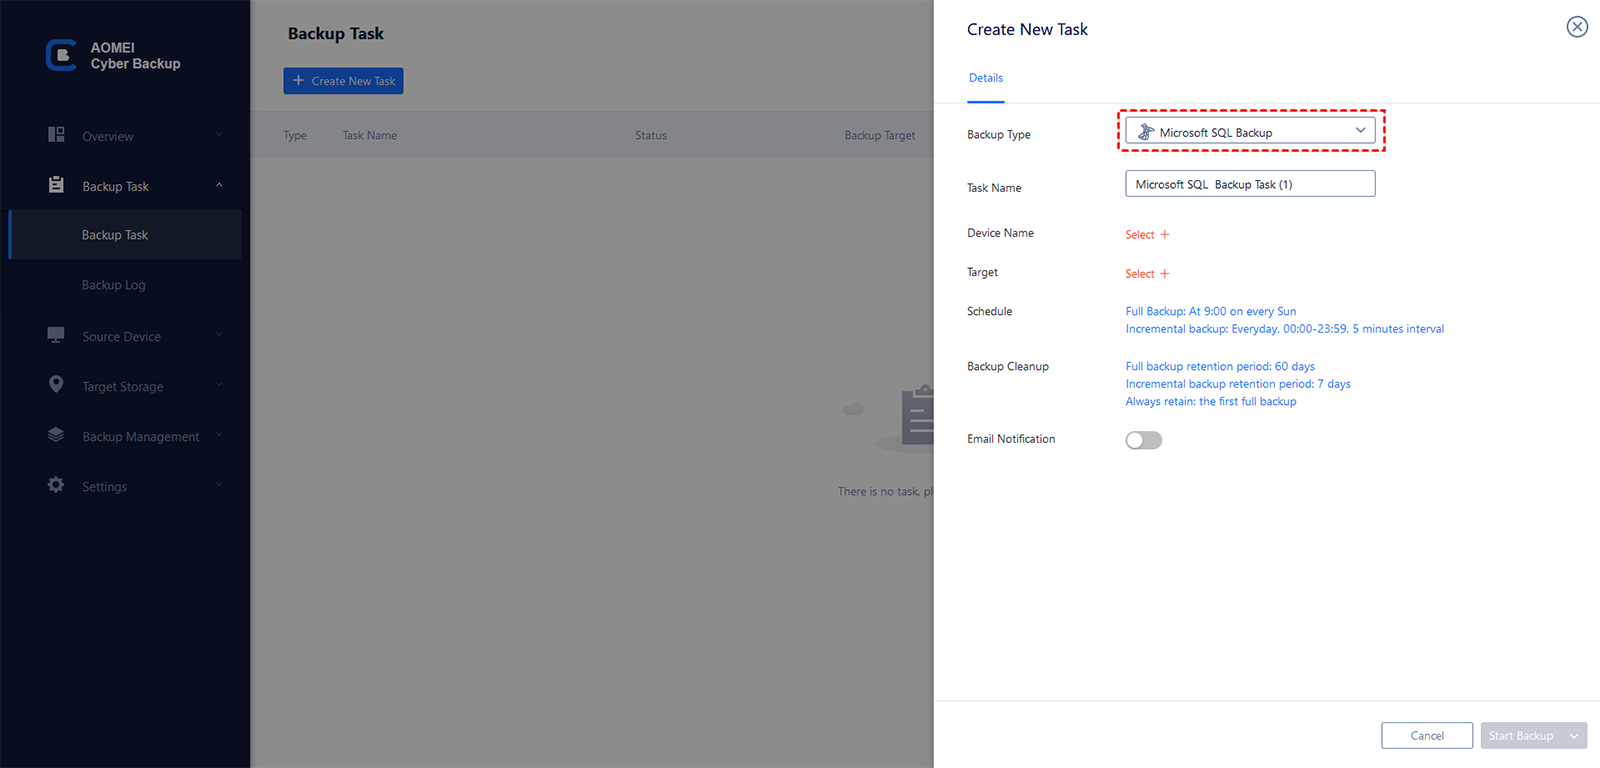
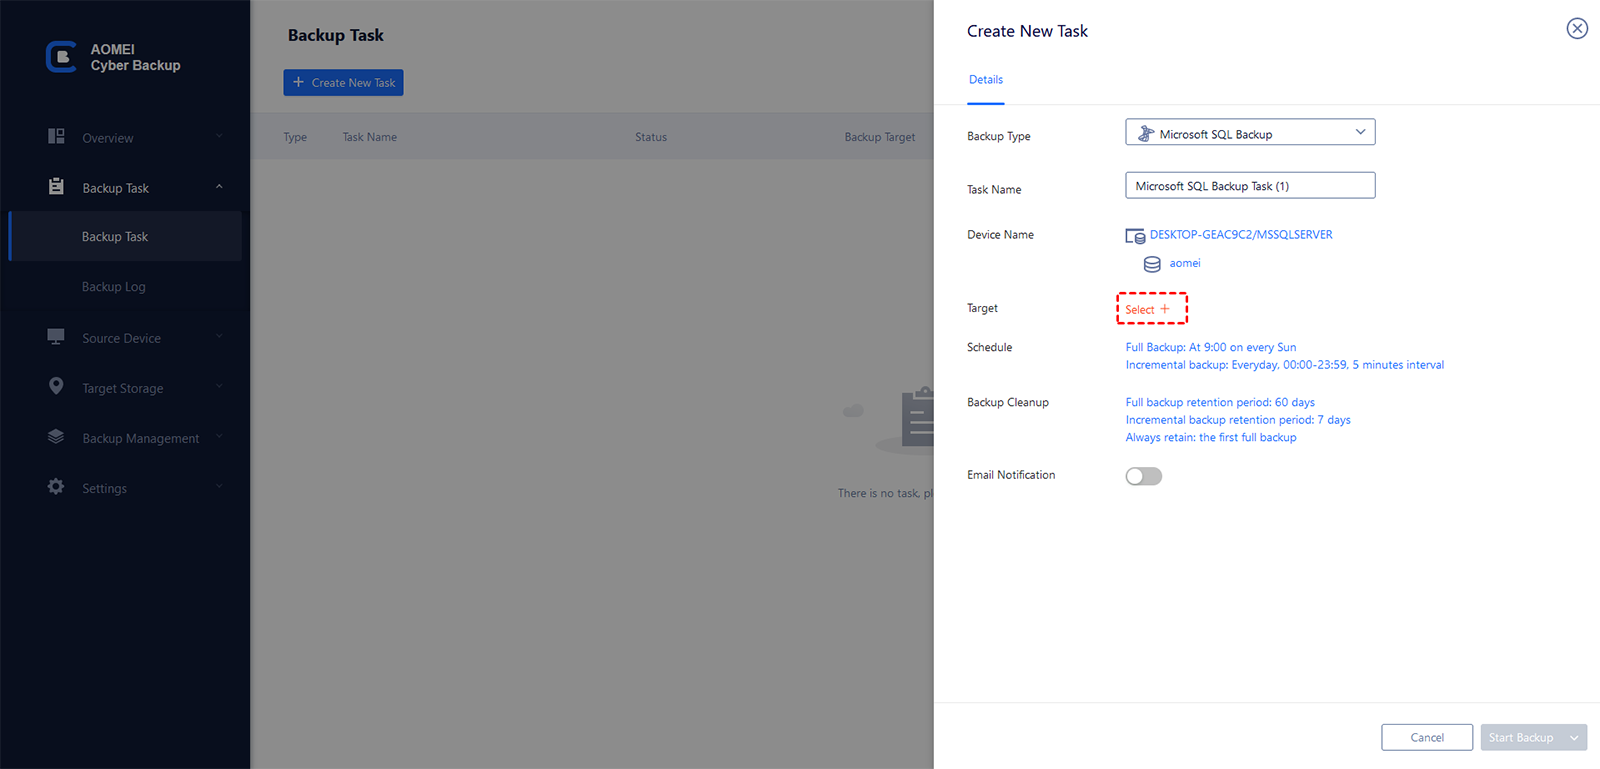
1. Click Backup Task -> Create New Task to create a Microsoft SQL Backup task.
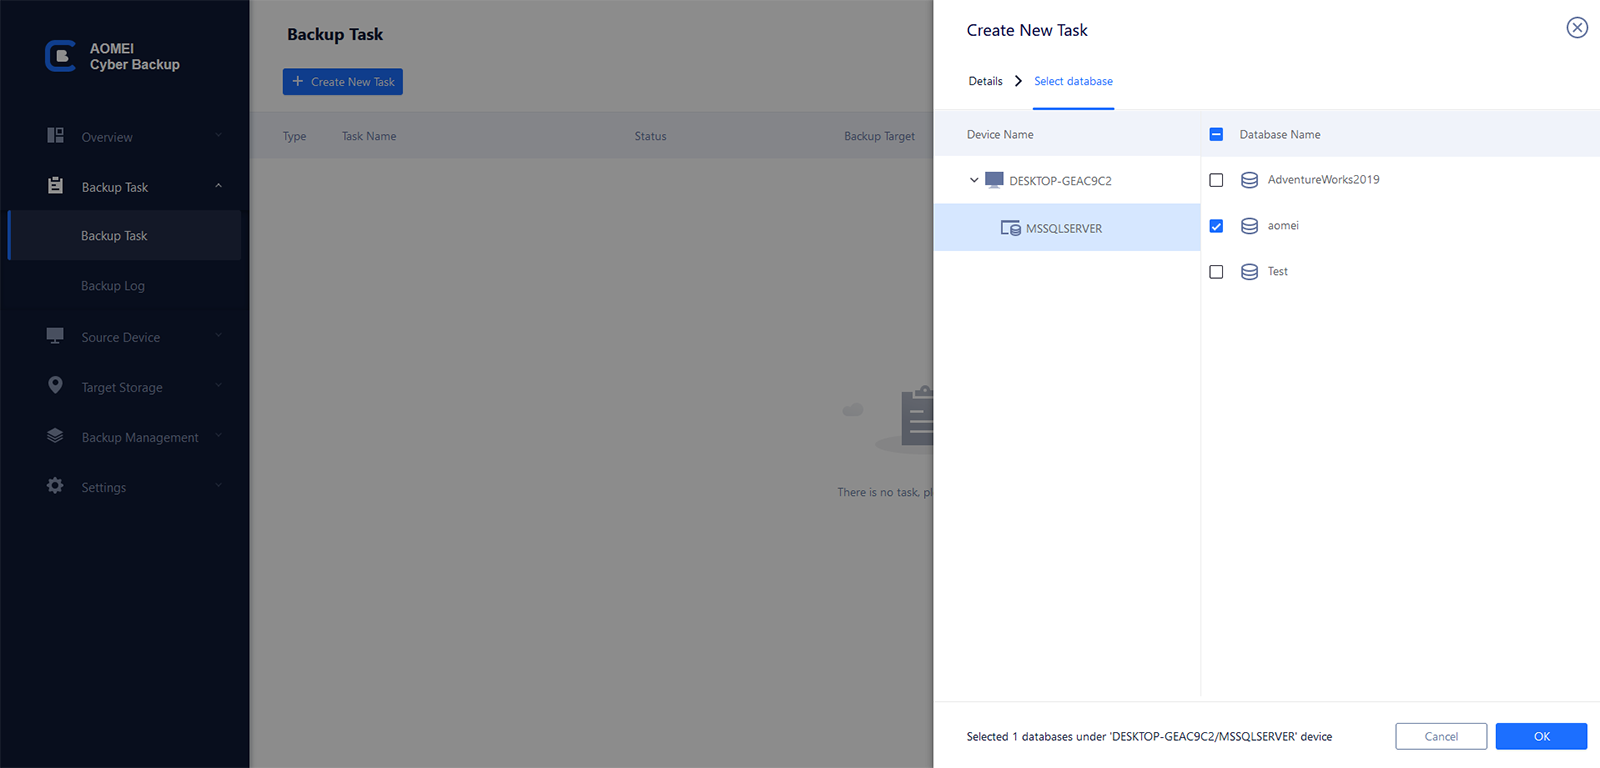
2. Click on Device Name to specify the instance and databases you want to back up. You can select one or multiple databases as you need.
3. Select a Target storage to save your SQL backups, it could be a local path or network path.
4. Set up a backup Schedule to run the SQL database backup daily/weekly/monthly, and choose the backup method as Full/Incremental/Differential.
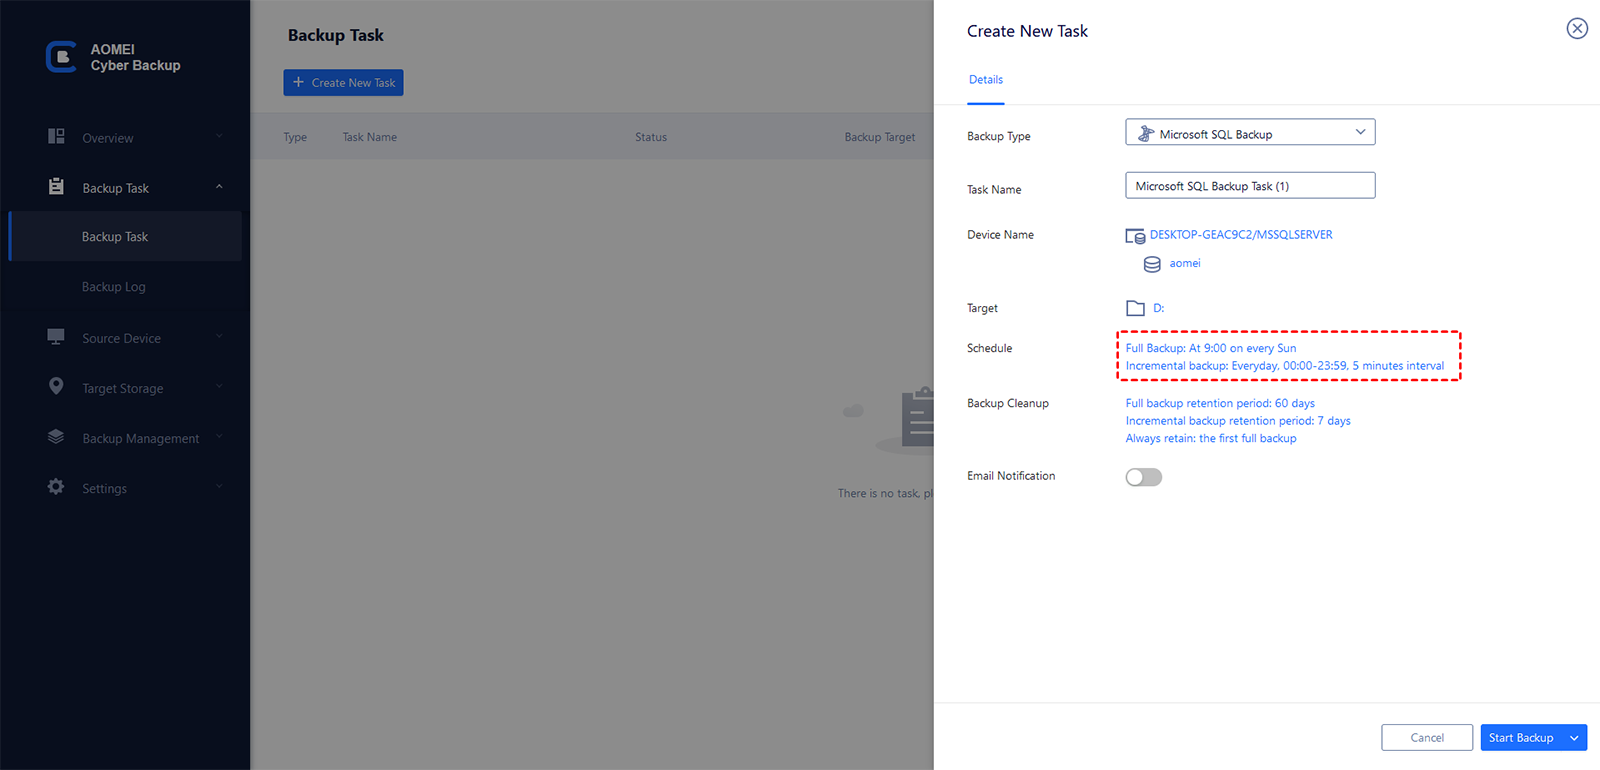
5. Click Start Backup to execute the task. Once it's finished, you will find it in the Backup Task tab.
✍More useful features:
- Backup Cleanup helps you to delete older backup version automatically and therefore save storage space. You can upgrade AOMEI Cyber Backup to enjoy this advanced feature.
- Email Notification enables you to receive email notifications when the task is abnormal or successful.
Verdict
There are two effective methods offered in this page to help you perform SQL Server auto backup every day. If you only want backup solutions for SQL Server, then SQL Server Management Studio can meet your needs. If you want a backup tool that can help with not only SQL Server backup but also regular backups for all computers within your company, then AOMEI Cyber Backup is what you need.

