Ultimate Guide: Surface Laptop Studio SSD Upgrade
This guide explores the steps involved in upgrading the SSD on your Surface Laptop Studio, including the preparation, tools required, and step-by-step instructions. We also cover common questions, offer tips for a successful upgrade, and provide an introduction to safeguard your data during the upgrade process.
By Sebastian Updated on October 10, 2024
Prepare for Surface Laptop Studio SSD Upgrade
Introduction to the tools required for the upgrade process:

-
A new M.2 NVME 2280 SSD for Surface Laptop Studio.
-
Popular options: Kingston NV1 1TB (~$80), Kingston NV1 2TB (~$180), Sabrent Rocket Q 2TB (~$250), Samsung 970 EVO Plus 2TB (~$250-300), Samsung 980 Pro 2TB (~$350).
-
An external enclosure for SSD cloning.
-
T3 Torx screwdrivers, and small tweezers.
-
Optional: Anti-static wrist strap for added protection.
How to Upgrade Your Surface Laptop Studio SSD
Once you have everything ready, you can begin upgrading the SSD in your Surface Laptop Studio. This process will enhance your laptop's performance and storage capacity. Make sure you have all the necessary tools, such as a screwdriver and your new SSD, on hand. Taking your time during the upgrade will ensure everything goes smoothly, and you'll soon enjoy a faster, more efficient device. Let’s dive into the steps to complete the upgrade.
Clone OS and Data to the New SSD
Before you swap out the SSD in your Surface Laptop Studio, it's important to move the Windows operating system and other files from the old SSD to the new one. This step is necessary to make sure your computer can start using the new SSD. To do this, you'll need trustworthy SSD cloning software, such as AOMEI Backupper Professional.
1. AOMEI Backupper includes a "System Clone" option that allows you to copy your SSD to a larger one and set it up to boot. If you only want to copy the operating system, you can use the "System Clone" feature instead.
2. The software helps you make the most of your SSD space and can change disk formats from MBR to GPT.
3. With advanced 4k technology, AOMEI Backupper boosts SSD performance, making your system operate more quickly.
4. It is compatible with all brands of M.2 2230/2280 SSDs, including those from Samsung, Toshiba, WD, and others.
Immediately download this powerful SSD clone software - AOMEI Backupper Professional, and start this step-by-step instruction.
1. Attach the new SSD to your Surface Laptop Studio using an external enclosure.
2. Launch AOMEI Backupper and select "Clone" > "Disk Clone."

Note:
The Professional version of AOMEI Backupper lets you clone both system disks (MBR/GPT) and data disks in various Windows versions like 11, 10, 8, 7, XP, and Vista. If you're using servers, you can opt for AOMEI Backupper Server.
3. Choose the current SSD as the source disk and the new SSD as the destination disk.
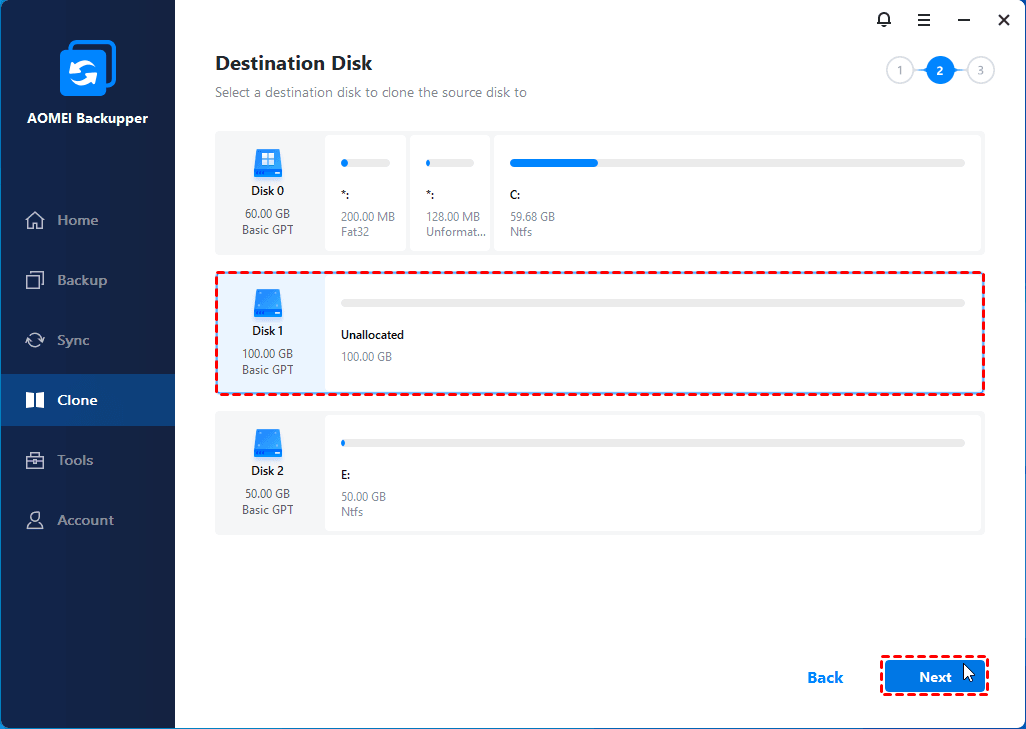
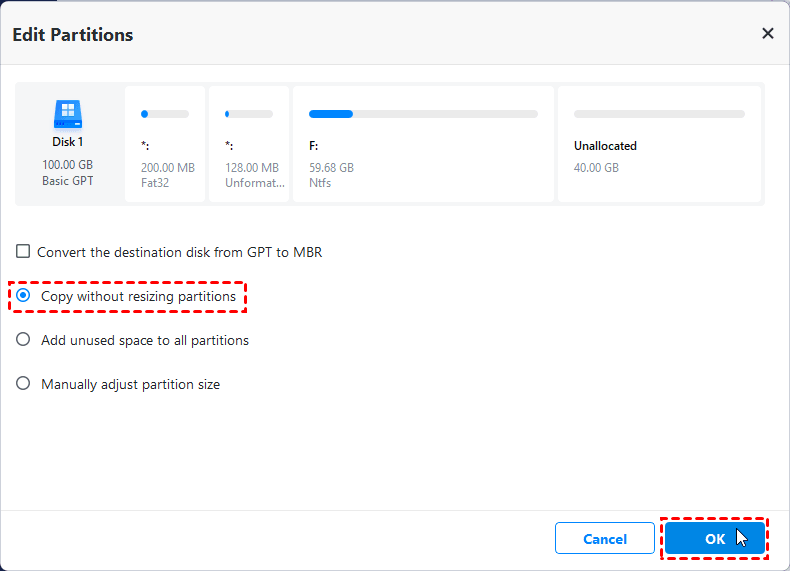
4. To boost your SSD's performance, make sure to check SSD Alignment. To prevent any leftover unallocated space after cloning, click on Edit Partitions. From there, choose to Add unused space to all Partitions or Manually adjust partition size.
5. Start the cloning process and wait for it to complete.
Change the SSD on the Surface Laptop Studio
Step-by-step instructions for physically replacing the old SSD with the new one.
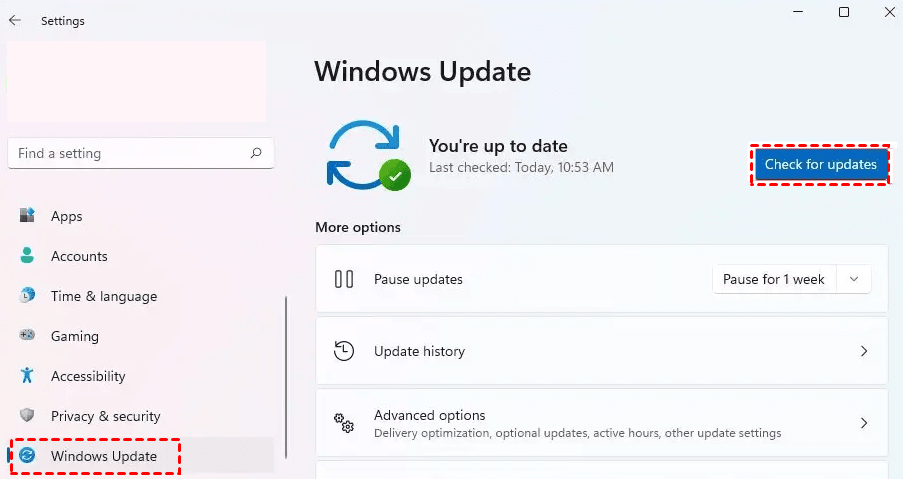
1. Check out if you have installed the latest updates. Follow Start > Settings > Update & Security > Check for updates. Then, select all the available updates.
2. Power off your Surface Laptop Studio and disconnect it from the power source.
3. Remove the rubber cosmetic strip and the two rubber feet on the lower case with tweezers.
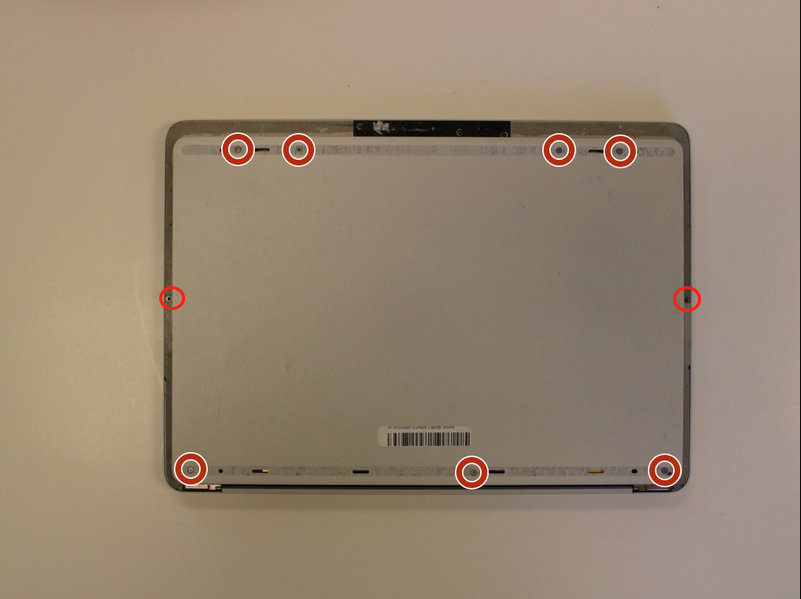
4. Remove the screws from the bottom cover using a T3 Torx screwdriver.
5. Lift the lowercase gently and put it aside.
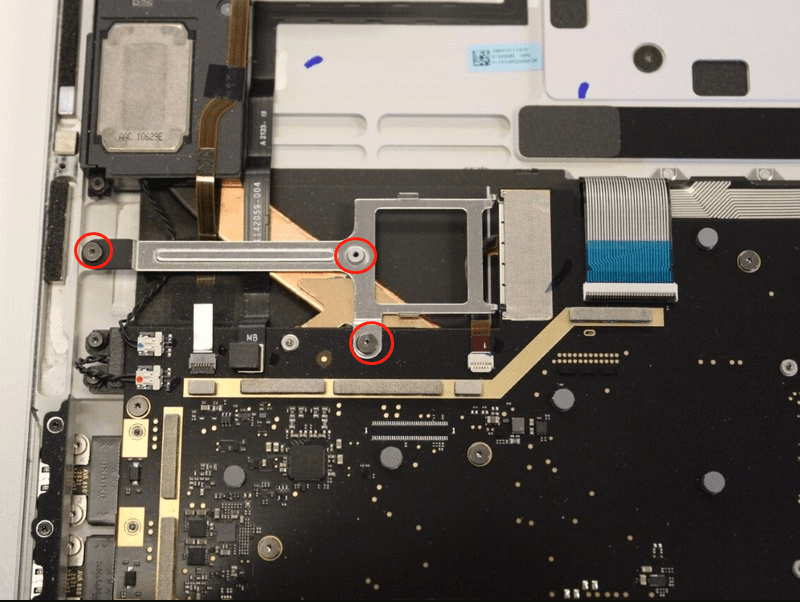
6. Disconnect the battery cable. Then, find the SSD near the motherboard.
7. Remove these 3 screws and replace the old SSD with the new one, ensuring it is firmly seated in the slot.
8. Reassemble the device by replacing the bottom cover and screws.
Boot Your Surface Laptop Studio from the New SSD
-
Start by pressing the power button located in the top right corner of your laptop.
-
Right after, press and hold the F12 key until the Boot Menu pops up on the screen.
-
Navigate through the options using the arrow keys and select the new SSD to boot from it.
Reasons for Surface Laptop Studio SSD Upgrade
To enhance the performance and storage of your Surface Laptop Studio, upgrading the SSD is key. If you require extra space for your files or want quicker read and write speeds, a new SSD can greatly improve your device’s performance. In this guide, we have discussed the benefits of upgrading your SSD and offered step-by-step instructions on how to do it.
▶ Increased Storage Capacity: Upgrading your SSD provides more room for documents, videos, and software, preventing storage issues.
▶ Improved Speed and Performance: A high-speed SSD enhances your Surface Laptop Studio with quicker startup times and faster app loading.
▶ Enhanced Productivity: A better SSD reduces delays, making your work more efficient, whether for complex tasks or everyday activities.
▶ Future-Proofing Your Device: Upgrading your SSD ensures your laptop can handle future software updates and demands.
▶ Customization and Personalization: An upgraded SSD lets you customize your laptop for more storage or faster speeds based on your needs.
FAQs about Surface Studio SSD Upgrade
Still, have questions about The Surface Studio SSD upgrade? Check out these frequently asked questions for hot tips.
Q 1: How much does it cost to upgrade the SSD on Surface Laptop Studio?
A 1: The cost of upgrading the SSD will depend on the capacity and brand of the new SSD you choose.
Q 2: Can I use any SSD to upgrade my Surface Laptop Studio?
A 2: Surface Laptop Studio supports M.2 PCIe NVMe SSDs, so ensure you choose a compatible SSD for the upgrade.
Q 3: Do I need to back up my data before upgrading the SSD?
A 3: It's always a good idea to back up your data before performing any hardware upgrades to avoid data loss.
Pro Tips for a Successful Surface Laptop Studio SSD Upgrade
-
Backup Your Data Thoroughly: Ensure all important files are backed up before you begin. Using reliable software like AOMEI Backupper can make the process smoother and safer.
-
Check Compatibility: Always verify the compatibility of your new SSD with the Surface Laptop Studio to avoid installation issues.
-
Perform Regular Backups After Upgrade: Regular backups to an external drive or cloud storage ensure your data remains safe even after the SSD upgrade.
Bottom Line
Upgrading the SSD on your Surface Laptop Studio can greatly enhance your device's performance and storage capacity. Whether you choose to clone your current SSD, install a fresh version of Windows, or use an external SSD, following the right steps and preparing properly will ensure a smooth process. Also AOMEI Backupper Standard is available to create Windows 8.1 image backup, allowing you to enjoy the benefits of a faster, more efficient laptop.