Learn How to Unsync OneDrive from PC [5 Ways Available]
Read this article to learn how to unsync OneDrive from PC from this post. OneDrive is the Microsoft cloud service that helps you sync files to the Cloud. But some people may want to unsync OneDrive from PC. In case of data loss, remember to make a backup of your files first.
By Yuka Updated on May 29, 2024
User Case
How to REALLY unsync OneDrive?
“I looked up how to unsync OneDrive and unsynced as well as not allowing OneDrive to start when I boot the computer. After 2 Win10 updates, OneDrive is now syncing again, though OneDrive is NOT starting up when I power up. I am very frustrated and want to make sure my files are NOT synced to OneDrive. I really don't need OneDrive, but I thought I would be another useful cloud option. But it turned into a disaster. What can I do to unsync OneDrive from my PC?”
- Question from Tom’s Hardware
OneDrive is Microsoft's cloud storage solution that you can use to store files and personal data like Windows settings in the cloud, share files, and sync files across Windows computers. It was first launched in August 2007. OneDrive offers 5 GB of storage space free of charge, with 100 GB, 1 TB, and 6 TB storage options available either separately or with Office 365 subscriptions.
But the problem is that it may pop up from time to time to ask you to back up your data, or it may slow down your Internet and PC speed. Therefore, some users believe that they do not need OneDrive and want to learn how to unsync OneDrive from PC.
Why Need to Unsync OneDrive from PC
Unsyncing OneDrive from your PC can be essential for several reasons, especially if you want to manage your storage space more efficiently, improve your computer's performance, or ensure data privacy. Here are a few common scenarios where unsyncing OneDrive can be beneficial:
📌Free Up Local Storage Space: If your PC's hard drive is running low on space, unsyncing OneDrive can help. By stopping OneDrive from syncing files to your local drive, you can free up valuable storage space while still keeping your files accessible online.
📌Improve System Performance: Continuous syncing of files between your PC and OneDrive can consume system resources, slowing down your computer. Unsyncing OneDrive can reduce the load on your system, leading to better performance, especially on older machines.
📌Protect Sensitive Data: If you have sensitive or confidential files that you don't want to be stored in the cloud, unsyncing OneDrive ensures that these files remain only on your local machine, providing better control over your data's privacy and security.
📌Troubleshoot Sync Issues: If you're experiencing problems with OneDrive syncing, temporarily unsyncing and then resyncing can often resolve issues, providing a fresh start for the sync process.
Learning how to unsync OneDrive can be a straightforward solution to various issues, allowing you to manage your storage, performance, and data privacy more effectively.
How to Unsync OneDrive from PC in Windows 11/10
In this part, you will learn how to unsync OneDrive from your PC either temporarily or permanently. By following the steps provided, you can choose the best option that fits your needs, whether it's for a short-term fix or a more lasting solution. Understanding these methods will help you manage your OneDrive synchronization more effectively.
📌Way 1. Pause OneDrive Sync in Windows 11/10 (Temporarily)
📌Way 2. Unsync Specific Files from OneDrive in Windows 11/10
📌Way 3. Disable OneDrive to Unsync from PC
📌Way 4. Unlink OneDrive from Your Windows 11/10 PC
📌Way 5. Uninstall OneDrive Directly from Windows 11/10 PC
Way 1. Pause OneDrive Sync in Windows 11/10 (Temporarily)
Sometimes, you don't know how to unsync OneDrive, instead of disabling OneDrive completely, you want to pause the syncing process for a while. OneDrive lets you pause the background syncing process (including upload and download) for 2, 8, and 24 hours. Follow the steps below to learn how to unsync files from OneDrive:
- Click the overflow icon “^” on the right side of the taskbar and click on the “OneDrive” icon in the overflow area.
![]()
Tip✍: If you don’t see the OneDrive icon in the overflow area, click on the Windows (Start) icon and search for “OneDrive”. Then, click on “OneDrive” in the search results.
- Next, click on “Help & Settings” in the OneDrive window. Then, click the “Pause syncing” menu and choose a time frame for which you want to disable sync.
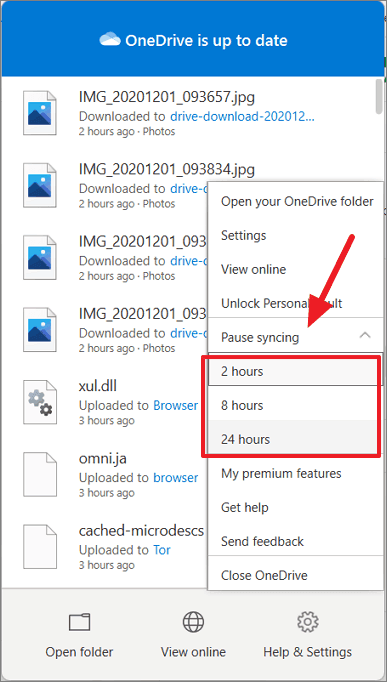
This will stop the synching process of the selected time and it automatically starts the process after that time is over.
Way 2. Unsync Specific Files from OneDrive in Windows 11/10
Instead of disabling the synchronization of all files and folders stored on your computer, you can learn how to unsync OneDrive specific files from PC in this part.
- Click the overflow icon “^” on the right side of the taskbar and click on the “OneDrive” icon in the overflow area.
![]()
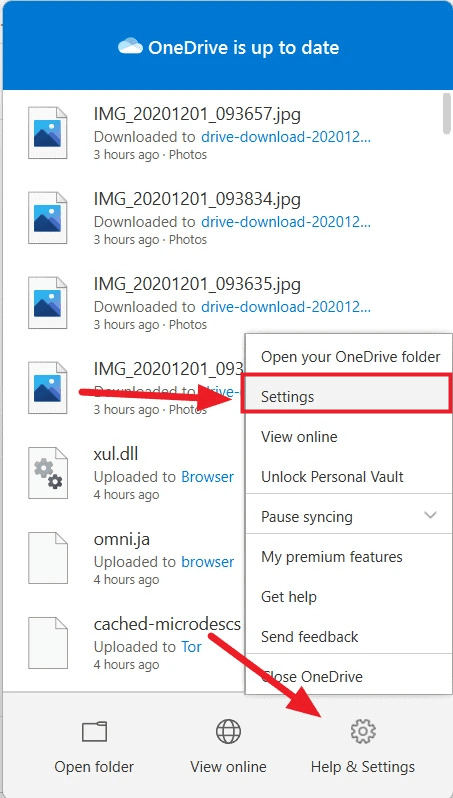
- Next, click on the “Help & Settings” button and select “Settings” from the menu that appears.
- In the OneDrive settings window, go to the Account tab, and click on the “Choose folders” button.
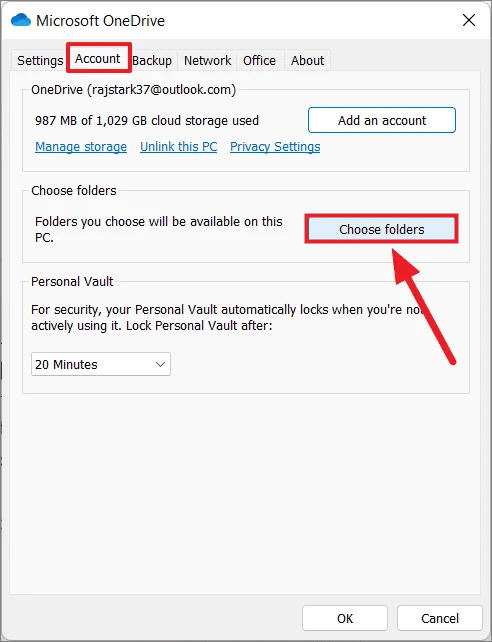
- This will show all folders that OneDrive is currently backing up (synchronizing) to the cloud. Uncheck the folders that you don’t want to sync and click OK. You could uncheck all the folders to unsync all the folders.
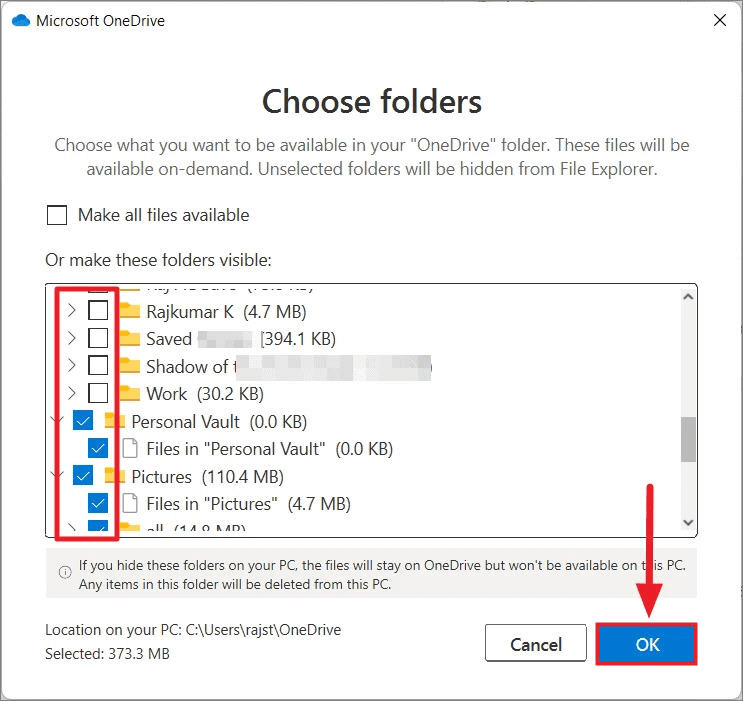
Note✍: You cannot unselect some of the default Windows folders such as the “Desktop” folder in Documents and “Camera Roll” and “Screenshots” folder in Pictures.
Way 3. Disable OneDrive to Unsync from PC
If you want to know how to unsync OneDrive from PC, you don’t need to completely uninstall it. You can disable the service and leave it on your computer for future use. Here are 5 ways to turn off this service.
#1. Disable OneDrive from Startup Using Windows Settings
By disabling the application from the list of startup applications in Windows 11 settings, you can easily prevent OneDrive from automatically starting during Windows 11 startup.
- Press Win + I together to open Settings.
- Next, select Apps in the left panel and click Startup on the right side.
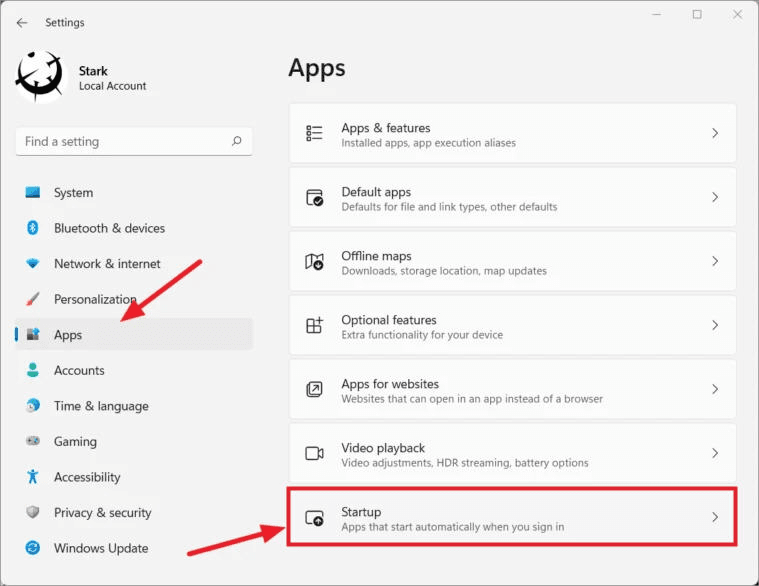
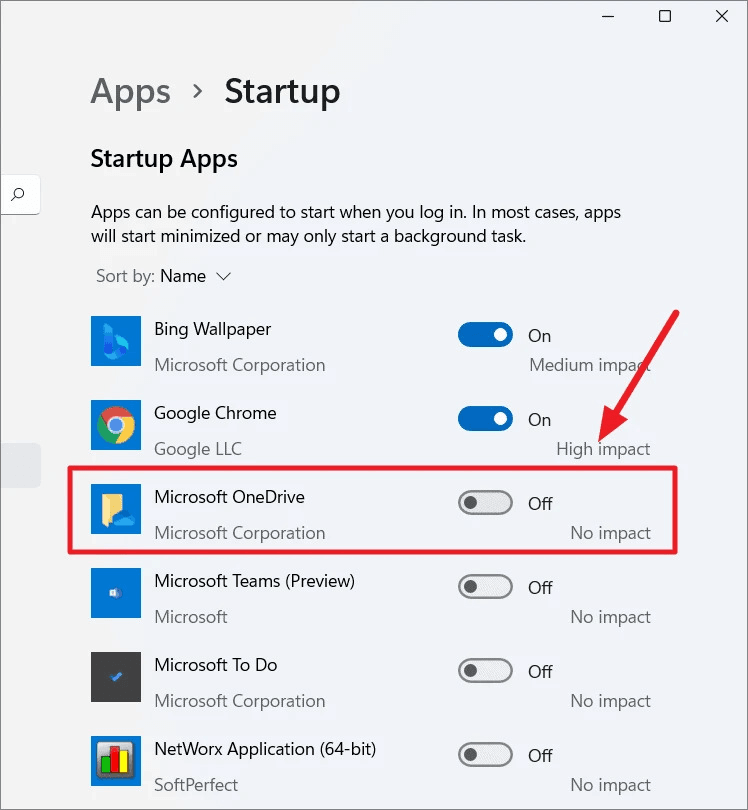
- Then, turn off the switch next to the "Microsoft OneDrive" option in the list of startup applications.
#2. Disable OneDrive from Startup Using Task Manager
Another way to disable OneDrive from the startup application is through Task Manager.
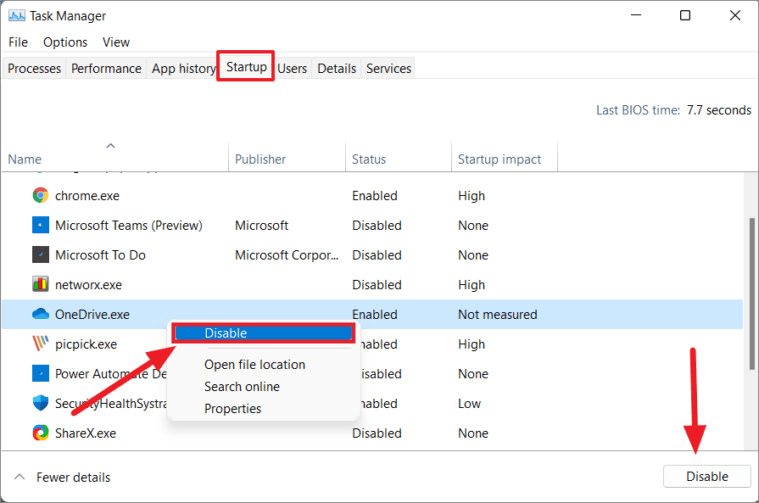
- Press Ctrl + Shift + Esc together to open Task Manager.
- Then, click the “Startup” tab in the Task Manager window. From the list of startup programs, right-click on “Microsoft OneDrive” and then select “Disable”. (or you can click the “Microsoft OneDrive” app and click the “Disable” button at the bottom right corner of the window)
Now, you have already unsyned OneDrive from PC. After that, OneDrive will only run when you manually start it.
#3. Disable OneDrive through the Group Policy Editor
You can also unsync OneDrive from PC through the Group Policy Editor, which allows users to change many important settings on their computers. To disable OneDrive through GPE follow these steps:
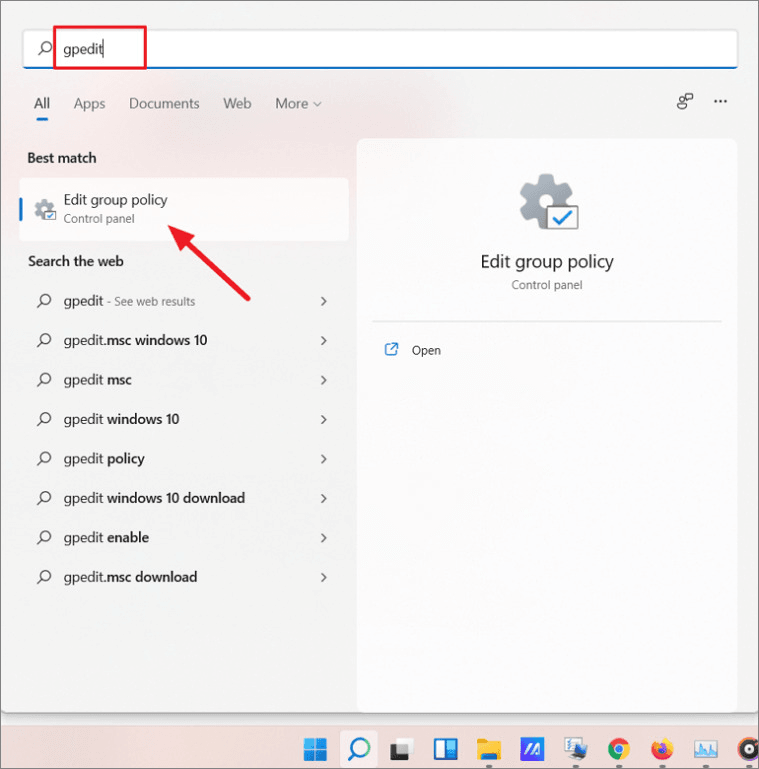
- Click the Start menu and type “gpedit” to open Edit Policy Editor control panel from the result.
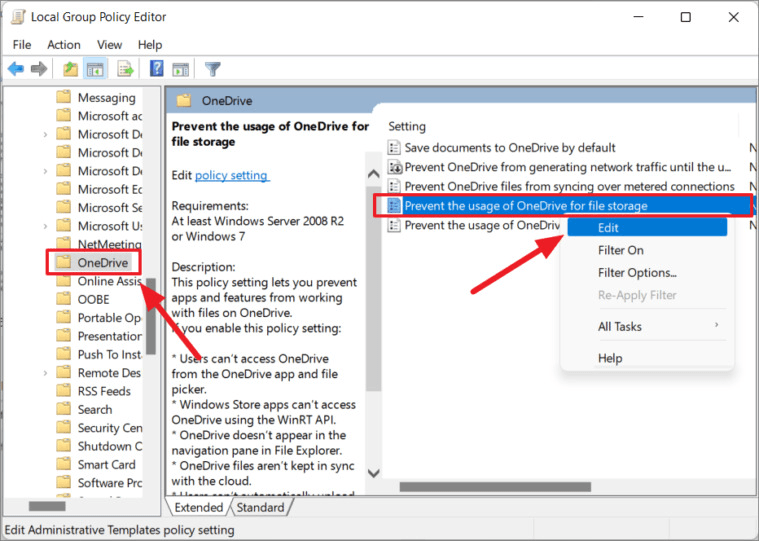
- In the Group Policy Editor, navigate to the following location from the left navigation bar.
☛ Computer configuration -> Administrative Templates -> Windows Components -> OneDrive - Then, double-click on “Prevent the usage of OneDrive for file storage” from the right pane or right-click on the setting and select “Edit”.
- Then, select “Enabled” from the top left menu, and then click “Apply” and “OK”.
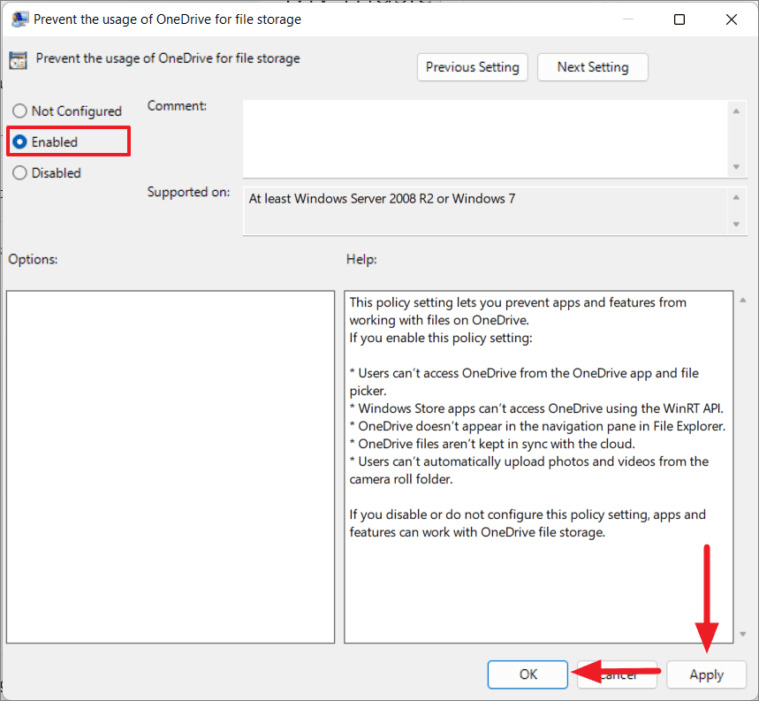
This will disable the OneDrive program including its background and syncing processes.
#4. Disable OneDrive on Windows 11/10 via Registry Editor
You can also try the method of how to unsync OneDrive from PC on Windows 11/10 through the registry editor.
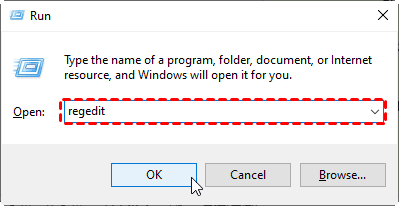
- Press the Win + R keys together, type in regedit and press Enter to open the Run dialog.
- Next, navigate to the following location or copy-paste the below location in its address bar and hit Enter:
☛ Computer\HKEY_LOCAL_MACHINE\SOFTWARE\Policies\Microsoft\Windows\OneDrive - Then, look for the DWORD named “DisableFileSyncNGSC” in the right pane double-click on it, and change its value to “1”.
What if there is no “DisableFileSyncNGSC” DWORD or “OneDrive” folder in Registry Editor?
If you cannot find the "DisableFileSyncNGSC" DWORD or "OneDrive" folder in the location specified above, you need to create a new folder and change the value data. You need to do this:
- Right-click on the “Windows” folder, and select New -> Key in order.
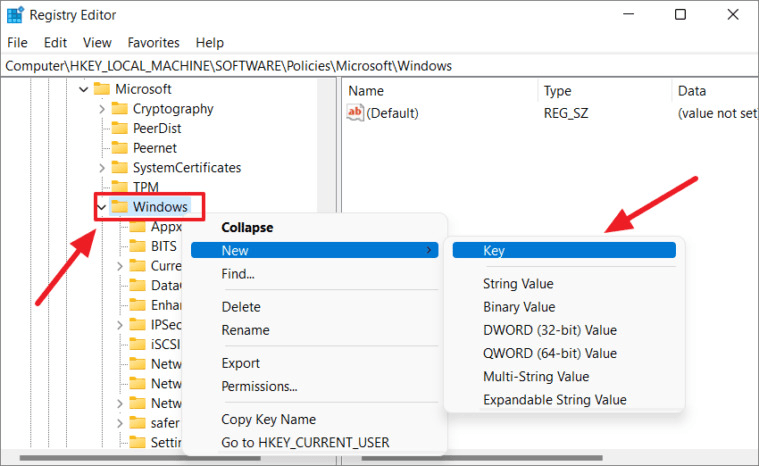
- Then, rename the folder (Key) into “OneDrive”.

- Next, right-click the “OneDrive” folder, and select New -> DWORD (32-bit) Value.
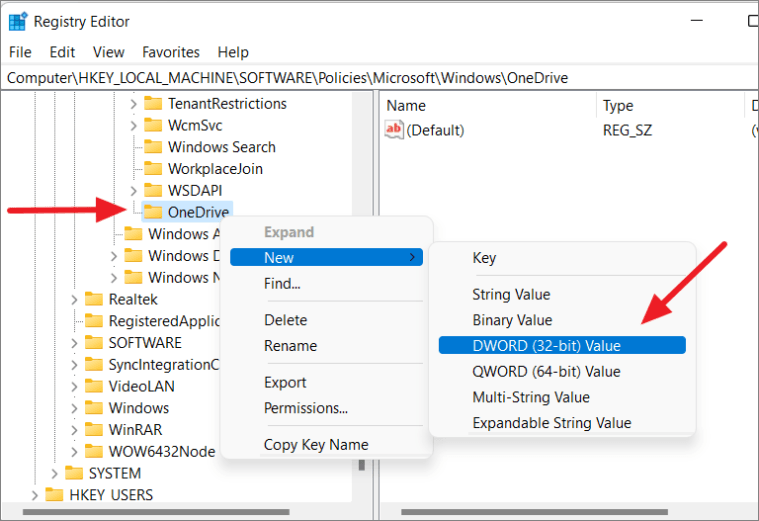
- This will generate a new DWORD value named “NewValue #1”. Rename that value to “DisableFileSyncNGSC” and double-click on it. Change the value to “1” I and click OK.

When finished, restart the system to apply the changes. If you want to re-enable OneDrive, just change the value of "DisableFileSyncNGSC" to 0.
Way 4. Unlink OneDrive from Your Windows 11/10 PC
Unlinking your OneDrive account from your PC will stop your PC from updating and syncing data with the cloud. You will not lose any files or data that are already synced. At the same time, you can always access updated and synchronized files by logging back into the OneDrive app or OneDrive.com. So, how to unlink OneDrive from PC? Here are the detailed steps:
- Open the OneDrive settings window like Way 2.
- In the OneDrive settings window, go to the “Account” tab and click “Unlink this PC”.
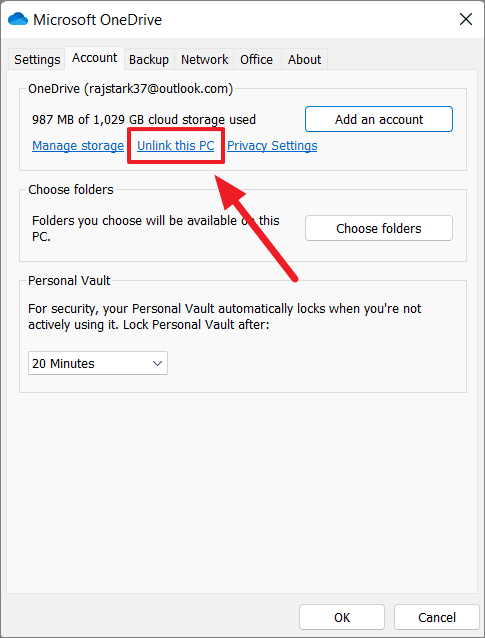
- Then, a confirmation dialog box will pop up. Click the “Unlink Account” button.

This will log you out of your OneDrive account on your PC and stop syncing your files with the cloud.
Way 5. Uninstall OneDrive Directly from Windows 11/10 PC
To permanently stop OneDrive from syncing, you can uninstall the OneDrive app from your Windows 10 or 11 PC. Follow the guide below to complete this process of how to unsync OneDrive:
1. Open the Control Panel via the search box and set the view to Category.
2. Click on "Uninstall a program" under the Programs section.
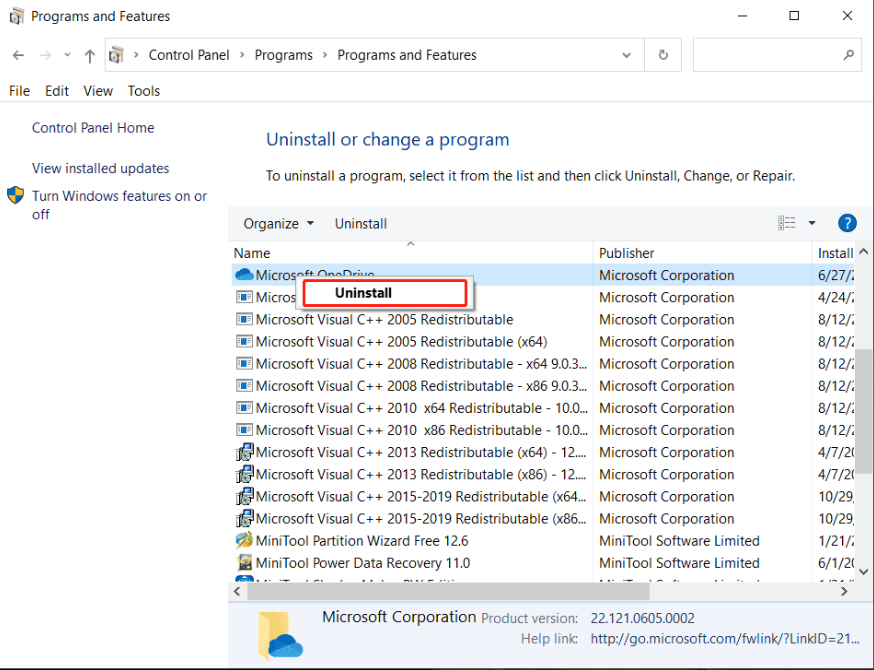
3. In the Programs and Features window, right-click on "Microsoft OneDrive" and select "Uninstall."
4. Confirm it to remove the app.
Backup Important Files to Prevent Data Loss
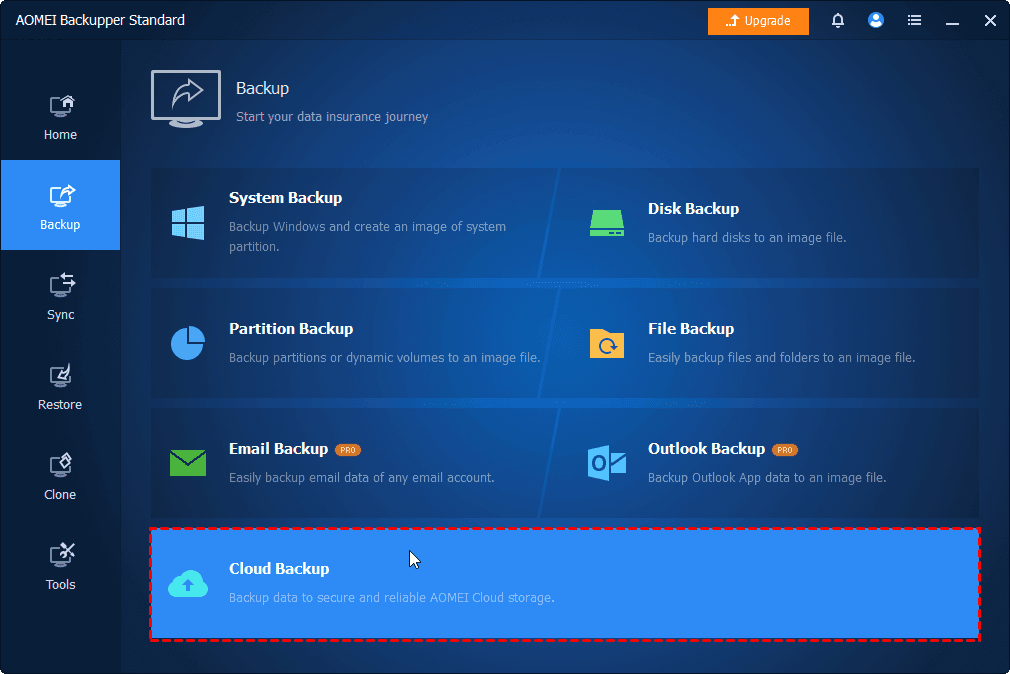
The above four ways can help you unsync OneDrive from PC. But in order not to lose your files when you modify Windows settings, you'd better back them up in advance. Here, I recommend a free backup software for Windows 11/10/8/7 —AOMEI Backupper Standard. This software is fully functional and easy to operate. Backing up your files only takes a few clicks. Click the download button below and install it on your computer.
To backup files in your computer, click Backup -> File Backup in turn after launching this software. Then the software will ask you to select the files or folders to be backed up and the backup destination. After finishing all the settings, click Start Backup.

More backup functions:
✵ Schedule backup: You can set automatic backup daily/weekly/monthly/event triggers/USB plug-in. It will help users continuously backup data so you will never miss any changes. The last two are available at least in AOMEI Backupper Professional.

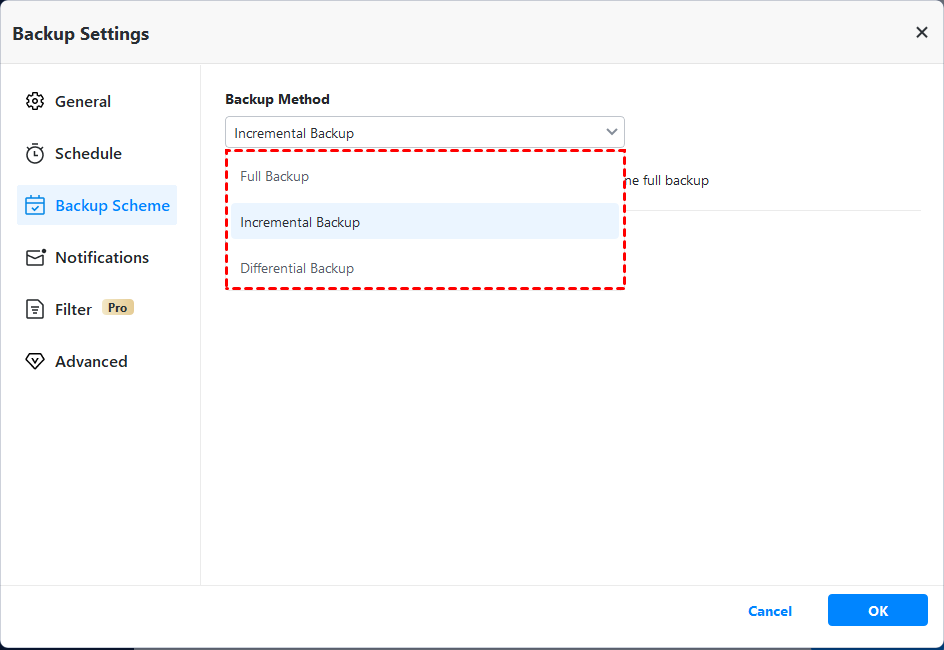
✵ Backup Scheme: 3 backup methods are provided: Full Backup, Incremental Backup, and Differential Backup. (Differential Backup is available in advanced versions.) You can also enable automatic backup cleanup to delete the old backups to save your disk space using advanced versions.
✵ Cloud Backup: If you have an AOMEI account, you can backup files to AOMEI Cloud. It offers you 1TB of free storage for 15 days after you sign up for an AOMEI account.
FAQs about how to unsync OneDrive
1. Why is OneDrive syncing everything?
OneDrive might sync all your files if you've enabled the Manage Backup feature. This happens because OneDrive automatically backs up files saved in the Documents, Pictures, and Desktop folders, even if you don't want them synced.
2. What happens to my files if I cancel OneDrive?
If you delete your OneDrive subscription, all data and content in SharePoint Online, including OneDrive, are immediately removed, bypassing the usual Expired and Disabled statuses.
3. Why is OneDrive syncing everything?
OneDrive syncs all files when the Manage Backup feature is turned on. This feature causes OneDrive to automatically back up and sync files from your Documents, Pictures, and Desktop folders.
To Sum Up
In a nutshell, this article provides you with 5 ways on how to unsync OneDrive from PC on Windows 11/10. Hope you can solve your problem with these methods. However, at the same time, in order to ensure the safety of your files or data, you’d better back them up in advance.
If you are experiencing the OneDrive Sync pending error, AOMEI Backupper can also help you. In addition to backup, there are more powerful functions waiting for you to explore. Try it at once!

