2 Ways to Unpack Windows Backup File and Restore Individual Files
As the built-in Backup and Restore tool in Windows won’t allow you to restore individual files from a system image backup, this page will show you how to unpack Windows backup file via Disk Management and AOMEI Backupper in detail.
By Lily Updated on November 11, 2024
Want to restore individual files from Windows system image backup
Backup is regarded as the most fundamental disaster recovery technology. To help users backup their system and important files, Windows has built in a backup tool named Backup and Restore. With Backup and Restore, you can:
▶ Create a system image which can be used to restore your computer if your computer ever stops working. However, you can’t choose individual items to restore.
▶ Set up a custom backup to backup multiple drives or specific folders. You can restore individual files with the Restore Files wizard under this circumstance.
There are times when you want to retrieve specific files but you have only made a Windows system image backup. One user posted his experience in the forum:
“Hi everyone,
I lost a file by accident. I have a Windows Image Backup which I believe contains this file but understand that I cannot restore individual files from this Image Backup. Is it possible to restore the Image to an external drive then copy the lost file to the Local Disc C without overwriting other files?”
How to mount WindowsImageBackup and restore individual files? Please read on.
👉 Extract files from Windows 10 backup with Disk Management
👉 Unpack Windows backup file via AOMEI Backupper🔥
Extract files from Windows 10 backup with Disk Management
Actually, a system image is saved as a VHD file with the .vhd or .vhdx file extension. The VHD file can be attached (mounted) as a separate disk using Disk Management, thus making it possible to browse the contents of a system image and extract individual files. Follow the guidance below to mount WindowsImageBackup and extract files:
1. Right click on This PC and hit the Manage option. In the pop-up window, click Disk Management on the left panel.
2. In Computer Management, go to the Action Menu and select Attach VHD.
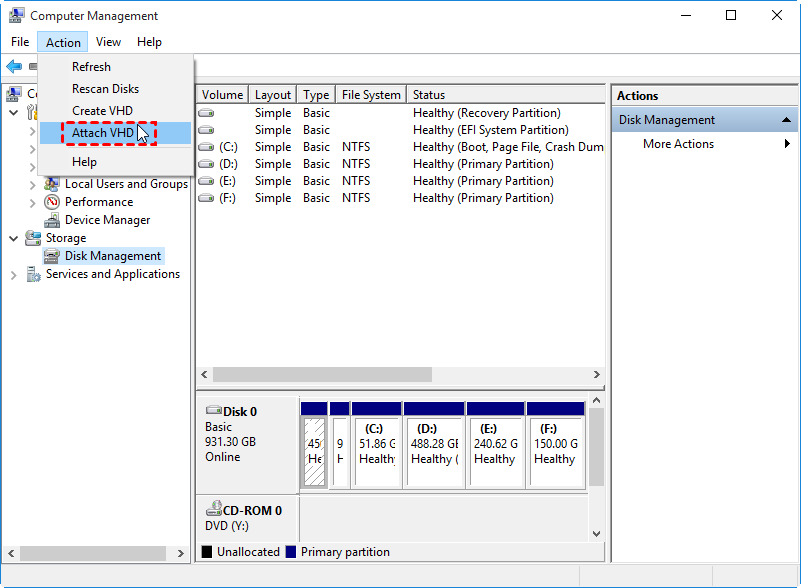
3. Click Browse to locate the system image backup file. Then, click OK to start attaching VHD.

✎ Tips:
• System images are saved in "[Drive Letter]\WindowsImageBackup\[Computer Name]\Backup [year-month-day] [hours-minutes-seconds]".
• You may find several VHD files under the path. That’s because all system-related partitions are backed up, not only C drive. You may choose the correct VHD file according to the file size.
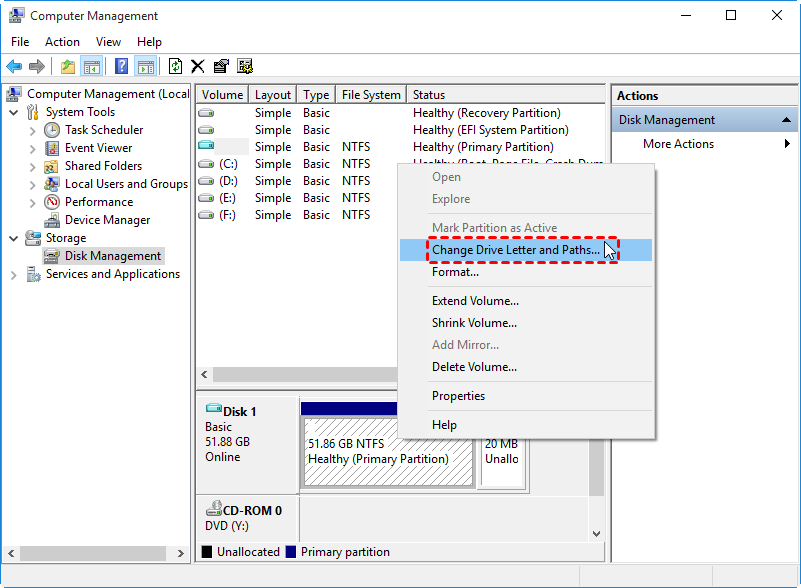
4. To access the mounted drive in File Explorer, you need to assign a drive letter for it. Right click on the attached drive and select Change Drive Letter and Paths to add a drive letter.
5. Press Win + E to open File Explorer. Double click on the newly-added drive, find the files you want to retrieve and copy them to another drive.
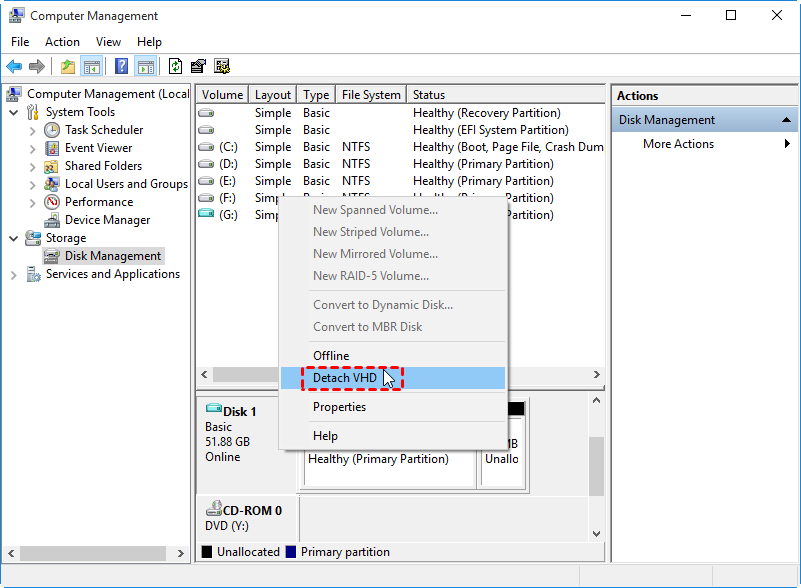
Once you’ve done copying files from the backup, you can detach the mounted drive by right clicking the “Disk” box that corresponds to the VHD in the Disk Management window and select Detach VHD.
Unpack Windows backup file via AOMEI Backupper
AOMEI Backupper Professional, all-in-one backup software for Windows 10/8.1/8/7/Vista/XP, makes it easier to extract files from Windows backup. If you have created a system image backup via AOMEI Backupper, you may use the Explore Image feature to restore specific files instead of the entire system. All operations can be done in AOMEI Backupper, no extra tools needed.
It also enables you to run file backup for your important files so that you can restore them without mounting an additional drive. Learn how to extract individual files from a Windows 10 system image backup using AOMEI Backupper below. Before you start, please click on the download button to securely download this professional backup tool.
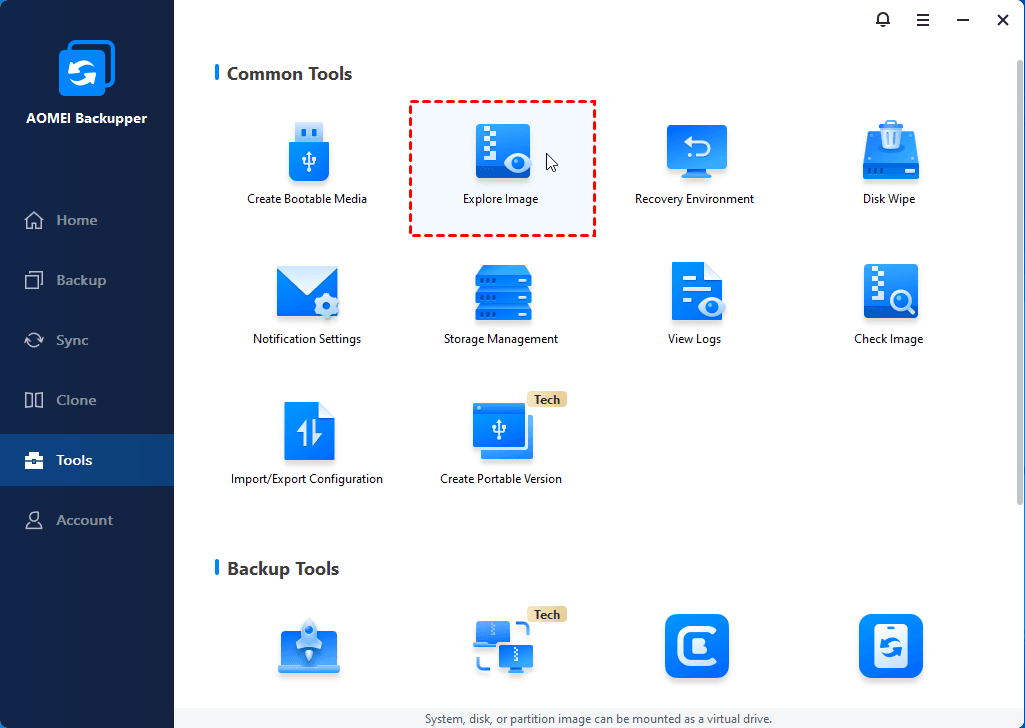
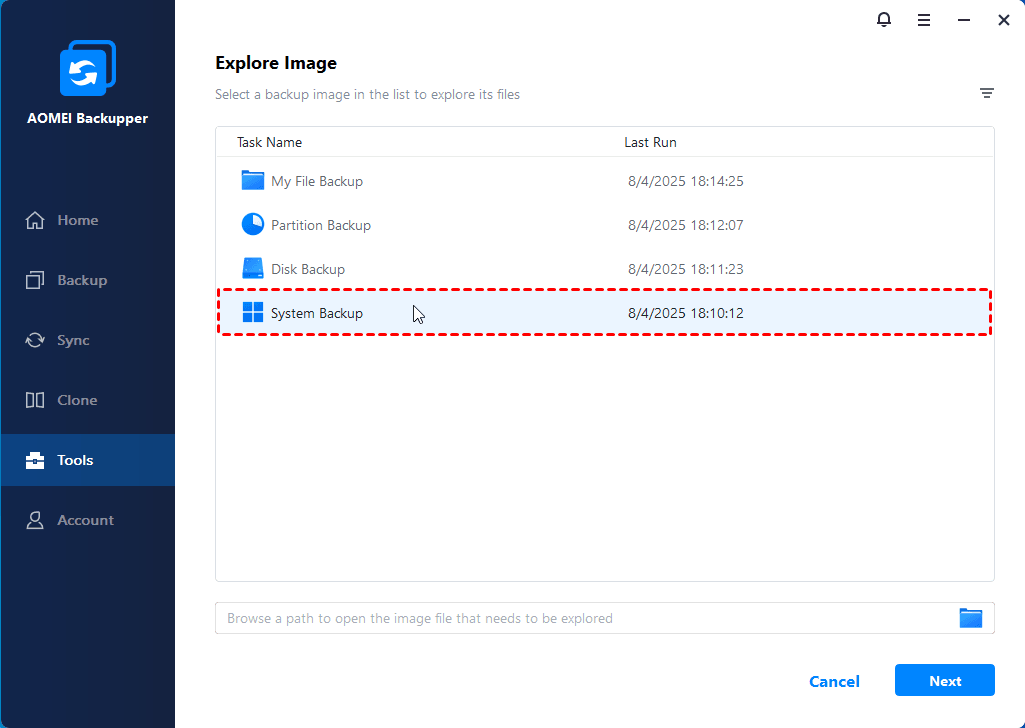
Step 1. Click “Tools” from the left panel and then select “Explore Image”.
Step 2. Select the system backup task to extract files and click “Next”.
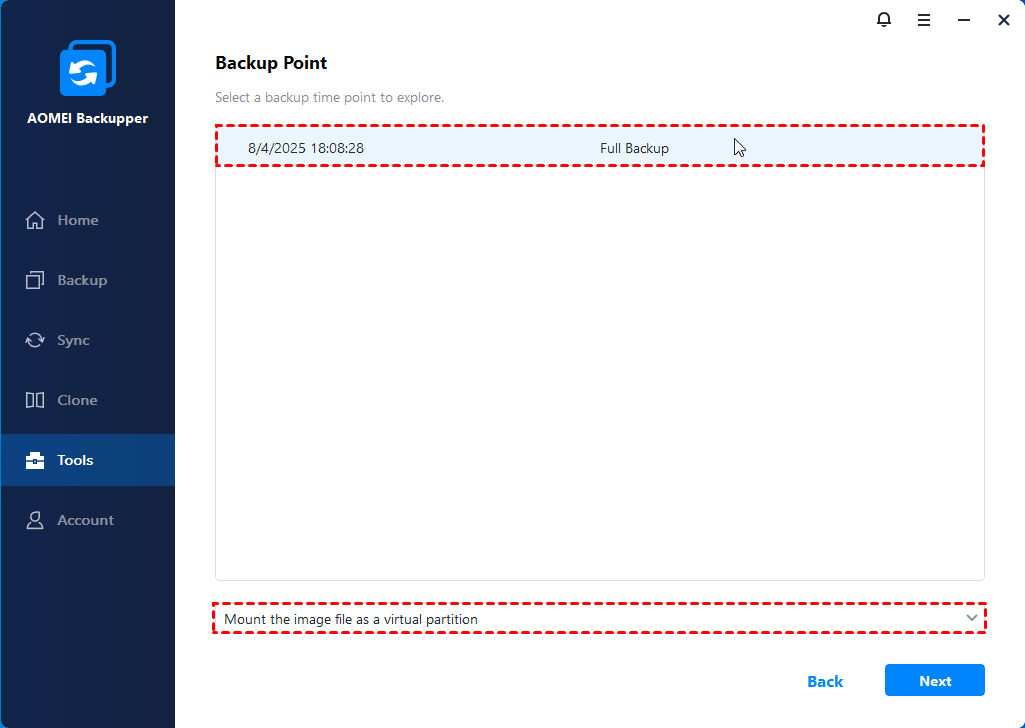
Step 3. Select a backup point and click “Next”. If you have run the system backup task several times, there would be different backup points available. You can select one according to the date.
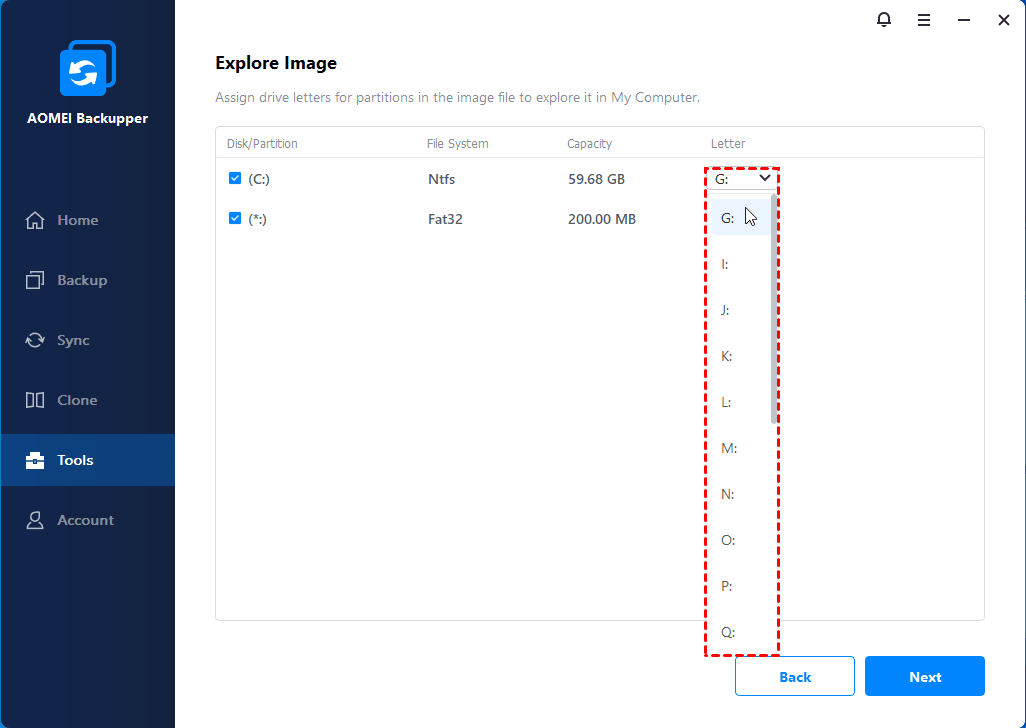
Step 4. Tick the drive(s) you want to mount and assign drive letter(s) for it (them). Then, click “Next” to mount the image.
Step 5. Wait for the process to complete and click “Finish”. Then, explore the contents in your backup image from Windows Explorer or This PC. Copy and paste the files you want to recover.
✎ Tip:
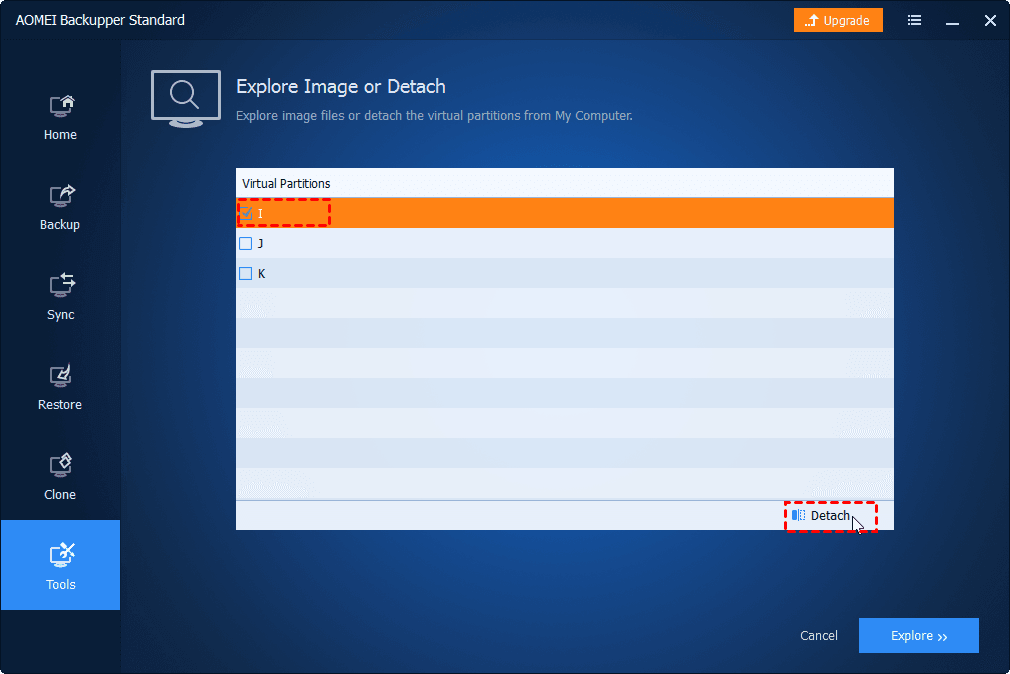
The mounted drive will be removed automatically upon your next boot. You can also detach it manually by going to “Tools” > “Explore Image” > Select the virtual drive > Click “Detach”.
Verdict
If you want to restore individual files from Windows system image backup, you can unpack Windows backup files with Disk Management. Or you can turn to the all-in-one backup software—AOMEI Backupper. It enables you to backup the operating system, disks, partitions and specific files based on your needs. With the Explore Image feature, you are able to mount a system/disk/partition image as virtual drives so as to extract individual files. Why not try it now?

