How to Remove Info from Computer Before Recycling Effectively
Before recycling your computer, it's crucial to remove all personal information to protect your privacy. This guide provides step-by-step instructions on securely erasing data, including using built-in tools and specialized software, to ensure your sensitive information is completely wiped and unrecoverable.
By Rosie Updated on February 13, 2025
Before you recycle your old computer, it’s essential to remove all the data stored on it. Your computer likely holds a lot of personal and sensitive information, from documents and photos to passwords and emails. If you don’t erase this data before getting rid of the device, it could easily fall into the wrong hands. Hackers or opportunistic thieves could potentially recover and misuse your personal information, leading to identity theft, privacy violations, or financial loss.
To avoid such risks, it’s important to take the right steps to ensure your data is completely wiped before you recycle or sell your computer. In this guide, we’ll walk you through the essential steps for how to remove info from computer before recycling and securely preparing your computer for recycling.
Backup Essential Data Before Deleting
Before you learn how to remove data from computer before recycling, it’s critical to back up any essential files you want to keep. Think of it as a precaution to ensure nothing important gets lost in the process.
How to back up your files?
AOMEI Backupper is an excellent option for securely backing up large amounts of data before you wipe your computer. The software allows you to create full backups, including the operating system, settings, and all files. You can even create an image of your entire hard drive, so if needed, you can restore your computer to its exact previous state.
To ensure your backup is secure, always use encrypted storage with AOMEI Backupper security features.
Step-by-Step Guide to Remove Info for PC
1. Sign Out and Deauthorize Accounts
Before you erase any data, it’s crucial to disconnect your accounts from the computer. Leaving your accounts signed in can create security risks for anyone who gains access to your device later. Signing out and deauthorizing apps ensures that no one can access your personal information or misuse your subscriptions, such as email, social media, or banking apps.
How to sign out of all accounts:
- Go through each program or service you use and sign out (email clients, social media, cloud storage, etc.).
- Don’t forget to deauthorize apps like Adobe Creative Cloud, or Microsoft Office from your computer. These apps often link your licenses to your device, so it’s important to remove this connection.
How to ensure you're no longer linked to your device:
- In your account settings, look for an option to deauthorize or unlink devices.
- For Google, go to your Google Account settings > Security > Manage Devices, and remove any linked devices.
2. Factory Reset Your Operating System (OS)
A factory reset is one of the easiest ways to restore your computer to its original state and erase most of your personal data. While a factory reset may not completely wipe everything (especially on SSDs), it does remove most data stored on the hard drive.
How to perform a factory reset:
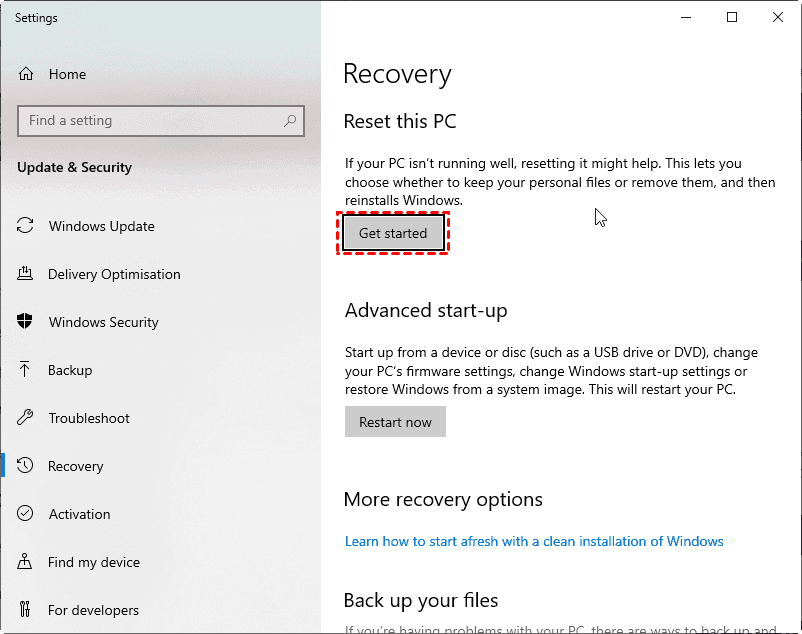
- Go to Settings > Update & Security > Recovery
- Click Reset this PC.
- Choose Remove Everything to wipe all files.
While a factory reset is effective, it may not erase all data completely. For example, data on an SSD (Solid State Drive) might still be recoverable with special software. That’s why a more secure method, like data-wiping software, is a safer bet.
3. Use AOMEI Backupper to Safely Erase All Info
For an extra layer of protection, consider using software like AOMEI Backupper Professional to securely erase all your data. Unlike a factory reset, AOMEI Backupper ensures that your files are wiped beyond recovery by overwriting them several times.

-
Erase an entire disk, specific partitions, or unallocated space so that data is permanently unrecoverable.
-
Supports all types of storage devices, including internal hard drives, USB drives, and SD cards, with compatibility for brands like Samsung, SanDisk, and Western Digital.
-
Utilizes military-grade data-wiping algorithms to ensure complete data destruction.
Steps to wipe all your PC data:
Step 1: Open the software and go to the left sidebar. Click on "Tools," then choose "Disk Wipe" under the "Common Tools" section.

Step 2: Next, you’ll be directed to the page where you can select the wiping type. You’ll have two options: Wipe partitions or unallocated space; Wipe disk. Choose the latter one and then click “Next”.
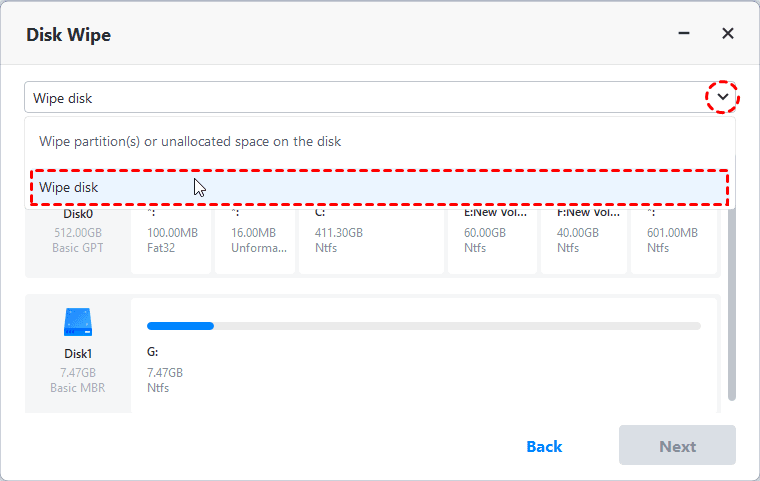
- Wipe Partitions or Unallocated Space: Choose this option to delete the selected partition or unallocated space on the drive. All sectors will be wiped, and recovery will be impossible.
- Wipe Entire Disk: Select this if you want to completely erase all partitions and sectors on the disk. This option ensures the data cannot be restored.
Step 3: Choose the disk you want to erase. Once selected, click “Next” to proceed.
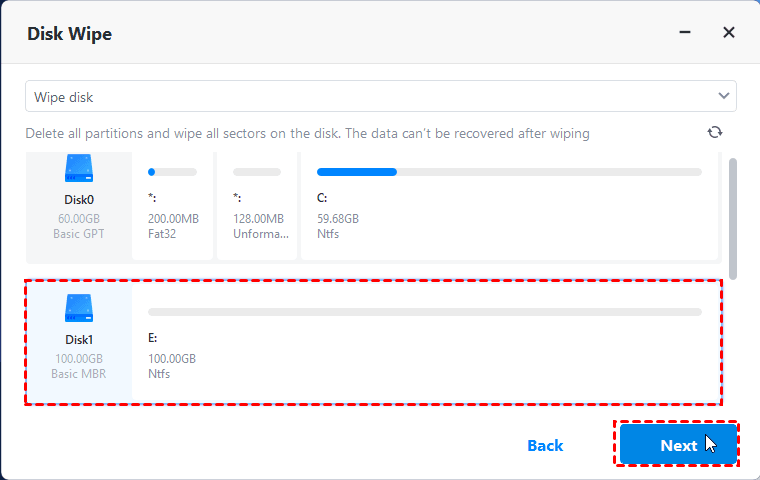
- Notes:✎...
- If you're wiping a disk that contains the operating system, a prompt will appear, informing you that the boot drive will be wiped in reboot mode. Click “OK” to confirm.
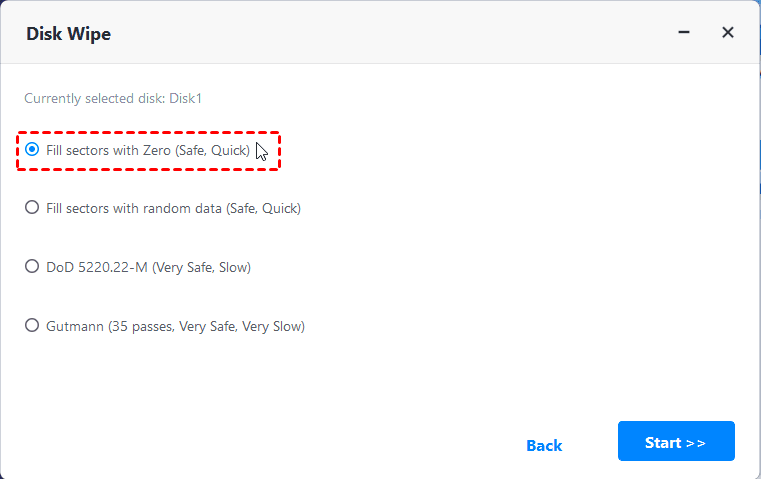
Step 4: Select the wiping method based on your desired safety level and speed. Once ready, click “Start” to begin the wiping process.
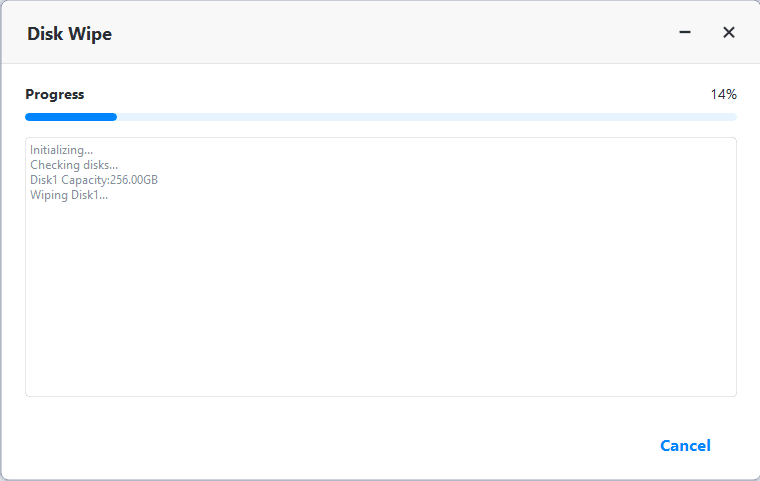
Step 5: As the wipe process starts, you’ll be directed to the wiping progress page. You can click “Cancel” at any time if you decide to halt the operation.
Helpful Tips:
- For a higher level of security, choose wiping methods with more passes and slower speeds, as they provide more thorough erasure.
- Always double-check that you have backed up any important files before proceeding, as this process is irreversible.
By following these steps, you can ensure that your data is completely wiped from your computer or storage device before recycling it, keeping your personal information safe.
Further Security - Check for Hidden Data
Even after performing a factory reset, there might still be hidden traces of your personal data in places you might not expect. Overlooked places where data may remain:
- Browser history: Your browser history, cookies, and cached files can hold sensitive data like usernames, passwords, and websites visited.
- Cloud Backups: If you’ve used services like Google Photos or OneDrive, some of your data may be backed up in the cloud.
- Unused Partitions: Sometimes, extra partitions are left on the hard drive that can store additional data.
How to clear these extra places:
- In your browser, clear history, cache, and cookies.
- Check any cloud backups and ensure you delete files from both the cloud and local storage.
- Use disk management tools to remove any unused partitions on your hard drive.
By thoroughly clearing these hidden data locations, you reduce the chances of leaving any trace behind.
Conclusion
By learning how to remove info from computer before recycling to protect your privacy and security. With backing up your files, signing out of accounts, performing a factory reset, and using tools like AOMEI Backupper, you can ensure that no one can access your personal information.
Remember to check for hidden data in places like your browser history and cloud backups, and always opt for responsible recycling methods. Double-check that all your data is securely wiped before you hand over your device. By following these steps, you’re not just protecting your information but also doing your part to contribute to responsible e-waste recycling. Stay secure, and don’t leave your personal data vulnerable!