How to Protect Sensitive Data During Computer Repair | Windows
Afraid of losing important data after sending hard drive or PC to repair? This article shows how to keep your crucial data safe.
by Delia Updated on January 4, 2023
Worry about your sensitive data during computer repair?
Nowadays, computers have become an integral part of everyone's work and life. Besides insignificant entertainment pieces, the data stored on a computer may also contain something sensitive, such as identity information, resume, financial details, photos, or even some confidential documents for work.
The problem is that neither computer hardware nor operating systems are unbreakable. If your desktop or laptop has a problem that can't be simply fixed and you have to send it for repair, how can you protect the sensitive data?
The word "protect" here has two meanings: One is to preserve the data without losing or damaging it; The other is to prevent data leakage, ensuring that it does not fall into the wrong hands during hardware repair.
Both of the concerns are well-founded: We should have all more or less suffered the trouble of losing important data, and empathized with the fear of privacy leakage from the experiences of some celebrities. So how can we do to effectively protect these sensitive data?

What to prepare for sensitive data protection during repair
![]() One of the first questions to consider is how badly corrupted your computer is. If you‘ve encountered system crush or hard drive failure, which causes the operating system refuses to boot, you may need a WinPE recovery drive to access the data stored on your computer.
One of the first questions to consider is how badly corrupted your computer is. If you‘ve encountered system crush or hard drive failure, which causes the operating system refuses to boot, you may need a WinPE recovery drive to access the data stored on your computer.
![]() The second thing is data protection, i.e. important data backup. If the problem is with the operating system, then the repair process may only reset the system files and not affect personal files (but not 100%). Whereas if the damage is to the hard drive, then all your previous data may be gone after replacing the hard drive. Therefore, it is necessary to copy important files to other devices in advance.
The second thing is data protection, i.e. important data backup. If the problem is with the operating system, then the repair process may only reset the system files and not affect personal files (but not 100%). Whereas if the damage is to the hard drive, then all your previous data may be gone after replacing the hard drive. Therefore, it is necessary to copy important files to other devices in advance.
![]() The last is to prevent data leakage, which can be achieved with data encryption or data wipe. Encrypting data can make it inaccessible to unauthorized people, but the operation may need to be implemented on a computer that is still able to boot properly. In this case you can opt for a more thorough approach, i.e. disk wipe.
The last is to prevent data leakage, which can be achieved with data encryption or data wipe. Encrypting data can make it inaccessible to unauthorized people, but the operation may need to be implemented on a computer that is still able to boot properly. In this case you can opt for a more thorough approach, i.e. disk wipe.
You may wonder if you can achieve the same effect by deleting the data directly. In fact, when you delete a file or a folder from the hard drive, it’s just marked as deleted, not fully erased. It can still be retrieved by some recovery tools until the data is actually overwritten. Therefore, you still need the help of specialized tools.
Based on the above analysis, you need to prepare a recovery media (if your system cannot boot normally), a backup solution and an effective disk wipe tool. To save the trouble, I'd like to introduce a data protection software that contains all these functions - AOMEI Backupper Professional.
It is a reliable backup & restore tool with many integrated utilities. It is famous for the easy-to-use interface as well as the robust functionality. To protect sensitive data during a hardware repair, you can use this software to:
👉 Create a bootable USB in any working Windows computer, and use it to boot the problematic one into WinPE.
👉 Backup files without booting Windows. You can perform File, Partition, System or Disk Backup as you need.
👉 Wipe partitions or disk completely so you don't need to worry about sensitive data leakage during repair.
These are just some of the features of AOMEI Backupper. You can also use it for disk clone, file sync, schedule backup, etc. It is one of the best choices for your daily data protection and disaster recovery, even when the repair of your computer has been completed.
This software works with all editions of Windows 11, 10, 8.1/8, 7, Vista and XP. Download the free trial to give it a go:
How to protect sensitive data during hardware or system repair
Next, I will introduce how can you address the computer repair scenario using AOMEI Backupper. The following tutorial is based on the assumption that your computer is no longer able to log into the system properly, if it still works, then things will become even easier.
Step 1. Backup important files even without booting Windows
Preparations:
- A well-functioned computer
- An USB flash drive
- An external device or NAS or network share path
1. Install and launch the software on any well performed PC and plug in the USB drive. Go to Tools > Create Bootable Media.

2. It is advised to select Windows PE option as the disc type. It supports both legacy/MBR and UEFI/GPT boot modes. Then follow the wizard to select the storage media and complete the creating process.

3. Remove the bootable device from this workable PC. Insert it to the computer you want to repair. Meanwhile connect the external device if you want to use it as the backup storage.
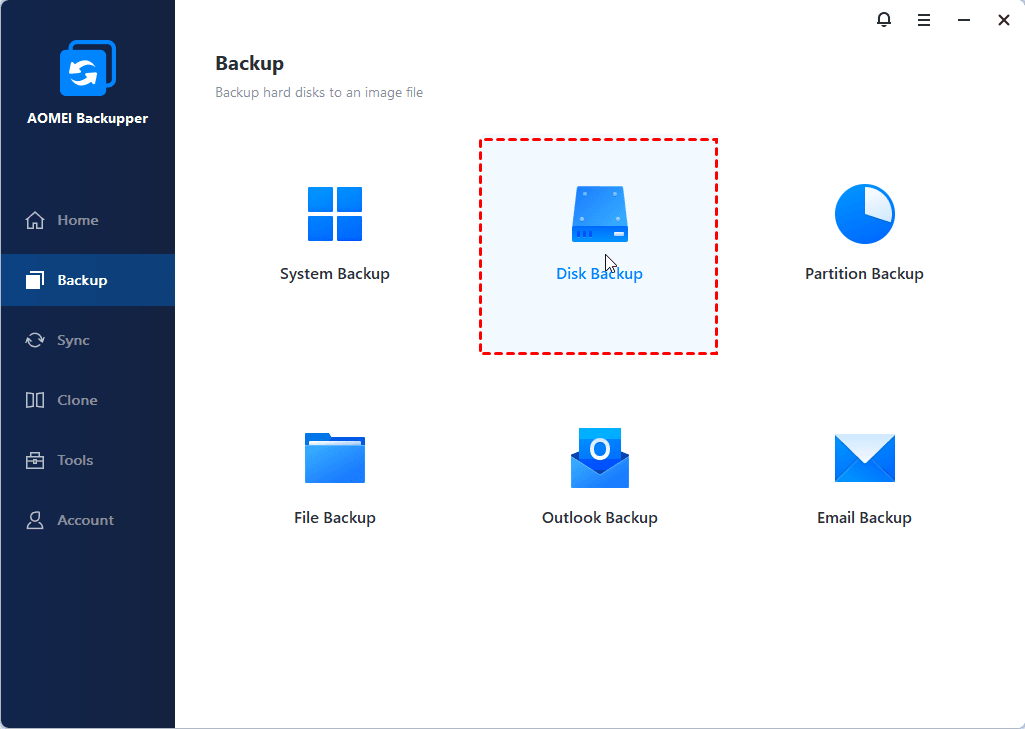
When you see AOMEI Backupper at the desktop, run it and go Backup this time. You can perform different operations depending on your situation. Here will take Disk Backup for example.
4. Follow to select the source disk and destination path.
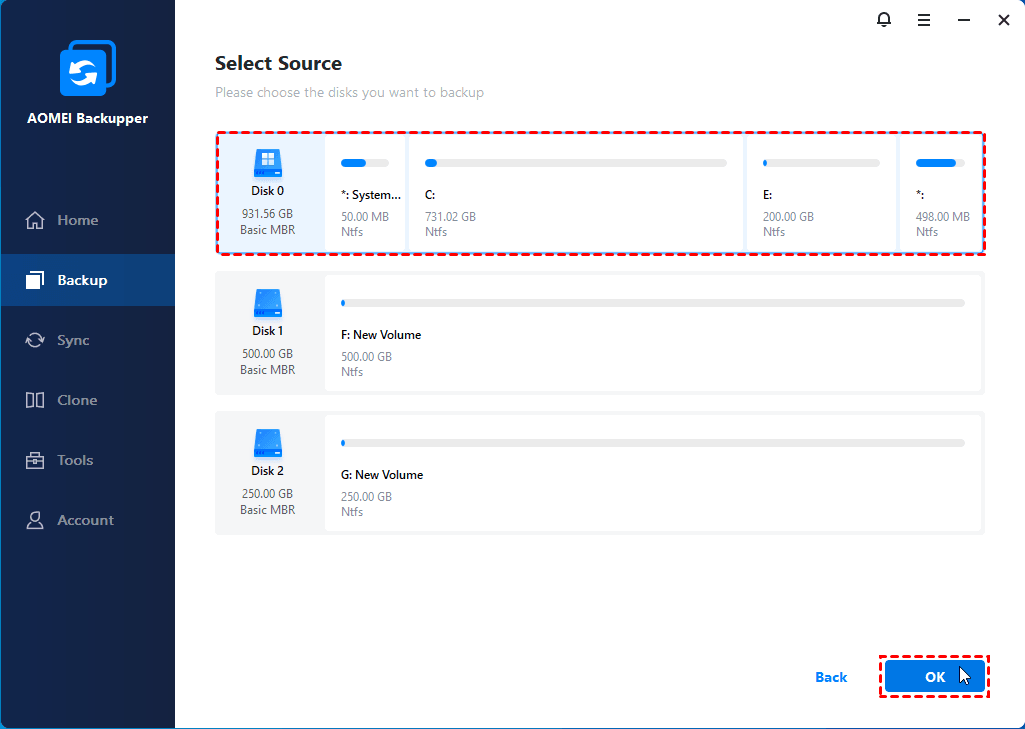
5. Finally, click Start Backup to execute the pending operations.
✎Tips:
- The USB drive used as bootable device could be replaced by a CD/DVD disc.
- If the OS is workable, you can skip the “create bootable media” step and backup crucial data directly.
- If you've created a system or disk backup, you can also restore it to different hardware without boot issues via the "Universal Restore" function.
Step 2. Erase disk or partitions to preven sensitive data leakage
Whether you are launching AOMEI Backupper in WinPE via bootable media, or using it inside Windows, you can use Disk Wipe feature to ensure that your important data does not fall into the wrong hands.
1. In AOMEI Backupper, navigate to Tools tab and choose Disk Wipe.

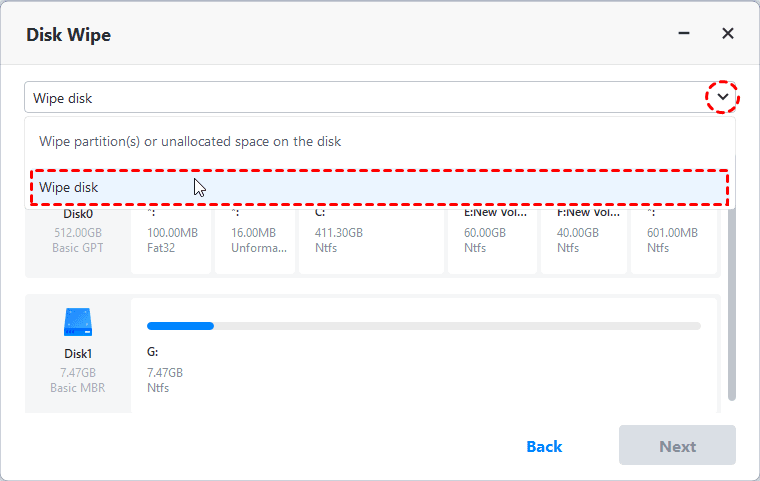
2. Choose a Wiping Type to determine what to clean, select Wipe disk if you want to delete all partitions and wipe all sectors. If you only want to wipe data partitions that contains the sensitive data, then choose the first option. Click Next to proceed.
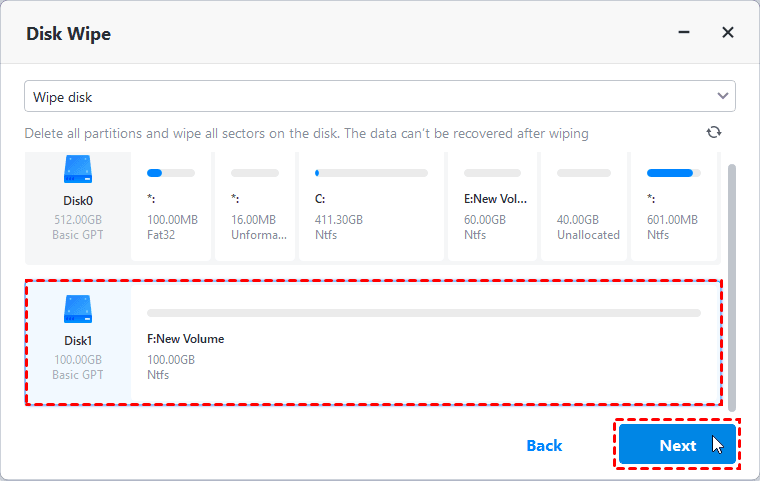
3. Select the hard drive you want to clean. Click Next to continue.
4. Choose a Wiping Method with the safety level and speed you want. Safer wiping methods come with more passes and lower wiping speed. Click Start to execute it now.

✎Note:
- This feature doesn’t support dynamic disks wiping currently.
- For your current system disk, the wiping operation will be executed in reboot mode, and you won’t be able to enter the system after completion.
Conclusion
There are many methods to protect sensitive data from unauthorized access during computer repair, and one of the safest ways is to back up important files first and then perform a data wipe. After this one-off data protection measure, you can also keep AOMEI Backupper with your computer and create regular backups just in case.
Besides automatic backup, it is also capable of disk cloning. For example, you can use it to replace HDD with SSD, clone larger drive to smaller drive, clone SATA to NVMe SSD, etc.

