Create Your Dell Recovery USB on Windows 10 Easy Guide
Read this detailed post to learn a step-by-step tutorial to know how to create a Dell Recovery USB. Here will give you 3 methods on how to create recovery bootable media and how to restore Windows 10 from the recovery USB.
By Lily Updated on June 4, 2024
Why is Dell recovery USB Windows needed?
Many Dell computers come with a recovery image that’s used to refresh or reset your computer. This recovery image is stored on a dedicated recovery partition that consumes 3 to 6GB in size. However, many users want to delete the recovery image from the computer and try to use a recovery drive to replace it. Thus, you need to create a Dell recovery USB drive.
📌System Recovery: It allows you to restore your system to its original factory settings in case of serious system errors or crashes.
📌Data Protection: It helps in recovering important files and documents if your system becomes unbootable.
📌Troubleshooting: Provides a reliable tool for diagnosing and fixing system issues without the need for external assistance.
📌Convenience: Having a recovery USB readily available saves time and effort compared to downloading recovery files or reinstalling the operating system from scratch.
Windows 10 Dell recovery USB will give a lot of help to computer users. If your Dell Windows running into problems, and you do not have a recovery partition or the recovery info has been removed, a Windows Dell recovery USB can help you troubleshoot and fix those problems. Even if your PC won’t start, you can use the Windows Dell recovery USB to access recovery tools and solve the problems. Besides, you can also use the recovery USB to free up storage space.
How to Create Dell Recovery USB with 3 Available Ways
Let's explore how to back up your Dell computer. There are several methods available to create a Dell recovery USB. In this guide, I will demonstrate how to create a Dell recovery USB. This process ensures you have a reliable backup in case of system issues.
Method 1: Create a Dell recovery USB in Windows 10 with a built-in tool
Windows 8 or Windows 10 allows you to create a Dell recovery USB (or other drives) or to create a system repair disc. To open the recovery drive creating tool in Windows 8, you can press the Windows key and type recovery drive, or tap the Settings category and launch the Create a recovery drive application.
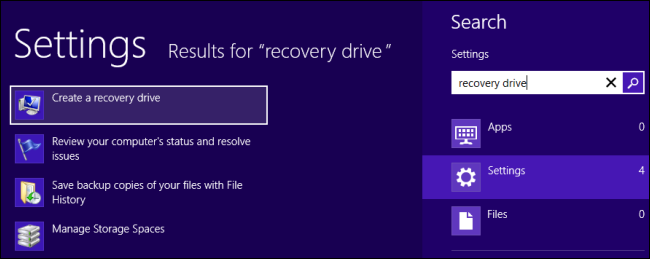
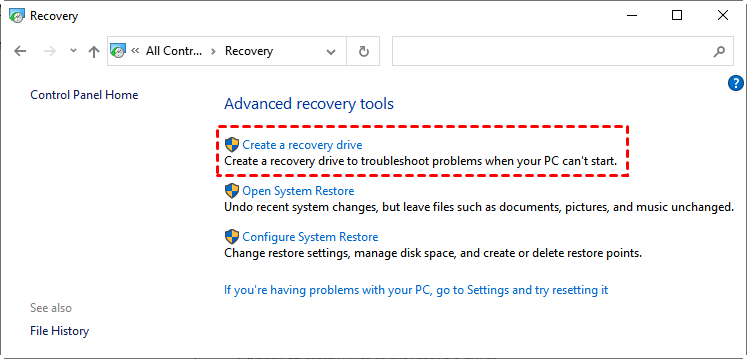
In Windows 10, you need to type recovery drive in the search box of Settings. You can also find the recovery drive creator by opening Control Panel (Win+X) -> Open Recovery -> Click Create Recovery Drive.
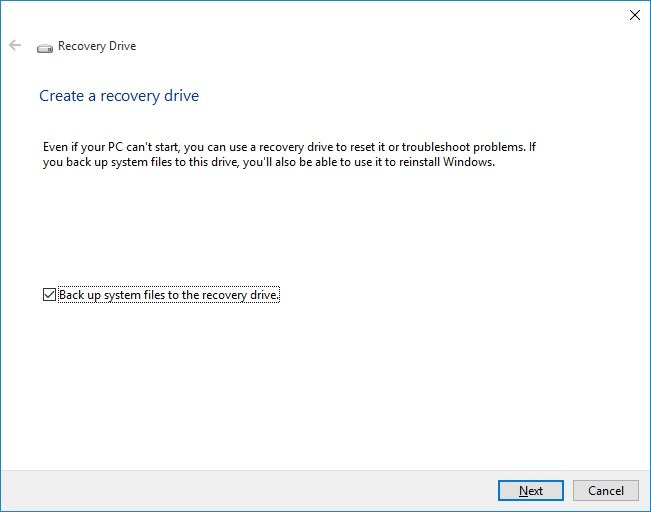
Then, you have opened the Recovery Media Creator in Windows 10. And next, you can use it to create a Windows 10 recovery drive for Dell. Click Next.
You will wait a minute for the recovery drive creator to prepare. After that, it will bring you to the page where you can select the USB flash drive.
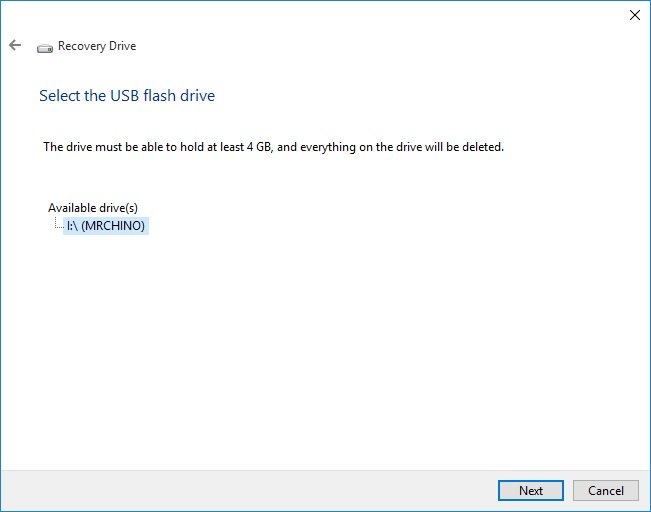
After you select the USB flash drive, Windows will give you a warning that everything on the drive will be deleted. So, if there is any important data, you'd better backup files on a USB flash drive before doing this job.
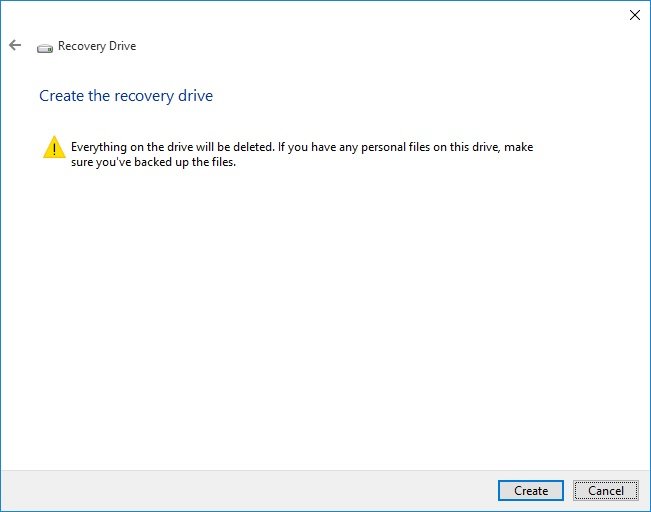
When you click Create, it will execute that task immediately, and that would take some time. When the process is finished, it will show you “The recovery drive is ready”. You can click Finish to exit.
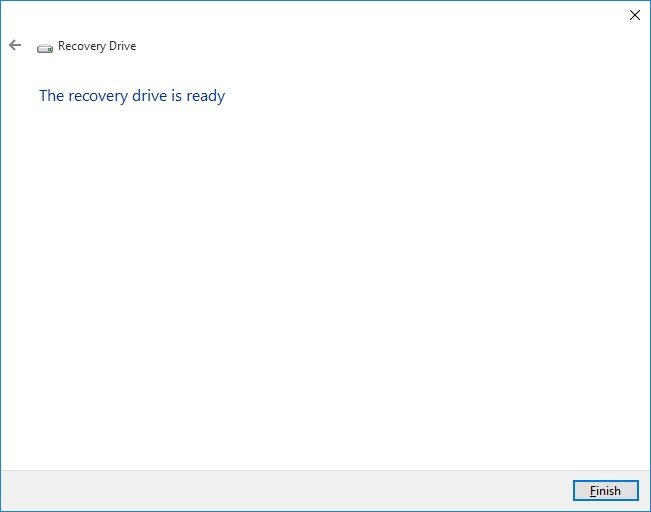
Thus, you have already created Dell Recovery USB Windows 10.
Method 2: Create the Dell Recovery Drive Using Dell Backup and Recovery
Dell provides an application called Dell Backup and Recovery specifically for its users. This tool allows you to back up and restore the operating system, as well as create a recovery disk. It's an essential solution for Dell users running Windows 10, enabling them to back up and restore specific files and the entire system.
Here are the detailed steps for creating a recovery disk using Dell Backup and Recovery:
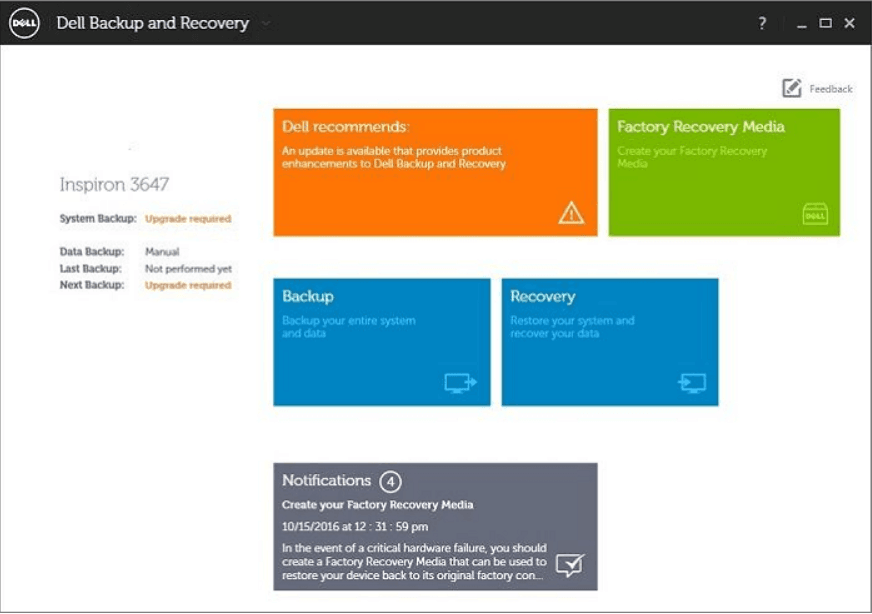
1. Open Dell Backup and Recovery.
2. In the main interface, choose Reinstall Disk/Rescue Disk.
3. Select either a USB flash drive or a disc. After making your selection, click on Continue. Ensure your USB flash drive has enough space.
4. Plug the USB flash drive into your computer and click on Start to initiate the backup process.
5. If using a USB flash drive, you'll be notified that all data on it will be erased. Then click Yes to continue.
6. Wait patiently for the backup process to finish.
How to boot from Dell recovery USB and repair Windows 10
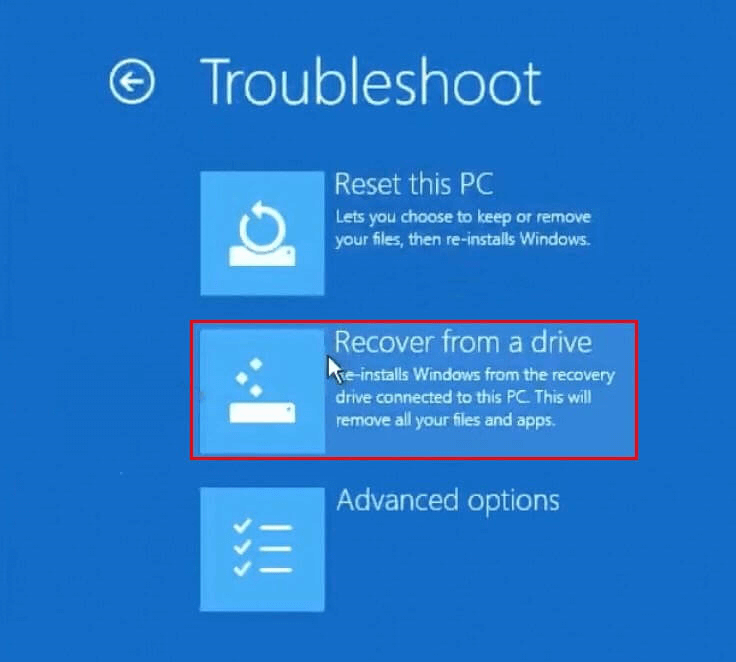
If there is something wrong with your Dell computer, you may need to troubleshoot the system to minimize the damage from the Dell recovery USB. Booting from a USB drive may vary depending on the model and make.
For a Dell laptop, here you need to press F12 (if you are working on a Dell desktop, press Esc). It will show you the Windows logo. Then, you can choose your keyboard layout, and click Troubleshoot -> Recover from a drive. Follow the on-screen instructions and wait for a while to troubleshoot the Windows 10 system.
Can’t create Dell recovery USB - make bootable media
However, you may face the problem of not creating a Dell recovery USB with Windows 10 by using the built-in recovery drive creator. Thus, here we highly suggest you create a Dell recovery USB with a third-party software AOMEI Backupper Standard.
AOMEI Backupper Standard is a free yet powerful backup and restore software for Windows users. You can use it to create a Dell recovery USB with Windows 10 more easily.
Step 1. Insert your USB formatted as NTFS to your computer. Free download AOMEI Backupper. Install and launch it. Then, select Create Bootable Media under the Tools tab.

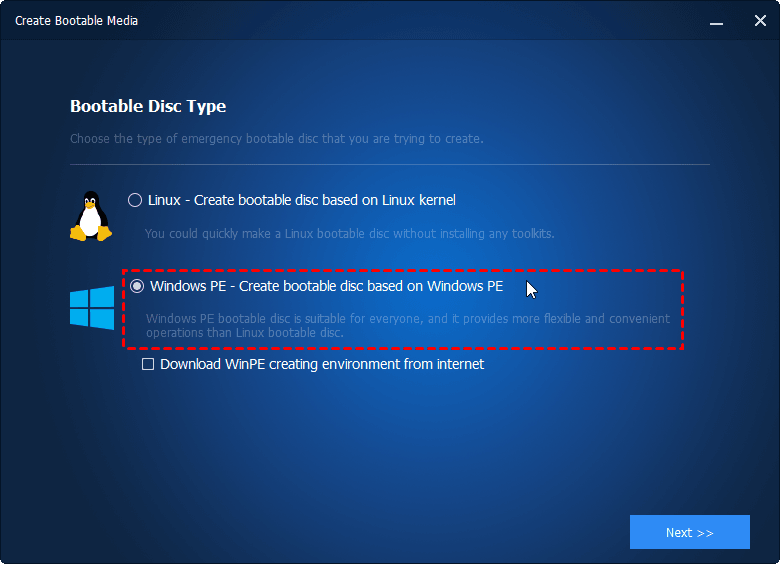
Step 2. Then, choose the type of emergency bootable disc that you are trying to create. Here we choose Windows PE. Click Next.
Step 3. In this page, you can select the USB you prepared before as the storage media. Click Next. The program will start to create Dell boot disk immediately.

With those simple steps, you can create a Windows 10 recovery USB for your Dell computer. After that, you can boot from the bootable USB drive you created.
AOMEI Backupper also allows you to create a system backup image. Whenever your computer fails to boot, you can use this recovery USB to boot your computer and restore the Windows 10 system image backup from it. Besides, it also works for other Windows OS including Windows 8, and Windows 7. What’s more, it has many other advanced features like dissimilar hardware restore, system clone, etc. You can upgrade to AOMEI Backupper Professional to get more.
FAQs about Dell Recovery USB
1. What is the key to Dell's recovery?
To access Dell recovery, press F12. When the Dell logo appears, repeatedly tap F12 to enter the computer setup screen. From there, select the USB storage device and press Enter. This will launch the Dell Recovery & Restore software from your USB drive.
2. Is a system repair disc the same as a recovery disc?
Yes, they serve the same purpose, so you only need one. A USB drive is generally the best option for most people, as it is more durable than a DVD and can transfer data faster. It is also more convenient to use compared to a DVD Reader/Writer.
3. Where is the Dell recovery partition?
To locate the Dell recovery partition, go to "Disk Management" under the Storage menu. In the center section of the Computer Management window, you'll see a list of storage drives. The hidden Dell recovery partition will be listed under the Volume field as Recovery.
Bottom Line
Creating a Dell recovery USB is essential for Dell computer users as it allows you to boot your computer and perform recovery actions when it becomes unbootable. To create a Dell recovery drive, you have several options: AOMEI Backupper, Dell Backup and Recovery, and the built-in Windows 10 tool. We recommend using AOMEI Backupper because it offers additional features beyond just creating a recovery disk.

