17 Ways to Fix the 'Critical Error Your Start Menu Isn’t Working' Problem
How to fix the problem of "Critical Error Your Start Menu isn’t working"? Please try the 17 methods provided in this article first, then learn the importance of backing up your system regularly, and master the easy way to back up your system.
By Yuka Updated on November 1, 2022
How to fix "Critical Error Your Start Menu Isn’t Working" in Windows 10
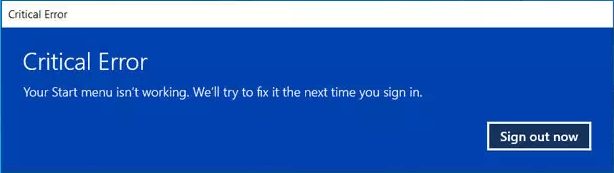
"I suddenly have a problem with my computer. When I click on the Start menu, a critical error pops up: Your Start Menu Isn’t Working. Even if I click Sign out now, I can't fix this error. This error has been bothering me for almost 4 months, during this time I restarted Windows 10 3 times and each time Start was working fine, but after updating Windows 10 the same error appeared. I really don't know what to do, can anyone provide some reliable help to fix the error?"
Start menu is one of the most useful components in Windows 10 and Windows 11, through which you can quickly access various settings and applications. However, feedback from some users shows that there are some problems with the stability of the Start menu, and in addition to the critical error described in the case above that do not work, the following similar problems may occur.
- Start menu and Cortana are not working.
- Unable to open Start menu in Windows 10.
- The Start menu does not disappear.
- Open the Start menu randomly in Windows 10.
- The Start menu is very slow in Windows 10.
- Start menu blinking in Windows 10.
All of these problems are similar, which means that if you can fix one of them, the rest will be solved. But before that, you need to understand the cause of the problem.
Causes of "Critical Error Your Start Menu Isn’t Working" problem
If you are not sure how to fix the "Critical Error Your Start Menu Isn’t Working" problem in Windows 10, try to start with these reasons.
🧱 Windows version is obsolete.
📑 Login file is corrupted.
📁System file is corrupted.
🔧 Windows settings are incorrect.
🍁 Dropbox or third-party anti-virus software is less compatible
🎃 Some Windows services did not start properly.
Fixed: Critical Error Your Start Menu Isn’t Working in Windows 10
Here are 17 ways to fix "Critical Error Your Start Menu Isn’t Working" problem in Windows 10, please try them in order to restore the Start menu as soon as possible. It is worth mentioning that these methods are also applicable to the "Critical Error Your Start Menu Isn’t Working" problem in Windows 11.
Method 1. Restart your computer and Windows File Explorer
Restarting your computer can fix many problems, so you can try this method first when you encounter the "Critical Error Your Start Menu Isn’t Working" problem. In addition, for some unknown reasons, Windows Explorer may also cause the above problem, so you can also try restarting Windows Explorer to fix the problem.
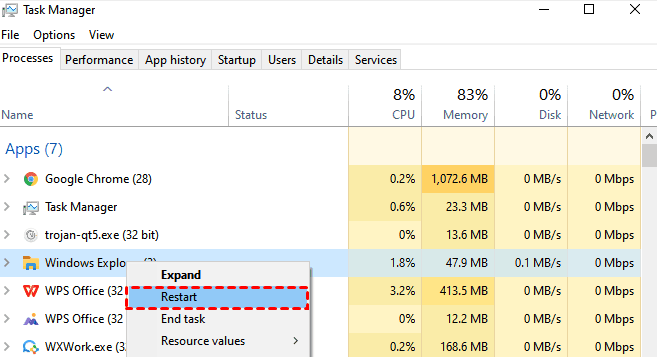
- Use Ctrl + Shift + ESC to open Task Manager and go to the Processes tab.
- Find Windows File Explorer in the list below, right click on it and select Restart.
- If the problem still exists, please use Alt+F4 to open the window, select Restart, and then tap the OK button.
Method 2. Hide Cortana from the taskbar
From the feedback of some users, hiding Cortana from the taskbar helps to fix the "Your Start Menu Isn’t Working" issue in Windows 10.
- Right-click the taskbar, and tap Show Cortana button in the expanded menu.
- After confirming that Cortana is hidden, right-click the taskbar again and select Show Cortana button.

Method 3. Enter Windows Safe Mode and return immediately
In Safe Mode, the Windows system will start with a limited number of files and drivers, which will help you troubleshoot problems on your computer and fix the "Critical Error Your Start Menu Isn’t Working" problem.
- Enter Windows Recovery Environment (Windows RE) by forcibly shutting down and rebooting the computer twice.
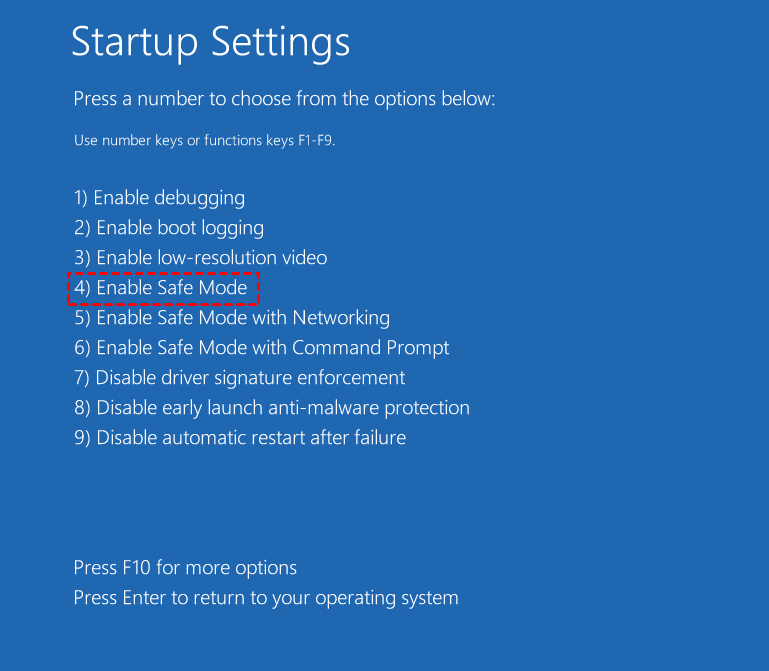
- In the Choose an option window, click Troubleshoot -> Advanced options -> Startup Settings -> Restart in order.
- After the computer restarts, press F4 or the number key 4 to start Windows Safe Mode.
Method 4. Update Windows system
Outdated Windows versions are a major cause of the "Critical Error Your Start Menu Isn’t Working" problem. Therefore, you can try to update your Windows system to fix the above problem.
- Use Windows + I to open Windows Settings and click Update & Security.
- In the Windows Update tab, click the Check for updates button.
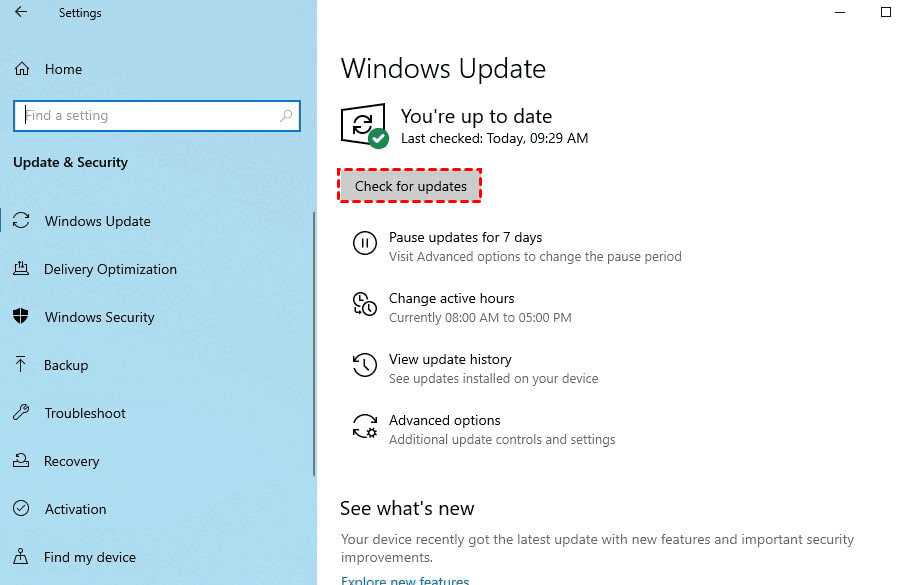
- If there is an available update, tap Download and install and restart your computer and wait for the Windows update to complete.
Method 5. Create and login to the user account
Creating a Windows account with administrator privileges can generate a new user profile at the same time. This will help you fix the problem "Critical Error Your Start Menu isn’t working".
- Use Ctrl + Shift + ESC to open Task Manager and tap the File option in the upper left corner.
- Click Run new task and enter powershell in the text box, check the Create this task with administrative privileges checkbox, and then click the OK button.
- Type net user yourname yourpassword /add in the Windows PowerShell window and press Enter.
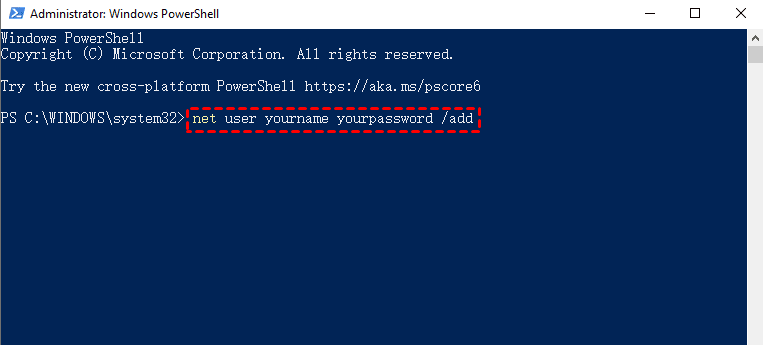
✨ Tip: yourname is the name you set for the account and can be replaced by yourself. And yourpassword is the password you set for the account, you can also replace it.
4. After restarting your computer, log in to your newly created user account and try clicking on the Start button again to see if the Start Menu is not working problem has been fixed.
Method 6. Transfer the database of account
If the method of creating a new user account does not work, then you can also try transferring the database to your original account to help you fix the "Critical Error Your Start Menu Isn’t Working" problem. However, it should be noted that you need to create two new administrator accounts before you can perform the above operation.
- Run Command Prompt as administrator, enter the following commands separately and press Enter respectively.
- net user /add admin1 password1
- net user /add admin2 password2
- net localgroup administrators admin1 /add
- net localgroup administrators admin2 /add

✨ Tip: You can replace the account name and password in the above command by yourself.
- Restart the computer and switch to the admin1 account and log in to the computer.
- Restart the computer again and switch to the admin2 account and log in to the computer again.
- Use Windows + E to open File Explorer and navigate to the following path.
- Local Disk (C:) -> Users -> admin1 -> AppData -> Local -> TileDataLayer.
🎊 Note: Please note that if you find the AppData folder, tap the View tab above and check the Hidden Items checkbox.
- Open the TileDataLayer folder, right-click on one of the point-and-click Database folders, and select Copy.
- Then, navigate to the following path.
- Local Disk (C:)-> Users ->Your_username>AppData>Local>TileDataLayer.
🎊 Note: Please note that Your_username refers to your original account name.
- Open the TileDataLayer folder, rename the Database folder in it to Database.old, and paste the previously copied Database folder.
- After restarting the computer, switch to the original account and log in.
Method 7. Uninstall Dropbox or third-party anti-virus software
According to some users' feedback, Dropbox and third-party antivirus software are the major causes of the "Critical Error Your Start Menu Isn’t Working" issue. Therefore, you can try to uninstall them, which will help you fix the above problem.
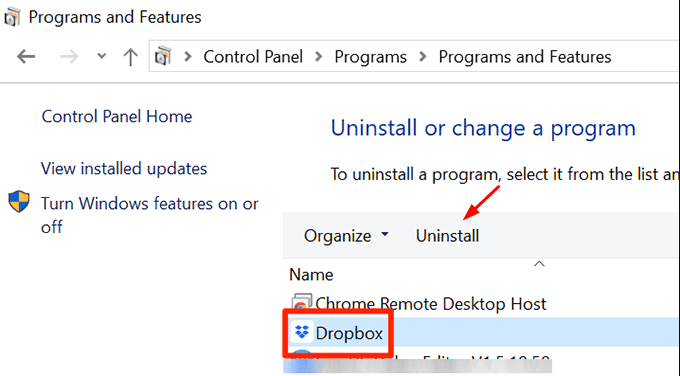
- Use Windows + R to open the Execute window, type appwiz.cpl and press Enter.
- Find Dropbox in the list, tap it, and select Uninstall.
Method 8. Execute SFC and DISM commands
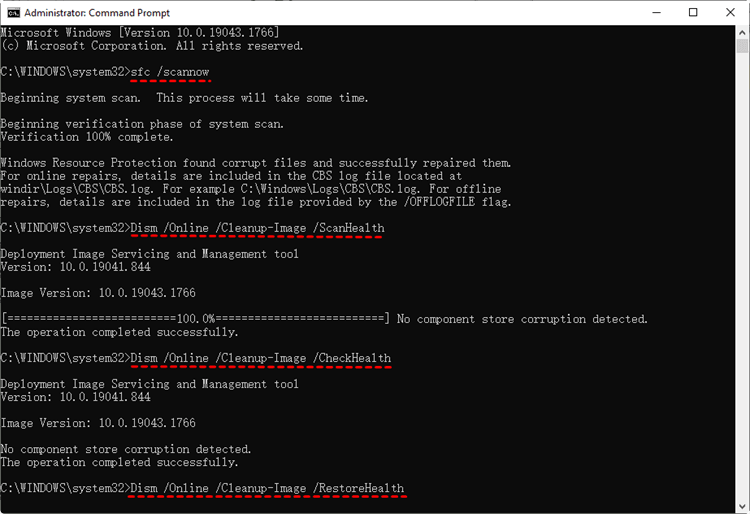
System File Checker (SFC) repairs system files and Deployment Image Services and Management (DISM) repairs system images. The combination of the two will help fix the "Critical Error Your Start Menu Isn’t Working" problem.
- Use Windows + S to open the search bar, type cmd and select Run as administrator.
- In the command prompt character window, type sfc /scannow and press Enter.
- Enter the following commands in turn, and press Enter to execute the commands respectively.
- Dism /Online /Cleanup-Image /ScanHealth
- Dism /Online /Cleanup-Image /CheckHealth
- Dism /Online /Cleanup-Image /RestoreHealth
Method 9. Perform Windows troubleshooting
Problems with the Start menu have existed since the beginning of Windows 10 and Windows 11, for which Microsoft has released a special troubleshooter for the Start menu, which you can try to use to fix the "Critical error your Start menu isn’t working" problem.
Download Microsoft Start Menu Troubleshooter and open it, click the Advanced button and uncheck Apply repairs automatically, then click Next.
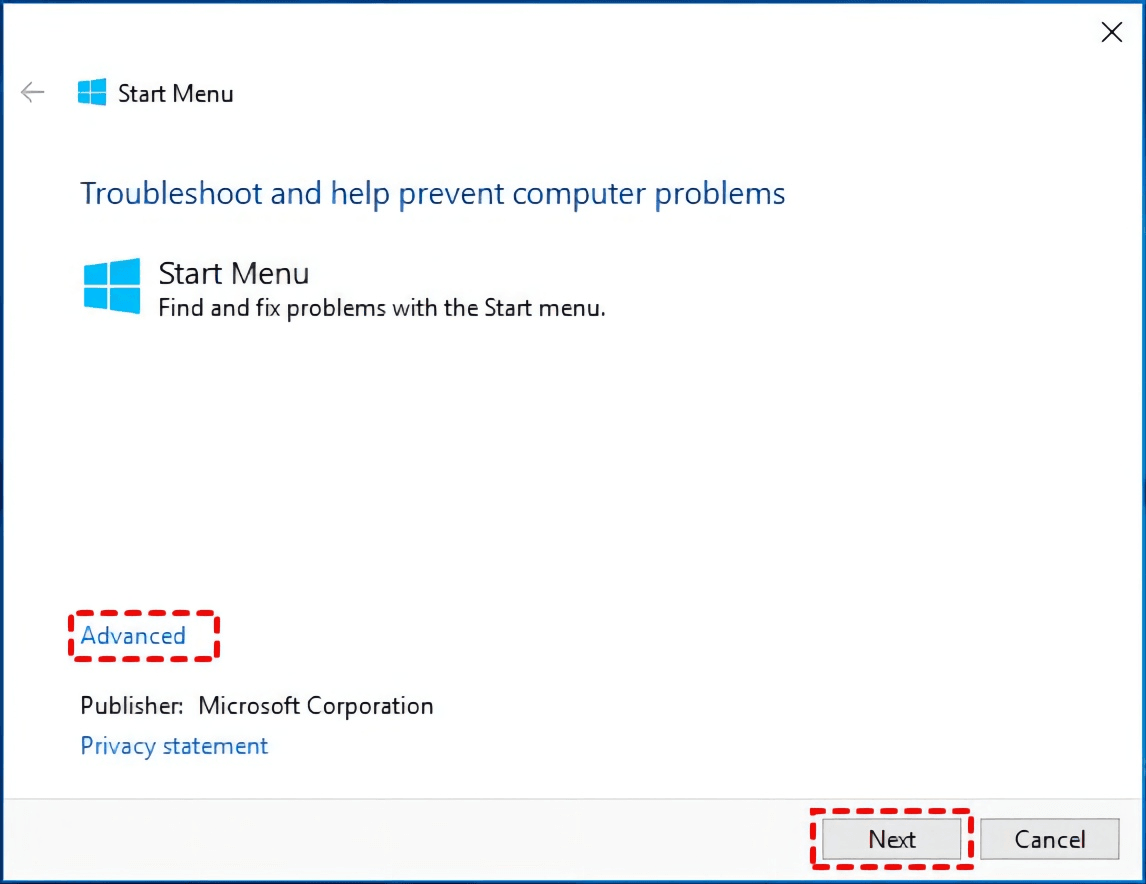
If you find any problems, just click the Repair button and wait for the process to complete.
Method 10. Reinstall the Start menu and register Cortana
Registering an application can refresh all Windows applications, including the Start menu and Cortana, to fix the problem of "Critical Error Your Start Menu Isn’t Working". However, it is important to note that this method may cause data in Windows applications to be deleted, so it is recommended that you make a backup of your files before doing so.
- Use Ctrl + Shift + ESC to open Task Manager and tap the File option in the upper left corner.
- Click Run new task and enter powershell in the text box, check the Create this task with administrative privileges checkbox, and then click the OK button.
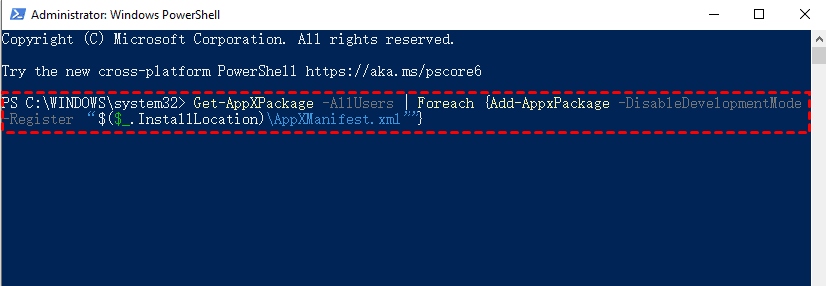
- Type the following command in the Windows PowerShell window and press Enter.
- Get-AppXPackage -AllUsers | Foreach {Add-AppxPackage -DisableDevelopmentMode -Register "$($_.InstallLocation)\AppXManifest. xml"}
Method 11. Delete the TileDataLayer folder
In addition to renaming the Database folder, you can also just delete the TileDataLayer folder, which also helps to fix the "Critical Error Your Start Menu Isn’t Working" issue.
- Execute the command prompt characters as system administrator, enter the following commands separately and press Enter respectively.
- net user /add admin1 password1
- net localgroup administrators admin1 /add
- Restart the computer, switch and login to the admin1 account.
- Use Windows + R to open the Execute window, type %localappdata% and press Enter.
- Find the TileDataLayer folder, right-click on it and select Delete.

- Restart your computer and switch to your original account, then try clicking the Start button to see if the problem with the Start menu not working has been fixed. If it is fixed, then you can delete the admin1 account you created earlier.
Method 12. Close Internet Explorer
- Use Windows + R to open the Execute window, type control and press Enter.
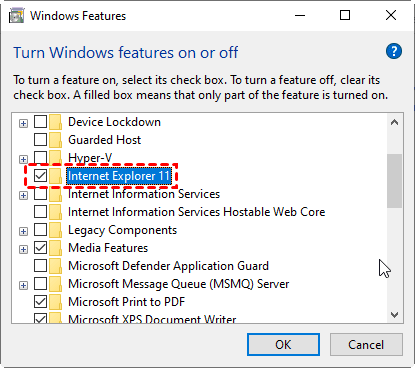
- Tap Programs, and then tap Turn Windows features on or off.
- Find Internet Explorer 11 in the list and uncheck it, confirm this action and tap the OK button.
Method 13. Disable fast start-up
- Use Windows + S to open the search bar, type power & sleep settings and press Enter.
- In the new window, click on its Additional power settings button.
- In the left panel, find and tap Choose what the power buttons do.
- Tap the Change settings that are currently unavailable button, and uncheck the Turn on fast start-up (recommended) checkbox, and tap the Save changes button.
Method 14. Open Application Identity service
- Use Windows + R to open the Execute window, type services.msc and press Enter.
- In the Services window, find Application Identity and double-click the service.
- In the Application Identity content window, change the Startup type to Automatic and tap the OK button.

Method 15. Perform a clean start
- Use Windows + R to open the Execute window, type msconfig and press Enter.
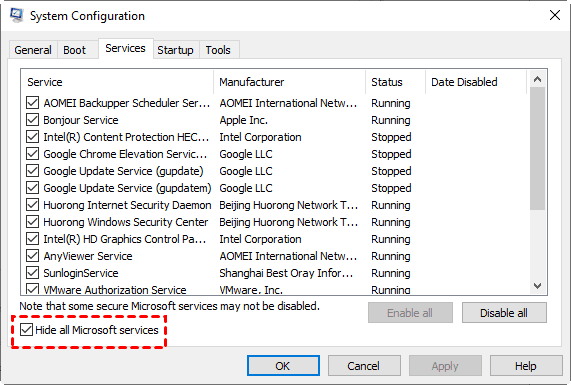
- Switch to the Services tab at the top of the System Configuration window, check the Hide all Microsoft services checkbox in the lower left corner, and then click the Disable all button.
- Then switch to the Startup tab and click the Open Task Manager button.
- In the Startup tab list, select each startup item in turn, and click the Disable button in turn, then close Task Manager.
- Then return to the Startup tab of System Configuration and tap the OK button.
Method 16. Restore Windows system
If you created a System Restore Point before the "Critical Error Your Start Menu Isn’t Working" issue, then you can restore your Windows system to the previous state, which will help fix the above issue.
- Use Windows + R to open the Execute window, type rstrui.exe and press Enter.
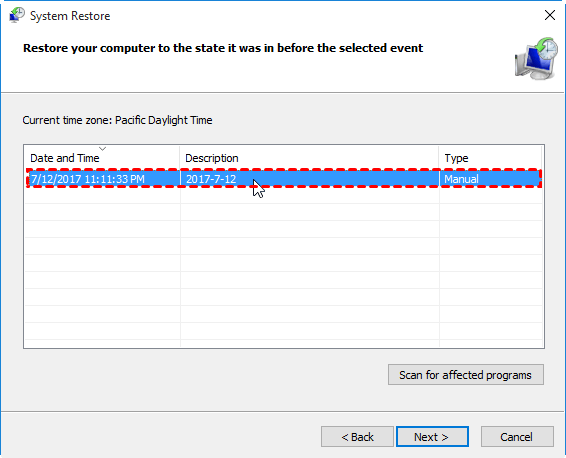
- In the System Restore window, tap Next.
- Then select the appropriate restore point according to the date and time, and then click Next.
- Next, then follow the wizard to restore the system can be.
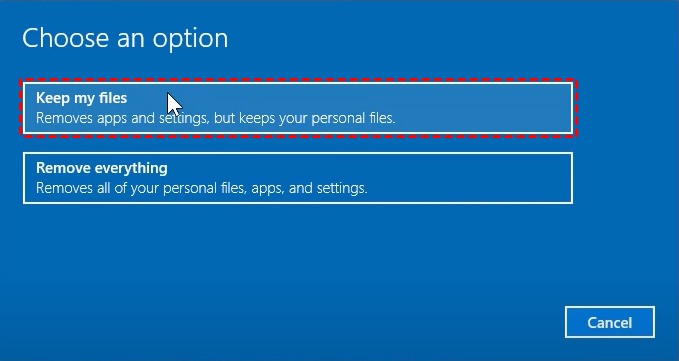
Method 17. Reset this PC
- Use Windows + S to open the search bar, type Reset this PC and press Enter.
- Find Reset this PC in the right panel and tap the Get started button.
- In the Choose an option window, choose Keep my files or Remove everything according to the actual situation, here it is recommended to choose Keep my files.
Scheduled system backup for quick recovery when needed
Since the problem "Your Start Menu Isn’t Working" will affect your computer experience, you need to fix it as soon as possible with the 17 methods provided in the article to get the Start Menu back to normal.
You should be reminded that similar problems with the Start Menu can still occur again, so it is recommended that you use AOMEI Backupper Standard to back up your system regularly after you fix the above problem. Make a habit of backing up your system regularly so that you can quickly restore your system to a normal state when you encounter similar problems again.
You can backup your system files, boot archive related partitions (EFI system partition and recovery partition, etc.), system disk applications and user profiles to any location for free with AOMEI Backupper Standard in Windows 11/10/8.1/8/7, etc. Next, we will introduce you the detailed steps of AOMEI Backupper Standard system backup, first, you need to download and install the software:
- Run AOMEI Backupper Standard, select the Backup tab in the left panel, and select System Backup in the right panel.

- In the System Backup window, select the destination path to save the system backup, and then click the Start Backup button. In addition, you can also click the pencil icon in the upper left corner to modify the current "Task Name".

🎊 Note: Before the backup starts, you can click on Options, Schedule Backup and Backup Scheme in the lower left corner for additional settings.
- Options: you can add comments to the current backup task, enable email notifications to receive backup task completion in real time, enable encrypted backups to increases the security of your backups, but requires upgrading to the Pro version.
- Schedule Backup: You can enable the free scheduled backup feature to automatically back up your system on a daily, weekly, or monthly basis. When upgrading to the Pro version, you can also set up automatic backup of your system on event triggers and USB plug in.
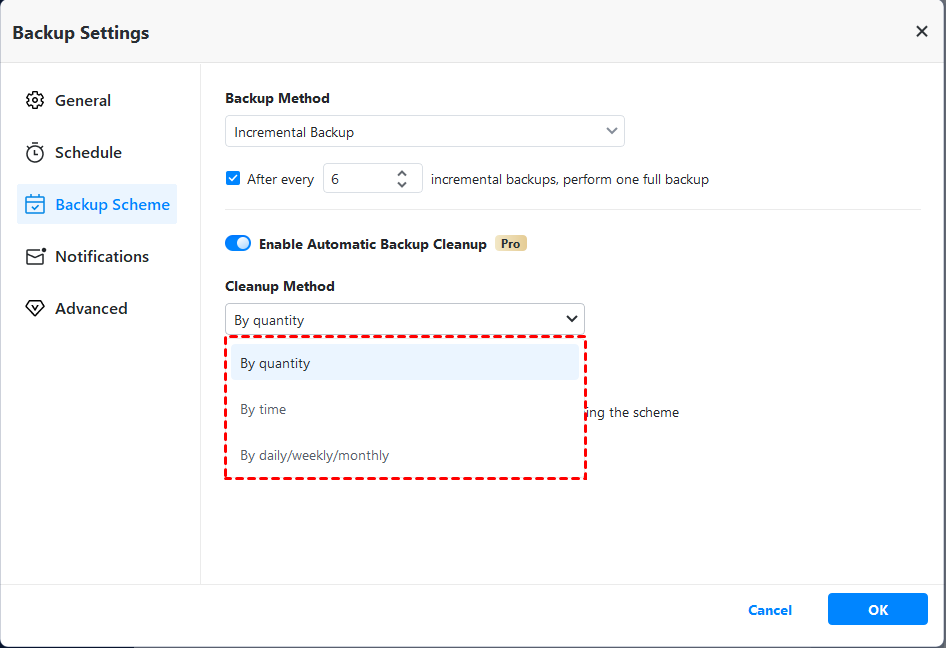
- Backup Scheme: You can change the current backup method, including incremental backup, full backup and differential backup, where differential backup needs to be upgraded to the Pro version. When upgrading to Pro version, you can also enable the automatic clean backup feature.
✌ In addition to system backup, you can also use AOMEI Backupper for more needs.
🎈 With a system backup image, you can use System Restore to quickly restore your system to its previous state in case of a crash, which will save you more time than reinstalling the system.
🎈 You can also create bootable media for secure booting in case the system fails to boot and ensure that AOMEI Backupper Standard performs the appropriate operations properly, which will help aid in system recovery.
🎈 The system backup function only backs up the data on the disk area where the system is located. Use the disk backup function if you want to provide security for the data on other disks of your computer.
Summary
If you are having trouble with the problem "Critical Error Your Start Menu isn’t working", please read this article to learn more about the 17 fixes for this problem to ensure that your Start Menu is working properly. To prevent the recurrence of Start Menu related problems, such as Start menu not working in Windows 11, it is recommended that you regularly backup your system with AOMEI Backupper Standard and make a habit of backing up your system regularly so that you can quickly restore your system when needed.
AOMEI Backupper Standard can provide you with easy ways to backup your system, even if you are a beginner. In addition, the software also provides you with features such as partition backup, disk clone, partition clone, etc. to make it easier for you to use your computer.

