Windows Server 2008/2012/2016 Backup Encryption Guide
You can set Windows Server 2008/2008 R2/2012/2012 R2/2016/2019/2022 backup encryption using BitLocker or third-party backup software - AOMEI Backupper.
By Yuka Updated on November 2, 2022
Why use Windows Server backup encryption? Get double protection
We all know how important it is to make a data backup. When something bad happens, you can restore it from backup. However, it is not enough to have a single backup. For example, you may worry someone may steal your backup and get the data on it. Anyone can access the image file, someone may modify or destroy it with intention. In order to protect your server from unauthorized access, you still need to set Windows Server backup encryption.
Encryption, by itself, can protect the confidentiality of data. Only the one who knows the password can access the image while others can not. In short, you need to back up your files. You also need to encrypt the ones containing sensitive information. Backup and encryption offer you double protection for your data.
There are two ways to help you set Windows Server backup encryption. The traditional way is using the BitLocker to encrypt the backup drive. Or if you prefer a more flexible way to make it, you can let one third-party tool help you set encryption for each backup task. Refer to Method 2 to learn more >
Method 1. Perform Windows Server backup encryption using BitLocker
BitLocker is a data protection feature to help you encrypt hard drive in Windows Server 2022/2019/2016/2012 R2/2012/2008. It will modify every byte of an encrypted file, so this process will take much longer than regular backups. Below are the steps to use BitLocker to execute Windows Server backup encryption.
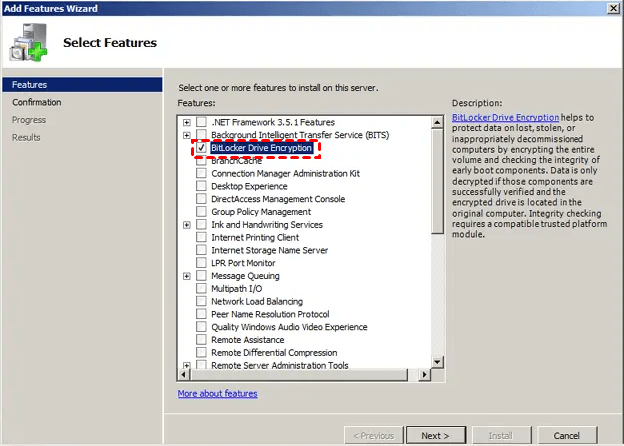
🎇 Note: By default, BitLocker is not installed by default, you need to add this feature in the Server Manager. The source and destination locations must be enabled and prepared for Bitlocker, otherwise the backup will fail.
- Click Start > Administrative Tools > Server Manager > Features > Add Features to open the Add Features Wizard. Then, in the Select Features window, tick BitLocker Drive Encryption and click Next > Install. You may be asked to restart your server, click Yes.
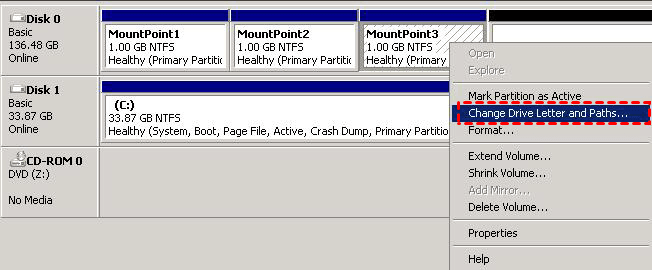
- After that, you need to assign a drive letter to the backup hard disk drive in the Server Manager navigation pane. Click Storage > Disk Management to open the Disk Management window. Right-click the backup drive, click Change Drive Letter and Path and then Add, choose a drive letter from the drop-down menu and click OK > Yes.
- At last, you still need to turn on the Bitlocker, please use the following steps.
- Click Start > Control Panel > Security, and then choose BitLocker Drive Encryption.
- Click Turn on BitLocker for each of the drives that you want to protect, and then click Yes.

- Choose the unlock method that you want to use (Insert a USB drive or Enter password) after it is encrypted. Then, you will be asked to back up your recovery key, select Save to USB flash drive, Save to a file and Print the recovery key. Keep your key and click Next.
- Select how much of your drive to encrypt, only the used space or entire drive, click Next.
- In the "Are you ready to encrypt this drive" window, tick "Run the Bitlocker system check" and click "Continue". It requires a restart, just do it and check if the drive is encrypted.
- When encryption is finished, unlock the backup drive using the BitLocker password that you created. Server backup, and file and folder restore should work as expected.
✨ Tips:
-
BitLocker Drive Encryption is only available in some editions of Windows 7/8/8.1/10, Windows Server 2008 and later.
-
Setting Windows Server 2012/2012 R2 backup encryption is quite similar to 2008 edition.
That's the entire process of installing and turning on Windows Server 2016/2012 disk encryption. Then, you just need to open Windows Server Backup and use it to do a regular backup. Learn detailed steps to create a system image for Windows Server 2008 here.
Method 2. Encrypt Windows Server backup easily with third-party software
AOMEI Backupper Server, one professional server backup utility, also provides the function to help the users encrypt the backup image. And this feature is integrated into this software, so you can set the backup job as well as encryption together, without making an extra effort.
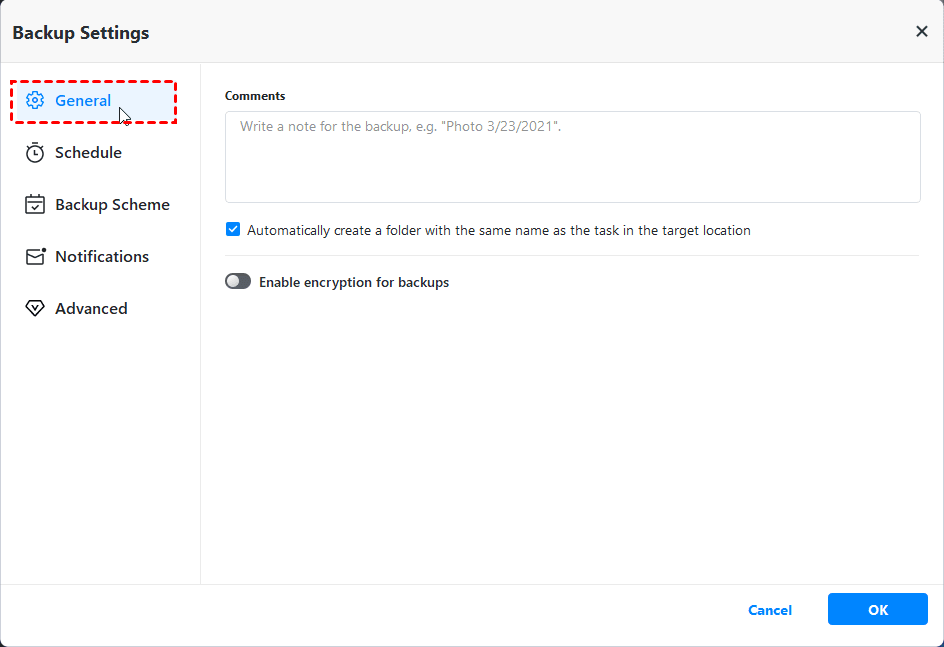
When backing up the system, file, disk or partition, you can find the "Enable encryption for backups" feature under "Options", and you can set the password easily by clicking it.
In addition, this software still offers you more powerful features, such as daily/weekly/monthly schedule backup, event trigger, USB plug in, incremental & differential backup, automatic backup cleanup, etc. Please download the 30-day free trial to set Windows Server backup encryption right now!
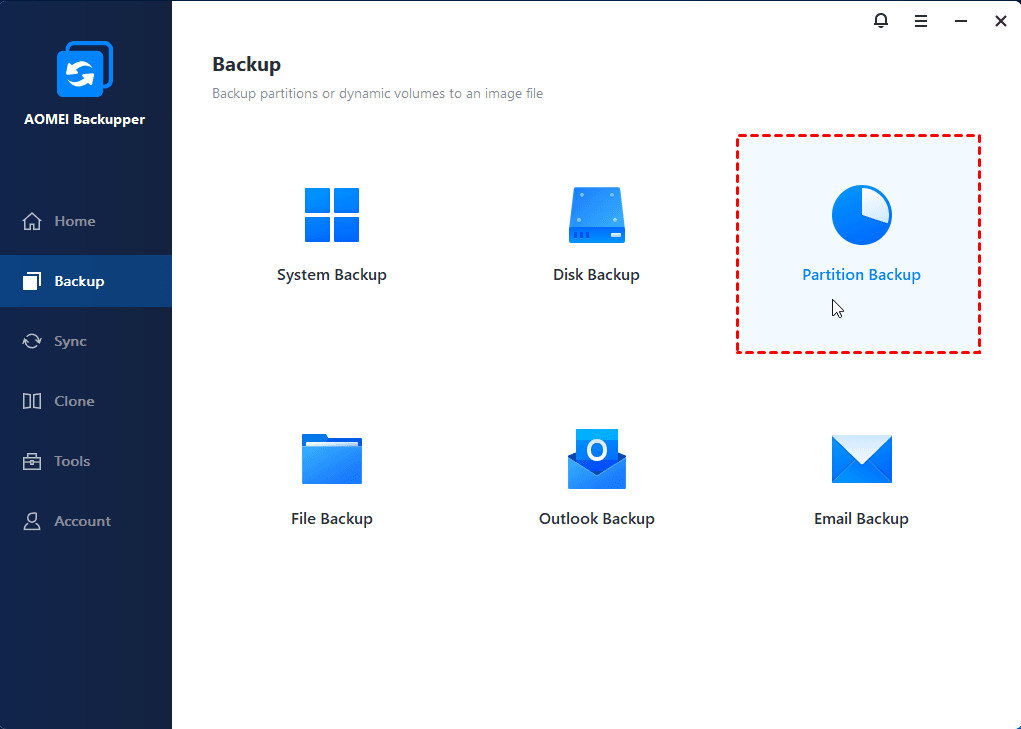
Step 1. Select a backup type under the "Backup" tab. Set Partition Backup as an example.
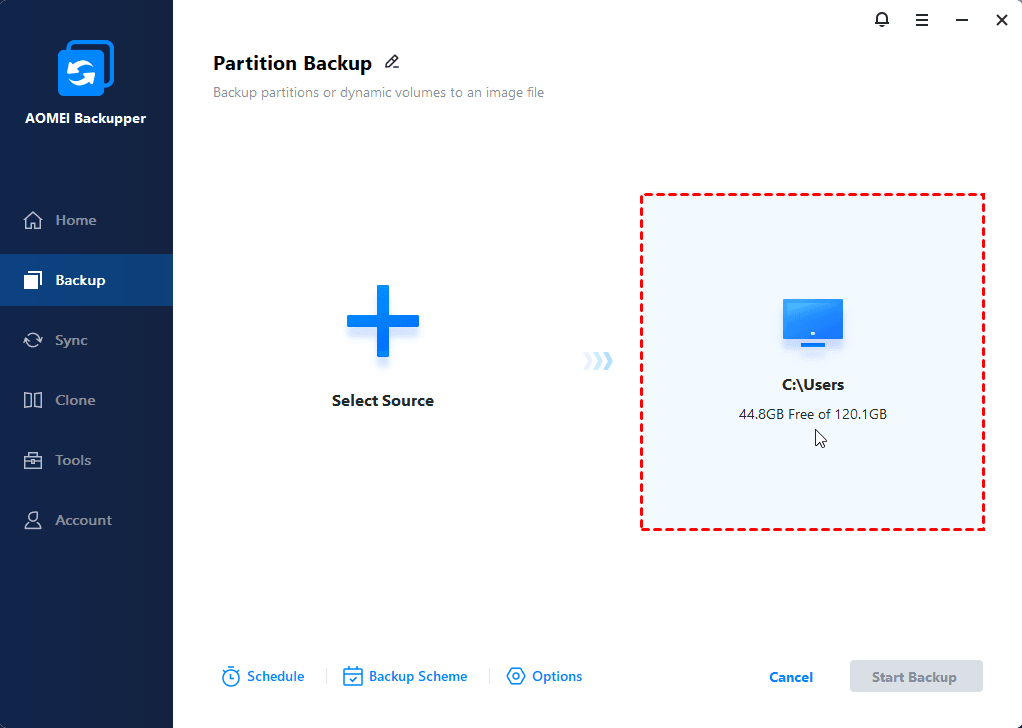
Step 2. Set the source partition(s) and the destination path respectively.
Step 3. Then click Options beneath to set encryption. In the Backup Settings window, go to General and click Enable encryption for backups, then type password and confirm it.
Tips:
-
To save space, you can set compression by clicking Options > Advanced.
-
If you already have an encrypted drive, and you want to make a backup of this hard drive. You may fail because you cannot access this drive. However, AOMEI Backupper allows you to backup BitLocker encrypted drive with the sector by sector method. Just click Options > Backup Mode and select "Make an Exact Backup".
Step 4. Confirm all the items and click Start Backup to backup Windows Server 2008 with password encryption.
More powerful features to manage Windows Server backups
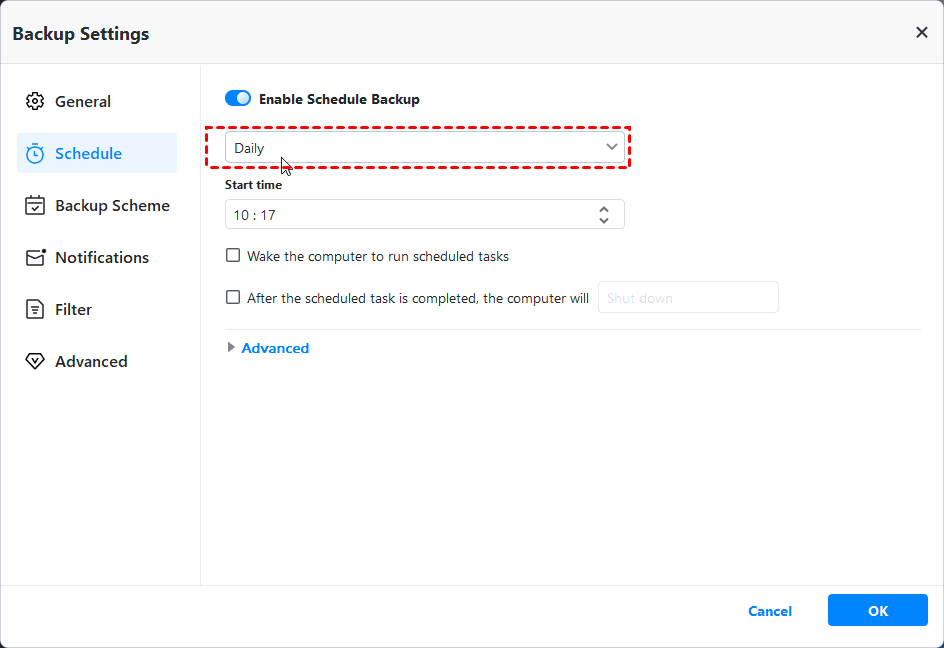
To help you manage your backups easily in Windows Server systems, AOMEI Backupper provides you with two powerful features: Schedule Backup and Backup Scheme.
>>> The schedule backup settings have 5 options listed here:
- Daily/Weekly/Monthly: To backup your Windows Server constantly, you could set up the backup to run daily, weekly, monthly or at a specific time, thus reducing the workload to backup the same content manually.
- Event Triggers: You could trigger the backup event by the 4 events: User logon, User logoff, System startup, System shutdown.
- USB plug in: AOMEI Backupper will automatically back up the data on the USB or backup data to USB drive while detecting the USB device is plugged in.
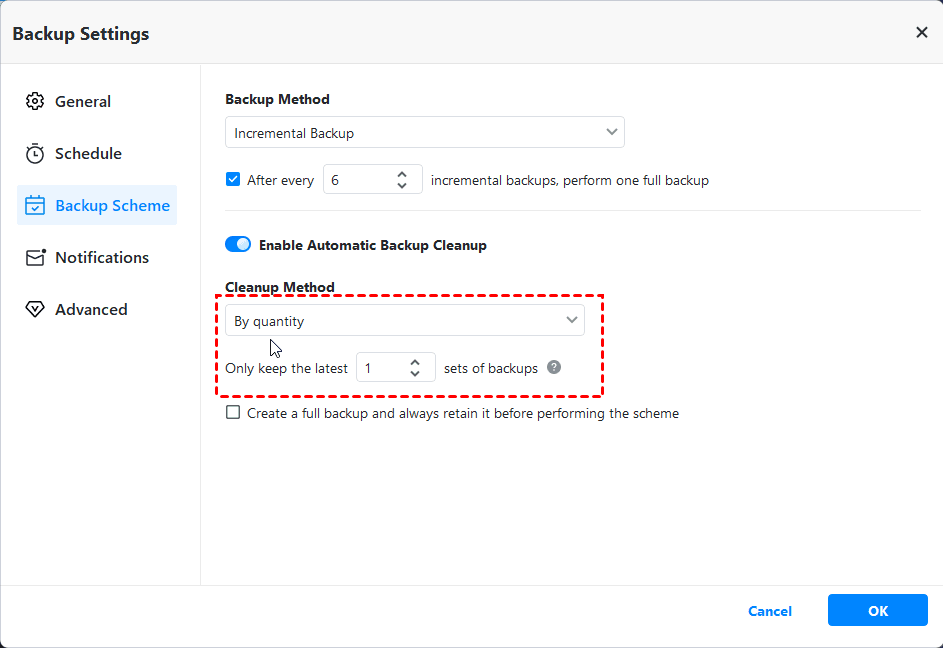
>>> To set backup method or delete old backup images for more space, you could enable backup scheme by clicking Backup Scheme.
Then, select incremental or differential backups under the Backup Method. To delete backups, you need to first enable automatic backup cleanup and then choose a cleanup method: By quality, By time or By daily/weekly/monthly.
Conclusion
Now you know two methods to set Windows Server backup encryption. By setting Windows Server backup encryption, you can rest assured that your data is double protected by it.
You have 2 ways to do so, namely using BitLocker and a third-party server backup software. The previous one requires Bitlocker installation and drive encryption first. Thus, if you prefer an easier and more flexible way to make it, AOMEI Backupper Server is a better choice. It provides you a simple option called Enable encryption for backup and you just need to turn it on during the backup process.
Besides, as a professional backup and restore software, it can even restore your computer to dissimilar hardware. If your computer is not bootable, it still allows you to create a universal bootable USB to boot your server computer.
For IT technicians, who want to protect unlimited PCs and servers within one company, you could use AOMEI Backupper Technician Plus. It offers unlimited billable technical services to clients. It also enables you to copy installation directory for portable version creation.

