How to Delete or Create Windows Server 2022 Recovery Partition
What is Windows Server 2022 recovery partition and its purpose? Is it safe to delete the recovery partition to expand your storage? What if you don’t have one, but want to create one to use when there is a problem with the system? Read on to find the answer.
By Jonna Updated on May 23, 2025
What is recovery partition in Windows Server 2022?
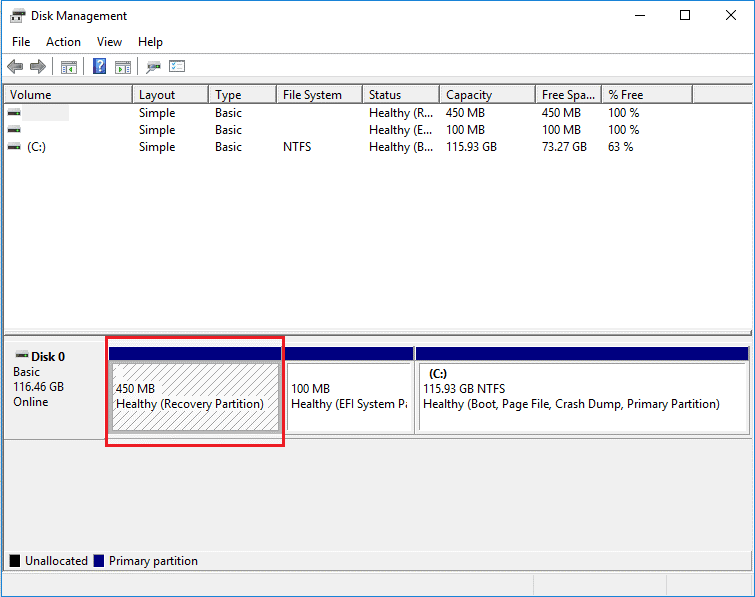
The recovery partition is a special partition on the disk, which helps to restore the factory settings of the OS (operating system) in the event of system issues. For where is the recovery partition in Windows Server 2022? It is usually hidden and you can't see it in Windows Explorer. But in Disk Management, you can see it, while there is no drive letter for this partition, and only a Help option is provided.
If you want to create one recovery partition in a simple and reliable way, please refer to: Create Windows recovery partition with AOMEI OneKey Recovery
Delete Windows Server 2022 recovery partition to gain more space
You have basically understood what the recovery partition is and what it does. The most concerned questions of users who have a recovery partition are "Is Windows Sever recovery partition necessary?" "Is it safe to delete the recovery partition?". What happens if the recovery partition is deleted? Does this affect the operating system that is running? Let's talk in detail.
Is it safe to delete the recovery partition on Server 2022?
Yes, it is safe to remove recovery partition from your computer. But for different Windows Server users, we have different suggestions:
◑ For ordinary users. It is not recommended to delete the recovery partition in Windows Server 2022. For example, if your computer’s operating system crashes or becomes damaged, you can use the recovery partition to get help without having to reinstall the OS.
◑ For advanced computer users, they can choose to delete the recovery partition to get more or better manage storage space. But it is pretty important that you have created a backup of Windows Server system image. So, if the operating system is damaged or you are not satisfied with its performance, you can use the image backup to restore to the previous state.
How to remove recovery partition in Windows Server 2022
As you know, it is not allowed to delete Windows Server recovery partition in Disk Management, only the Help option is provided there. Here, we provide you with 2 effective ways to erase recovery partition in Windows Server 2022.
#1. Delete recovery partition with DiskPart.exe
To erase recovery partition, you can use Windows built-in utility—Diskpart command prompt.
- Click “Search” icon, and type “cmd” on the box.
- Right-click on the “Command Prompt”, choose “Run as Administrator”.
- Once the Command Prompt is launched, type “diskpart” and press Enter to open DiskPart.
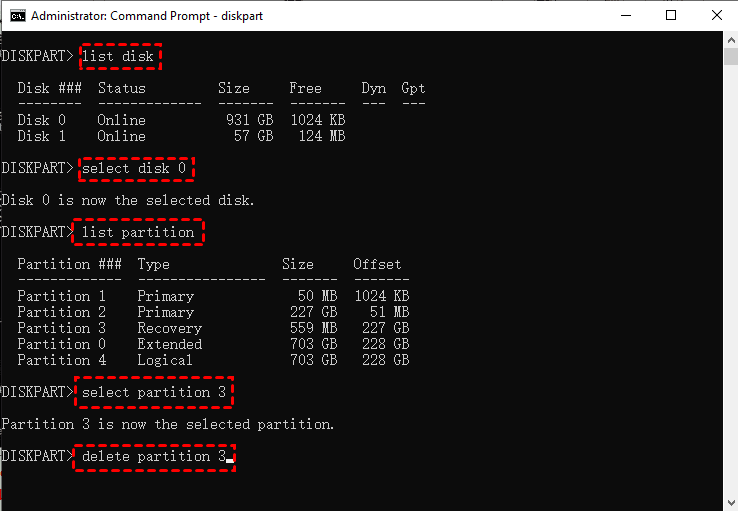
- Input and press Enter to run following commands one by one:
● list disk (display all the disks)
● select disk n ("n" should be replaced with the correct disk number contains the recovery partition. Usually, it is disk 0)
● list partition (list all the partitions on the selected disk)
● select partition n (choose the recovery partition number)
● delete partition
After deleting the recovery partition, the remaining space is unallocated space. You can use the unallocated space to create a new volume or extend an existing partition to make full use of the disk storage space.
#2. Delete Recovery Partition while Creating Recovery Drive
There is another way to help you delete the partition. This trick appears during the process of creating a USB recovery drive.
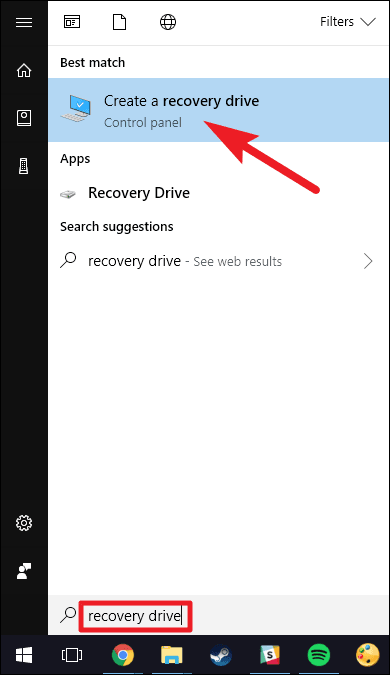
- Click “Search” icon, and enter “recovery drive” in the search box, and then select Create a recovery drive.
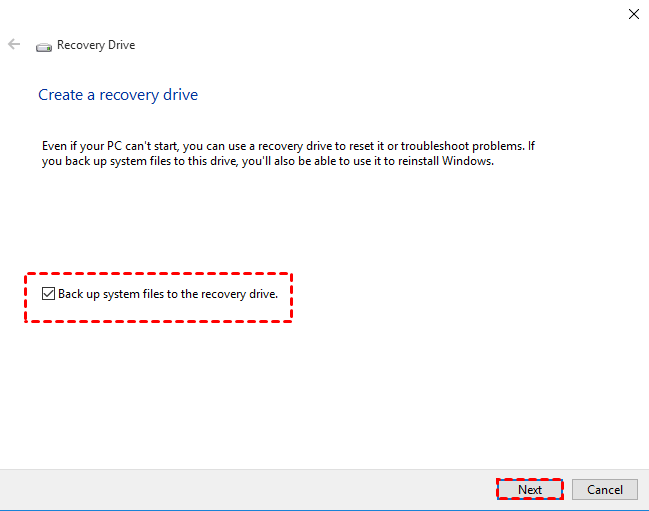
- After the recovery drive tool opens, make sure the “Back up system files to the recovery drive” is selected, and then select Next.
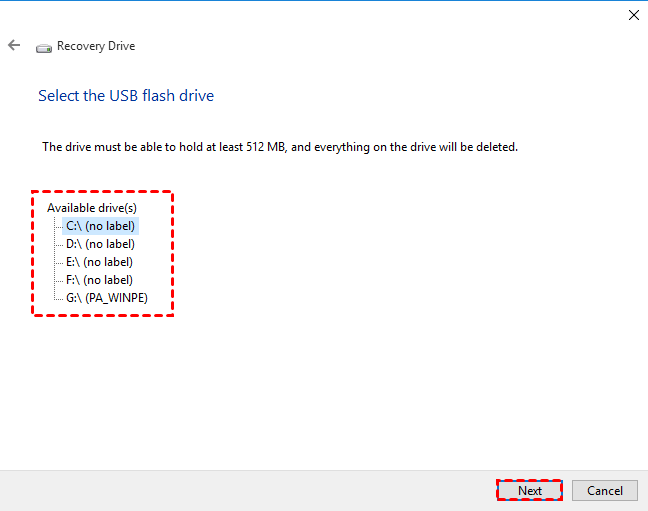
- Insert a USB flash drive into your PC that's at least as large as the size indicated on the screen. Select the USB flash drive connected you connected and click “Next” to continue.
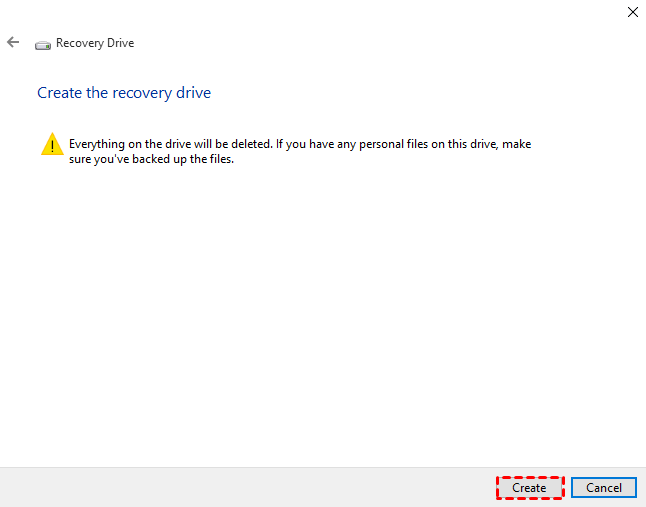
- Click “Create” to begin creating the recovery drive.
- When the process is done, do not select Finish. Select Delete the recovery partition to remove the recovery partition from your PC and free up disk space. Then click on Delete. This will free up the disk space used to store your recovery image. When the removal is done, select Finish.
Note✍: Some PCs do not provide an option to delete the recovery partition. If you encounter this situation, it means that your PC does not have a recovery partition that uses additional disk space.
Create Windows recovery partition with AOMEI OneKey Recovery
We all know that when there is a problem with the system, the recovery partition can play a great role in helping us restore the system to factory settings. If you find that there is no recovery partition on your computer, how can you create one?
Here, I recommend that you use a qualified onekey backup and recovery solution - AOMEI OneKey Recovery to create Windows recovery partition. It supports all Windows PCs and Servers. It enables you to easily backup system to factory partition or other location in case of a system failure.
- It applies to all brands computers instead of one specific brand computer.
- It allows you to backup system to recovery partition and other external devices, such as, external hard drive, USB flash drive, CD/DVD, etc.
- It is able to compress or encrtpt backup image.
- It is capable of backing up system regularly, daily, for example. Also, you can enable weekly or monthly backup.
- It supports both F11 or A recovery key and boot menu at the system startup.
Download it to have a try. I will show you how to create Windows recovery partition safely on Server 2022 via AOMEI OneKey Recovery.
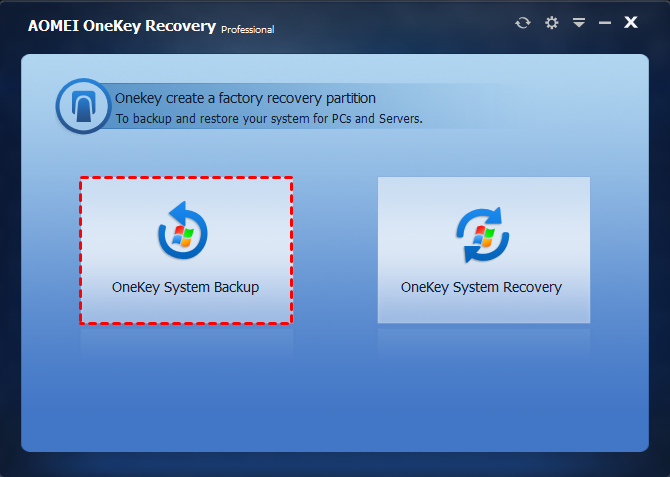
Step 1. Install AOMEI OneKey Recovery on your computer and launch it. Choose Onekey System Backup.
Step 2. Select "Backup system to AOMEI OneKey Recovery Partition (Recommended)" and click Next.

Note✍: If your computer does not have enough space to accommodate all the contents on the system partition, you can choose "Back up the system to other location", such as an internal secondary disk, an external hard drive, or a removable USB flash drive, etc. It can effectively avoid lack of disk space.
Step 3. Then, you need to select one of the existing partitions on the system disk and divide some space to create a factory recovery partition. If there is enough unallocated space on the system disk, the program will automatically select it to make the factory recovery partition. This step will be skipped, and the program will go directly to the next step.
Step 4. Click "Advanced" to preview the partition layout, and click "Start Backup" after confirmation.
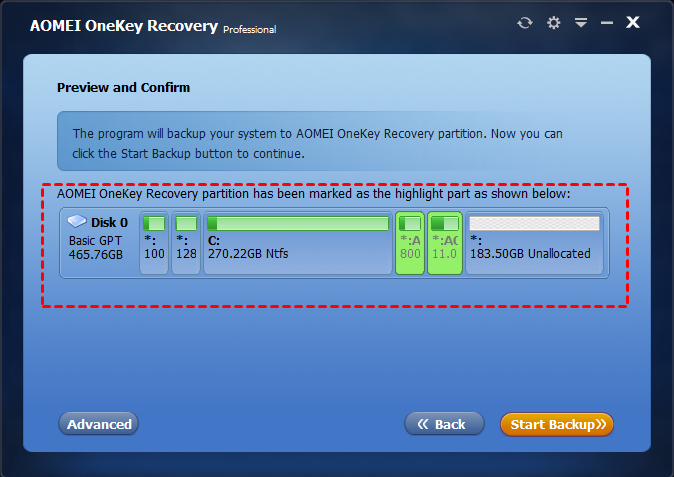
When the creation process is over, you will have the system image backup and recovery partition. You can use it to recover your computer in the event of a disaster.
►Bonus tip: You can create System backup for your computer via AOMEI Backupper in case of future system failure.
🔥Hot: Windows Server 2025 released
Windows Server 2025 was officially released on November 1, 2024, bringing several exciting updates. Here are some of the key highlights:
- Desktop Shell: The first time you sign in, the desktop shell adopts the sleek look and feel of Windows 11, offering a modern and familiar user interface.
- Bluetooth Support: Windows Server 2025 now includes Bluetooth functionality, making it easy to connect and pair devices like mice, keyboards, headsets, and audio devices.
- DTrace Integration: DTrace is now a native tool in Windows Server 2025, providing a powerful command-line utility for real-time system performance monitoring and troubleshooting.
- Email & Accounts: You can now manage Microsoft Entra ID, Microsoft accounts, and Work or School accounts directly in Windows Settings under Accounts > Email & Accounts. However, note that domain joining remains necessary for most configurations.
If you'd like to experience all these wonderful features, you may make a Windows Server 2025 Media Creation Tool to install Server 2025 on a compatible device.
FAQ on Windows Server 2022 recovery partition
1. How do I access the recovery partition in Windows Server 2022?
To access the recovery partition in Windows Server 2022, you can usually do so during the boot process by pressing a specific key combination, such as F8 or F11, depending on your server's manufacturer. Alternatively, you can access it through the Windows Recovery Environment (WinRE) by booting from installation media or using the advanced startup options in Windows Server.
2. Can I customize the recovery partition in Windows Server 2022?
Yes, you can customize the recovery partition in Windows Server 2022 to some extent. You can add additional tools or utilities that you may need for recovery purposes, although it's essential to ensure that any modifications you make do not interfere with the recovery process or compromise system integrity.
3. What are the common uses of the recovery partition in Windows Server 2022?
The recovery partition in Windows Server 2022 is commonly used for tasks such as repairing the operating system, restoring system backups, troubleshooting startup issues, performing system restores, and accessing advanced recovery options like system image recovery or Command Prompt for manual repairs.
4. What is recovery environment in Windows Server 2022?
The Recovery Environment in Windows Server 2022, also known as Windows Recovery Environment (WinRE), is a pre-installed, minimal operating system environment provided by Microsoft for troubleshooting and repairing system issues that may prevent normal booting of the server. It serves as a recovery platform to diagnose and fix various problems related to the operating system, startup process, or system files.
Key features and functionalities of the Recovery Environment in Windows Server 2022 include:
- Automatic Startup Repair: WinRE automatically detects and attempts to repair common startup problems that may prevent Windows Server from booting properly.
- System Restore: Allows users to restore the server's system files and settings to a previous state, typically a restore point created before encountering issues.
- System Image Recovery: Enables users to restore the server from a previously created system image backup, which includes the entire system configuration, settings, and data.
- Command Prompt: Provides access to the Command Prompt, allowing advanced users to execute command-line tools and utilities for troubleshooting and repairing the system manually.
- Startup Settings: Grants access to advanced startup options, including Safe Mode, Debugging Mode, and options to disable driver signature enforcement, which can help diagnose and resolve boot-related issues.
- Access to File Explorer: In some versions of WinRE, users may have limited access to File Explorer, allowing them to browse and manipulate files on the server's hard drive.
5. Why are there 2 recovery partitions?
In some Windows Server installations, you might notice the presence of two recovery partitions.
- One is created by installing Windows on a GPT disk, which contains the Windows Recovery Environment (WinRE). The disk space occupied by this type of recovery partition is negligible. This is usually called Windows recovery partitions.
- The second one is set by the computer manufacturer (such as Lenovo, Dell, or HP). It takes up a lot of disk space. Because this part of the recovery partition contains the manufacturer settings of the application driver and other content that allows you to restore these default settings. It is also marked as OEM Partition (computer supplier’s recovery partitions).
While both recovery partitions serve the purpose of system recovery, they have distinct functionalities and cater to different scenarios:
- The OEM recovery partition is more focused on restoring the server to its original factory settings and configurations provided by the manufacturer.
- The WinRE partition, on the other hand, is tailored specifically for repairing and recovering the Windows Server operating system itself, irrespective of the server's original factory state.
Having both partitions offers redundancy and flexibility in the event of system failures or issues. It ensures that administrators have multiple options for restoring the server, whether they need to revert to the factory settings or repair the Windows Server installation.
To sum up
It’s essential to have a Windows Server 2022 recovery partition. Because when your hard drive fails, the recovery partition can help you restore to the factory settings.
If you already have it, you can backup recovery partition to another location first, and then create a bootable media to help you restore the recovery partition even the computer cannot boot. Then you can delete the recovery partition on your computer to free up storage space.
If you do not have a recovery partition in Windows Server 2022, the best system recovery partition maker - AOMEI OneKey Recovery can help you create one. Download and try it by yourself.

