Mounting ISO Windows 11 Not Working? Enable It in 3 Ways
ISO file doesn’t mount on Windows 11? You’ll find some reasons and methods after reading this article.
By Maggie Updated on August 28, 2025
Why can’t mount ISO in Windows 11?
An ISO file or ISO image is a single file that contains an identical copy of data saved on an optical disk, like CD or DVD. As a digital backup, an ISO file is used by mounting them on computers so that users can optimize the storage of the device drivers, applications, and other data stored on your CD or DVD, and store them on your hard disk.
However, you may have encountered problems when attempting to mount ISO files on your Windows 11 PC. The following presents some reasons to explain why mounting ISO Windows 11 not working:
- Unsupported Disk Image Formats: Some ISO files may use disk image formats that are not supported by Windows 11, making them unmountable. In this case, you can try to mount it using other software or you can convert the ISO file to a supported format.
- File Corruption: If the ISO file is corrupted or incomplete, it may not mount correctly. In this case, you can try to re-download the file and try to mount it again.
- Permission Problem: Try to run the ISO mounter as administrator to solve the permission problem.
- Operating System Incompatibility: Make sure your operating system meets the requirements of the ISO file. If the ISO file requires a higher version of the operating system, it cannot be mounted.
In a word, the reasons that lead to ISO unmounting problems are various. Check out the reasons one by one until you find the appropriate solution.
How to fix mounting ISO in Windows 11 not working
According to the above-mentioned problems, if you can’t mount ISO Windows 11, there are three possible methods for you to mount ISO Windows 11 correctly.
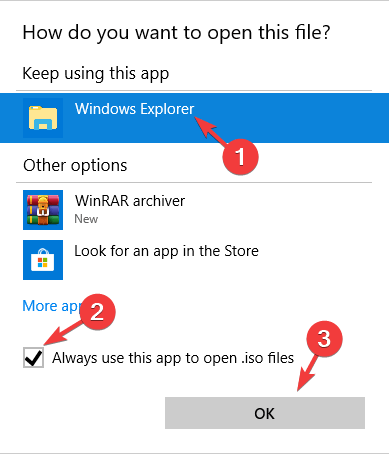
Method 1: Open the ISO file with Windows Explorer
Step 1. Locate the ISO file through File Explorer.
Step 2. Right-click the file and choose Open with and Chose another app from the menu.
Step 3. Select Windows Explorer from the list. Check Always use this app to open ISO files and click OK.
Method 2: Unmount all drives
Step 1. Type in Search bar This PC and click on it.
Step 2. Expand Devices and Drives.
Step 3. Right-click on individual virtual drives and click Eject.
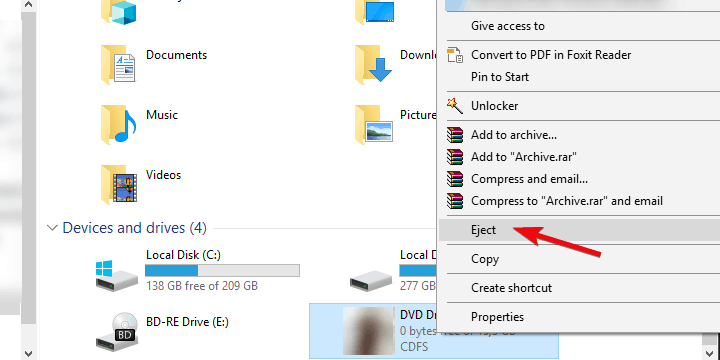
Step 4. Restart your computer and retry to mount the desired ISO file in any open slot.
Method 3: Check if the ISO file is blocked and not set to Read-only mode
When the ISO file that has been downloaded from the Internet, gets blocked by the security tool on the Windows system. If it gets blocked it usually throws an error message. Also, it is a good idea to check if the file is set to read-only mode or not. If not, please set it to read-only mode.
Let us see below some simple steps on how to do it.
Step 1. Right-click on the ISO file by browsing the folder which contains it.
Step 2. Tap on the Properties option from the context menu as shown below. Please make sure the General tab is selected.
Step 3. Then at the bottom, verify if the Read-only checkbox is checked. If not, please click on the checkbox to check it.
Step 4. After that, also make sure Unblock option is unchecked.
Step 5. Once done, click Apply and then OK to make changes and close the properties window.
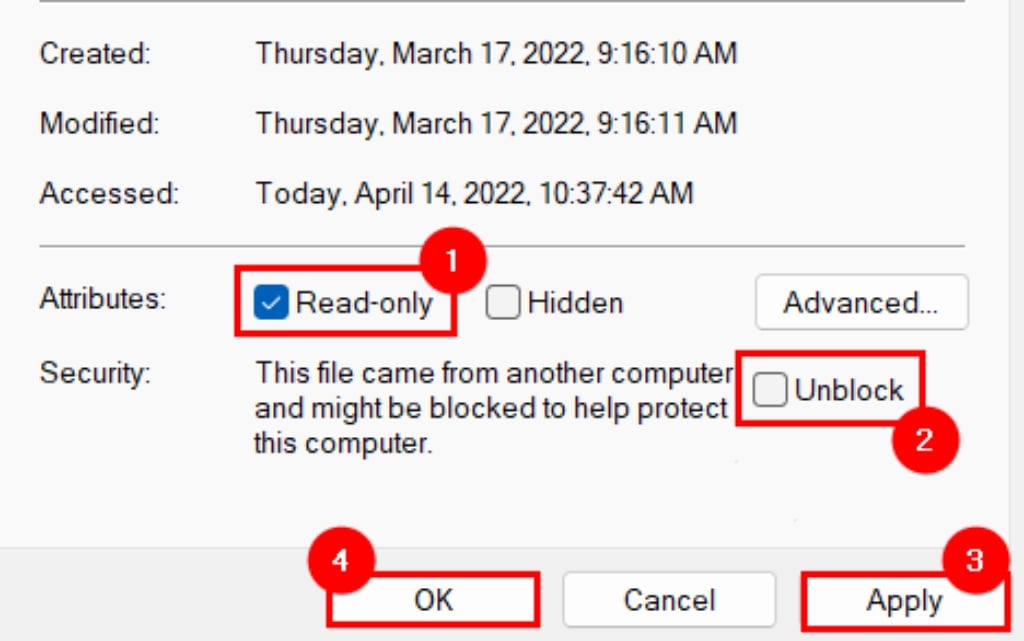
Now check if you are able to mount the ISO file or not.
What’s more, there is always an alternative to third-party repair software for you if you don’t want to fix the unmounting ISO Windows 11 manually. AOMEI Backupper Professional, for example, is recommended to you.
Easily install Windows 11 with the system image recovery tool
AOMEI Universal Restore, also called Dissimilar Hardware Restore, is a powerful feature available in the AOMEI Backupper paid versions to help you mount ISO Windows 11. And the process involves two computers. You need to install AOMEI Backupper Professional on a Windows 11 PC and create a system image based on this PC. If the computer where you want to install Windows 11 cannot boot, it is necessary to create a bootable device.
In summary, some prerequisites are listed as follows:
- Download the backup software AOMEI Backupper Professional and install it on your Windows 11 PC.
- Create a Windows 11 system image. You can save the image to a NAS, or a USB drive.
- A bootable USB drive to boot the target computer.
Here are the detailed steps about how to install Windows 11 with Universal Restore.
Step 1. Boot the target computer via a bootable USB drive. You may need to change the boot priority in the BIOS/UEFI.
Step 2. Go to the Home tab, click Restore to select a task or image file.

Step 3. Select to restore the entire backup image and click Next.
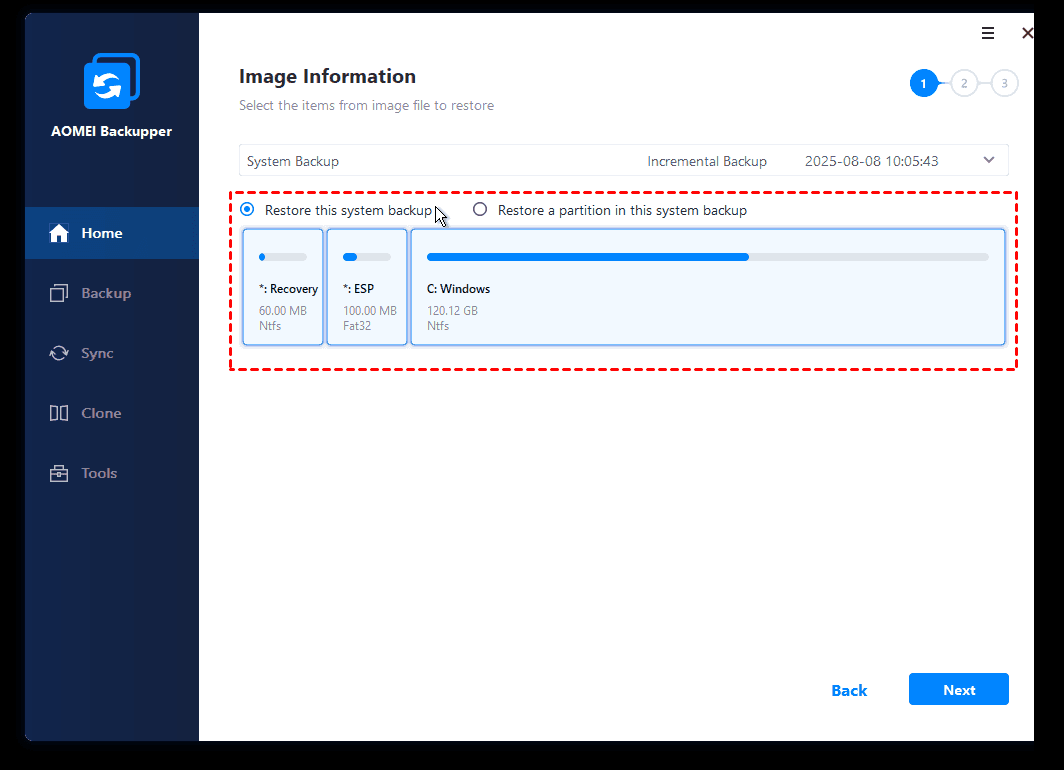
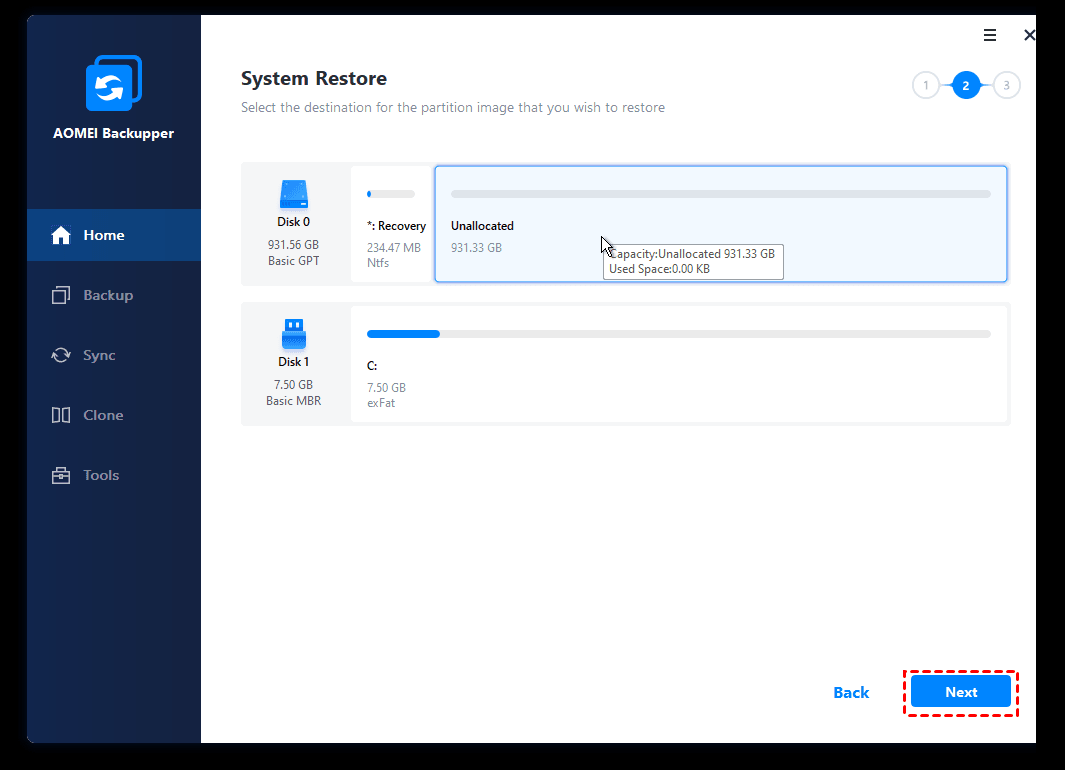
Step 4. Select a restore path to receive the system image and click Next to continue.
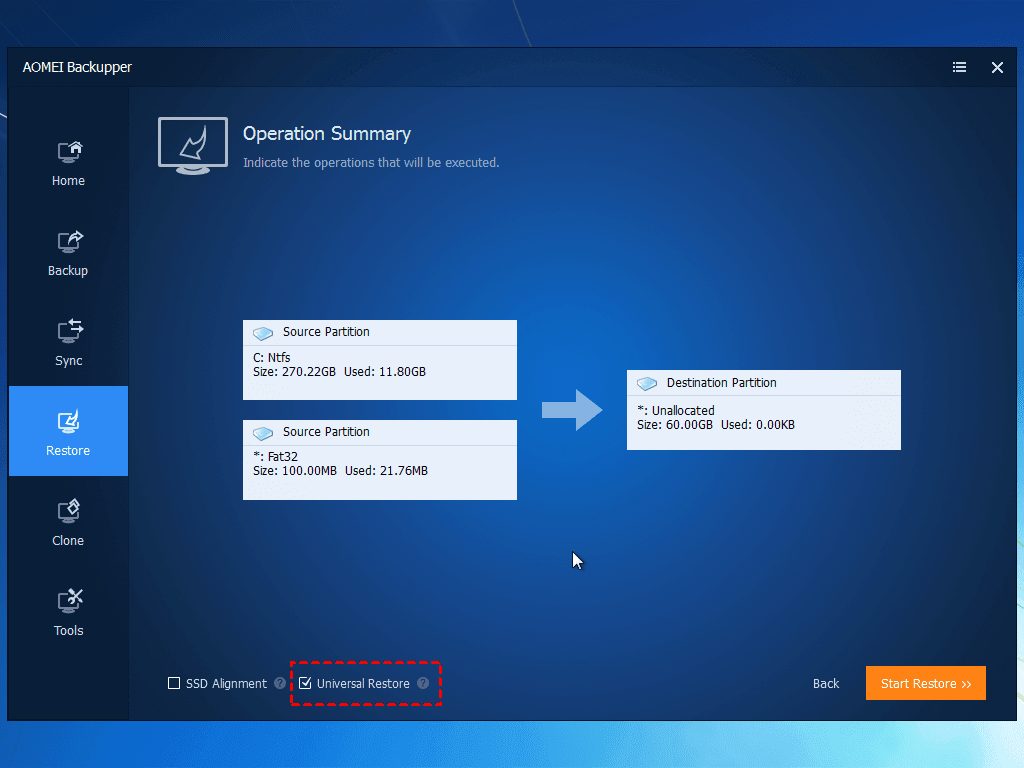
Step 5. On the "Operation Summary" page, preview the operation that will be executed. Remember to select Universal Restore in order to make sure the recovered system is bootable. Then, click Start Restore.
Summary
When you encounter the problem of mounting ISO Windows 11 not working, you can check the possible reasons and then solve the problem. What’s more, you can turn to the third-party software - AOMEI Backupper Professional, which can help install Windows 11 by restoring from an image file created before.

