[Solved] How to Backup a Dell Laptop Windows 11
This article presents 4 efficient ways to backup Dell laptop Windows 11. Find the one that best suits you after reading.
By Maggie Updated on October 30, 2024
The necessity of backup your Dell laptop data
Dell laptop becomes popular among all ages and different user groups for its mobility convenience. Do you remember when the last time you backup your Dell laptop Windows 11 is? Last month? Last week? Never? Setting up a good backup scheme seems to be time-consuming and intimidating, but it’s neither. Anyone can do it, and everyone should do it in order to protect their PC security in case of any threats as below:
▪Data loss: unexpected situations such as system failure, virus and malware attack, or accidental deletion may lead to data loss.
▪System breakdown: accidental power off or system crash ruined the un-backup data.
▪Other events: like fire, flood, theft, etc.
Then, how to backup a Dell laptop Windows 11? you can manually select, copy and paste your important files to backup. However, this is really time-consuming and laborious. You can choose the following 4 useful ways when you prepare to back up.

Method 1. Backup Dell laptop via Backup and Restore
Backup and Restore is an embedded tool of Windows to create a full backup of the operating system. You can recover your laptop to an earlier state when system accidents happen. Now follow the below steps to figure out how to backup data on Dell laptop.
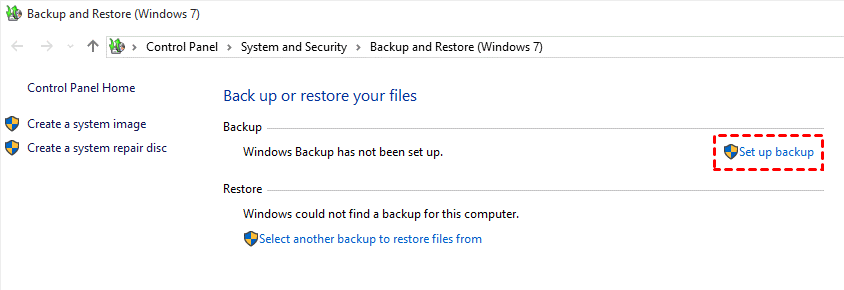
Step 1. Go to the Control Panel and select Backup and Restore (Windows 7), and click Set up backup.
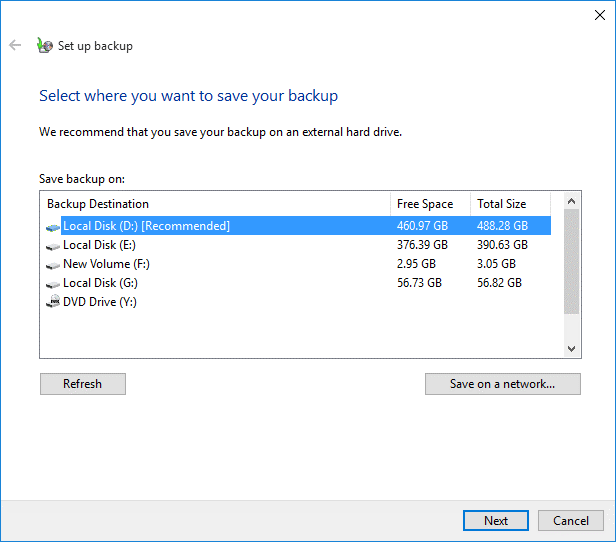
Step 2. Select a location to store your backup. You can also choose to backup to an external hard drive with sufficient storage space. And click Next.
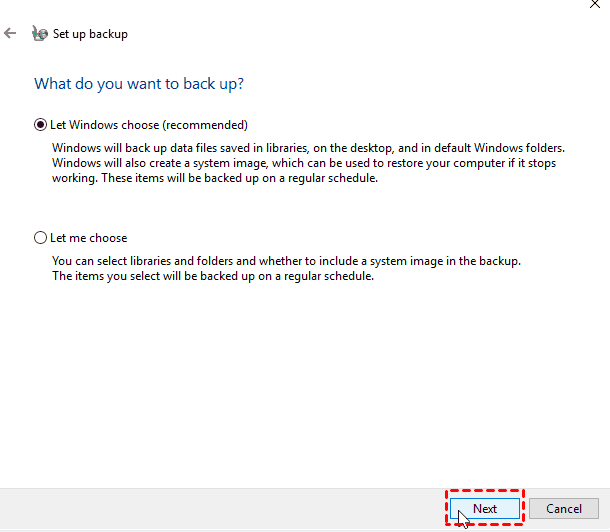
Step 3. Select the Let Windows choose (recommended) option and hit Next.
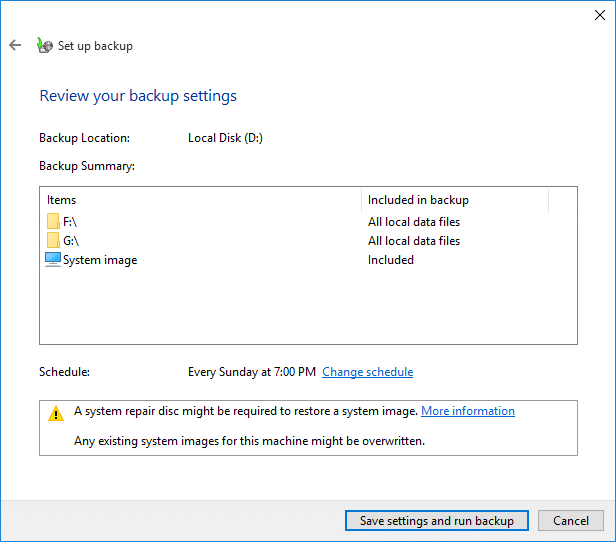
Step 4. Lastly, confirm your options and click Save settings and run backup to finish the task.
Method 2. Backup Dell laptop through Windows 11 Backup Assistant
Windows Backup Assistant is a backup and recovery tool provided by Windows operating system, which allows you to backup your systems, files, and folders, recover your data after system crashes or breakdown and manage your backup. After signing in your Microsoft account, click Start and then execute your operations.
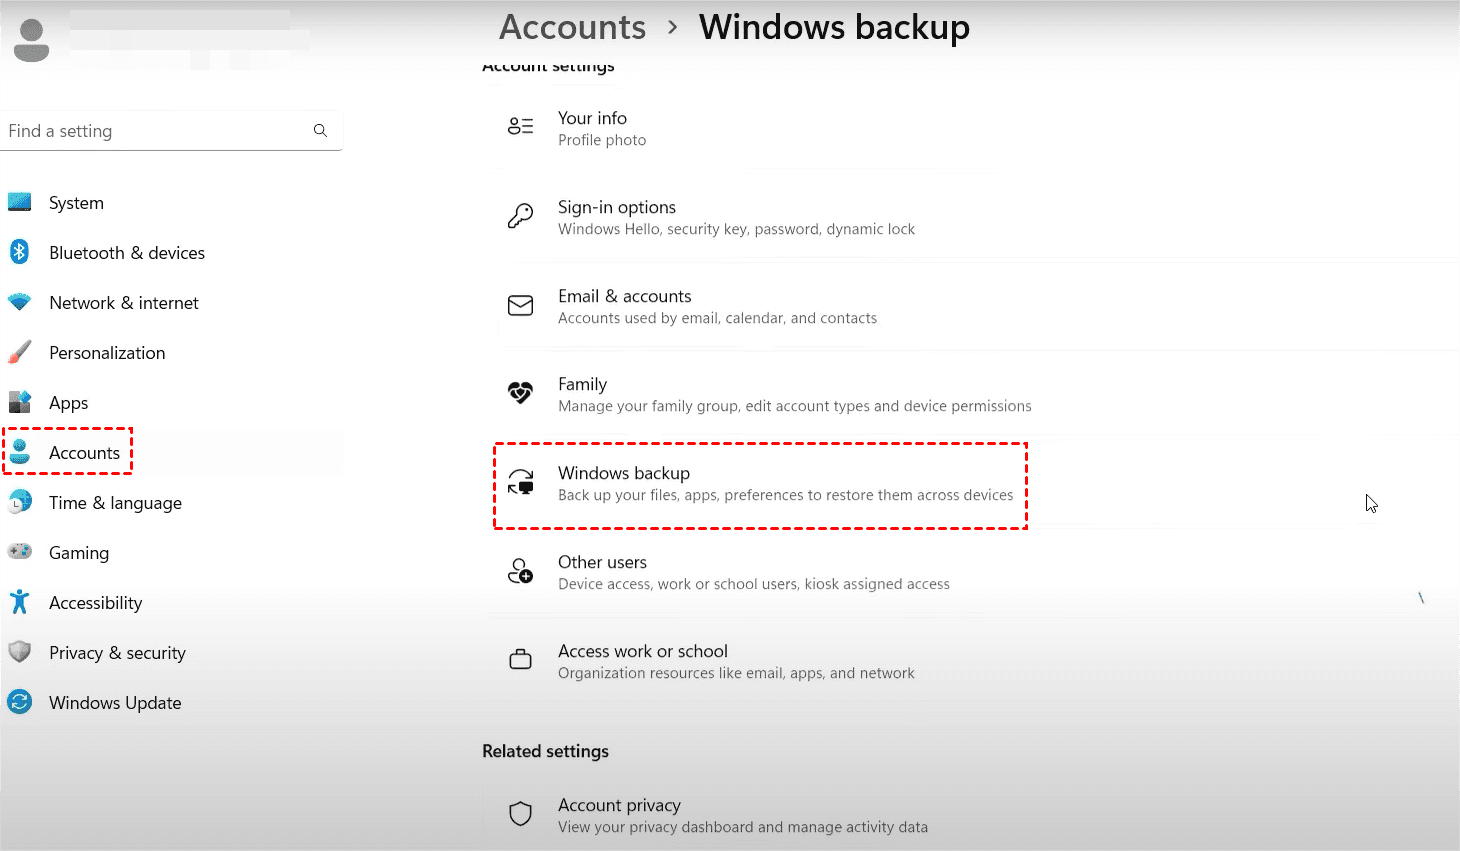
Step 1. Go into Settings, and click on Accounts. Scroll down and select Windows backup.
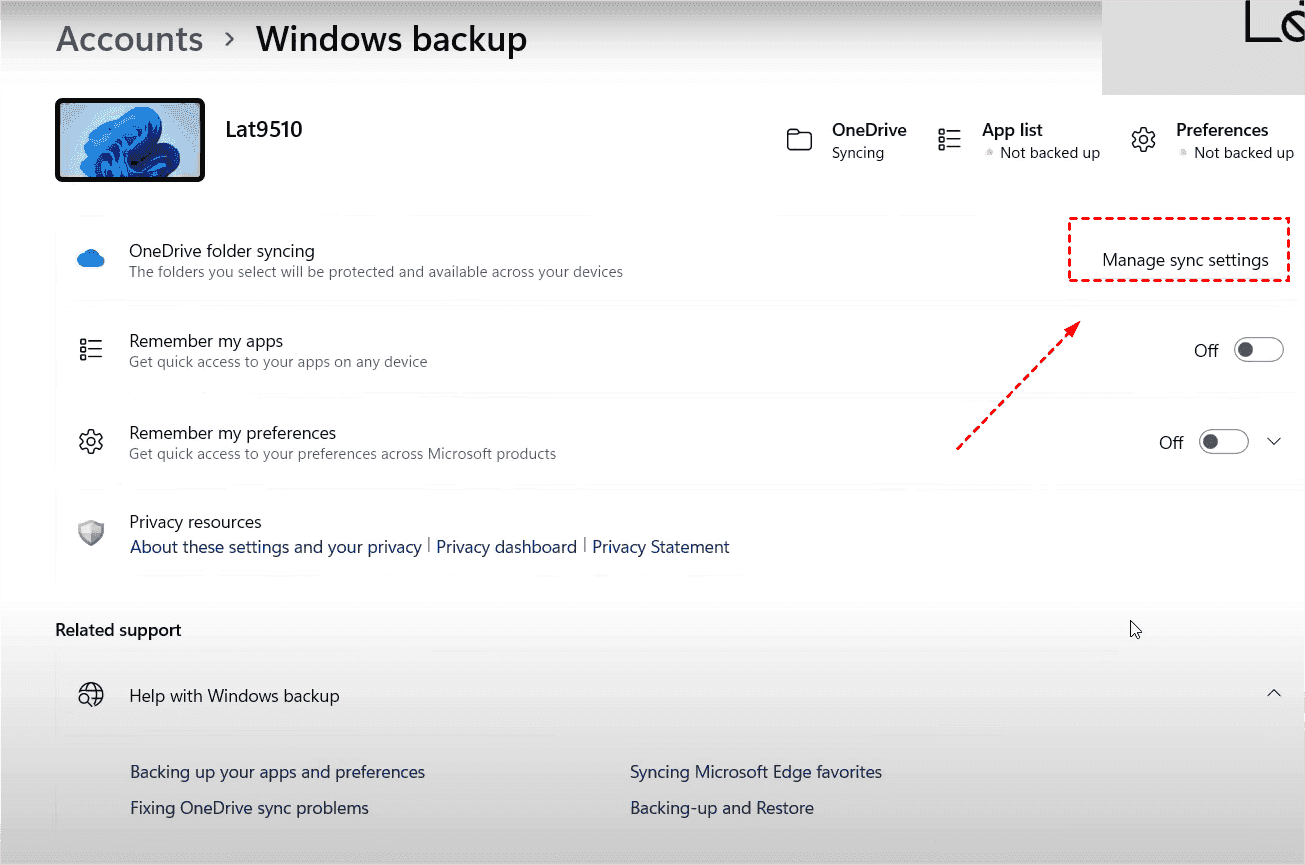
Step 2. In the pop-up window, select Manage sync settings on the right page.
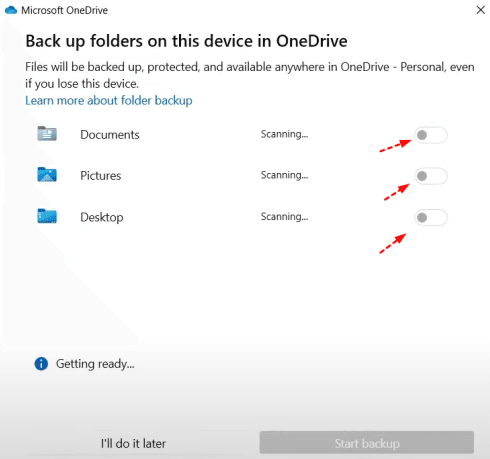
Step 3. Then you can choose the items you want to backup on your Dell laptop.
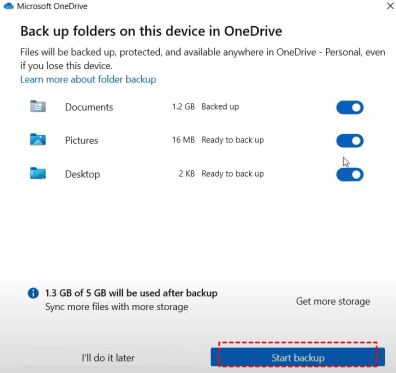
Step 4. After selecting, click Start backup to execute the progress.
Method 3. Backup Dell Laptop to an external hard drive via File History
How to backup files on Dell laptop? File history is a practical application that is integrated into Windows 11 and Windows 10 that allows you to execute timely backup. Now you can follow the tutorial below to learn how to backup Dell laptop to external hard drive on Windows 11.
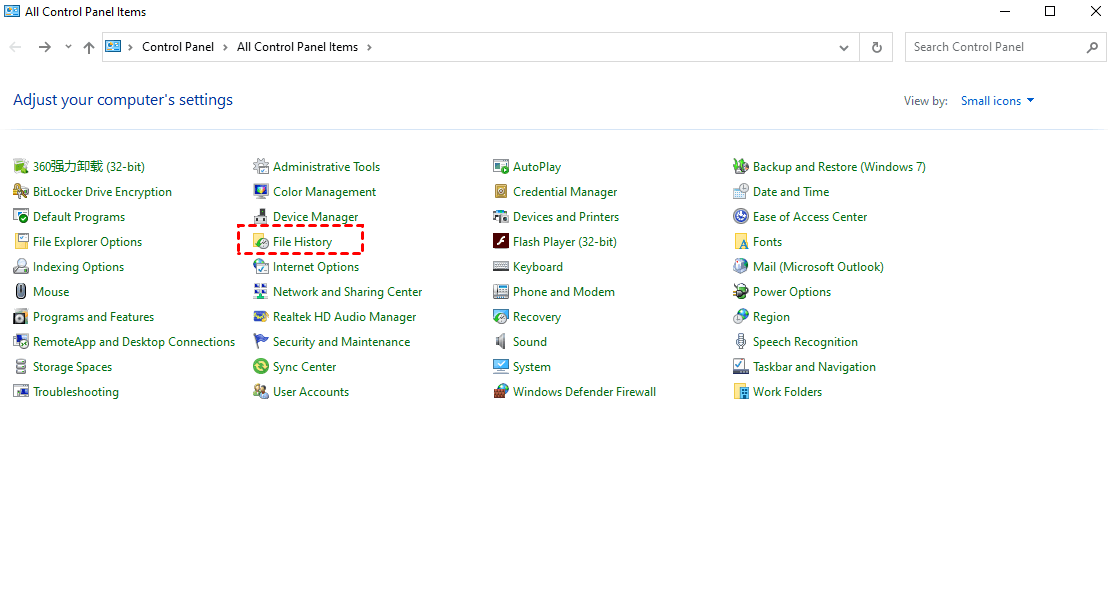
Step 1. Connect your external hard drive to your Dell laptop, open Control Panel, and navigate to File History, open it.
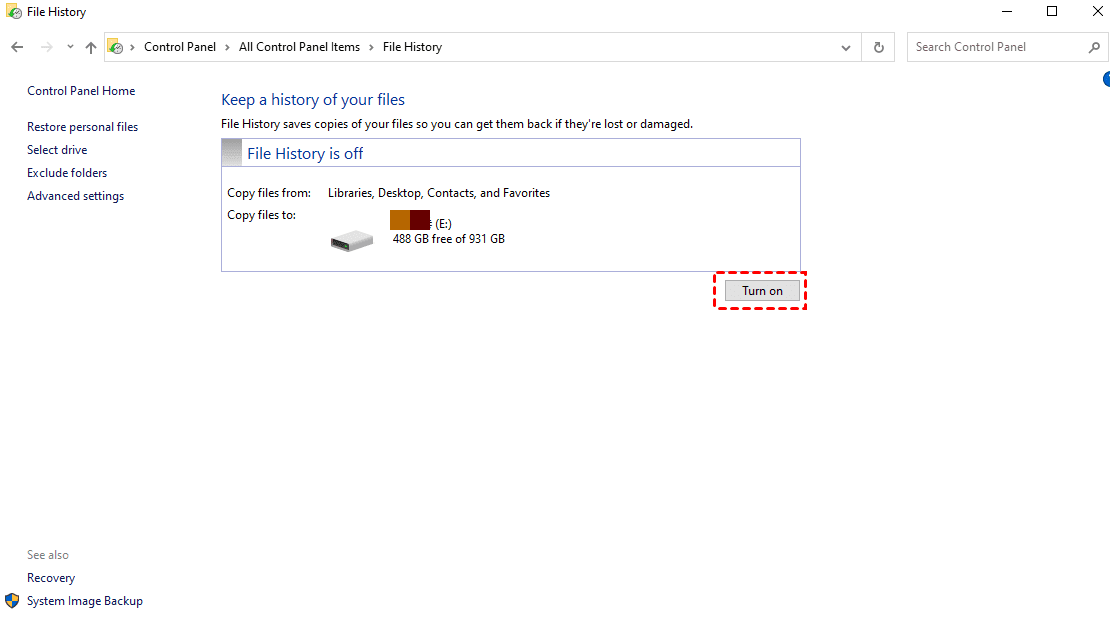
Step 2. In the file history pop-up window, click Turn on button after ensuring the correct destination path.
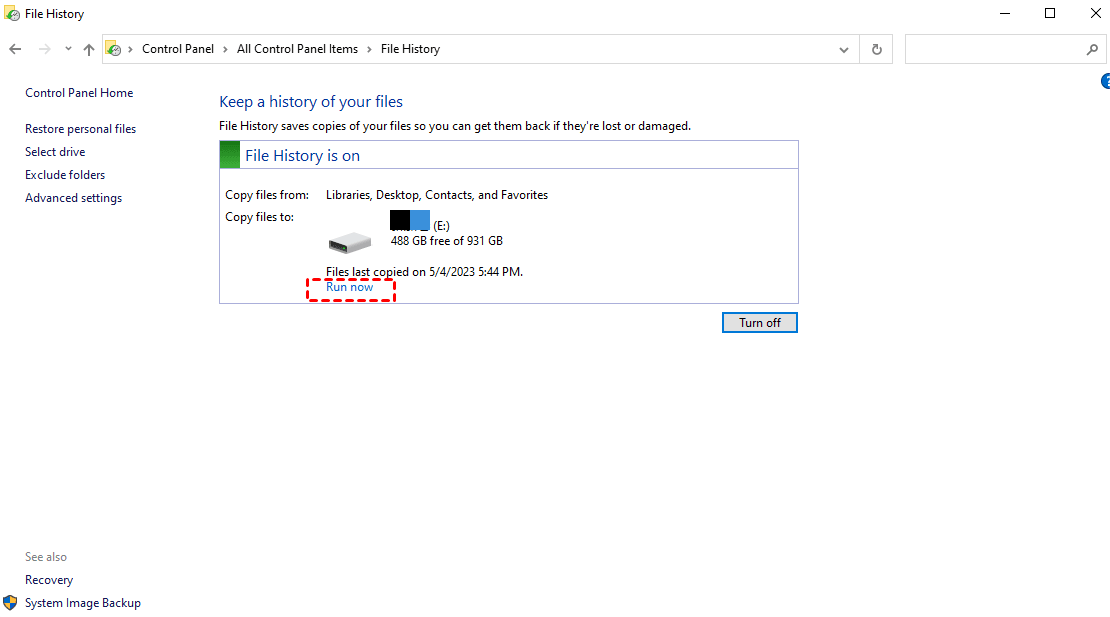
Step 3. Then click Run now to backup your files to external hard drive you choose.
Method 4. Best solution for Dell laptop Windows 11 backup - AOMEI Backupper
If you want to continuously backup your laptop system, full backup provided by File History may cause a lot of duplicates, which will take up significantly huge storage space. Another workable option for your convenience is AOMEI Backupper Standard, which is a highly reliable software noticed for the below backup features:
☞Functionally, it enables you to realize system backup, disk backup, partition backup, and files/folders backup.
☞For compatibility, it supports backing up to various locations like local disks, external hard drives, network share, NAS devices, cloud drives, etc.
☞For backup schedule, it allows you to automate your backup tasks on daily, weekly, monthly, and event triggers, USB plug-in.
Now download AOMEI Backupper and you can take the File Backup in the following as a reference.
Step 1. Click File Backup after choosing Backup. If you want to backup the entire hard disk, click Disk Backup instead.

Step 2. Click Add file or Add Folder to select files or folders on your laptop that you want to back up.

Step 3. Select the location as the destination path to store the image file.

Step 4. Confirm your setting by clicking Start Backup button and wait for the task to finish.
✍Advanced features you may need
If you upgrade to AOMEI Backupper Professional, you can customize your need:
◆Differential backup: You can choose to backup changed files in order to save storage space when you want to continuously backup your system.
◆Backup scheme: It can help you manage backup disk space by automatically deleting backup files when the backup versions reach the backup number you set.
Conclusion
Now you already know how to backup Dell laptop Windows 11 through Backup and Restore, Backup Assistant, File History, as well as AOMEI Backupper. Additionally, AOMEI Backupper is not only the best free software to backup Dell laptops but also regarded as the best free alternative to Dropbox.

