Complete Guide to Backup Specific Folders on Windows 11 | 5 Ways
Want to know how to back up specific folders on Windows 11? This article provides 5 different ways, including the copy feature, Windows 11 built-in backup tool File History, Backup and Restore (Windows 7), OneDrive and free third-party software - AOMEI Backupper.
By Lily Updated on September 10, 2025
Why backup certain folders on Windows 11?
There are many benefits of backing up files or folders on Windows 11. The most obvious advantage is to ensure data security and keep files up to date. For users who frequently use certain folders, they may change files, add files, and delete files in these folders. Backing up your folders can avoid the annoyance of losing files.
In addition, if you do not create folder backups, you may lose files once and for all in the event of an unexpected situation (such as disk failure, virus, malware, fire, flood, etc.). And you never know when these failures occur.
How to backup specific folders on Windows 11
To avoid data loss, you need to backup files or folders in advance. As for how to backup specific folders on Windows 11, 5 ways are provided below, you can choose one according to your needs.
👉 #1. Automatic folder backup with the best free backup software🔥
👉 #2. Manually copy Windows 11 folder to external drive as a backup
👉 #3. Backup selected files using File History
👉 #4. Backup specific folder to OneDrive on Windows 11
👉 #5. Backup specific folders using Backup and Restore (Windows 7)
#1. Automatic folder backup with the best free backup software
AOMEI Backupper Standard is the best free backup software that allows you to perform automatic folder backup on Windows 11 effortlessly. Compared with Windows' built-in backup tools, it has the following advantages and it can avoid all kinds of errors in the built-in tools, such as File History doesn’t recognize this drive, File History drive is disconnected, etc.

-
Multiple backup types. You can perform System Backup, File Backup, Disk Backup, and Partition Backup as per your needs.
-
Multiple destinations. All the backup types support backing up to internal or external hard drives, cloud drives, network location and NAS devices. If you have an AOMEI account, you are able to backup files to AOMEI Cloud.
-
Get an email notification when the backup is complete. When you encounter an emergency, you can leave without waiting for the final result. Later, the software will notify you of the result via email.
-
Support various Windows OS. You can use it to backup specific folders in Windows 11, 10, 8, 7 with equally simple operation.
This is just the tip of the iceberg among its many functions. More powerful functions are worth exploring by yourself. The detailed steps for backing up specific folders with this software on Windows 11 are as follows:
Step 1. Download AOMEI Backupper Standard, install and launch it. Click Backup -> File Backup.

Step 2. Click Select Source > Add Folder to select the specific folders you want to back up on Windows 11.

Step 3. Then, click the PC icon to select the device where you want to store the backup image.

Notes✍:
✬ Options: You can write comments and modify the compression level of the backup here. After upgrading to AOMEI Backupper Professional Edition, you can encrypt your backups.
✬ Schedule: You can set automatic backup here. It will help users continuously backup data, so you will never miss any changes.
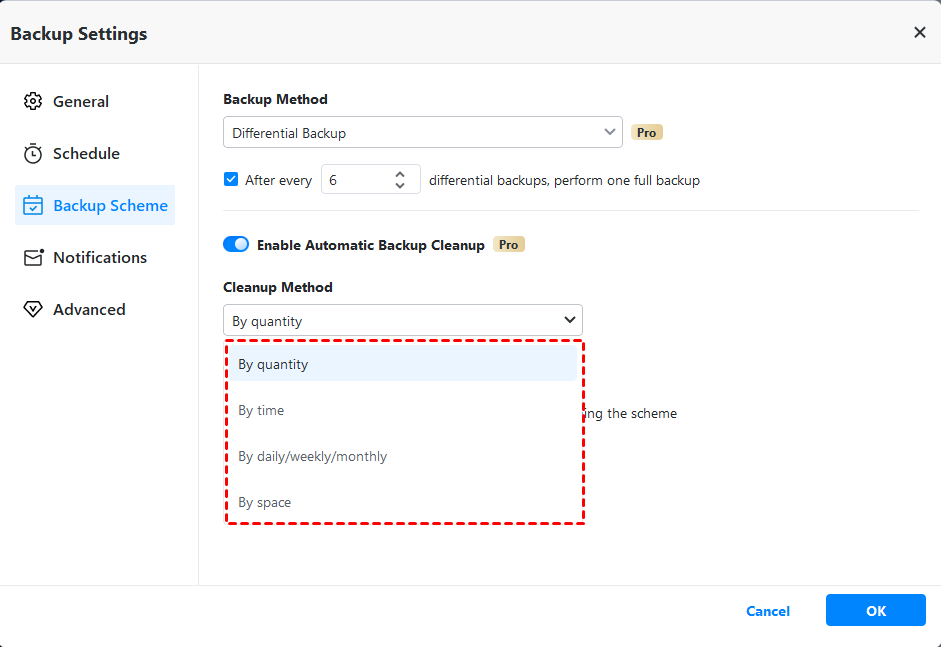
✬ Backup Scheme: If you upgrade to advanced versions, you can enable this feature to delete old backup images to ensure that there is always enough space to keep the new backup images.
Step 4. Finally, after confirming all the backup settings, click Start Backup.
#2. Manually copy Windows 11 folder to external drive as a backup
Alternatively, you can manually copy a folder to a backup location instead of using an application or tool. Steps are as below:
- Attach an external drive to your computer.
- Go to the folder that you want to backup and right-click on it. Select the Send to option and select external drive you connected. Then, your folder will successfully start transferring to the external drive.

#3. Backup selected files using File History
File history is a built-in Windows backup tool used to back up all folders and files in the user's home directory, including Documents, Music, Pictures, Videos, and Desktop. Windows users can use the backup created by File History to restore the original file that was lost or damaged. File History also allows you to browse the backup timeline, select the version you want and restore it.
To backup certain folders on Windows 11 via File History, follow the steps below:
- Connect an external hard drive or USB drive to your computer properly.
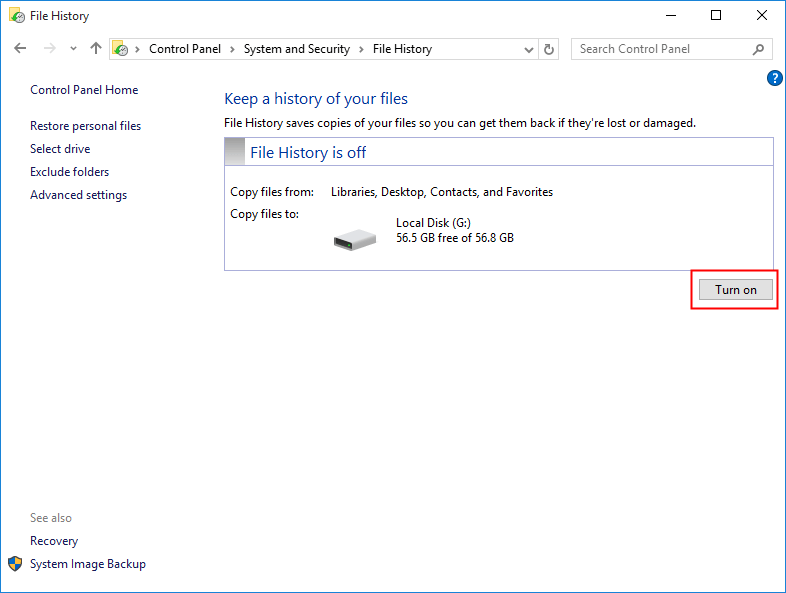
- Type and search File History in the Windows search bar, then click Open.
- File History will automatically select the external drive connected to your computer as the backup destination. Click Turn on to enable File History.
- If there are some folders by default settings you don’t want to back up, click Exclude folders from the left menu to add the folders you don’t want to save copies.

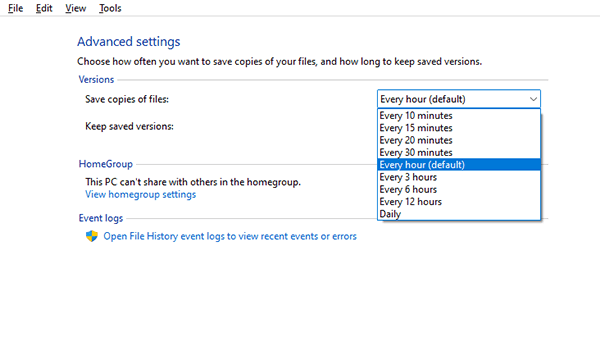
- Click Advanced settings from the left menu to configure additional settings based on your needs.
#4. Backup specific folder to OneDrive on Windows 11
OneDrive is a storage service provided by Microsoft. It provides 5GB of free storage space and also allows you to access a free version of Microsoft Office.
To backup specific folder to OneDrive on Windows 11, follow the steps below:
- Press Windows + I to open Settings or click on Start Menu and select Settings.

- In Windows Settings, click Accounts -> Windows backup. Then click Set up syncing in the "OneDrive folder syncing" section.
- Then you’ll be prompted to enter your OneDrive account email address and password to sign in.
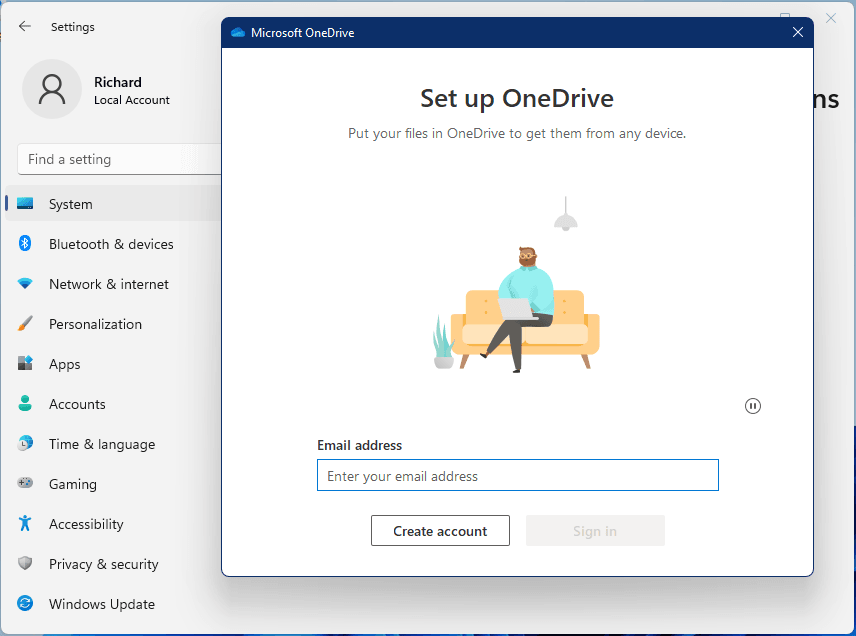
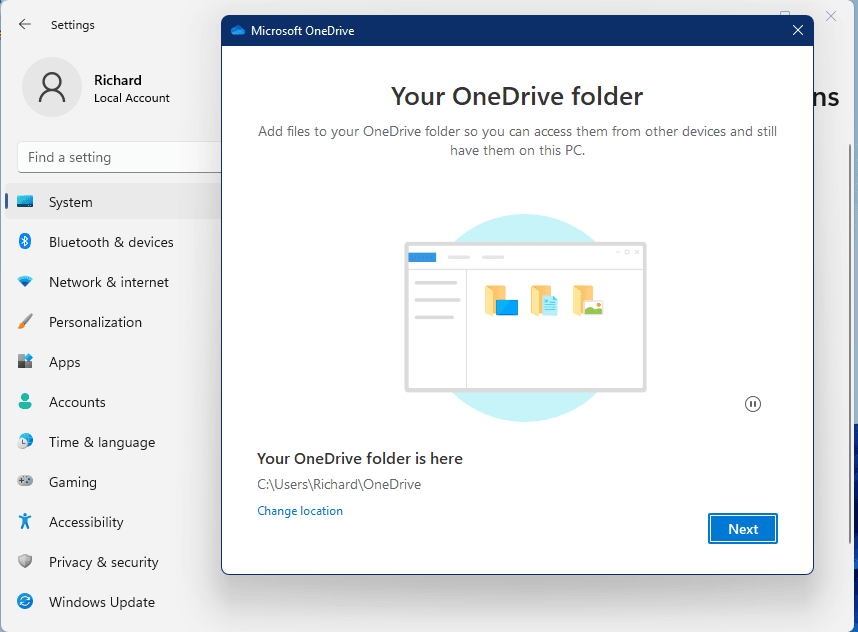
- After logging in, you will proceed to the setup wizard.
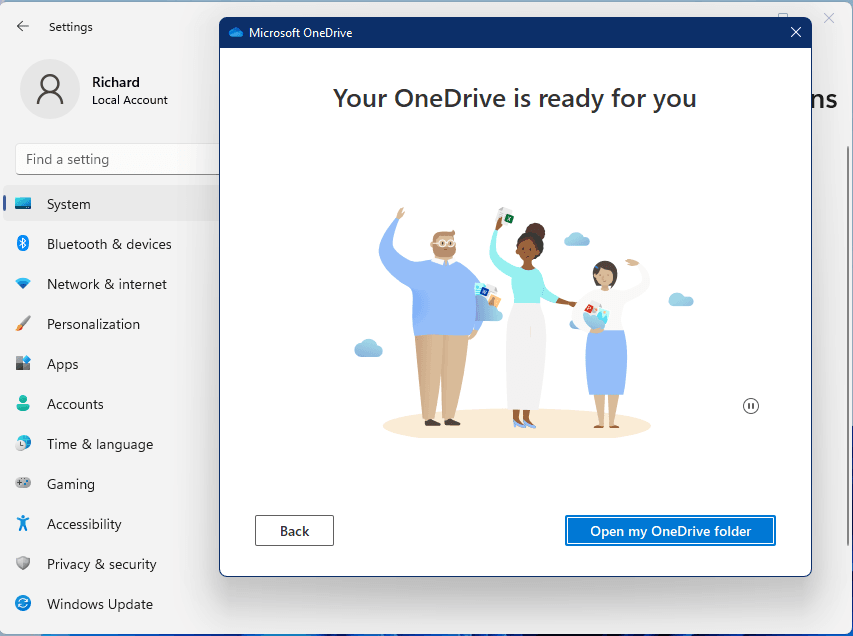
- When you’re done with the setup wizard, your OneDrive is ready to use. Click Open my OneDrive folder.
- Drag and drop or copy and paste the files/folders you want to backup into the OneDrive folder. The client will automatically sync them to the OneDrive website.
#5. Backup specific folders using Backup and Restore (Windows 7)
The entrance for reaching Backup and Restore (Windows 7) in Windows Settings has been removed and replaced with another backup utility – OneDrive backup. However, you can still access Backup and Restore through Control Panel.
To backup selected files using Backup and Restore (Windows 7), follow the steps below:
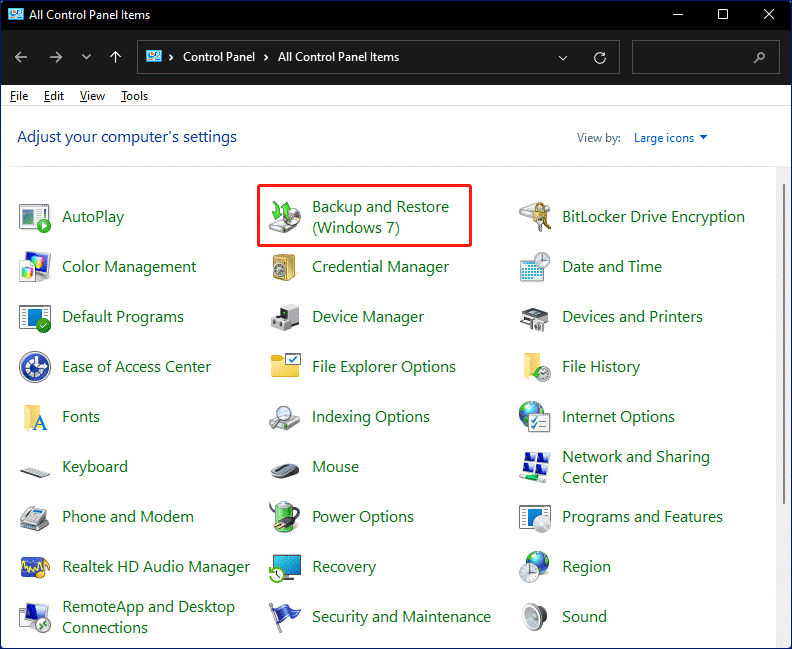
- Click on the Search icon (magnifier) in the center of the taskbar. Type Control Panel and click on the search result.
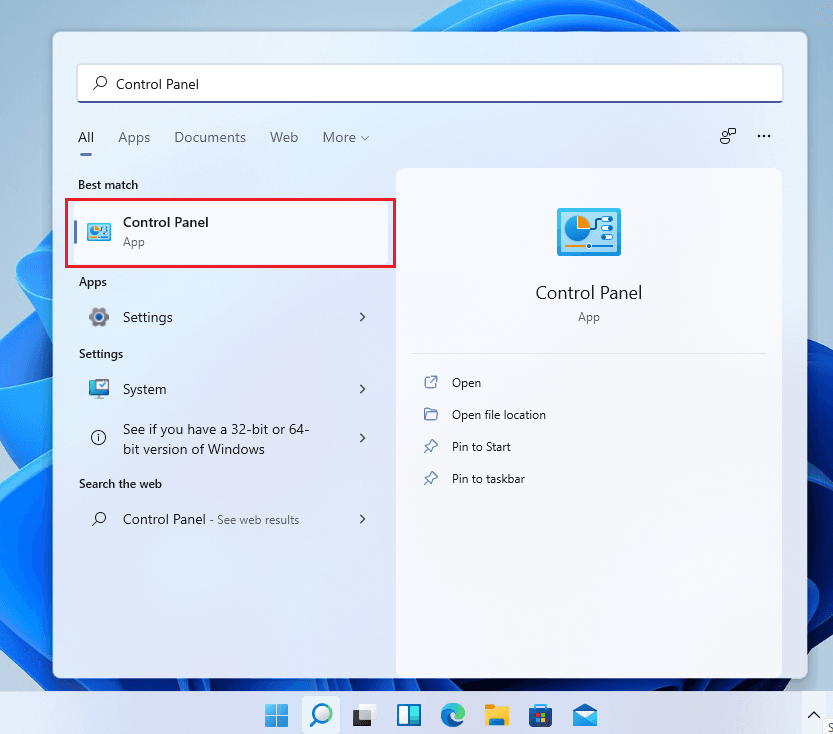
- In Control Panel, find and select Backup and Restore (Windows 7).
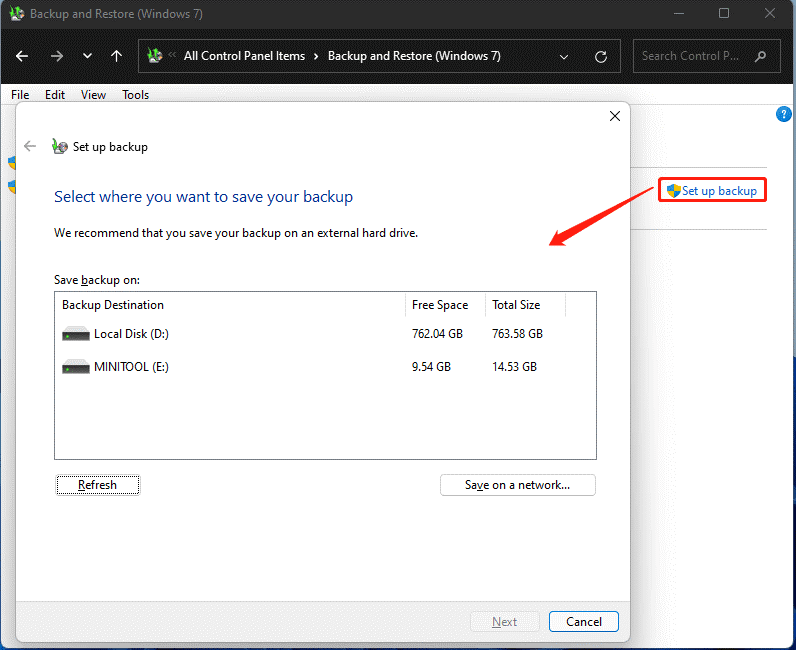
- Then click Set up backup option to enter the data backup settings. Select where you want to save your backup and click Next to continue.
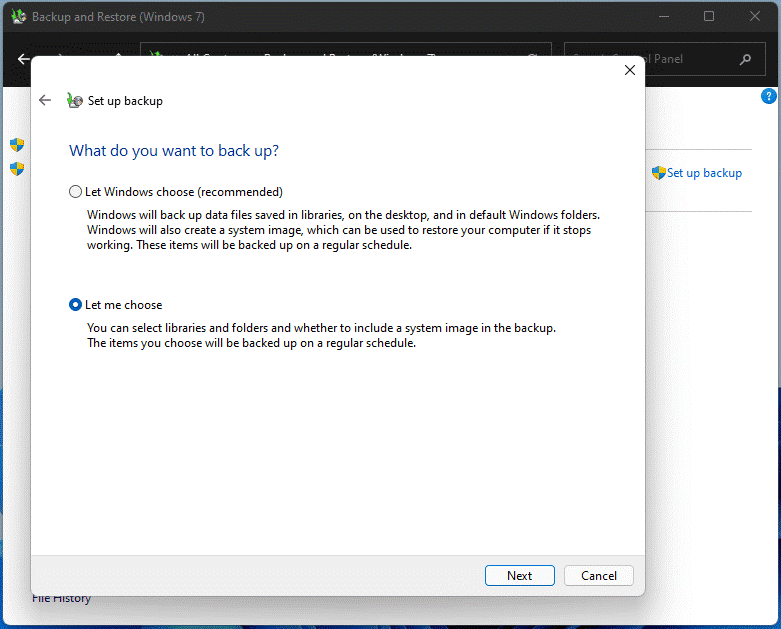
- Next, select what do you want to back up. Select Let me choose to customize files that you want to back up and click Next.
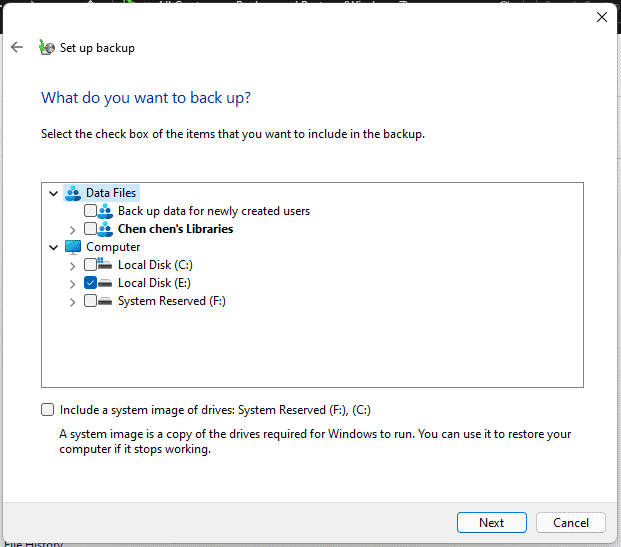
- Select the check box of the items you want to include in the backup. You can expand the directory and select the folder that needs to be backed up. If you don’t want to create a system image of Windows 11, uncheck the box of Include a system image of drives.
- Check your backup settings. You can customize the backup frequency by clicking Change schedule. Then, the changed or new files since the last backup will be added to your backup according to the schedule you set.
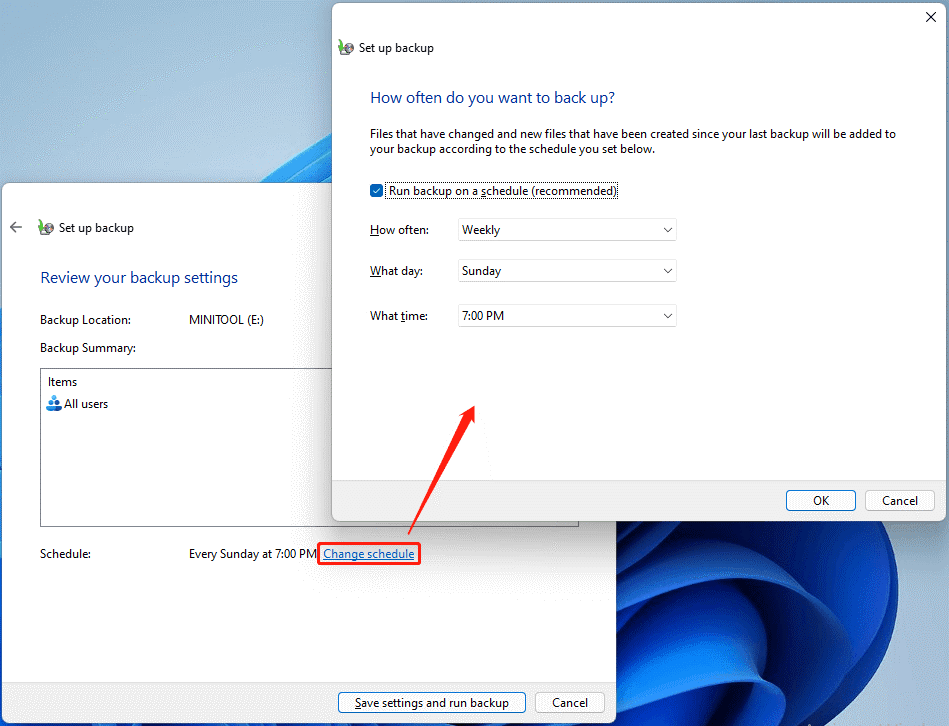
- Finally, when all settings are done, click the Save settings and run backup button.
Conclusion
You can easily backup specific folders on Windows 11 through the 5 ways provided in this article. They are all good choices, but some are easier and better than others. Taking all factors into consideration, I suggest you use a third-party Free software-AOMEI Backupper. You can also use it to backup only new files to external hard drives.
In addition to the backup function, it is also embedded with other powerful functions such as Restore, Synchronization, and Clone. For instance, you can use it to move hard drive to new computer in Windows 11, perform a bootable clone on Windows 11, etc. Why hesitate? Use it now to protect your data!

