How to Use RescueaZilla on Windows 10 - Backup And Restore
You can learn how to use RescueZilla on Windows 10 to backup and restore system images. Another professional backup and recovery software is also recommended to you.
By Miya Updated on November 23, 2023
What Is Rescuezilla?
Rescuezilla in Windows 10 is a free and open-source disk imaging and system rescue software. It is designed to help users create backups of their entire disk or specific partitions, allowing them to restore their system in case of data loss, system crashes, or other emergencies. Rescuezilla is based on the popular Clonezilla software but offers a more user-friendly interface and additional features.
With Rescuezilla, you can create a complete image of your hard drive or specific partitions, including the operating system, applications, and data. This image can be stored on an external drive or network location for safekeeping. In the event of a system failure or data loss, you can use Rescuezilla to restore the image and get your system back up and running.
Rescuezilla supports various file systems and disk formats, making it compatible with a wide range of systems. It also includes tools for disk partitioning and resizing, as well as the ability to clone disks and perform data recovery tasks. Overall, Rescuezilla provides users with a reliable and efficient solution for system backup, recovery, and rescue operations.
How to Use RescueZilla on Windows 10
You can download RescueZilla from the official RescueZilla website and select the features you are interested in and follow the on-screen instructions. Here we will show you how to use Windows 10 RescueZilla's backup and restore functions.
Of course, if you want to use a simpler, more specialized program that combines backup, restore, sync, clone, etc., please go to the end of this article.
1. Backup System Image via RescueZilla In Windows 10
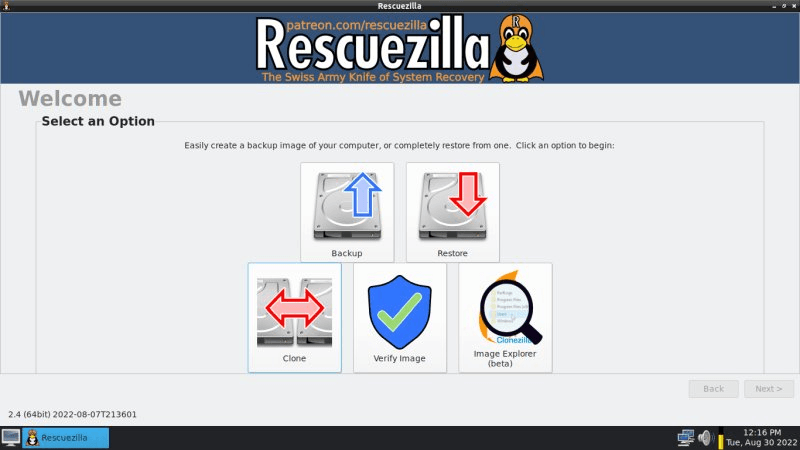
Step 1. After you perform RescueZilla download, select the backup option, where you have the choice between a full disk image or an individual partition image.
Note:
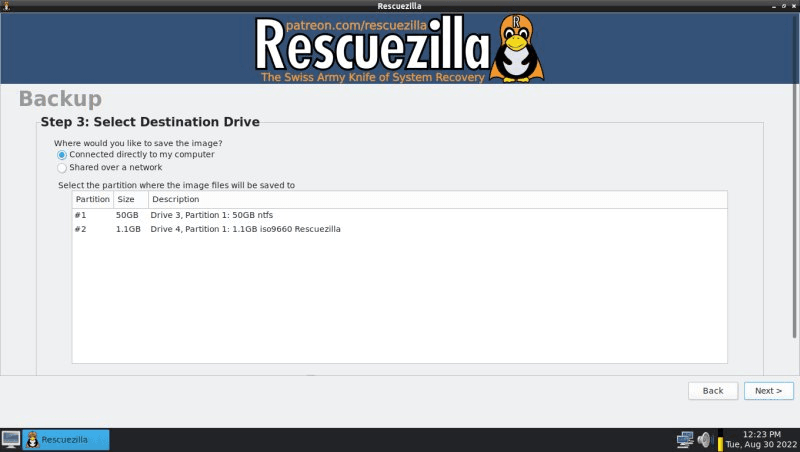
◉If you find that the second disk is not appearing in the destination list for saving the images, it may be due to the disk not being initialized. In such cases, you can use a tool like GParted to initialize the disk by creating a new GPT partition table. Then, proceed to create a single partition and format it with the NTFS file system.
◉Alternatively, if you don't have a second local disk, you can also save the image to a network destination.
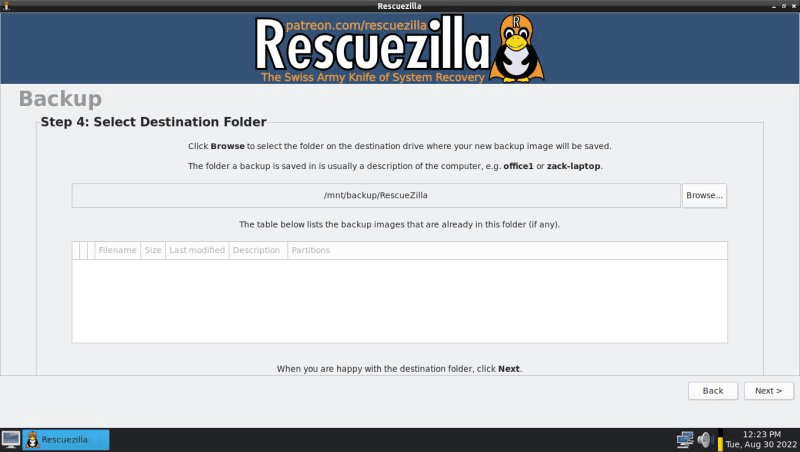
Step 2. Next, select a destination folder. Click Browse and choose an existing or new folder to save the image. Optionally, give the image a custom name instead of using the default.
Step 3. Next, choose the compression level. Note that RescueZilla does not provide encryption options, so you'll need to encrypt the image manually later. Afterward, let RescueZilla finish the imaging process. In the case of a stock Windows 10 installation, the entire process took approximately 8 minutes.

Step 4. You can verify the saved image, which took only 2 minutes to complete.
2. Restore System Image via RescueZilla In Windows 10
If you perform another backup, saving two out of three partitions on the disk, the process remains the same. Afterwards, you attempt to restore the image(s).so here are steps on how to use RescueZilla on Windows 10 to restore Windows 10 images.
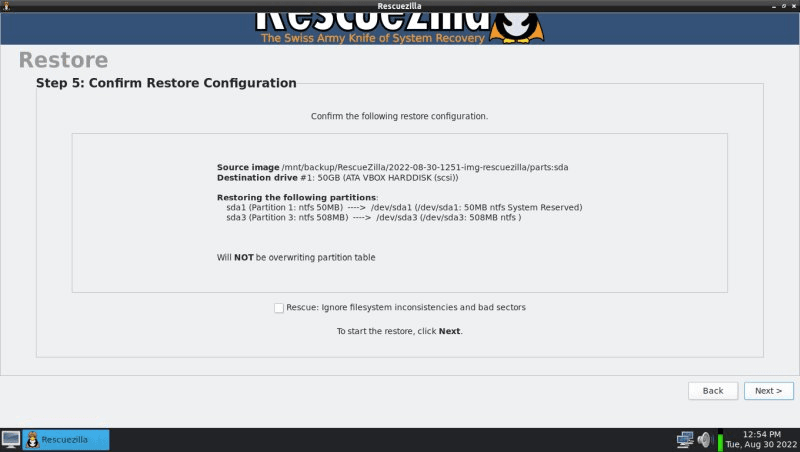
Step 1. During the selection of the restore destination, you come across a checkbox labeled "Overwrite partition table." This can be confusing and worrisome. If you only intend to restore specific partitions rather than entire disks, you can safely ignore this option. However, selecting the destination partition(s) in the table might be a little tricky.
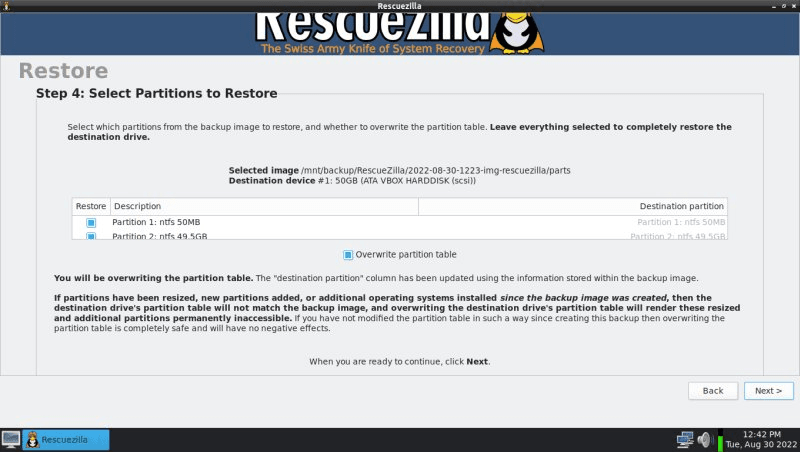
Step 2. If you uncheck Overwrite partition table, all listed partitions in the table will be deselected. Manually selecting them will prompt an error about no destination being chosen and prompt you to select from the dropdown menu.
To correctly select partitions, click below the Destination partition label for each line in the table. A dropdown menu will appear, allowing you to choose the partitions. Ensure proper matching, such as restoring a 50MB partition to a 50MB partition. Afterward, the process becomes straightforward.
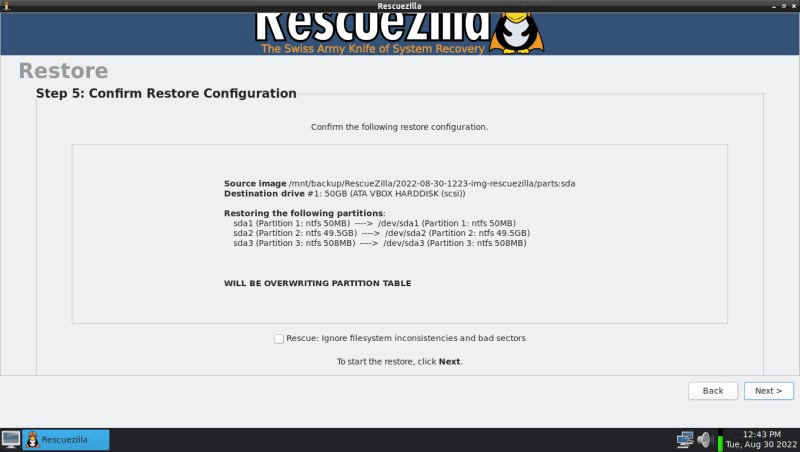
Step 3. When you have selected all the partitions to be recovered, click Next to start recovering the backup.
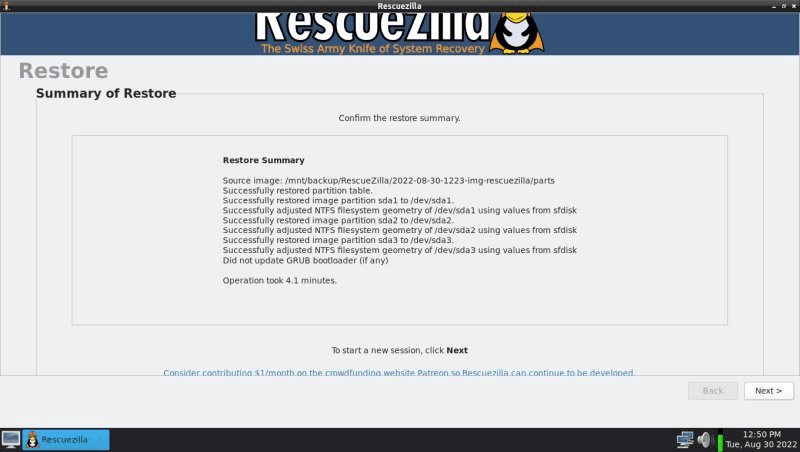
Step 4. After the recovery process is successfully completed, you can see the following page, if you want to open a new session, please click Next.
An Easier Way to Backup And Restore Windows 10
RescueZilla's Backup and Restore feature is popular but lacks support for differential backup. To overcome these limitations, consider using the more professional and user-friendly alternative, AOMEI Backupper Standard, for Windows 10 backup. It offers various backup solutions, including System Backup, Disk Backup, Partition Backup, and File Backup, with several advantages:
- Three backup methods: incremental, differential (You can find this feature in Pro version), and full backups.
- Schedule backups with daily, weekly, or monthly frequency.
- Different backup modes and compression levels.
- Add comments to backups and receive email notifications.
- Support for multiple storage devices (USB, HDD, SSD, etc.).
- Compatible with various operating systems (Windows 7, 8, 8.1, 10, 11, etc.).
To backup your Windows 10 files, follow these steps:
Step 1. Download, install, and launch AOMEI Backupper Standard. Select Backup and choose File Backup.

Step 2. Choose either Add File or Add Folder and select the specific files or folders you want to include in the backup.

Step 3. Select the destination where you want to store your backup.

Additional options you can utilize include:
✾ Options: This feature allows you to compress or split image files and enable email notifications.
✾ Schedule Backup: Set up automatic backup tasks at regular intervals, like daily, weekly, or monthly.
✾ Backup Scheme: Perform incremental or differential backups to save disk space by backing up only changed files. Old backups are automatically deleted.
Note that some features are available in AOMEI Backupper Professional and higher versions.
Step 4. Click Start Backup to initiate the Windows 10 backup process using the software.
You can backup folders to AOMEI Cloud, which offers 1TB of free storage to enhance your backup safety thus you backup to another location, after registration, you can enjoy 15 days of free access to the cloud.

To restore files or the operating system using AOMEI Backupper:
Click on Restore and choose either Select Task or Select Image File. Follow the instructions provided by the wizard to complete the recovery process. This will help you restore your files or the operating system.

Summary
This article provides a guide on using Rescuezilla for Windows 10 backup and file restoration. Additionally, you can utilize a free and professional file backup and restoration software called AOMEI Backupper Standard. It offers easy backup and restoration of various data. Moreover, the professional edition includes the Universal Restore function, which facilitates system restoration on computers with different hardware configurations.
Furthermore, AOMEI Backupper serves as a free SSD migration tool, allowing you to easily migrate your operating system to an SSD. For further exploration of its useful features, you can download AOMEI Backupper.

