How to Make a System Image in Windows 11, 10, 8, 7
Many unpredictable things could lead your system damaged, also caused us so much trouble. A reliable and professional system backup tool can help us prevent such unfavorable things. In this article, we will show you how to make an image for your system.
By Lily Updated on October 16, 2023
The Importance of Making an Image for Our Computers
You'll never know what's going to happen in the future. Though your computer system runs smoothly and perfectly at this time, it still can be impaired due to some unpredictable errors. If we have made an image for our computers first, then there's no need to worry about system crash or some other unfavorable accidents any more.
Here comes a question, "how can we backup our system?" For that, we sincerely recommend you choose AOMEI Tech's dedicated computer backup tool - AOMEI Backupper.
Free Windows Backup Software - AOMEI Backupper
AOMEI Backupper Standard is the best free backup software for Windows PC. It offers you all-around backup solutions to help you protect your computer OS and data.
- There are five backup types available: System/Disk/Partition/File Backup and Cloud Backup. You can choose one backup type that best fits your need.
- To have changed data backed up automatically, you can enable Schedule Backup.
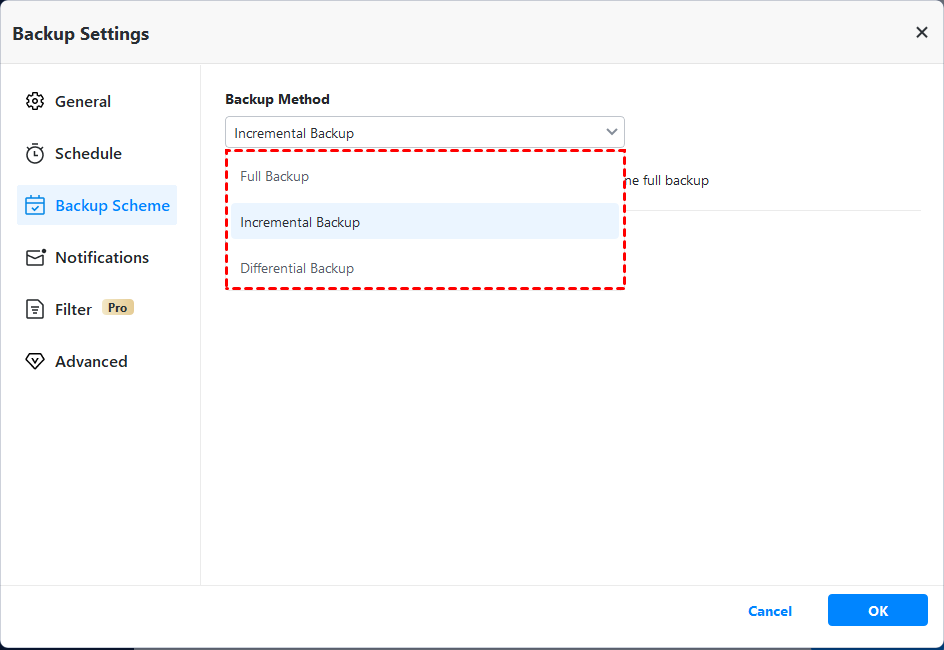
- Besides full backup, you are able to create incremental backup to improve backup efficiency and save storage space.
Following are some requirements for using AOMEI Backupper:
- Operating System: Windows XP/Vista/7/8/8.1/10/11. If your computer is running Windows Server, try the server edition.
- Storage Devices: Supports almost all storage devices recognized by Windows, such as IDE, SATA, SCSI, SSD, USB external disk, Hardware RAID, NAS device, etc. Moreover, supports MBR and GPT style.
Now free download AOMEI Backupper and try it out.
How to Create an ISO Image from Your Operating System
Step 1. Launch the program. You can see the four main functions (Backup, Sync, Restore, Clone) listed vertically on the left side of the main interface. Click Backup and choose System Backup.

Step 2. System-related partitions are selected by default. Choose a destination path to store the system image.

Step 3. You may change the settings of backup by clicking Options, such as change compression level and enable email notification. You can also set up automatic backup with Schedule Backup. Then please click Start Backup to proceed.

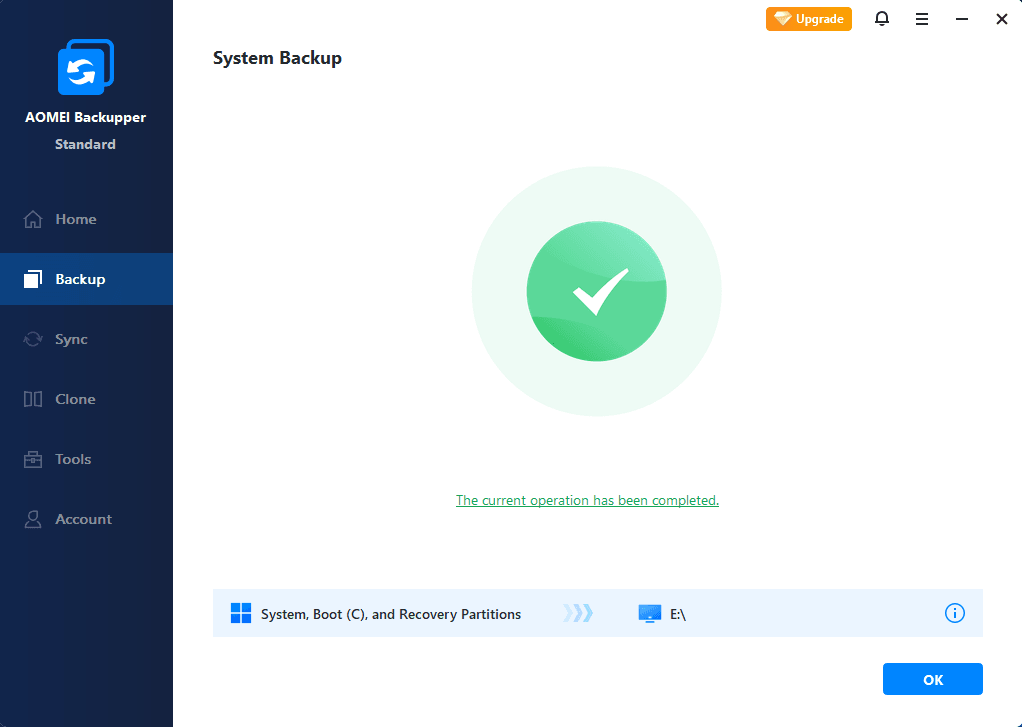
Step 4. Click Finish when the backup progress reaches 100%.
Tip: In order to save your time in making image in the future, you can choose incremental/differential backup under Backup Scheme. You may upgrade to higher editions to enjoy differential backup.