How to Recover Files Lost While Moving?
Learn how to recover files lost while moving via three efficient solutions in this article. You can also get related Word data loss prevention tips to prevent data loss.
By Penny / Updated on April 30, 2026
Files lost while moving!
Transferring data from one device or folder to another is a common and straightforward task. The most basic method involves using keyboard shortcuts like Ctrl + C and Ctrl + V, or Ctrl + X and Ctrl + V.
Help! I lost some files when I was moving them from my computer to my USB stick. using the Ctrl X and Ctrl V. But during the process, my power failed. After rebooting, I can’t find my moved files on my USB drive. So is it possible to recover files lost while moving? Thanks in advance.
However, during the file transfer process, there is a risk of data loss if any interruptions occur. But please don’t worry because there exists a possibility to recover files after cut and paste.
Why did my files lose while moving?
Let’s get an overview of the following reasons before recovering files lost while moving.
- Sudden power failure
- System crash
- Abrupt removal of a removable storage device
- An error message pops up in an alarming window
How do I recover lost files while moving?
If you happen to lose files during a cut-and-paste or copy-and-paste operation, there are three available ways for you to recover moved files Windows 10/11 computer.
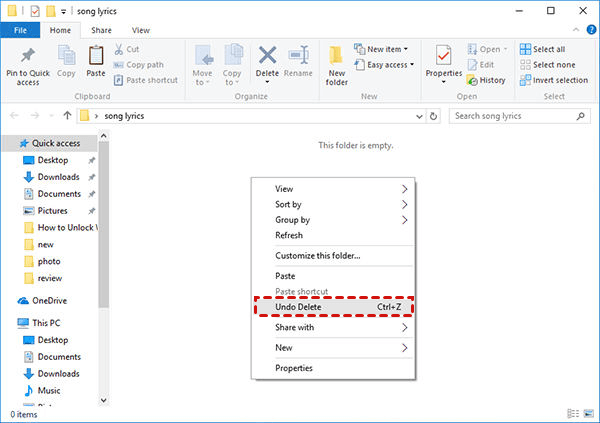
Solution 1. Press Ctrl + Z to cancel moving files
If you accidentally moved files, you can press the Ctrl + Z keys to cancel your move action. Then you can get your lost moved files back.
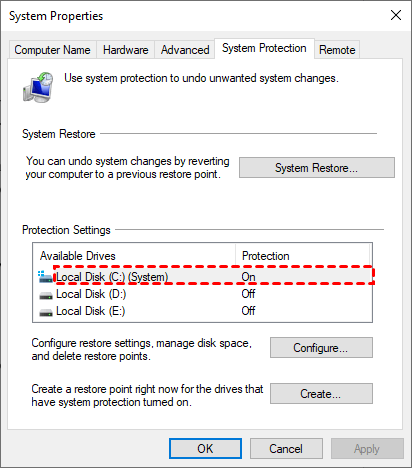
Solution 2. Recover moved files Windows 10/11 with Previous Versions
After turning on File History or the System Protection of the local disk that stores your needed Office files, you can get varied copies of files/folders according to the time.
Previous Versions is right for some users like writers because this Windows feature can record the changes and modifications of your important files as time goes by. Moreover, you can recover overwritten Word documents using it.
Step 1. Right-click on your saved Microsoft Office files with pasted items. Then select the “Properties” button.
Step 2. Under the Previous Versions tab, choose a file version based on your needs.
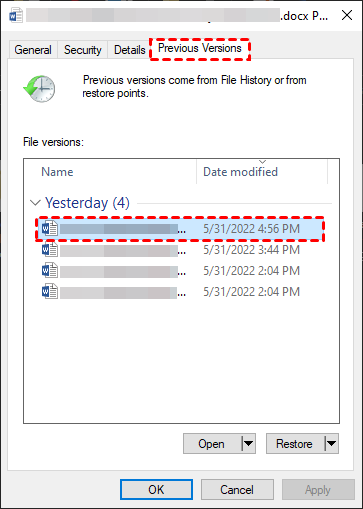
Step 3. Click “Restore” to get your MS files to their original location. But if you prefer to set a new saved path, please right-click Restore > select Restore to.

After restoration, you can go to the corresponding paths and open your recovered Office files to check whether your needed pasted texts have been restored or not.
Solution 3. Recover moved files Windows 10/11 via data recovery software
Released by AOMEI Tech, powerful FastRecovery aims to help all users recover deleted & missing Microsoft Word documents from hard drives within three steps. Besides, its advanced scanning technology will automatically scan and find all recoverable files on your selected drive.
- ★Other key features of FastRecovery:
- All-inclusive: Apply to a variety of data loss scenarios such as deletion, disk formatting, system crashes, or virus attacks.
- High-efficiency: Recover 1000+ types of files such as Microsoft Word, Excel, PPT, and WPS files, folders, compressed files, photos, audio, songs, videos, and websites from HDDs, USB sticks, SD cards, etc.
- Advanced scanning method: FastRecovery runs Quick Scan or Deep Scan automatically to search all the recoverable files.
- Flexible Layout: Organize and display data by Type or Path, along with options to sort, search, filter, and preview files.
- Excellent compatibility: Compatible with Windows 11, 10, 8, 7, and Windows Server, as well as NTFS, FAT32, exFAT, and ReFS file systems.
How to recover lost Word documents without backups? Download FastRecovery on your Windows 11, 10, 8, 7, or Server PC to retrieve them!
- Don't download and install FastRecovery on the drive where you store deleted files, as this may cause data to be overwritten.
- Any newly added data or disk formatting can overwrite data. Please avoid these operations after deletion.
Step 1. Install and launch FastRecovery. Click Deleted Files Recovery.
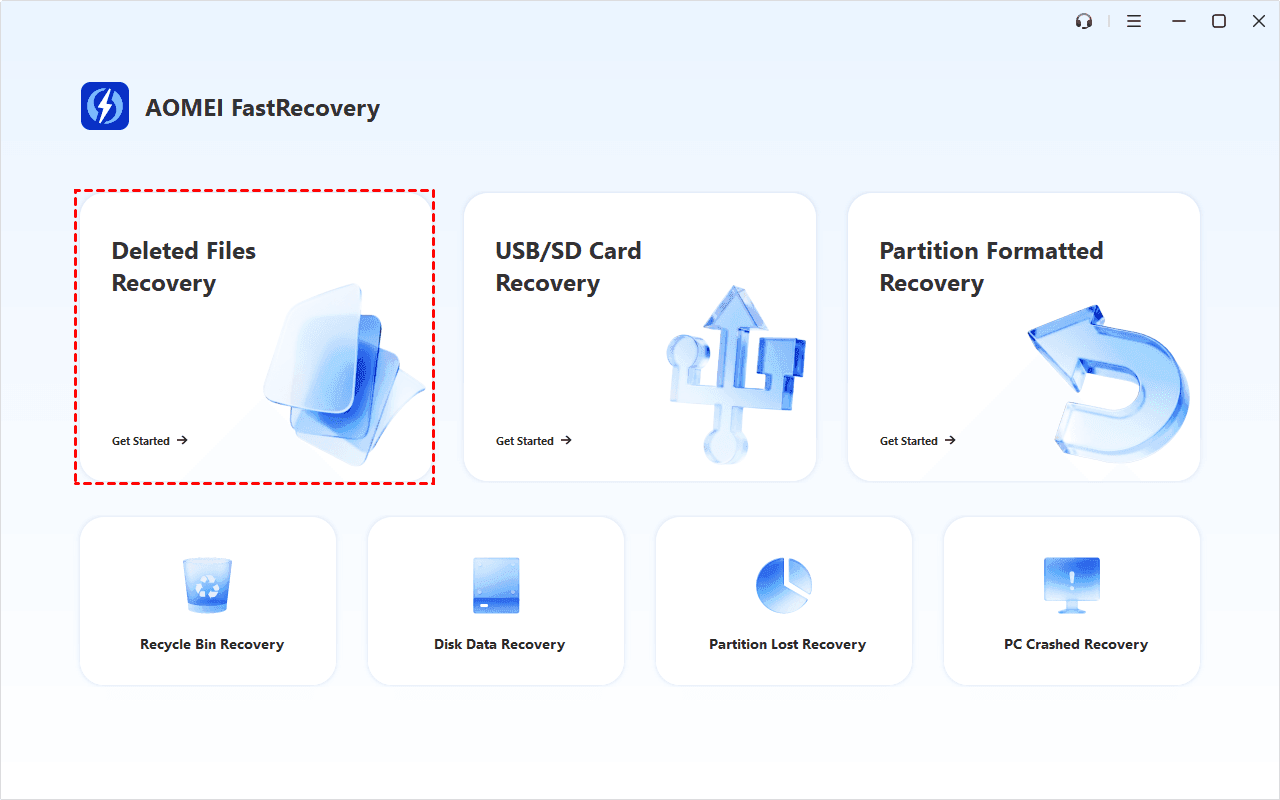
Step 2. Hover the mouse over the drive saved deleted files before, and click Scan.

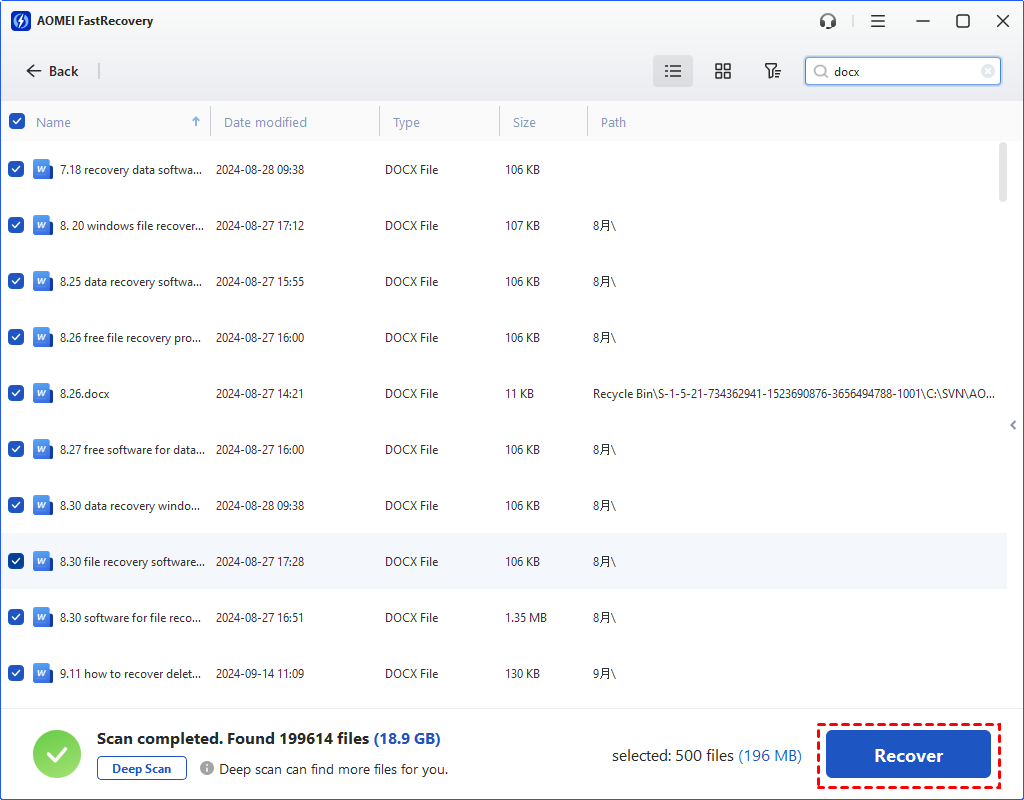
Step 3. It will scan the drive with Quick Scan. You can select files by Path or Type (default), and combine them with sort, search, filter, or preview to pinpoint your target or narrow down your options.
- Sort: Sort files by name, date modified, type, etc., on the right panel.
- Filter: Specify the data type, such as images, videos, documents, etc., and size, from less than 512KB to 1GB above.
- Search: Type the file name or extension in the search box to locate lost files precisely.
- Preview: Preview files in a clear thumbnail, such as wav,ico, jpg, png, bmp, jpeg, tif, svg, gif, mp4, mp3, txt, xlsx, pdf, ini, docx, etc.

Step 4. Select the Word files you want. Then, click “Recover” and select a new location to start the Word document recovery process.
- Notes:✎...
- After recovery, please remember to store your retrieved MS Word files in another drive instead of the original hard drive.
- FastRecovery can recover your 500MB of files for free. To recover unlimited data, please upgrade to the advanced edition.
Bonus tips: How to prevent documents from loss?
As you can see, regular backups could be the best hedge against data loss. If you’re unwilling to suffer the second damage, please consider putting the following data loss prevention measures into practice.
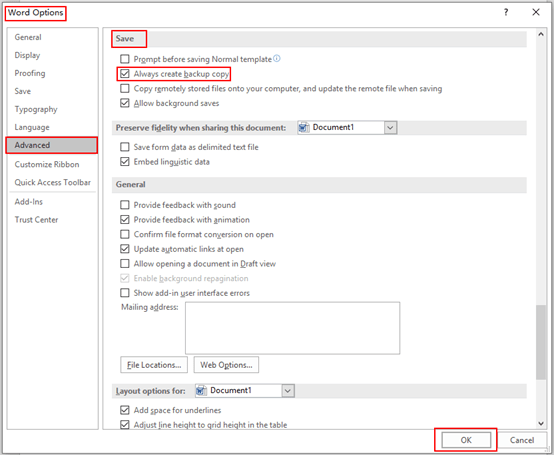
- Open your Microsoft Word and click File > Options > Advanced > Save. Then tick Always create a backup copy > OK.
- Use this free backup software for Windows, AOMEI Backupper to make File Backups, Partition Backups, Disk Backups, or System Backups.

- You can customize the storage size of your Recycle Bin to save large deleted files with these clicks: right-click on your desktop Recycle Bin icon > select Properties > set the storage size > Apply > OK.
- Please don’t empty your desktop Recycle Bin randomly.