[2026] How to Use PhotoRec to Recover Files on Windows PC
PhotoRec is a powerful tool for photo recovery tool. If you have no clear idea about how to use PhotoRec to recover files on Windows PC, this guide will come to help. You will also be given an easier way to perform data recovery.
By Zoey / Updated on April 30, 2026
As a companion recovery tool to TestDisk, PhotoRec is dedicated to helping you recover images from a variety of digital devices, including computers, cameras, cell phones, tablets, memory cards, external hard drives, and more.

If you just download the tool on your computer, you may feel confused about its command-line interface and don’t know how to use PhotoRec to recover files. This guide can come to do you a favor. Besides, an easy-to-use alternative to PhotoRec is also introduced in this guide to help you perform better data recovery.
How to use PhotoRec to recover deleted files
PhotoRec can help recover lost photos, videos, or documents that have been accidentally deleted or even completely destroyed by a virus or the system crashing. Keep reading this part to learn about how to use PhotoRec to recover encrypted files and deleted files on Windows PC.
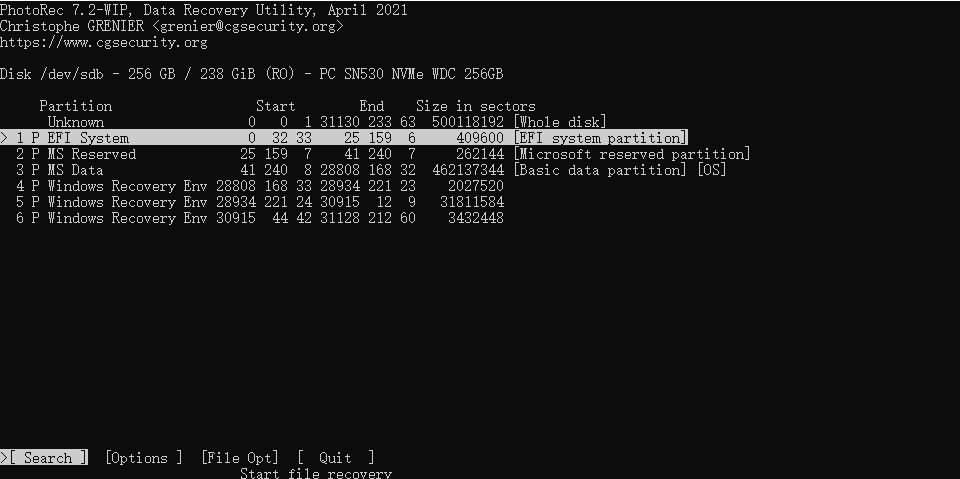
Step 1. Download and launch PhotoRec on your computer > Use Up/Down arrow key to choose the disk you want to work with > Enter Proceed to confirm.

Step 2. When you are given three options to choose from: Search, Options and File Opt, choose Search for data recovery > Press Enter to begin the file recovery process.
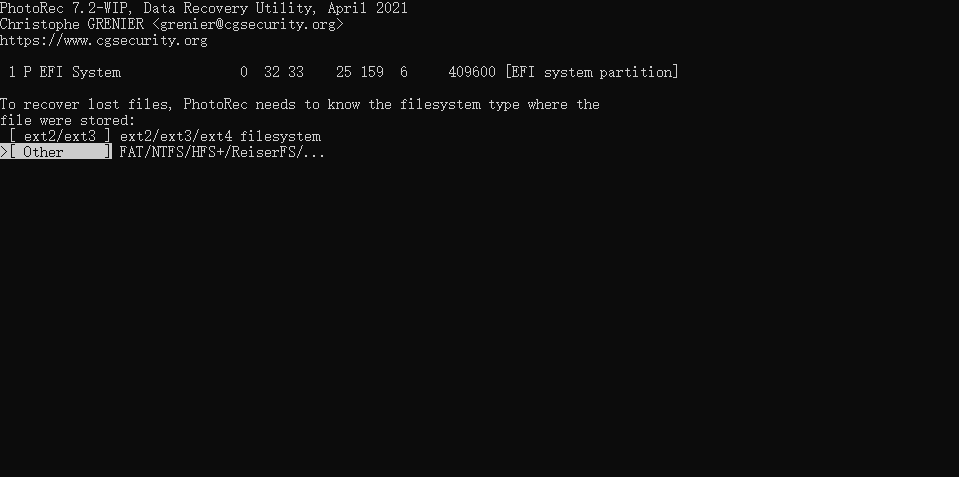
Step 3. PhotoRec requires knowing the file system type used to store the files in order to recover lost files. Select Other if the file system is not ext2, ext3, or ext4.
Step 4. Use Up/Down arrow keys to select a location to save the recovered files. Press C to start recovery.

Easier way to recover data - FastRecovery
Apparently, PhotoRec has an outdated command-line interface that calls for users to enter complex commands. As a result, for users who are not tech-savvy, recovering files with PhotoRec is kind of challenging. Since actions cannot be undone in PhotoRec, any wrongdoing could have disastrous effects on your other data. Therefore, it is recommended you utilize FastRecovery, an easy-to use data recovery software for Windows.
PhotoRec vs. FastRecovery
Why FastRecovery outweighs PhotoRec? Let’s take an overview of the main features of FastRecovery.
- 👍More user-friendly interface and operation. Just within several steps, it can help you recover deleted/lost files from disk, external hard drive, memory cards, cameras, and more.
- 👍 More file formats supported. PhotoRec is often not able to handle all kinds of file formats. FastRecovery is able to recover files from a wider range of file formats, which include but are not limited to photos in JPG/JPEG, PNG, TIF, GIF, etc., as well as documents, videos, audio, archives, and so on.
- 👍 Faster and deeper scan process. With advanced scanning technology, the Quick Scan and Deep Scan help recover your data without any omissions.
- 👍 Supports recovering files in specific folders. You cannot use PhotoRec to recover files from specific folders. But for FastRecovery, you can be free to recover a single file as per your need.
FastRecovery is designed for all levels of users, including those new to computers, are meant to use it. Free download the powerful software on your computer and follow the steps in the next part to recover the wanted files on your computer.
Steps to recover lost files using FastRecovery
If you need to recover files from SD card, USB, and so on, please connect them to your computer before following the steps below.
- Don't download and install FastRecovery on the drive where you store deleted files, as this may cause data to be overwritten.
- Any newly added data or disk formatting can overwrite data. Please avoid these operations after deletion.
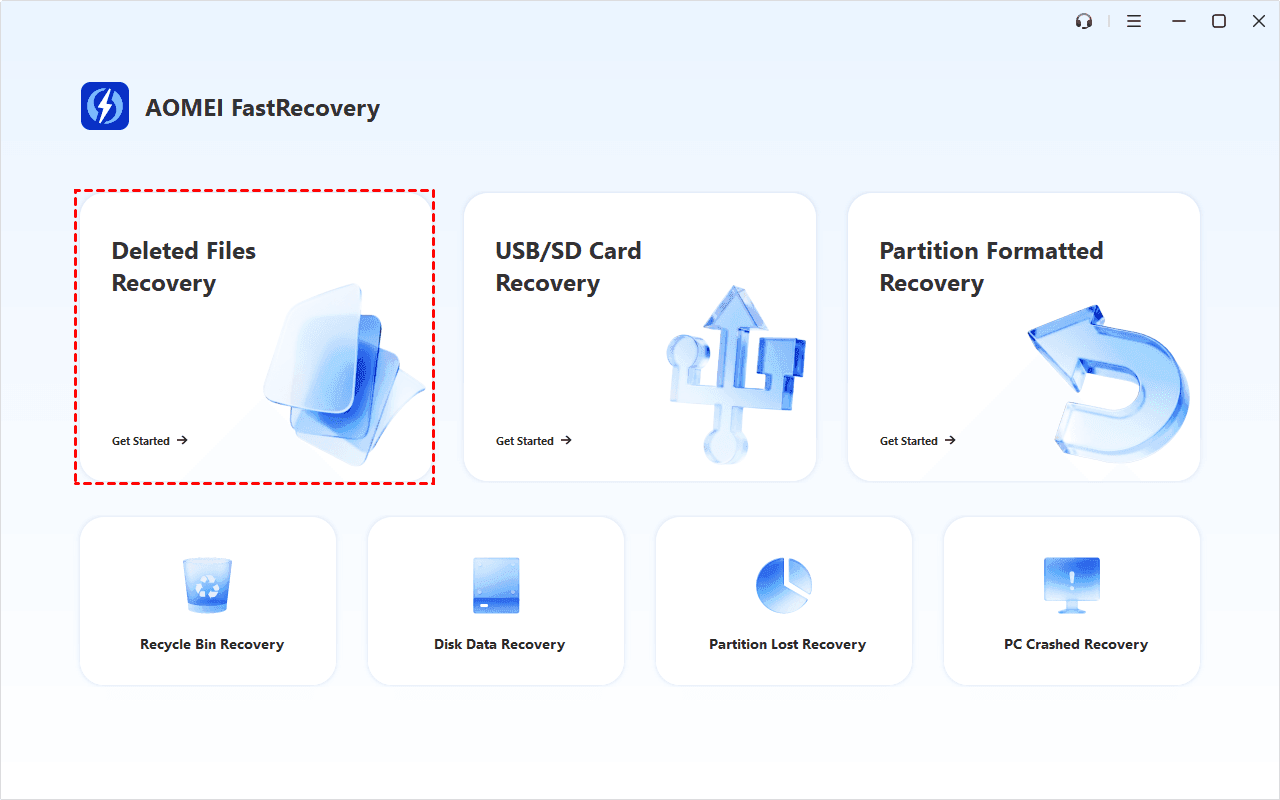
Step 1. Run FastRecovery on your computer. Then, click Deleted Files Recovery. You can also choose a more suitable alternative, such as Recycle Bin Recovery, Disk Data Recovery, etc. All of them can help you retrieve data without causing any damage.
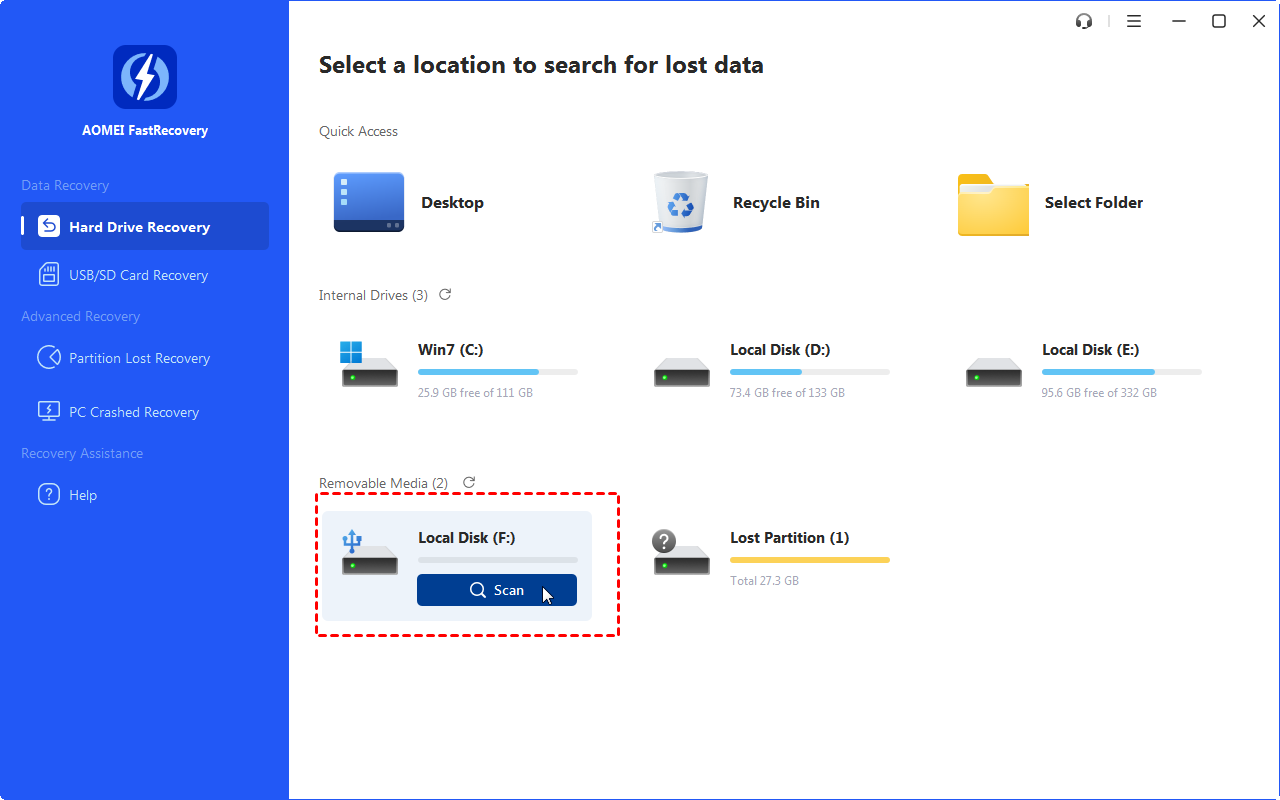
Step 2. You'll see all available drives. Hover the mouse over the drive and click Scan to get started.
Step 3. Wait for the software to scan and display all recoverable files by Path or Type, along with options to sort, search, filter, and preview files. All your lost photos, together with other data types, will be shown below.
- Sort: Sort files by name, date modified, type, etc., on the right panel.
- Filter: Specify the Type/Size (from Less than 512KB to 1GB above) to target your search.
- Search: Type the file name or extension in the search box to locate deleted files precisely.
- Preview: Preview files in a clear thumbnail, such as wav,ico, jpg, png, bmp, jpeg, tif, svg, gif, mp4, mp3, txt, xlsx, pdf, ini, docx, etc.
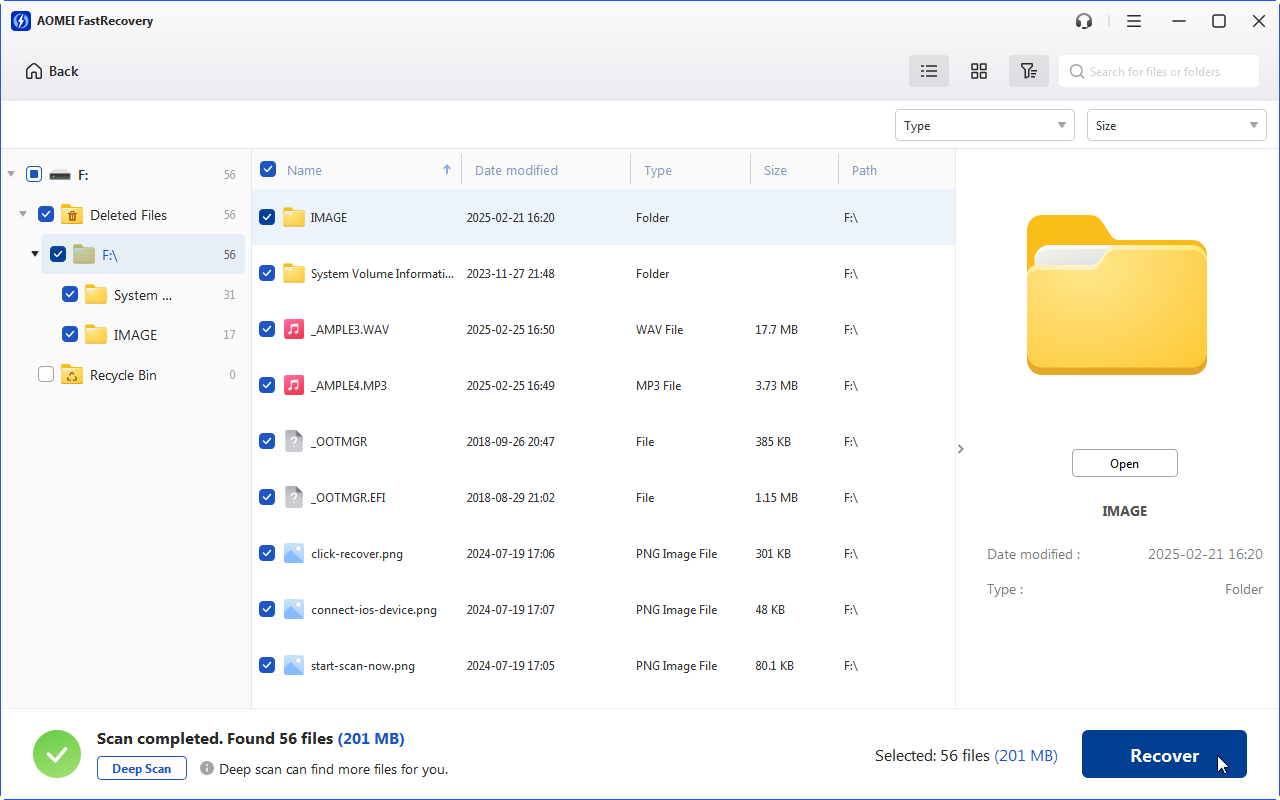
- The Type categories include all supported data types, including images, videos, documents, mails, web pages, compressed files, etc.
- Click the Deep Scan to find more data if Quick Scan fails. It will scan every sector of the disk and take longer.
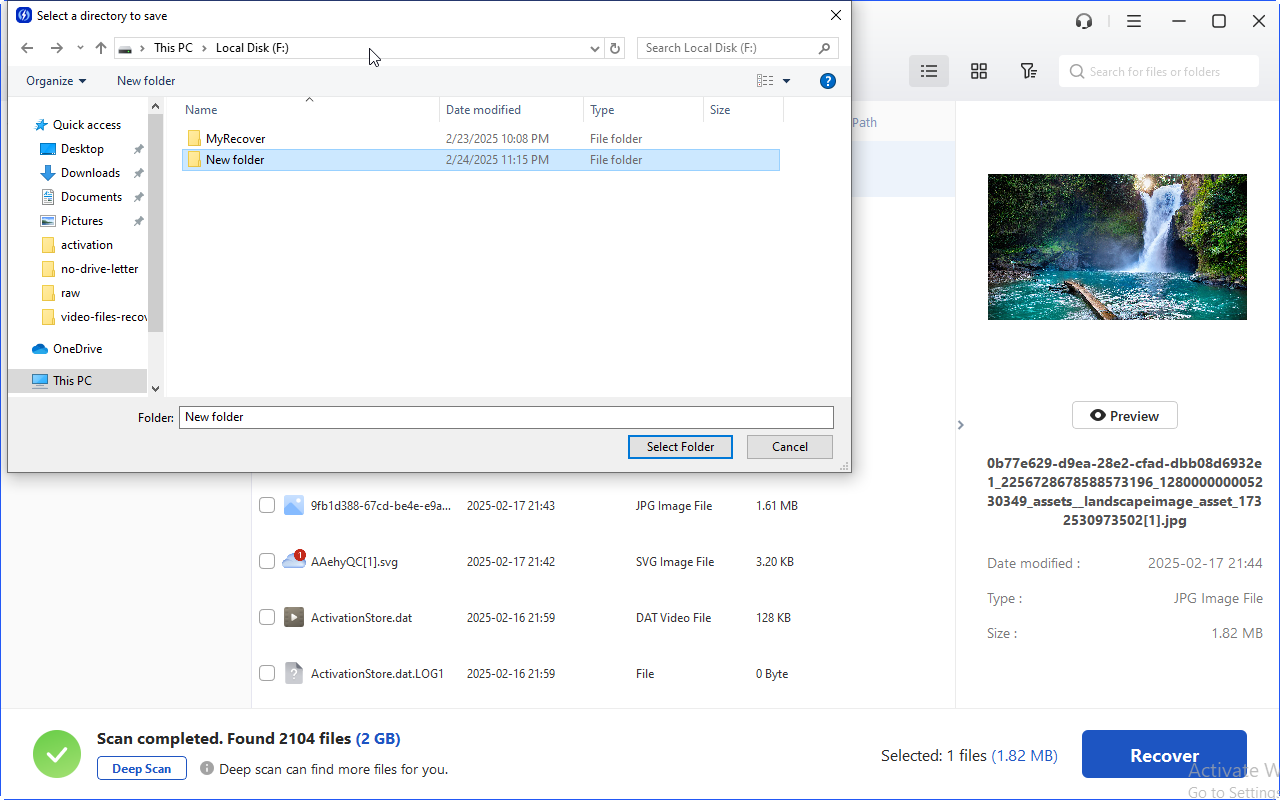
Step 4. Choose all recoverable files you want to recover. Finally, click Recover and choose a location to save these files.
Conclusion
Hope you have clear idea about how to use PhotoRec to recover files now. Overall, it is an excellent program to retrieve and recover lost photos, but it needs certain techniques and may fail to recover some formats of files. For most users, FastRecovery can be a better choice. Just one click then all the precious data will be found back!