
5 Easy Ways to Restore D Drive in Windows 10/11
This article describes 5 easy ways to restore D drive in Windows 10/11. You can choose one from them that suits your needs. Scroll down to get the guide in detail.
By Ivy / Updated on March 9, 2026
The issue: D drive missing in Windows 10/11
“My D drive is completely missing from my computer and I cannot find it. It’s not on my computer and when I clean the disk, it doesn’t show there either. Does anyone know what’s wrong with my computer? Could you help me get the missing D drive back?”
In fact, your D drive is not missing even if you can't see it in File Explore. The possible cause may be the operating system update process, accidental deletion, hard drive problems, etc.
More importantly, it is only a part of the story. Continue to read more about the D drive missing in Windows 10/11 and how to get D drive back on computer in 5 easy methods. It's also possible if you just want to recover data from D drive (in Part 2).
⭐Part 1: How to get D drive back on computers
Here are 5 feasible solutions to restore D drive in Windows 10/11. If your D drive is completely deleted, the most effective method is to use professional partition recovery software.
Way 1. Restore D drive in Windows 10 or 11 with software
To save you much time and effort, you could try the trustable partition recovery software to get your missing D drive back. Here, AOMEI Partition Assistant Professional is the most recommended partition recovery software for its rich-features and great reputation.
❤❤❤ Why Choose AOMEI Partition Assistant?
✔ With a user-friendly interface, it simplifies your computer disk partition management task.
✔ Provide users with two scanning methods so that they can easily find deleted or lost partitions.
✔ Recover deleted/lost partitions in Windows 11/10/8/7 along with your data as long as they are not overwritten.
✔ Support NTFS partition recovery, FAT partition recovery, and Ext2/Ext3/Ext4 partition recovery
✔ Create, resize, move, merge, and split partitions to maximize disk space, convert disk between MBR and GPT, migrate OS to new HDD/SSD, etc.
Now, click the download button to get started.
Step 1. Open AOMEI Partition Assistant. Then, click on "Recover" > "Partition Recovery" in turn.
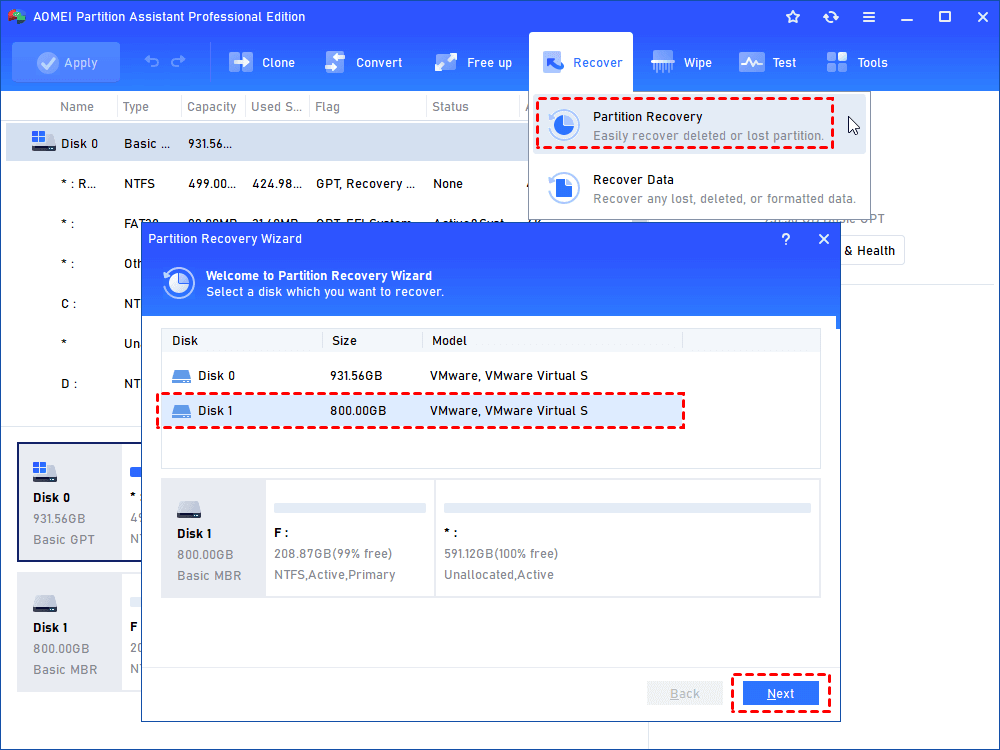
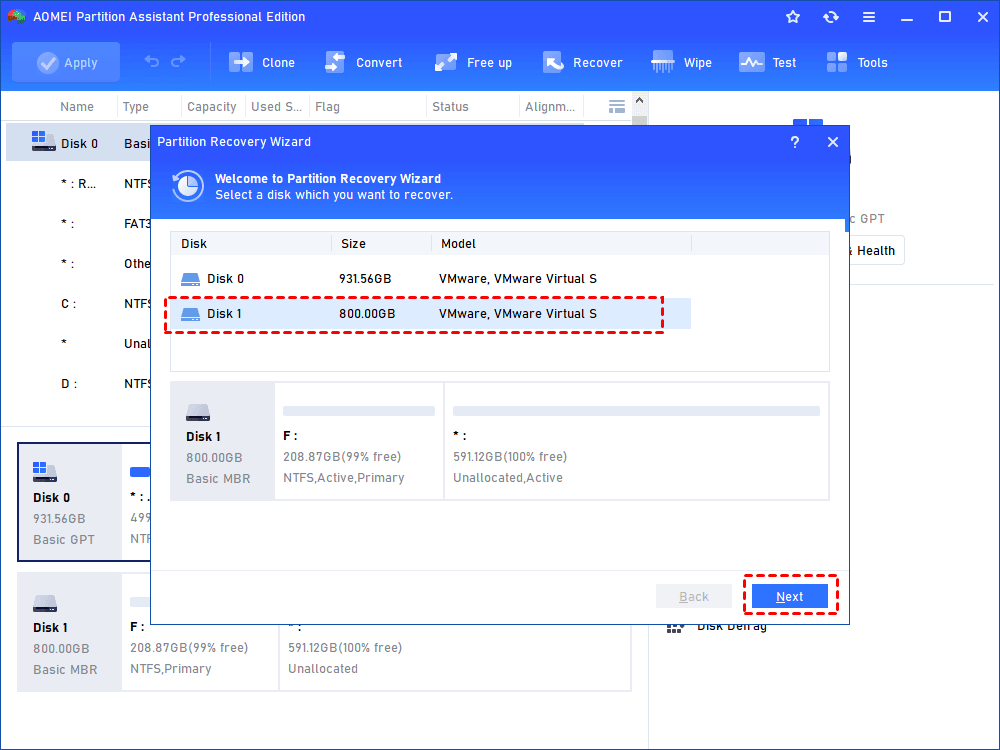
Step 2. Choose the disk where the D drive original was and click "Next".
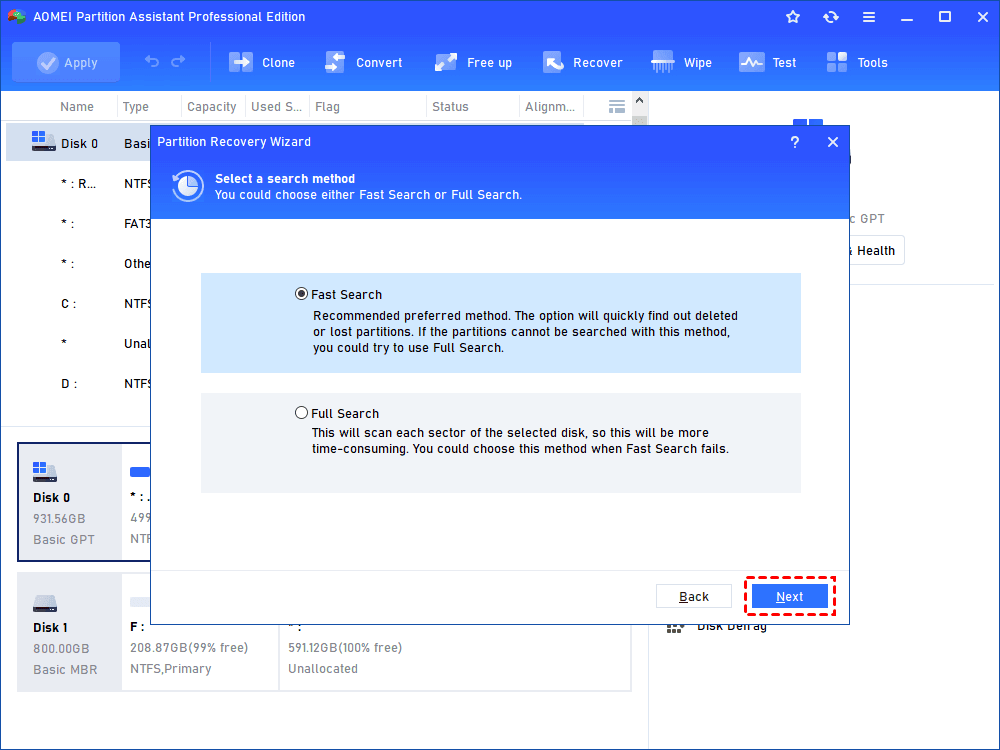
Step 3. Select "Fast Search" and click "Next" now. If the drive is not found, then try "Full Search" instead. It will scan every sector of the disk containing D drive to find out the missing partition.
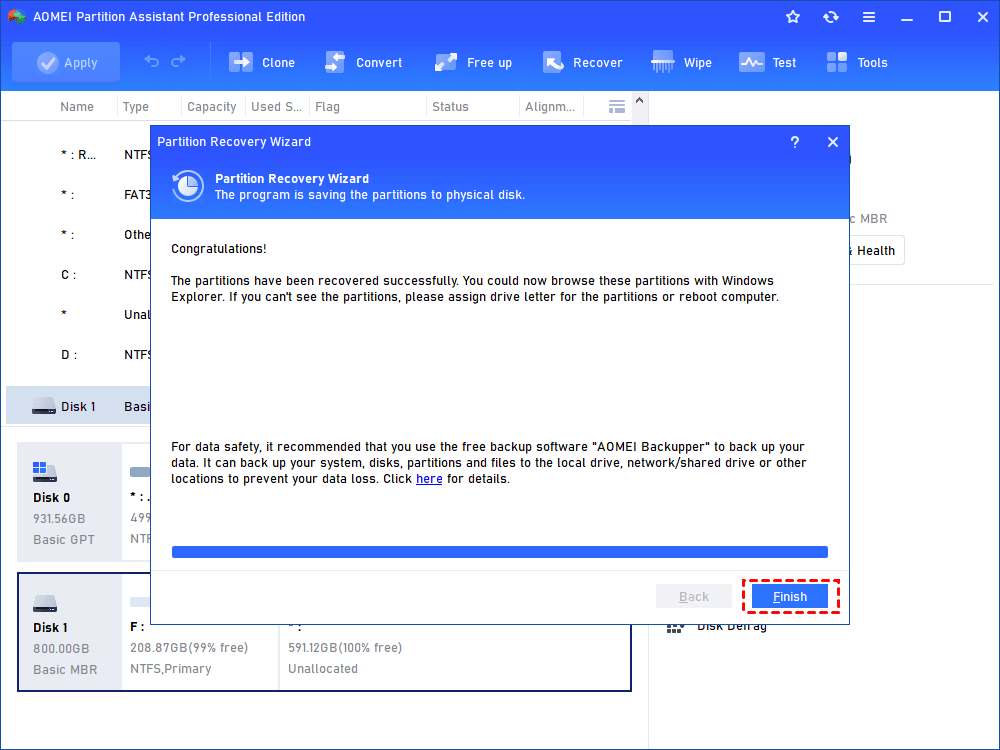
Step 4. Select the D drive and choose "Proceed". When it is completed, click "Finish".
Way 2. Rescan disks to restore the missing D drive
You can also rescan all the disks to fix the D drive missing error. It is possible that Windows has made an error in recognizing its path.
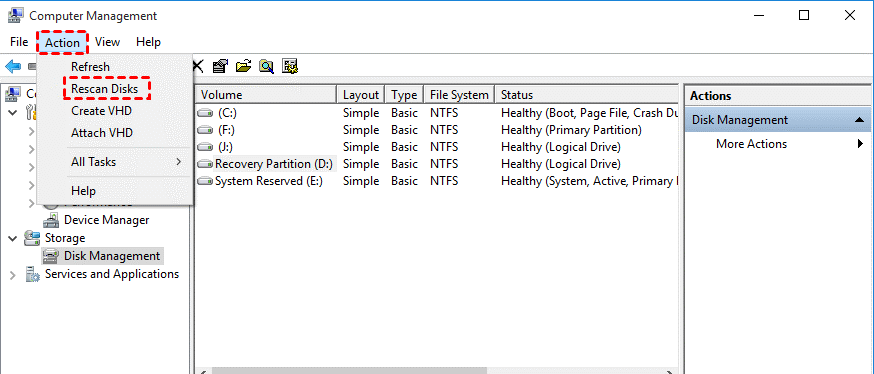
Step 1. Press “Windows + R” to open the Run window. Then, type “diskmgmt.msc” in the window and click “OK” to open Disk Management.
Step 2. Click “Action” > “Rescan Disks”. Check if the D drive is available after re-scanning all the disks.
Way 3. Restore D drive from system restore point
The System Restore feature enables users to revert their computers’ state (system files, installed applications, Windows Registry, and system settings) to a previous time point. Meanwhile, personal files such as documents, music, pictures, and videos will be not affected.
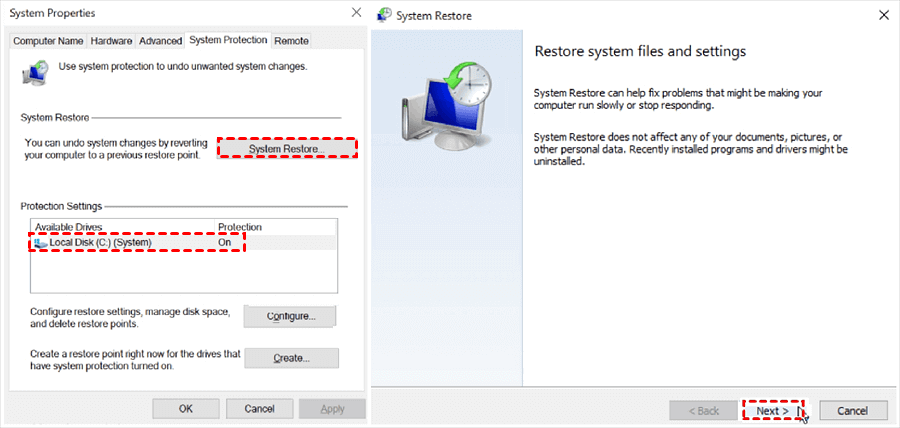
Step 1. Go to the System Properties window. Then, click “System Restore” > “Next”.
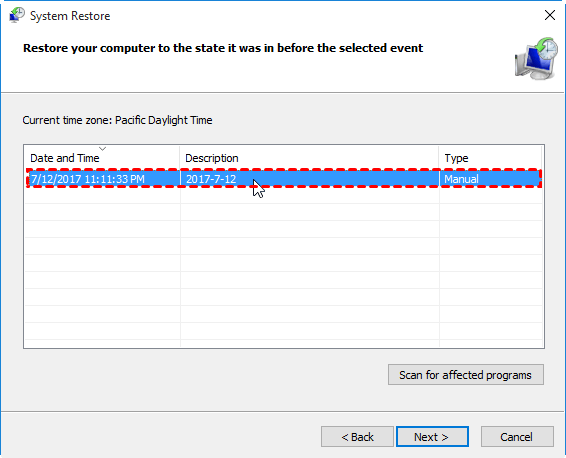
Step 2. Select your needed restore point from the list and click “Next”. You can also click “Scan for affected programs” to confirm deleted drives and programs.
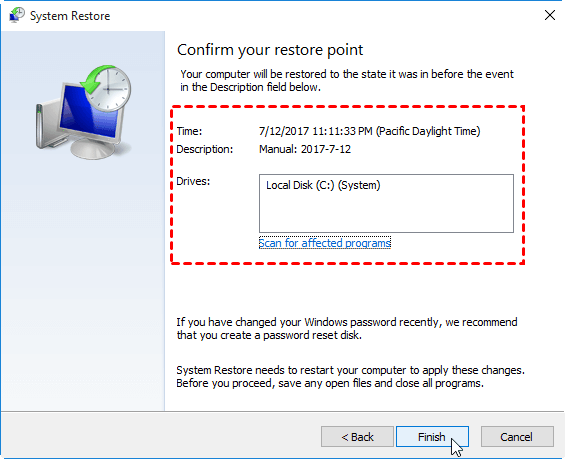
Step 3. Confirm your selected restore point and click “Finish”. Click "Yes" when you are prompted to restart your computer and wait until it boots again.
If your system is not working properly, try to restore Windows from system image created by Backup and Restore(Windows 7), a free backup software for Windows to make a complete PC backup in Windows 10 or 11. If your computer is still bootable, try the following steps:
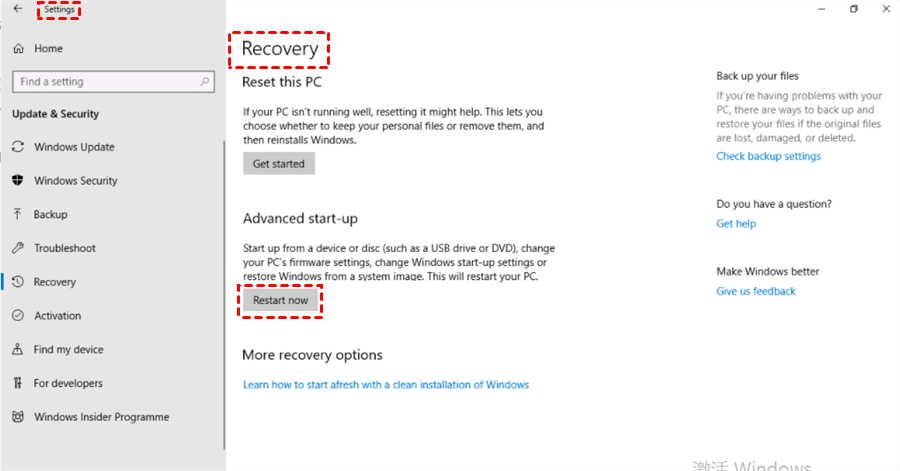
Step 1. Press “Windows”, and type “Settings” in the search bar. Then, open it.
Step 2. Click “Update & Security” > “Recovery” > “Restart now”. Your computer will shut down and boot to a blue screen.
Step 3. Click “Troubleshoot” > “Advanced options” > “System Image Recovery” > “Windows 10”.

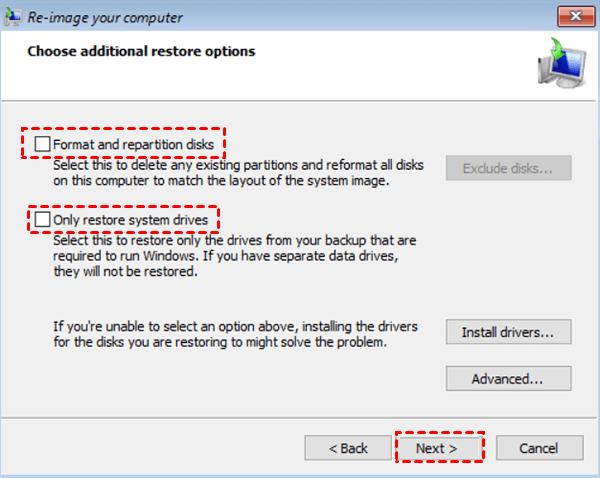
Step 4. Choose the “Use the latest available system image” option on the Re-image your computer page. Then, click the “Next” button.

Step 5. Click “Format and repartition disks” > “Exclude disks” to exclude some partitions or other attached storage. Then, click “Next” > “Finish” to start system image recovery.
Way 4. Unhidden missing D drive
Sometimes, your D drive is not deleted but hidden. If possible, just take the following steps to unhide it:
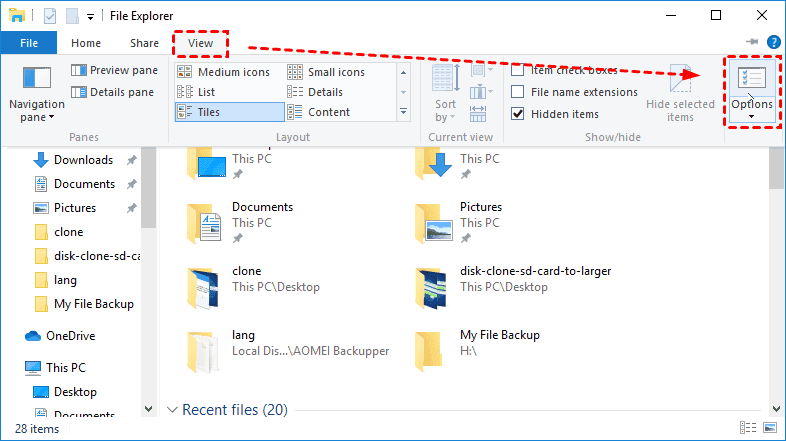
Step 1. Double-click "This PC" to access Windows File Explorer.
Step 2. In the File Explorer window, click on "View" and choose "Options > "Change folder and search options".
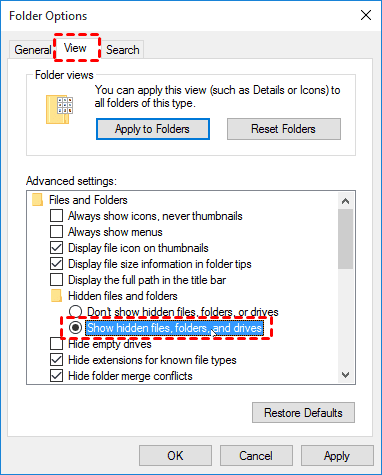
Step 3. Go to the "View" tab. Under "Advanced settings", select "Show hidden files, folders, and drives" and click "OK".
Way 5. Add a new drive letter to restore D drive
In addition, the D drive missing may be due to the lack of the drive letter. You can check this in Disk Management, and if so, add a new disk letter for it.
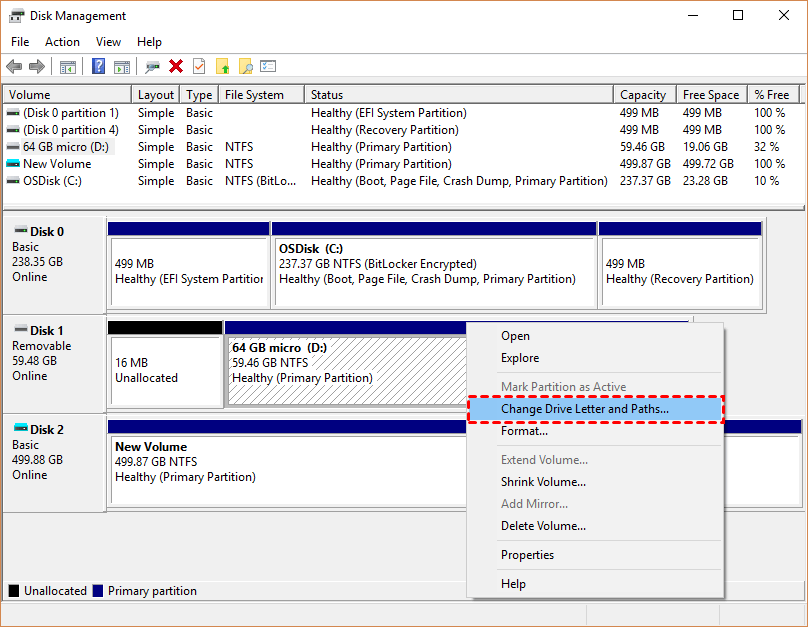
Step 1. Right-click the Windows Start menu and select "Disk Management". Then, check if there is a drive missing drive letter. If yes, right-click it and select "Change Drive Letter and Paths".
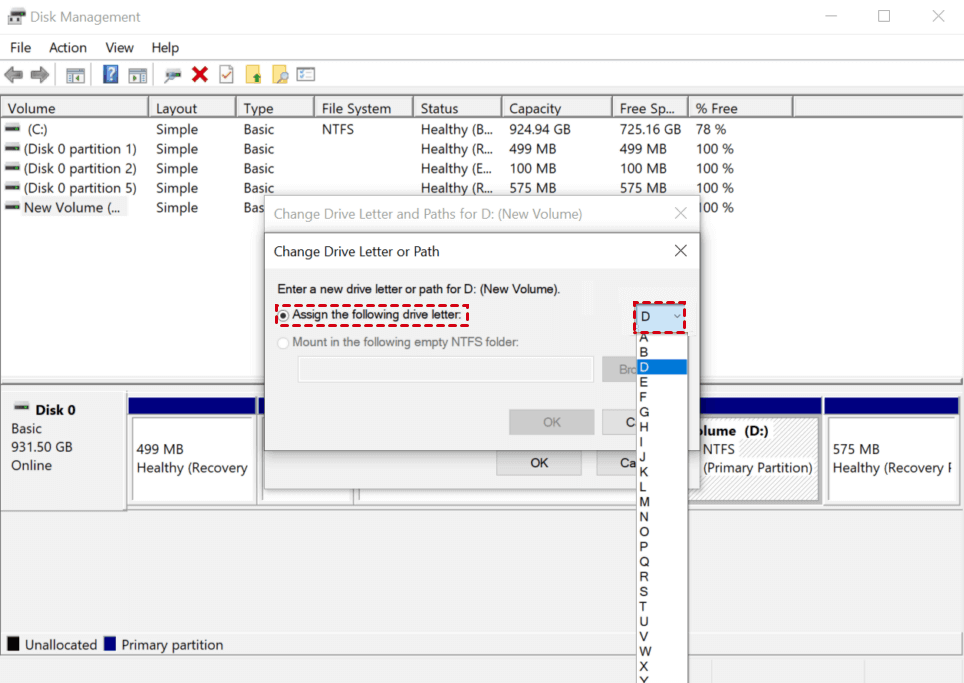
Step 2. Click the Add button.
Step 3. Then, in the pop-up window, go to Assign the following drive letter, and select a new drive letter. At last, click OK.
⭐Part 2: How to restore lost data from D drive easily
Sometimes, you just want to recover some lost files and data from D drive, instead of recovering the entire D drive, you can consider trying powerful data recovery software - FastRecovery.
- Provide a clear graphical user interface and simple steps.
- Intelligent use of scanning technologies Quick Scan or Deep Scan to scan for all recoverable data.
- Recover more than 1000 types of files, such as Word, Excel, PPT, JPG, GIF, 3FR, MP3, MP4, MOV, VWM, ANI, ZIP, etc.
- Filter, search, and preview files during scanning.
- Recover specific files or folders instead of all.
- Work perfectly with NTFS, FAT32, exFAT, and ReFS file systems.
- Available on all Windows operating systems including Windows 11/10/8/7 and server PCs.
Here is an easy tutorial and you can follow it to recover deleted data from D drive. Please download and install powerful data recovery software - FastRecovery first.
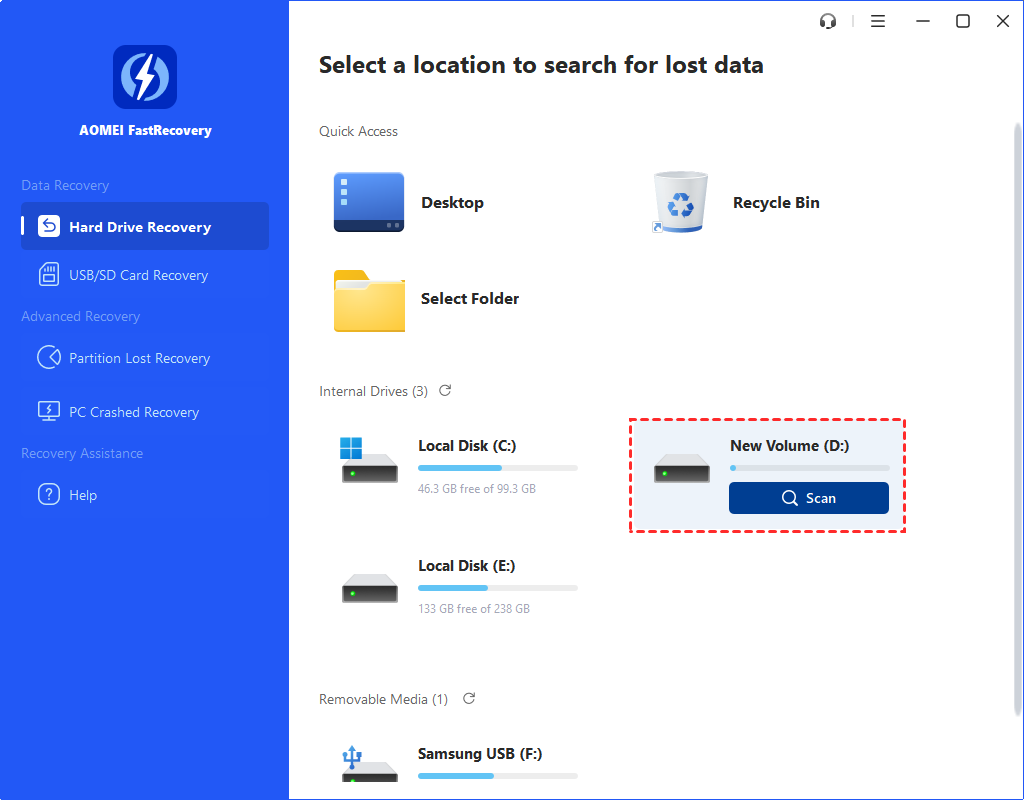
Step 1. Scan the missing D drive
Open FastRecovery. Hover the mouse over your D drive and click Scan.
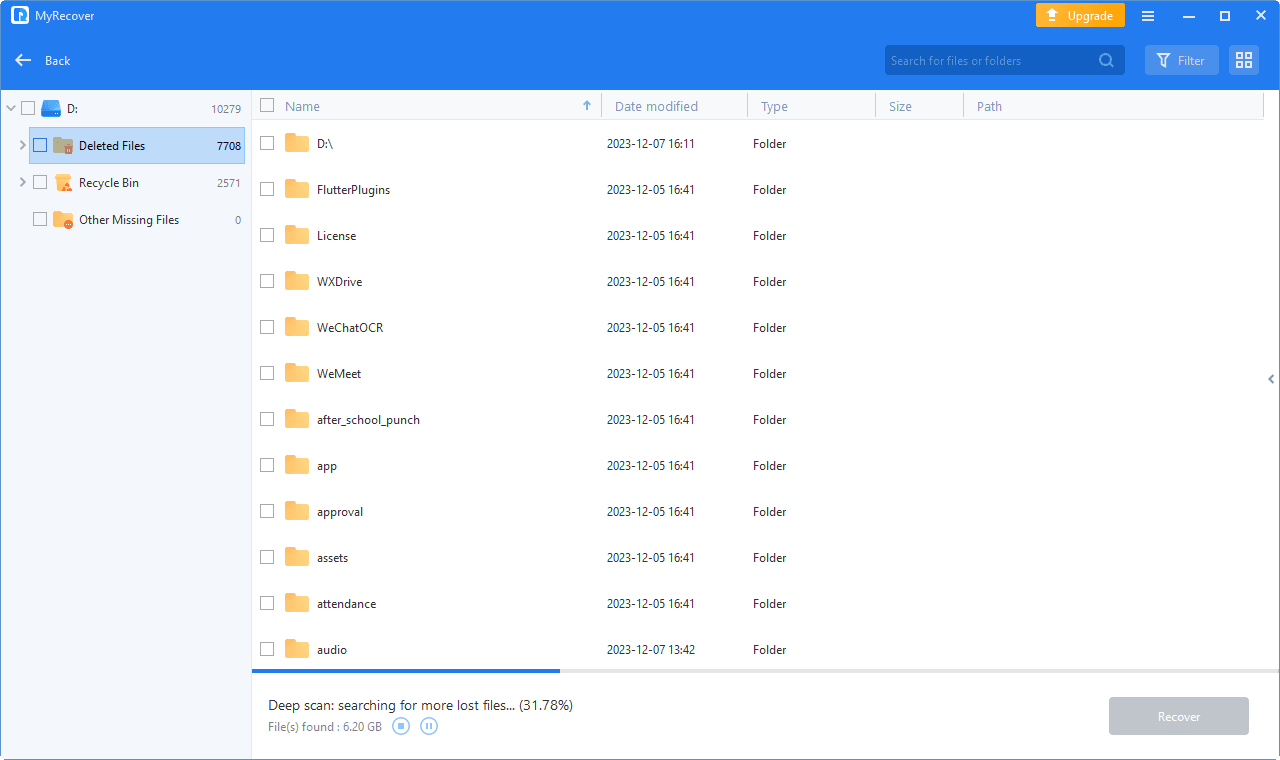
Step 2. Scan for all recoverable data.
Then, the scanning process will start automatically. It will perform a Quick Scan first to find recently deleted files and then a Deep Scan to find other missing files.
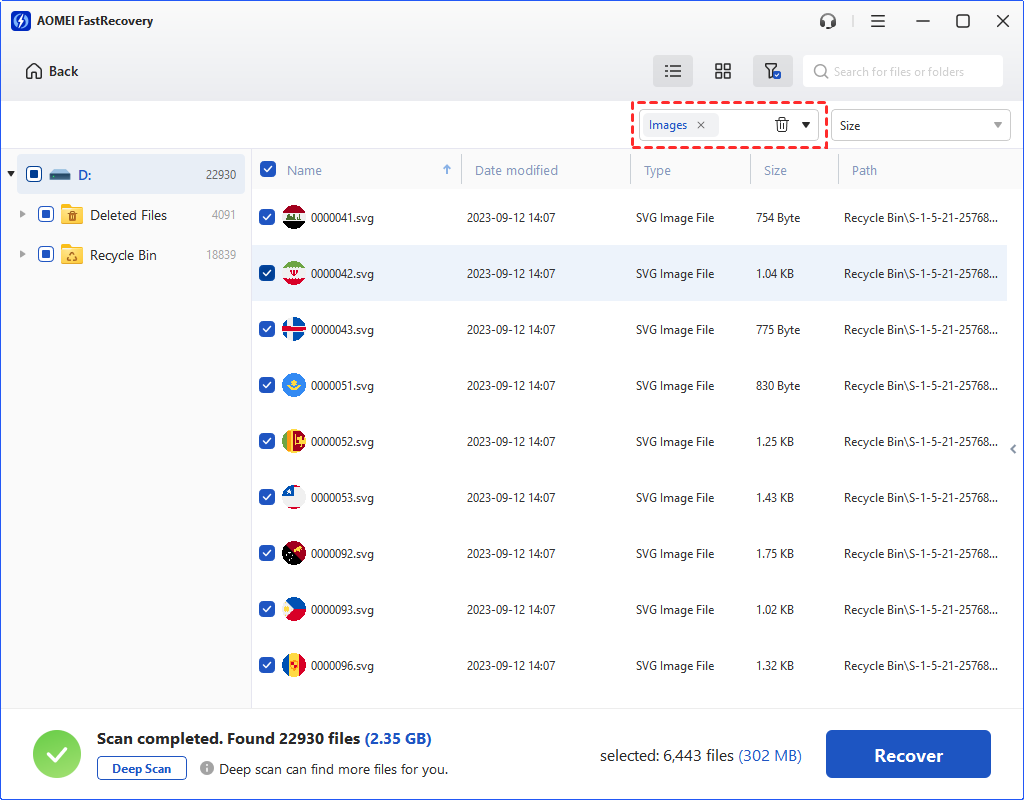
Step 3. Search or filter lost files
During scanning, you can use the Search or Filter feature to locate your lost files quickly. For example, to recover deleted PNG files, click the funnel-shaped button to specify the "Image" data type and then type the extension (.png) in the search box.
Or directly expand Other Missing Files to find deleted PNG files.
Step 4. Preview and recover files from D drive
Once found, double-click to preview the lost data. You can choose the data that you want to recover and click Recover xx files. Please choose a new path to save the restored data.
Wrapping up
How to restore D drive in Windows 10/11? If it's completely deleted, the most effective method is to try partition recovery software - AOMEI Partition Assitant. If not, rescan all the disks to show the D drive or try other methods above.
To recover files instead of the entire disk, you'd better use data recovery software like FastRecovery. It can help you a lot if your data are not overwritten. However, you may not want to pay for it every time. The best way to prevent data loss is to create regular backups, either using Windows built-in features or 3rd-party software.

