Solved! Fix Windows 11 Flashing Screen and Missing Taskbar
This article provides 4 easy and detailed ways to help you fix Windows 11 flashing screen no taskbar issue. It also includes a way to recover lost files after fixing the problem.
By Zoey / Updated on March 9, 2026
Have you ever found yourself staring at your computer screen, only to be greeted by a discotheque of flashing lights, with your taskbar seemingly on a holiday? Well, you're not alone. The "fix Windows 11 flashing screen no taskbar" issue has become a common headache for users, turning what should be a seamless computing experience into a frustrating puzzle.
But fear not! This article is your handy toolkit, packed with solutions to get your digital life back on track. Let's dive into the world of troubleshooting, where we demystify the causes and conquer the fixes, one step at a time.
Understanding the Problem
Before we roll up our sleeves and get down to business, let's take a moment to understand what we're up against. A flashing screen in Windows 11, accompanied by a missing taskbar, is often a symptom of deeper system conflicts or malfunctions. From outdated drivers to corrupted system files, the culprits can be many, but the end result is the same: a desktop that's more of a light show than a workspace.
This problem may cause your data loss, and you can easily and quickly recover any data using the best free file recovery software like FastRecovery.
Top 4 Ways to Fix Windows 11 Flashing Screen No Taskbar
After fixing the Windows 11 screen flashing without taskbar issue, you may find that some files are missing, so you'd better back up the files before repairing. Free backup software for Windows - AOMEI Backupper Standard can help you. Here are the 4 best ways to fix Windows 11 flashing screen no taskbar issue.
1. Update Your Drivers
First things first, let's talk about drivers. Outdated or corrupted drivers are often the party crashers causing your screen to flicker. Here's how to update them:
- Access Device Manager: Right-click the Start button and select Device Manager.
- Update Display Drivers: Expand the "Display adapters" section, right-click your graphics driver, and choose "Update driver."
- Automatic Search: Opt for "Search automatically for updated driver software" and follow the prompts.

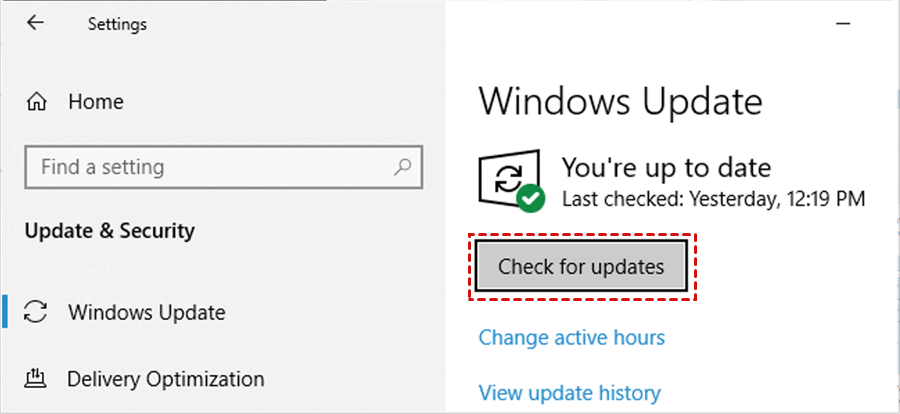
2. Check for Windows Updates
Staying up to date is not just good life advice; it's crucial for your operating system. Here's how to ensure you're not missing out on essential fixes:
- Open Settings: Use the shortcut Win + I.
- Navigate to Updates: Click on "Update & Security" and then "Windows Update."
- Check for Updates: Click on "Check for updates" and install any available ones.
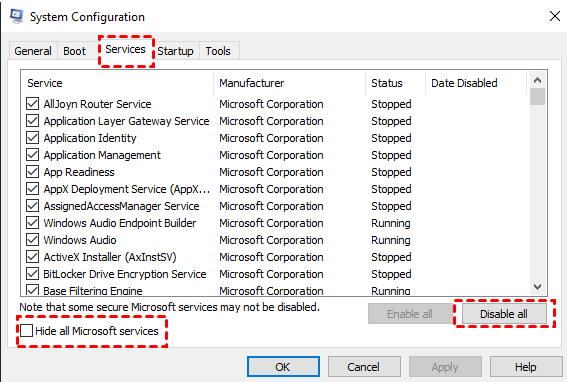
3. Perform a Clean Boot
Sometimes, less is more. A clean boot starts Windows with a minimal set of drivers and startup programs, helping you identify if background applications are the villains:
- System Configuration: Type "msconfig" in the search bar and press Enter.
- Selective Startup: Under the General tab, choose "Selective startup" and uncheck "Load startup items."
- Hide Microsoft Services: Go to the Services tab, check "Hide all Microsoft services," and then click "Disable all."
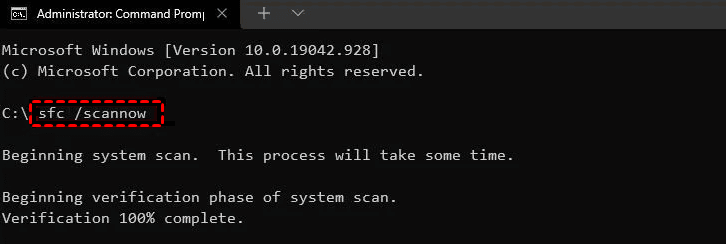
4. Use the System File Checker
Corrupted or missing system files? No problem. The System File Checker (SFC) is here to save the day:
- Open Command Prompt as Administrator: Right-click the Start button and choose "Command Prompt (Admin)."
- Run SFC: Type "sfc /scannow" and hit Enter. This process might take some time, so grab a coffee and hang tight.
Recover Windows 11 Data with FastRecovery
After repairing Windows 11 screen flicker issue, you may find that some files are missing. If you have backed up your files, you can restore them directly from the backup. If not, you can use a free file recovery tool such as FastRecovery to recover your data.
FastRecovery is a powerful tool designed to facilitate Windows data recovery and restore functionality to your Windows 11 device. With its intuitive interface and comprehensive features, FastRecovery simplifies the recovery process, allowing you to resolve issues such as a flashing screen with no taskbar effortlessly.
Features of FastRecovery:
-
Free & easy to use: Recover lost/deleted data from Windows within 3 quick steps.
-
Recover 200+ file formats: It can recover deleted Microsoft Word, Excel, PPT, PDF, PPTX, JPG, PNG, MP4, MOV, MP3, CDA, 7Z, ZIP, MSG, EML, and more.
-
Customizable options: During the scanning process, it allows you filter, preview, and recover your desired files.
-
Support various data loss scenarios, such as lost or deleted partitions, virus infection, formatted disks, it can also perform computer crashed recovery.
-
Recover 500MB of data for free.🔥
Steps to Utilize FastRecovery for Windows 11 Recovery:
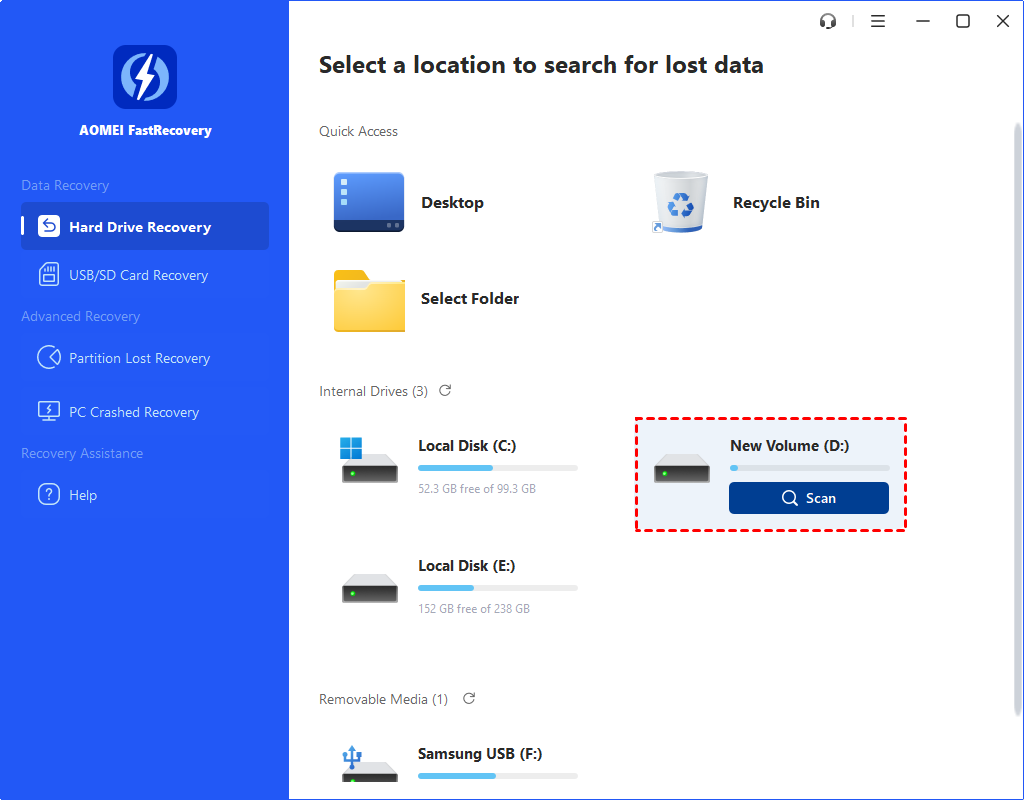
1. Download and install FastRecovery from the official website.
2. Launch the application and follow the on-screen instructions to initiate the recovery process.
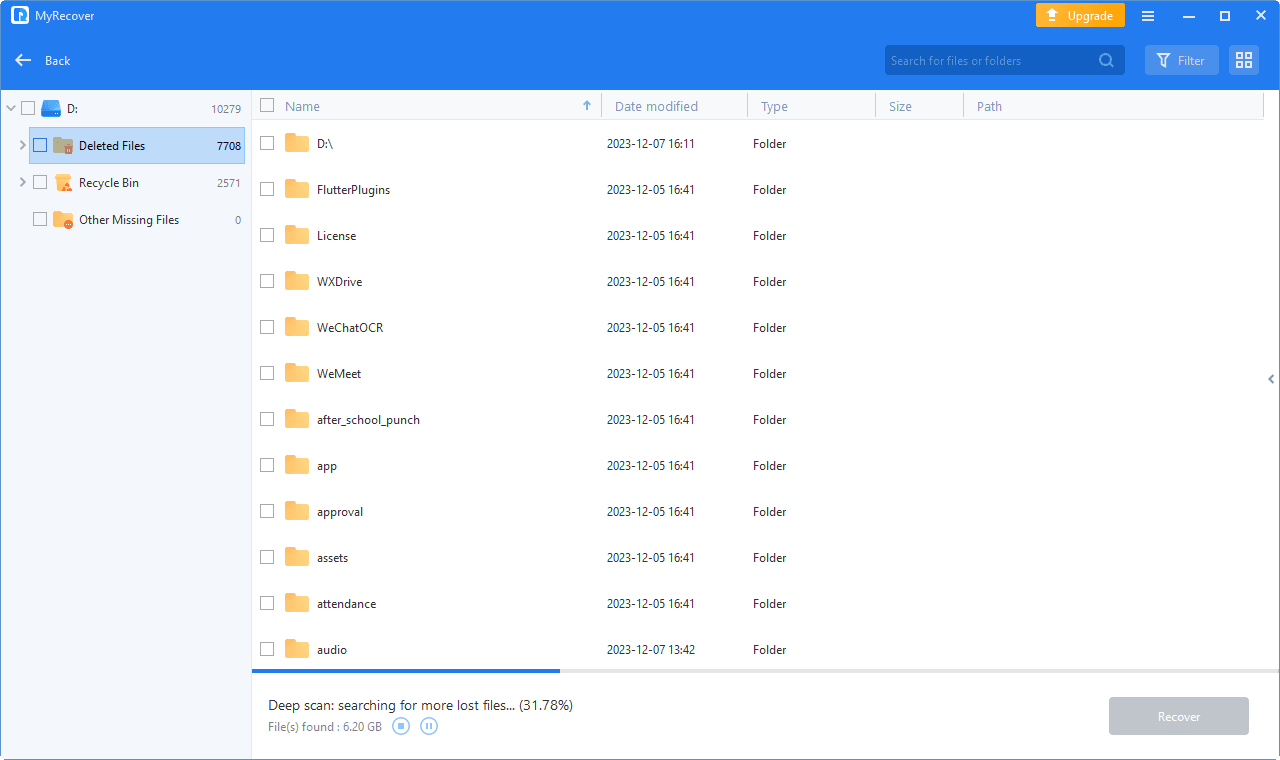
3. Your deleted and missing files and folders will be displayed here. You can search for a file/folder name or sort by file type, date modified, or size to locate the one you want quickly.
- Type:It will contain all the file types in the local drive, such as, images, videos, documents, mails, webpage, compressed files, etc.
- Data Modified:It supports today, yesterday, last 7 days, last 30 days, and custom.
- Size:It allows you to filter file size from less than 128KB to 128KB ~1MB to 1MB ~ 512MB and above, or custom.
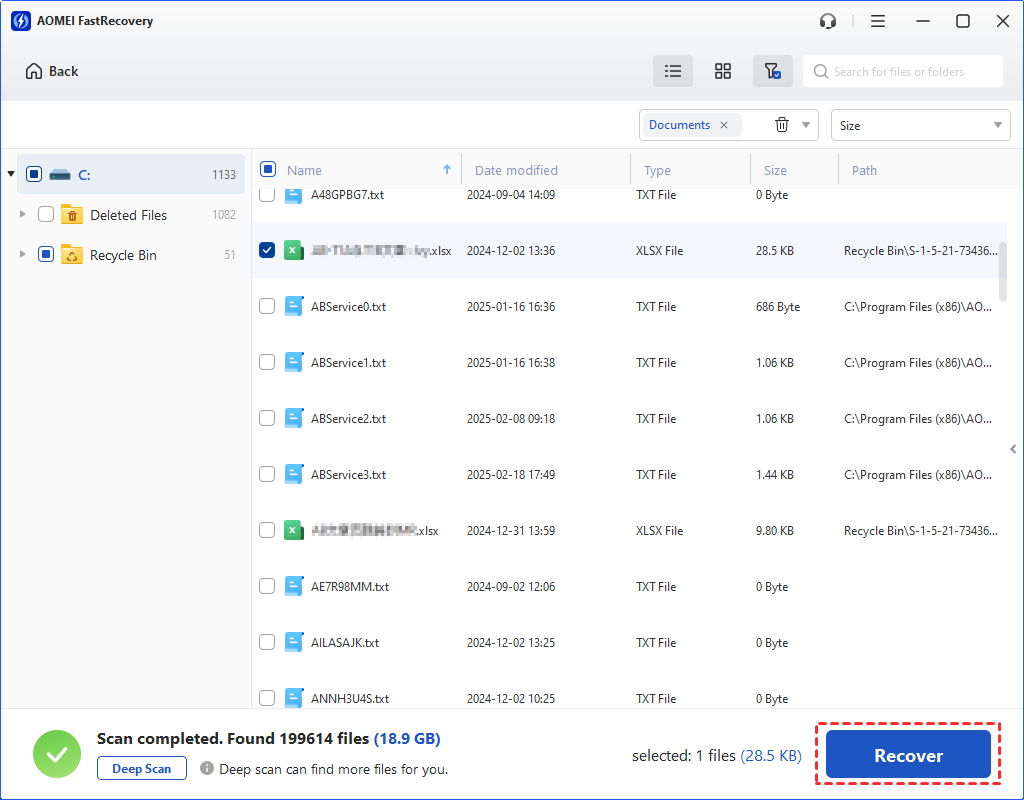
4. Expand Deleted Files folder and Other Missing Files folder to choose the desired items. Tap on Recover x files, and then pick a path to store the recovered files.
🌟Tips:
- Please note that restoring files to their original paths will cause secondary data loss, so choose a new location to save the recovered files.
- It can be used in Windows Server 2012(R2), 2016(R2), 2019, 2022, etc. So recover deleted files in Windows Server 2012 is an easy thing using FastRecovery.
- FastRecovery also allows you to recover deleted files from external hard drives, SD cards, USB flash drives, SSDs, HDDs, and other storage devices for free, up to 500 MB.
- If you want to enjoy unlimited data recovery, please upgrade to FastRecovery Pro/Tech. It offers 3 subscription plans: Monthly, Yearly, and Lifetime. Select the plan that suits your data recovery needs.
Conclusion
Conquering the "fix Windows 11 flashing screen no taskbar" challenge might seem daunting, but with the right tools and a bit of patience, it's entirely doable. By following the solutions outlined in this guide, you'll be well on your way to a stable and flicker-free Windows 11 experience.
With FastRecovery, you can easily recover deleted files in Windows 11 after fixing Windows 11 flashing screen no taskbar issue. Try to use this freeware to recover up to 500MB of files. Remember, the key to troubleshooting is one step at a time. Happy fixing!
FAQs
Can a virus cause my screen to flash and my taskbar to disappear in Windows 11?
Will resetting my PC fix the flashing screen and missing taskbar issue?
How do I know if my graphics drivers are the problem?