[Full Guide] to Lenovo All in One PC Hard Drive Replacement
If you want to upgrade Lenovo all in one PC hard drive to a larger or more advanced drive, read this article to get a stepwise guide to do hard drive replacement and data transfer on Lenovo AIO desktop.
By Lily Updated on March 20, 2025
About Lenovo all in one (AIO) PC
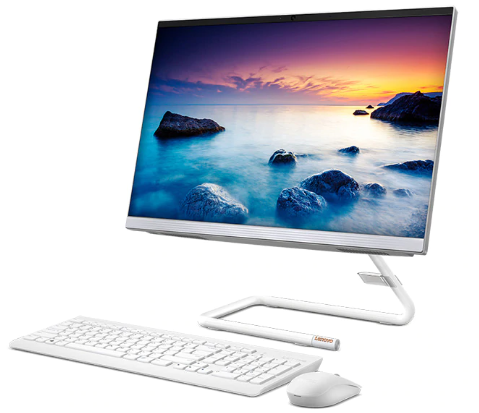
An all in one computer consolidates all the elements of a desktop computer into a single package, including display, tower, keyboard, and mouse. It is compact, easy to set up, easy to use, and easy to maintain. You can think of an all in one PC as the desktop equivalent of a laptop.
Lenovo all in one desktop combines sleek good looks with the latest technologies. Its popular products include ThinkCentre M90a AIO, IdeaCentre AIO 3i, IdeaCentre Yoga A940, etc.
How to perform Lenovo all in one PC hard drive replacement
If the hard drive in your Lenovo AIO PC is running out of space, or you want a faster drive for gaming, you can follow the instructions below to do Lenovo all in one desktop hard drive replacement. Here I’ll take Lenovo IdeaCentre A340 as an example.
👉 Things to prepare
👉 Transfer data from the old hard drive to the new drive🔥
👉 Replace the old hard drive with the new drive🔥
👉 Wipe the old hard drive for reuse
Things to prepare
- A new hard drive that fits your current PC. IdeaCentre A340 supports 2.5" SATA HDD/SSD and M.2 PCIe SSD.
- A SATA-to-USB adapter or a PCIe external enclosure.
- A Phillips head screwdriver.
- A pry tool.
Transfer data from the old hard drive to the new drive
To avoid reinstalling Windows and all your applications after hard drive replacement, you can transfer everything from the old hard drive to the new drive with specialized disk cloning software. Here I’d like to recommend AOMEI Backupper. You can benefit a lot from its following features:
♬ Disk Clone: it allows you to copy an entire disk to another. Everything on the source disk will be copied, including Windows OS, installed programs and personal files.
♬ System Clone: it enables you to copy only OS from one disk to another. It is helpful when the destination disk is smaller than the source disk.
♬ Partition Clone: it helps you copy a particular partition as you want, such as D: drive, E: drive, etc.
♬ Supported Devices: it supports various disk types, such as SATA HDD/SSD, M.2 SSD, NVMe SSD, etc. Also, it supports almost all common disk brands, like Samsung, WD, Crucial, Kingston and so on.
♬ Supported OS: it is compatible with all editions of Windows 11/10/8.1/8/7.
Let’s say you are replacing 2.5" SATA HDD with 2.5" SATA SSD. Use the following steps to perform Lenovo IdeaCentre SSD upgrade:
- Connect the new SSD to your Lenovo desktop via the SATA-to-USB adapter. If it contains any important data, backup it now.
- Download, install and run AOMEI Backupper. Then click Clone and select Disk Clone.

- Select the old HDD as Source Disk and the new SSD as Destination Disk in order.

- Check SSD Alignment to accelerate the read/write speed of the target SSD. Then click Start Clone to begin data migration from HDD to SSD.

- When the cloning process is done, disconnect the target SSD from your computer.
Note: The steps are same to clone an M.2 SSD to another M.2 SSD. Just use a PCIe enclosure to connect the target SSD before cloning.
Replace the old hard drive with the new drive
After cloning, learn how to open Lenovo all in one desktop and replace the old hard drive with the new drive as follows.
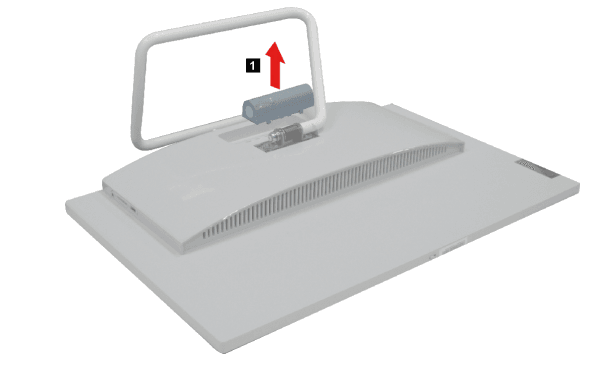
- Remove the computer stand base.
- Turn off all connected devices and the computer. Wait 3 to 5 minutes to let it cool down.
- Disconnect all power cords from electrical outlets and all cables that are connected to the computer.
- Gently lay the computer down on its panel. Let the base naturally be supported by the flat surface.
- Remove the stand base bracket.
- Remove 4 screws.
- Remove the stand base.
- Remove the rear cover.
- Twist the hand screw ring clockwise until the rear cover is loosened.
- Insert a pry tool to separate the rear cover from the panel module.
- Remove the rear cover.

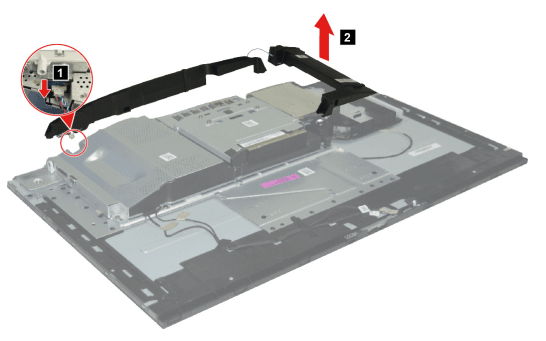
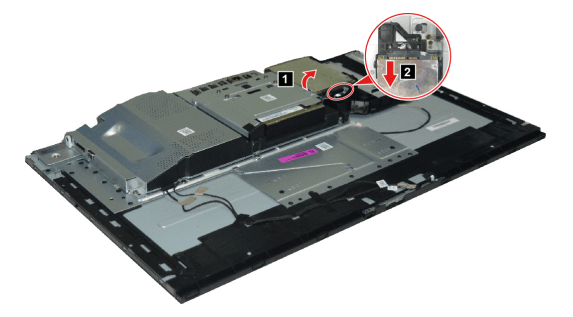
- Detach the speakers connector. Then remove the speakers.
- Lift up the hard disk drive from the bracket. Then unplug the hard disk drive.
- Put the new drive in the bracket. Reinstall the speakers, rear cover and stand base. Then reconnect cables to your computer.
Note: To replace the M.2 SSD, besides the computer stand base, rear cover and speakers, you should also remove the middle frame, fan and system board frame before you can remove the original M.2 SSD. Get details from IdeaCentre AIO A340 Hardware Maintenance Manual.
Wipe the old hard drive for reuse
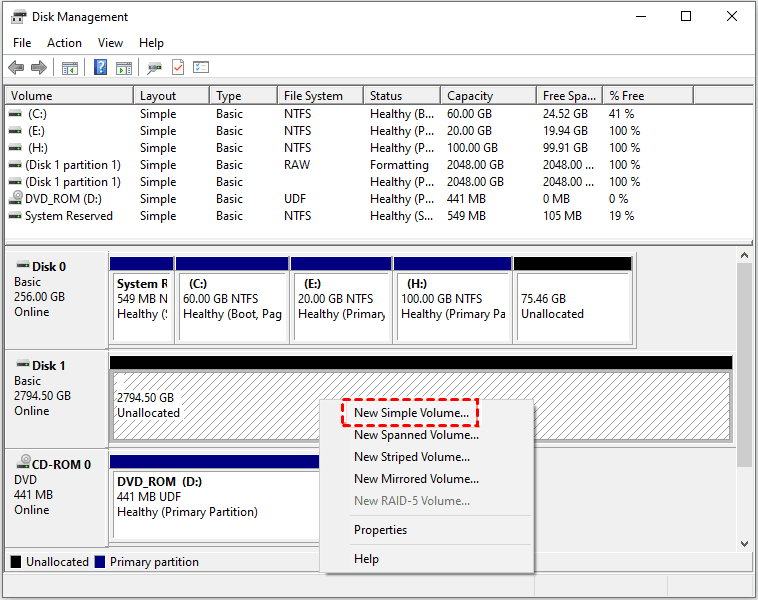
If the new drive works properly after a period of time, you can wipe the old hard drive for reuse. AOMEI Backupper can also help you with hard drive erasing. Click Tools > Disk Wipe and follow the wizard to complete the process.

Your hard drive will become unallocated after wiping, and you need to create a new simple volume with Disk Management to make it usable again.
To sum up
That’s all about how to perform Lenovo all in one PC hard drive replacement. After hard drive replacement, ensure that all components have been reassembled correctly and that no tools or loose screws are left inside your computer.
As you see, AOMEI Backupper is not only specialized disk cloning software but also a superb disk wipe tool. It enables you to permanently delete files from computer. Try it now to discover more!

