O&O DiskImage: Backup Guide and Free Alternative
It is always necessary to backup your data before it is lost. Learn how to make a backup via O&O DiskImage and a free alternative in this article.
By Lily Updated on April 26, 2024
Overview of O&O DiskImage
O&O DiskImage is a kind of disk imaging software released by O&O Software. It lets you create a backup of the entire computer, your hard disks and partitions quickly and easily. You are also allowed to backup individual files and directories. In the event of data loss, your backed-up data will be quickly available again with just a few mouse clicks.
When carrying out a system restore, you can even restore the backup image onto a computer whose hardware is different from the original machine. What’s more, you are allowed to create a boot medium (CD, USB) to boot up your system if something goes awry. Want to know how to use it? Just keep reading.

How to use O&O DiskImage to backup your data easily
Here I pick the trial version of O&O DiskImage Professional Edition. After the first installation, it is recommended to create a boot medium and a full image to immediately protect your computer against data loss.
Create a boot medium
Before you start, connect a USB drive to your computer and backup files on it, because all data on the target drive will be deleted during the boot medium creation process.
1. Run O&O DiskImage. Choose Continue with unregistered trial version and click Next.
2. Enter your e-mail to subscribe to O&O Software newsletter or leave it empty and click Next.
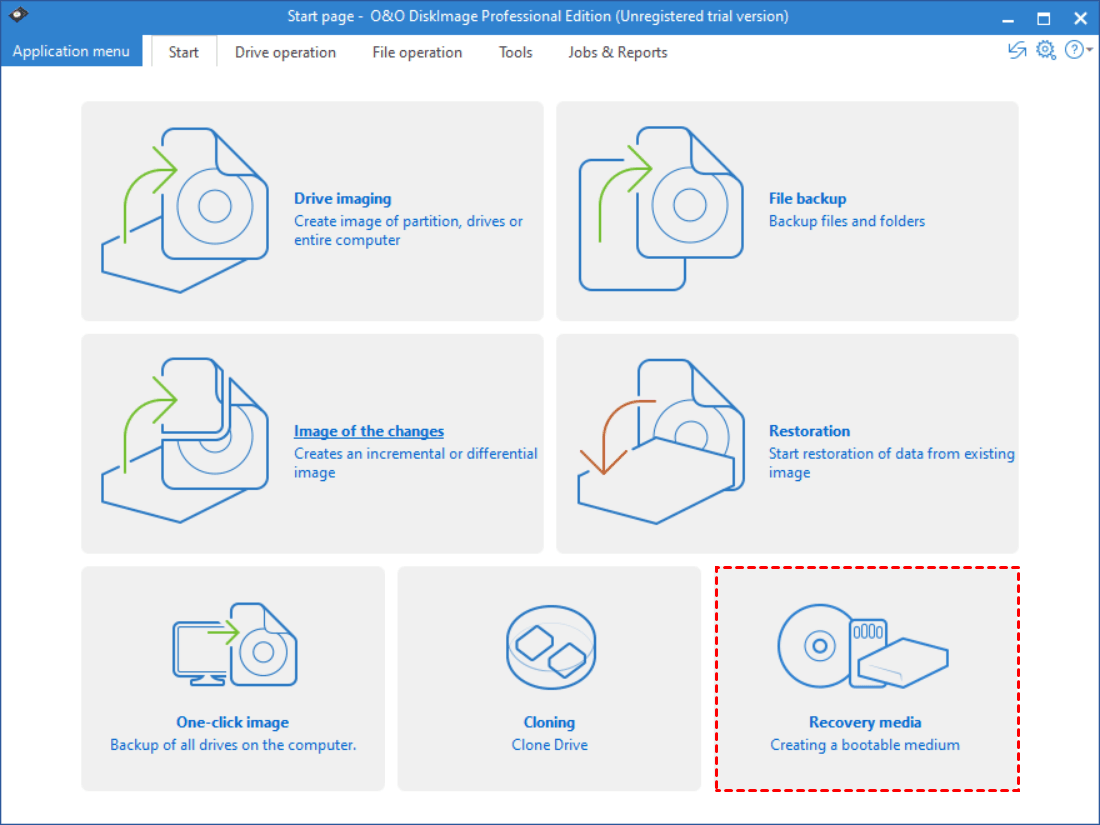
3. On the Start page, choose Recovery media.
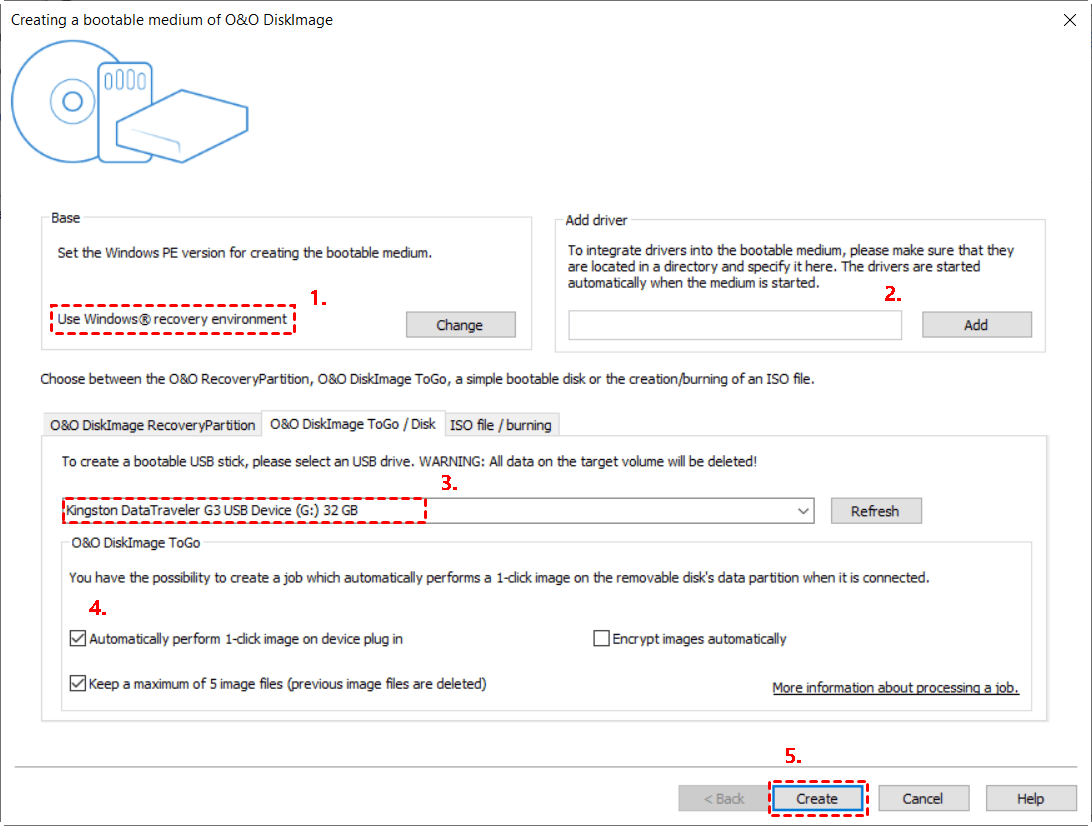
4. The program will detect those options available for creating a bootable disk within the system and it selects Windows recovery environment by default if it is found. You can adjust the base by clicking Change.
5. Integrate drivers into the bootable medium as per your need.
6. Open the O&O DiskImage ToGo / Disk tab, and choose your USB drive from the drop-down menu. If you don’t see it, check USB connection and click Refresh.
7. The option Automatically perform 1-click image on device plug in and Keep a maximum of 5 image files are selected by default. You can uncheck them if you don’t need this backup. Finally, click Create to begin.
Create a full image for system disk
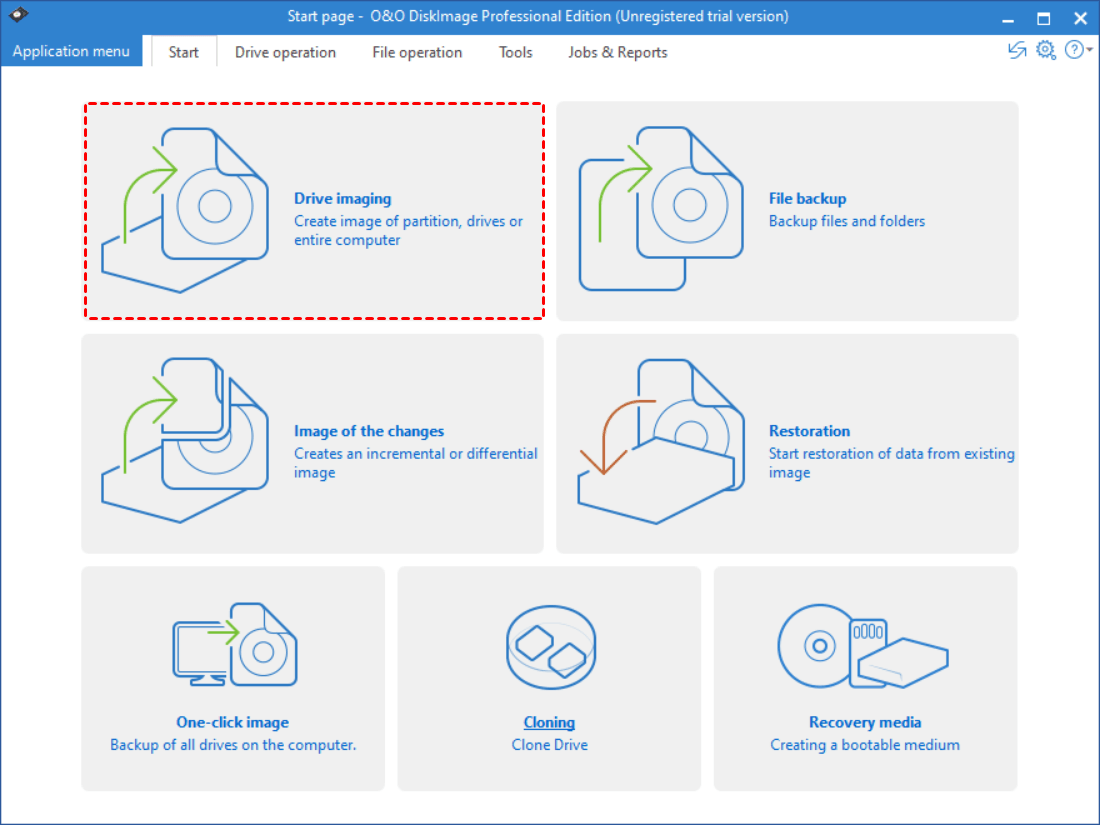
1. Run O&O DiskImage. On the Start page, choose Drive imaging.
2. Select the system disk to be backed up and click Start drive imaging.

3. The program automatically saves the backup image in C:\ProgramData\OO Software\DiskImage\Images. You can specify another location based on your need. Then, click Start to begin the imaging process.
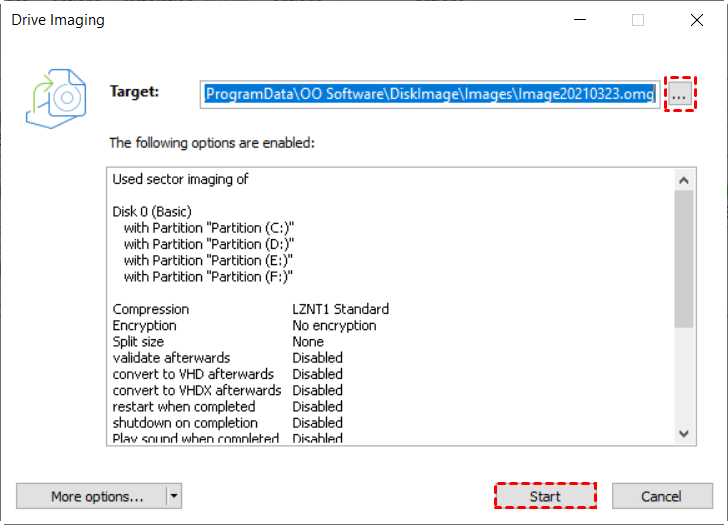
Tip: To do more settings, you can click More options in the lower-left corner of the Drive Imaging window. You are allowed to add comment to image, validate image when completed, and convert image to VHD/VHDX when completed, etc.
Best free alternative to O&O DiskImage🔥
Superb as it looks like, O&O DiskImage has some disadvantages. For example, there is no backup scheduler in O&O DiskImage to help users perform automatic backups. In addition, the user interface is a kind of messy and it only supports Windows 10 and Windows 8/8.1.
Luckily, there is another disk imager that owns almost all functions of O&O DiskImage and overcomes its shortcomings. That is AOMEI Backupper Standard. It is free of charge and it supports all editions of Windows 11, 10, 8.1, 8, and 7.
◈ It enables you to backup OS, disks/partitions, or specific files to various computer backup devices.
◈ It allows you to create incremental and differential backups based on a full backup so as to reduce backup time and save storage space. (Differential backup is available in the Pro version or higher.)
◈ You can set a backup task to run automatically using the built-in “Schedule Backup” feature.
◈ You are able to create bootable media or create recovery environment to boot your computer in case of boot errors.
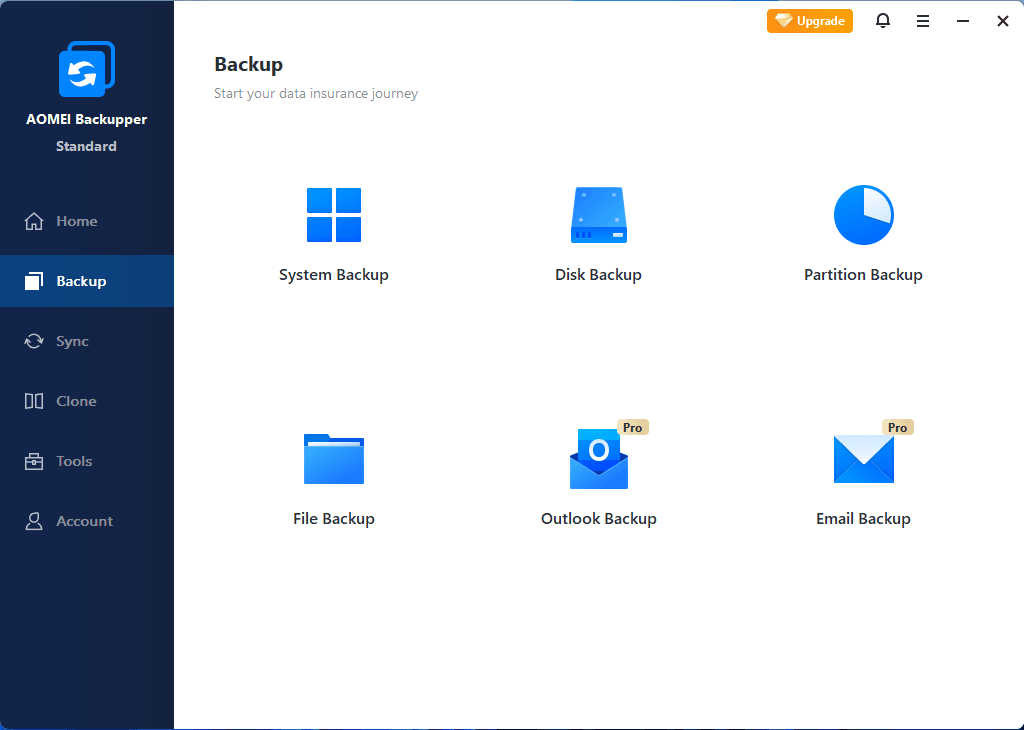
Just download AOMEI Backupper and install it on your computer. You’ll be attracted by its streamlined interface.
How to use AOMEI Backupper to protect your computer
1. Click Tools > Create Bootable Media and follow the wizard to make a bootable CD, DVD or USB drive.

2. To backup system partitions only, click Backup > System Backup. To backup the whole computer hard drive, click Backup > Disk Backup.
FAQs about O&O DiskImage
Q 1: Do I have unlimited use of all functions with the trial version?
A 1: The trial version is not restricted – all program functions are fully operational for 30 days.
Q 2: Can I continue working during the imaging process?
A 2: You can continue working without any problem. However, the working memory buffer is restricted. You can see how much is available in the Memory buffer display.
Q 3: When and how often should I make images?
A 3: It is recommended to create images on a regular basis (at least once a month). The more regularly it’s performed, the more up-to-date the data contained within those images will be.
Q 4: During restoration, O&O DiskImage created a new temporary file on my hard disk. Where does this file come from?
A 4: Before creating an image, O&O DiskImage normally deposits a number of metadata in a local file. The file will be included in the imaging to assure consistency in the image and it will be automatically removed during restoration.
Under certain circumstances, it's possible that another action of the operating system or the user prevents this temporary file from being deleted. You can, however, delete this temporary file without any risk.
Summary
You have learned a quick guide to O&O DiskImage. It offers multiple functions to help you protect your important data, including drive imaging, file backup, and drive cloning, etc. However, you may be disappointed with its messy user interface and the lack of backup scheduler.
AOMEI Backupper just makes up the drawbacks. What’s more pleasing, it can be used as bootable hard drive eraser that enables you to wipe all data on a hard drive. Don’t hesitate to give it a try!

