Top 4 Ways: Fix No NVME Drive Detected Dell Error
You can learn why the no NVME drive detected Dell error occur and top 4 methods to fix the error as well as how to prevent similar errors occur again. You can read on for more detailed information.
By Clytze Updated on September 5, 2025
Why the No NVME Drive Detected Dell Error Occur?
NVMe, which means Non-Volatile Memory Express, is a high-performance transfer protocol for SSDs. Use the high-speed PCIe socket to communicate between the storage interface and the system CPU.
Since it is faster than traditional hard drives, NVMe is also favored by more and more users, but recently many users have reported encountering this no NVME drive detected Dell error.
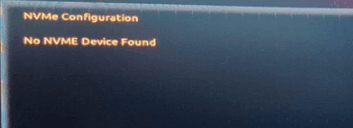
You can first understand what may be causing this error.
- NVME SSD is not enabled.
- NVME SSD is not properly connected to the computer.
- The NVME SSD driver needs to update.
- NVME drive letter is missing.
How to Fix No NVME Drive Detected Dell Error
After knowing the reason, you can continue reading the article to learn 4 ways to fix this error. These four methods are divided into two cases. The first and second methods are applicable to the situation that NVME is not detected in BIOS, and the third and fourth methods are applicable to the situation that NVME is not detected in Disk Management. Each method includes specific steps.
Fix 1. Enable PCIE Support
If your NVME SSD is not detected by BIOS, you can try method 1 and method 2 to try to fix this error. The first way is to achieve the goal by enabling PCIE support. You can follow the steps below.
Step 1. Restart PC and press F2/Delete to access BIOS.
Step 2. Go to Advanced > M.2_2 PCIE Storage RAID Support.

Step 3. Make sure it's enabled, and save the changes.
Fix 2. Reinstall the NVME SSD
Besides the first method, when the NVME drive not showing in BIOS, you can also fix this error by reinstalling your NVME SSD. Specific steps are as follows.
Step 1. Disconnect Your PC's power supply and open the computer.
Step 2. You can see a horizontal slot labeled SATA or PCIE.
Step 3. Remove the mounting screw opposite the slot, and reinstall the NVME SSD.
Step 4. Restart your PC and follow the onscreen instruction.
Fix 3. Change NVME SSD Drive Letter
If your BIOS can detect your NVME drive, but Windows doesn't. You can use method 3 and method 4 to try to solve the situation that NVME is not detected in disk management. You can follow the steps below to change the drive letter of the NVME SSD to fix the Dell not detecting SSD error.
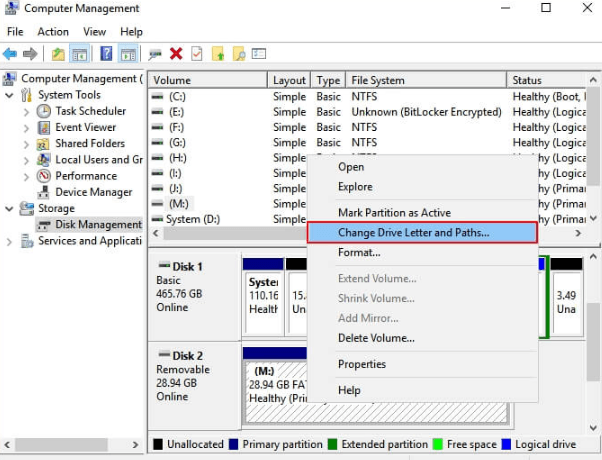
Step 1. Right-click This PC and select Manage.
Step 2. Open Disk Management.
Step 3. Right-click your SSD and choose Change Drive Letter and Paths.
Fix 4. Update NVME SSD Drive Letter
If changing the NVME SSD drive letter still does not fix the problem that NVME is not detected in Disk Management, you can also try to update the NVME SSD drive letter. You can follow the steps below.
Step 1. Press Windows + X and click Device Manager.
Step 2. Expand Disk Drives.
Step 3. Right-click the NVME SSD and choose Update Driver Software.
Step 4. In the update driver software window, choose Search automatically for updated driver software.

How to Prevent Similar Errors from Occurring Again
After fixing this error, in order to avoid data loss caused by similar errors again. You can use the free professional disk backup software AOMEI Backupper Standard to back up your NVME disk regularly. This way, even if the disk encounters any problems, you can quickly restore from the previous disk backup and use the computer normally. It also has the following advantages.
- Scheduled backup: This software allows you to set scheduled automatic disk backup on a Daily, Weekly, Monthly basis, so you can always keep the latest backup version of your system/disk.
- Multiple backup methods: You can choose to perform your backup tasks with full backup or incremental backup method. Incremental backup will only back up the changed parts, thus, this method will help you save backup time and storage space.
- Different paths: You can back up your NVME disk to different destination locations, such as local disk, external disk, HDD, SSD, USB drive, NAS, etc.
- Various systems: It supports all Windows operating systems, including Windows 7/8/8.1/10/11, etc.
First, download and install this freeware, then follow the graphic tutorial below. If you are a Windows Server user, you can pick AOMEI Backupper Server.
Step 1. Open AOMEI Backupper Standard and click Backup > Disk Backup.
![]()
Note: Except for System Backup and Disk Backup, it also provides Partition Backup, File Backup, etc., you can choose them if you need.
Step 2. Click Select Source to choose the disk you want to backup. You can add multiple disks at the same time (if needed).

Step 3. You need to select the backup destination (click the PC icon) for your disk and then click Start Backup.

Notes:
- Options: It allows you to write comments, compress or split an image file and enable email notifications.
- Schedule: It supports setting a backup task to run automatically at fixed intervals, such as Daily, Weekly, Monthly, Event trigger, etc.
- Backup Scheme: It offers 3 backup methods (Full/Incremental/Differential). The Differential backup method is easier to restore, you can upgrade to the Professional or higher versions to enjoy it. After upgrade, you can also enable automatic backup cleanup feature to delete older backups regularly.
Summary
This article explains why the no NVME drive detected Dell error occurs and 4 ways to fix it. In order to avoid similar errors occur again, it is recommended that you regularly back up your NVME disk with the free professional backup software AOMEI Backupper Standard. In this way, even if your disk encounters a problem accidentally, you can use the disk backup you created before for a quick restore without losing any data.
In addition, it also provides a variety of functions such as disk clone, recovery environment, and other features, like the create bootable media feature to comprehensively protect your computer security. You can download this software to explore more useful functions.