Guide: Asus X505ZA SSD Upgrade-No Data Loss and Boot Issues
Want to perform Asus X505ZA SSD upgrade? This article provides you with detailed steps to show you how to upgrade HDD to SSD in Asus VivoBook X505ZA. A reliable disk cloning software is also provided to help you migrate data and system.
By Yuka Updated on September 14, 2024
Why Need to Upgrade HDD to SDD in Asus X505ZA?
There is nothing more frustrating than a slow or malfunctioning computer. Poor performance makes it difficult for the computer to complete work. It can also cause the computer to crash, overheat, and drain the battery more quickly. If you are looking for a cost-effective way to improve the performance of your Asus X505ZA without completely replacing the device, consider upgrading from HDD to SSD.
Learn more about the advantages of SSDs to determine if you need to upgrade HDD to SSD in the future.
▶ SSDs boast faster performance than HDDs
With SSD, you will enjoy faster startup time, data retrieval and overall performance. In fact, some SSDs run 30 times faster than traditional hard drives.
▶ SSDs are more efficient than HDDs
When you install an SSD, your computer will require less energy to run and save your battery life. This efficiency is especially important for users who travel or are often far away from chargers.
▶ SSDs are lighter, yet more durable than HDDs
The design of SSD is slimmer and simpler, without moving parts. So, it is unlikely to be damaged by humans. The durability of SSDs is essential to ensure the safety of your data.
▶SSDs are more reliable than HDDs
In fact, the average failure rate of SSD is 0.5%, while the average failure rate of HDD is 5%.
Reliable Disk Cloning Software to Migrate Data and System
Generally, there are two situations when users want to perform Asus VivoBook X505ZA SSD upgrade. The first is to replace the original HDD with a 2.5-inch port SSD. The second one is to keep the original HDD and add a SATA M.2 SSD.
For Asus VivoBook X505ZA, the operating system is pre-installed on the original hard drive. If you want to replace the original HDD, you need to migrate your data and system to the new SSD. At this time, you need a reliable disk cloning software to help you upgrade HDD to SSD.
AOMEI Backupper Standard is a free disk cloning software that can help you migrate your data and system without boot issues. This cloning software has a user-friendly design and a clear interface, allowing all users to use it smoothly in a short time. It supports all Windows PCs, including Windows 7/8/8.1/10/11/XP/Vista. It provides you with more powerful functions, such as:
✩ Multiple disk types are supported: HDDs, SATA SSDs, NVMe SSDs, M.2 SSDs, etc.
✩ All brands of SSD are supported: clone HDD to WD Blue SSD, Kingston SSD, Samsung SSD, etc.
✩ 2 clone methods are provided: Intelligent Clone (default) and Sector by Sector Clone. By default, this disk clone software just clones the existing data (the used sectors) on the disk.
Using this software, you can easily transfer the data and system on the original ASUS X505ZA HDD to the new SSD. Next, I will give you a detailed introduction on how ASUS X505ZA upgrades HDD to SSD.
How to Perform Asus X505ZA SSD Upgrade Step by Step
The specific operations of the two different situations are slightly different, please choose according to your actual situation. If you want to perform Asus X505Z SSD upgrade, the steps are the same.
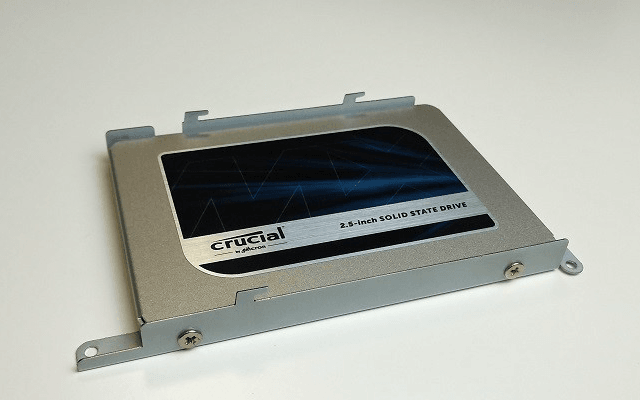
Situation 1. Replace the Original HDD with a SATA 2.5" SSD
If you want to replace the original hard drive with a new SSD, you need to use AOMEI Bakupper to migrate your data and system, and then install the new SSD on your computer and boot from it. Before migrating your data and system, you need to do some preparations.
Preparations:
✽ Connect the SATA 2.5" SSD to your Asus X505ZA with a SATA-to-USB cable.
✽ The cloning process will delete all data on the target disk. If there are data or files on the SSD, please backup files as needed.
Stepwise Guide to Migrate Everything on Original HDD to New SSD
Step 1. Download AOMEI Backupper and install it on your computer.
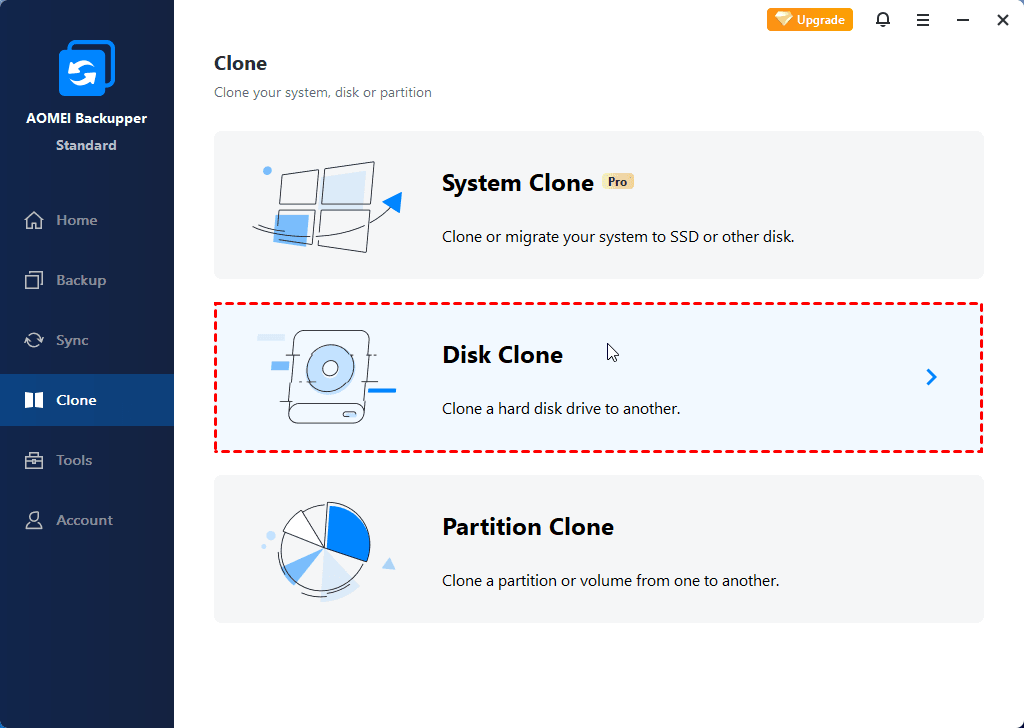
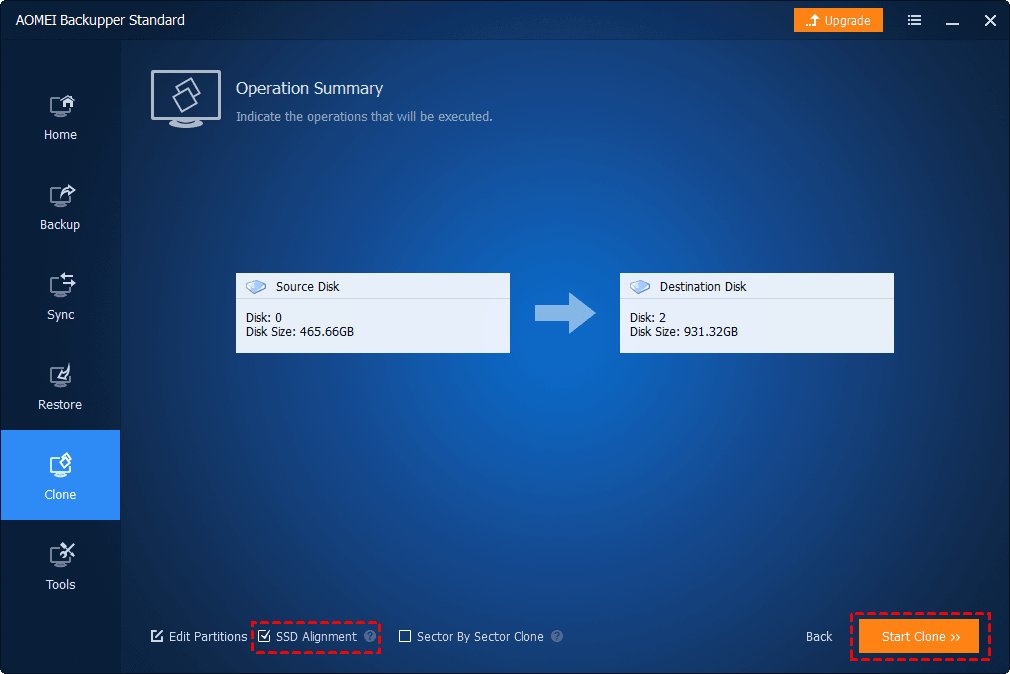
Step 2. Launch this freeware. Click Clone on the left menu and select Disk Clone on the left panel.
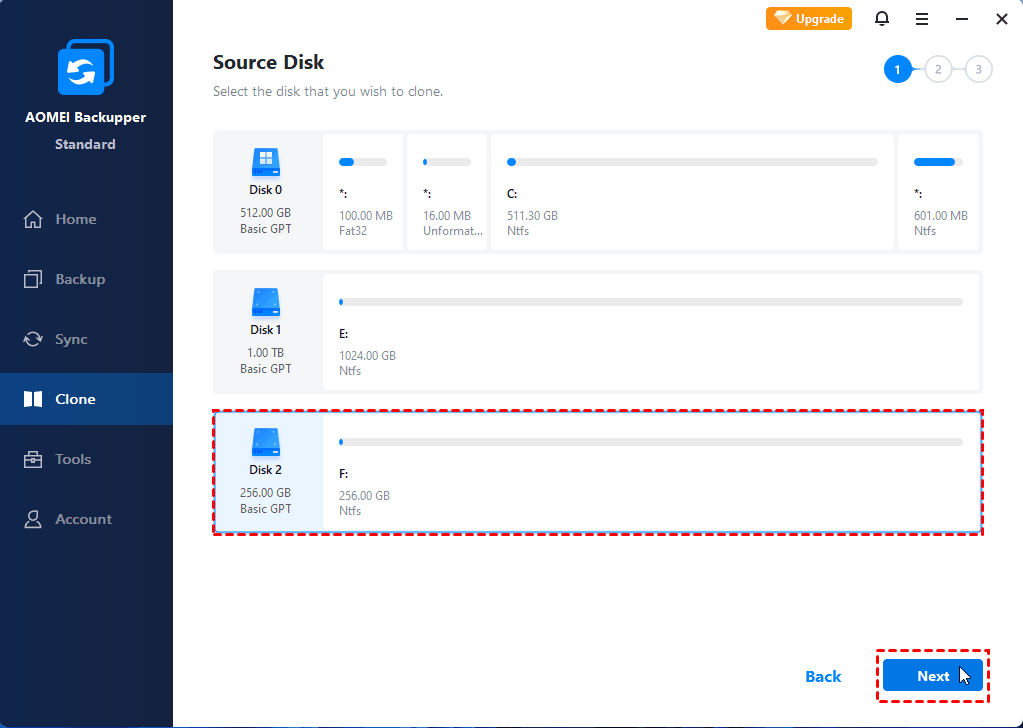
Step 3. Select the original hard drive as the source disk that you want to migrate data from, and then click on Next.
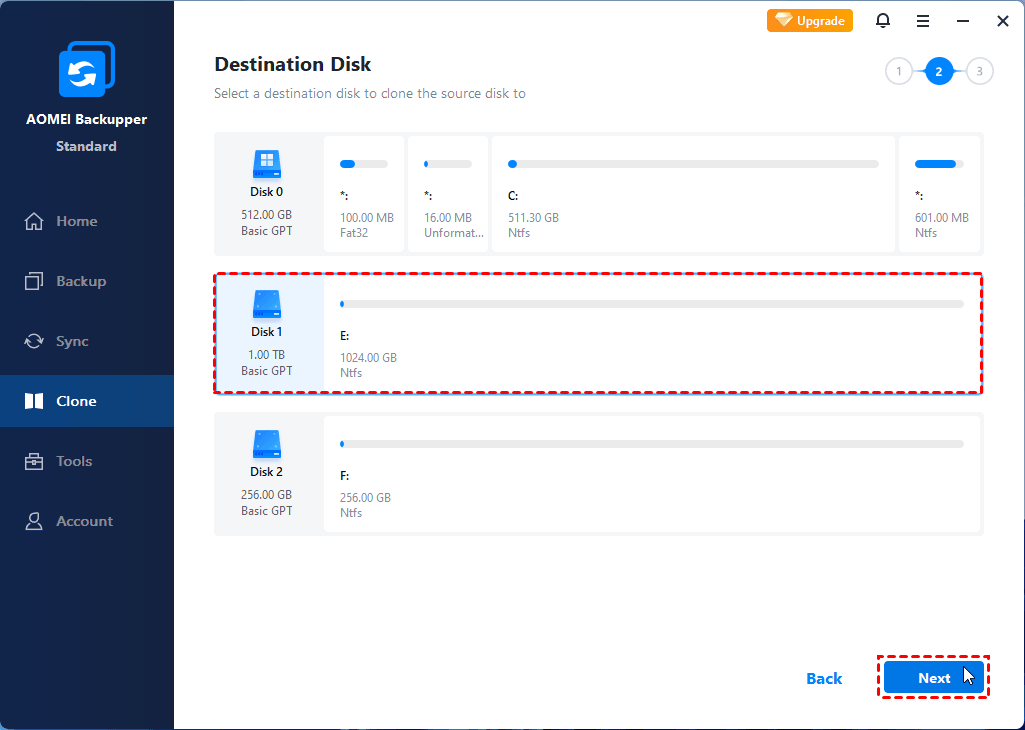
Step 4. Select the new SATA 2.5" SSD as the destination path.
Step 5. Tick SSD Alignment to optimize the performance of the SSD, then click Start Clone.
Tips✍:
✭ The free version of AOMEI Backupper only supports cloning system disk from MBR to MBR. If you want to clone MBR to GPT disk and vice versa, or clone GPT to GPT, you will be asked to upgrade to AOMEI Backupper Professional.
✭ If you want to adjust partition size of destination disk with “Edit Partitions”, please upgrade to higher version.
Install New SDD to Your Computer
After migrating your data and system to the new SSD, you can perform Asus VvivoBook X505ZA SSD upgrade.
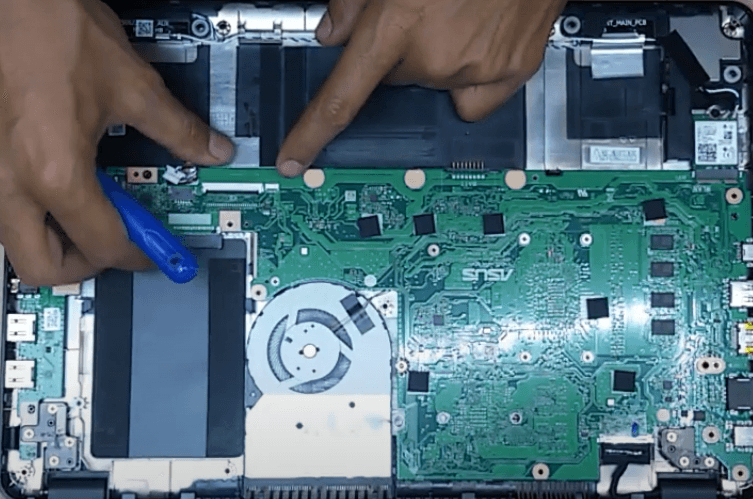
Step 1. Loosen the screws on the back cover, and then use a screwdriver to open the cover. Disconnect the power cord and connection cable between the touchpad & keyboard and the motherboard.
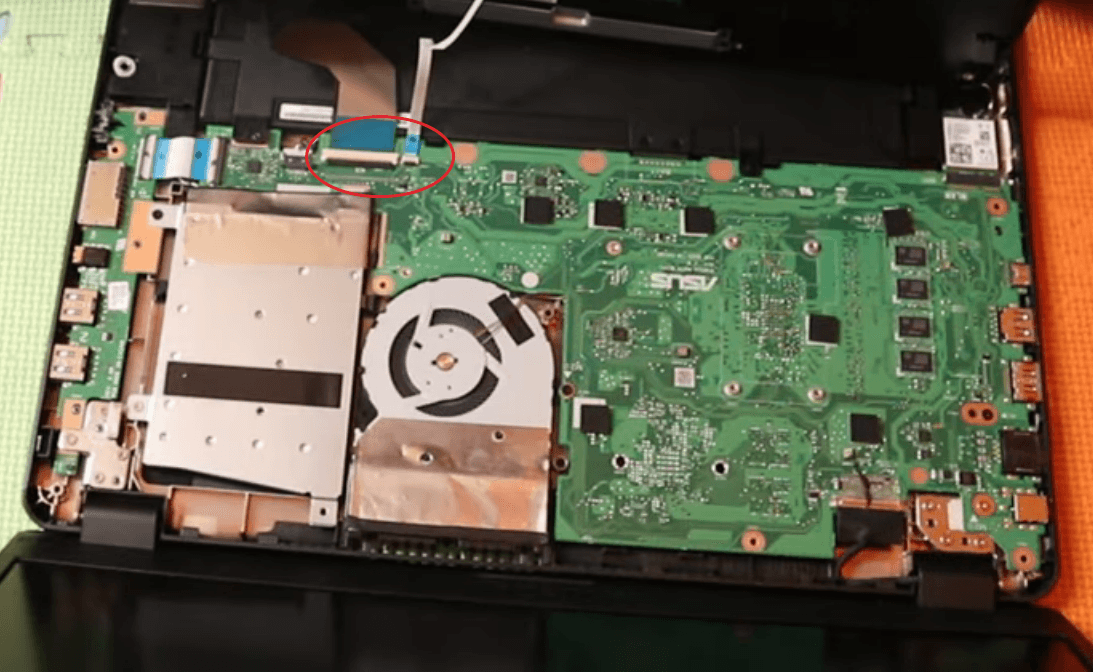
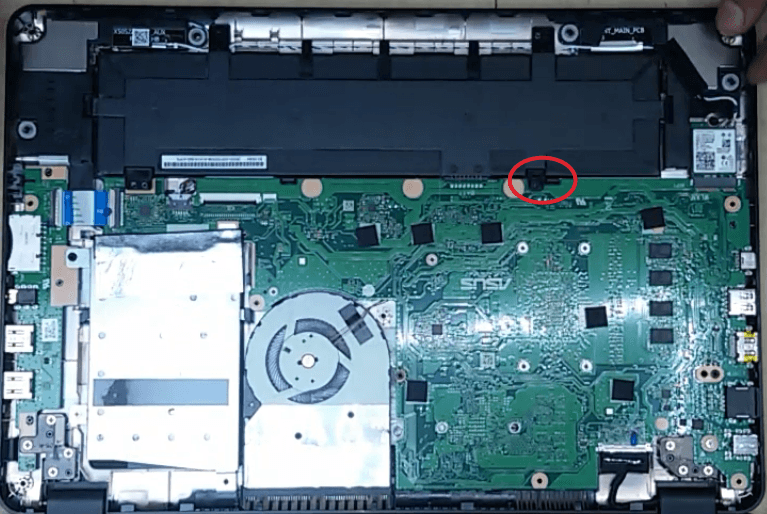
Step 2. The hard drive is located on the top right. Just remove the 4 screws that hold the hard drive.
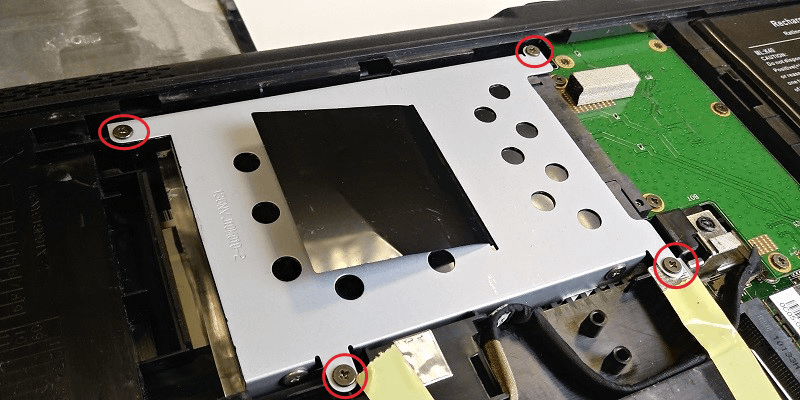
Step 3. After removing them, simply pull the hard drive to unplug it from the SATA connector. The hard disk is fixed in the rack by 4 screws, you need to remove these 4 screws and take the hard disk out of the rack.
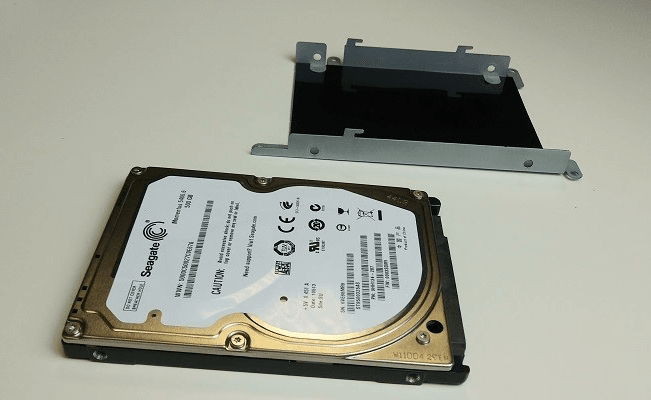
Step 4. Then you have to screw the SSD onto the rack. And retrace your steps to reassemble everything.
Step 5. After the assembly is complete, restart your computer and you can boot from the cloned SSD successfully.
Situation 2. Keep the Original HDD and Add a SATA M.2 SSD
If you want to perform Asus X505ZA SSD upgrade but keep the original hard drive on your computer, you can add a SATA M.2 SSD. If this is the case for you, you can install the new SSD on your computer and then migrate the data and system on your HDD to the new SSD.
Add a SATA M.2 SSD on Asus X505ZA
Step 1. Open the cover of your laptop as mentioned above. And then unscrew the battery.
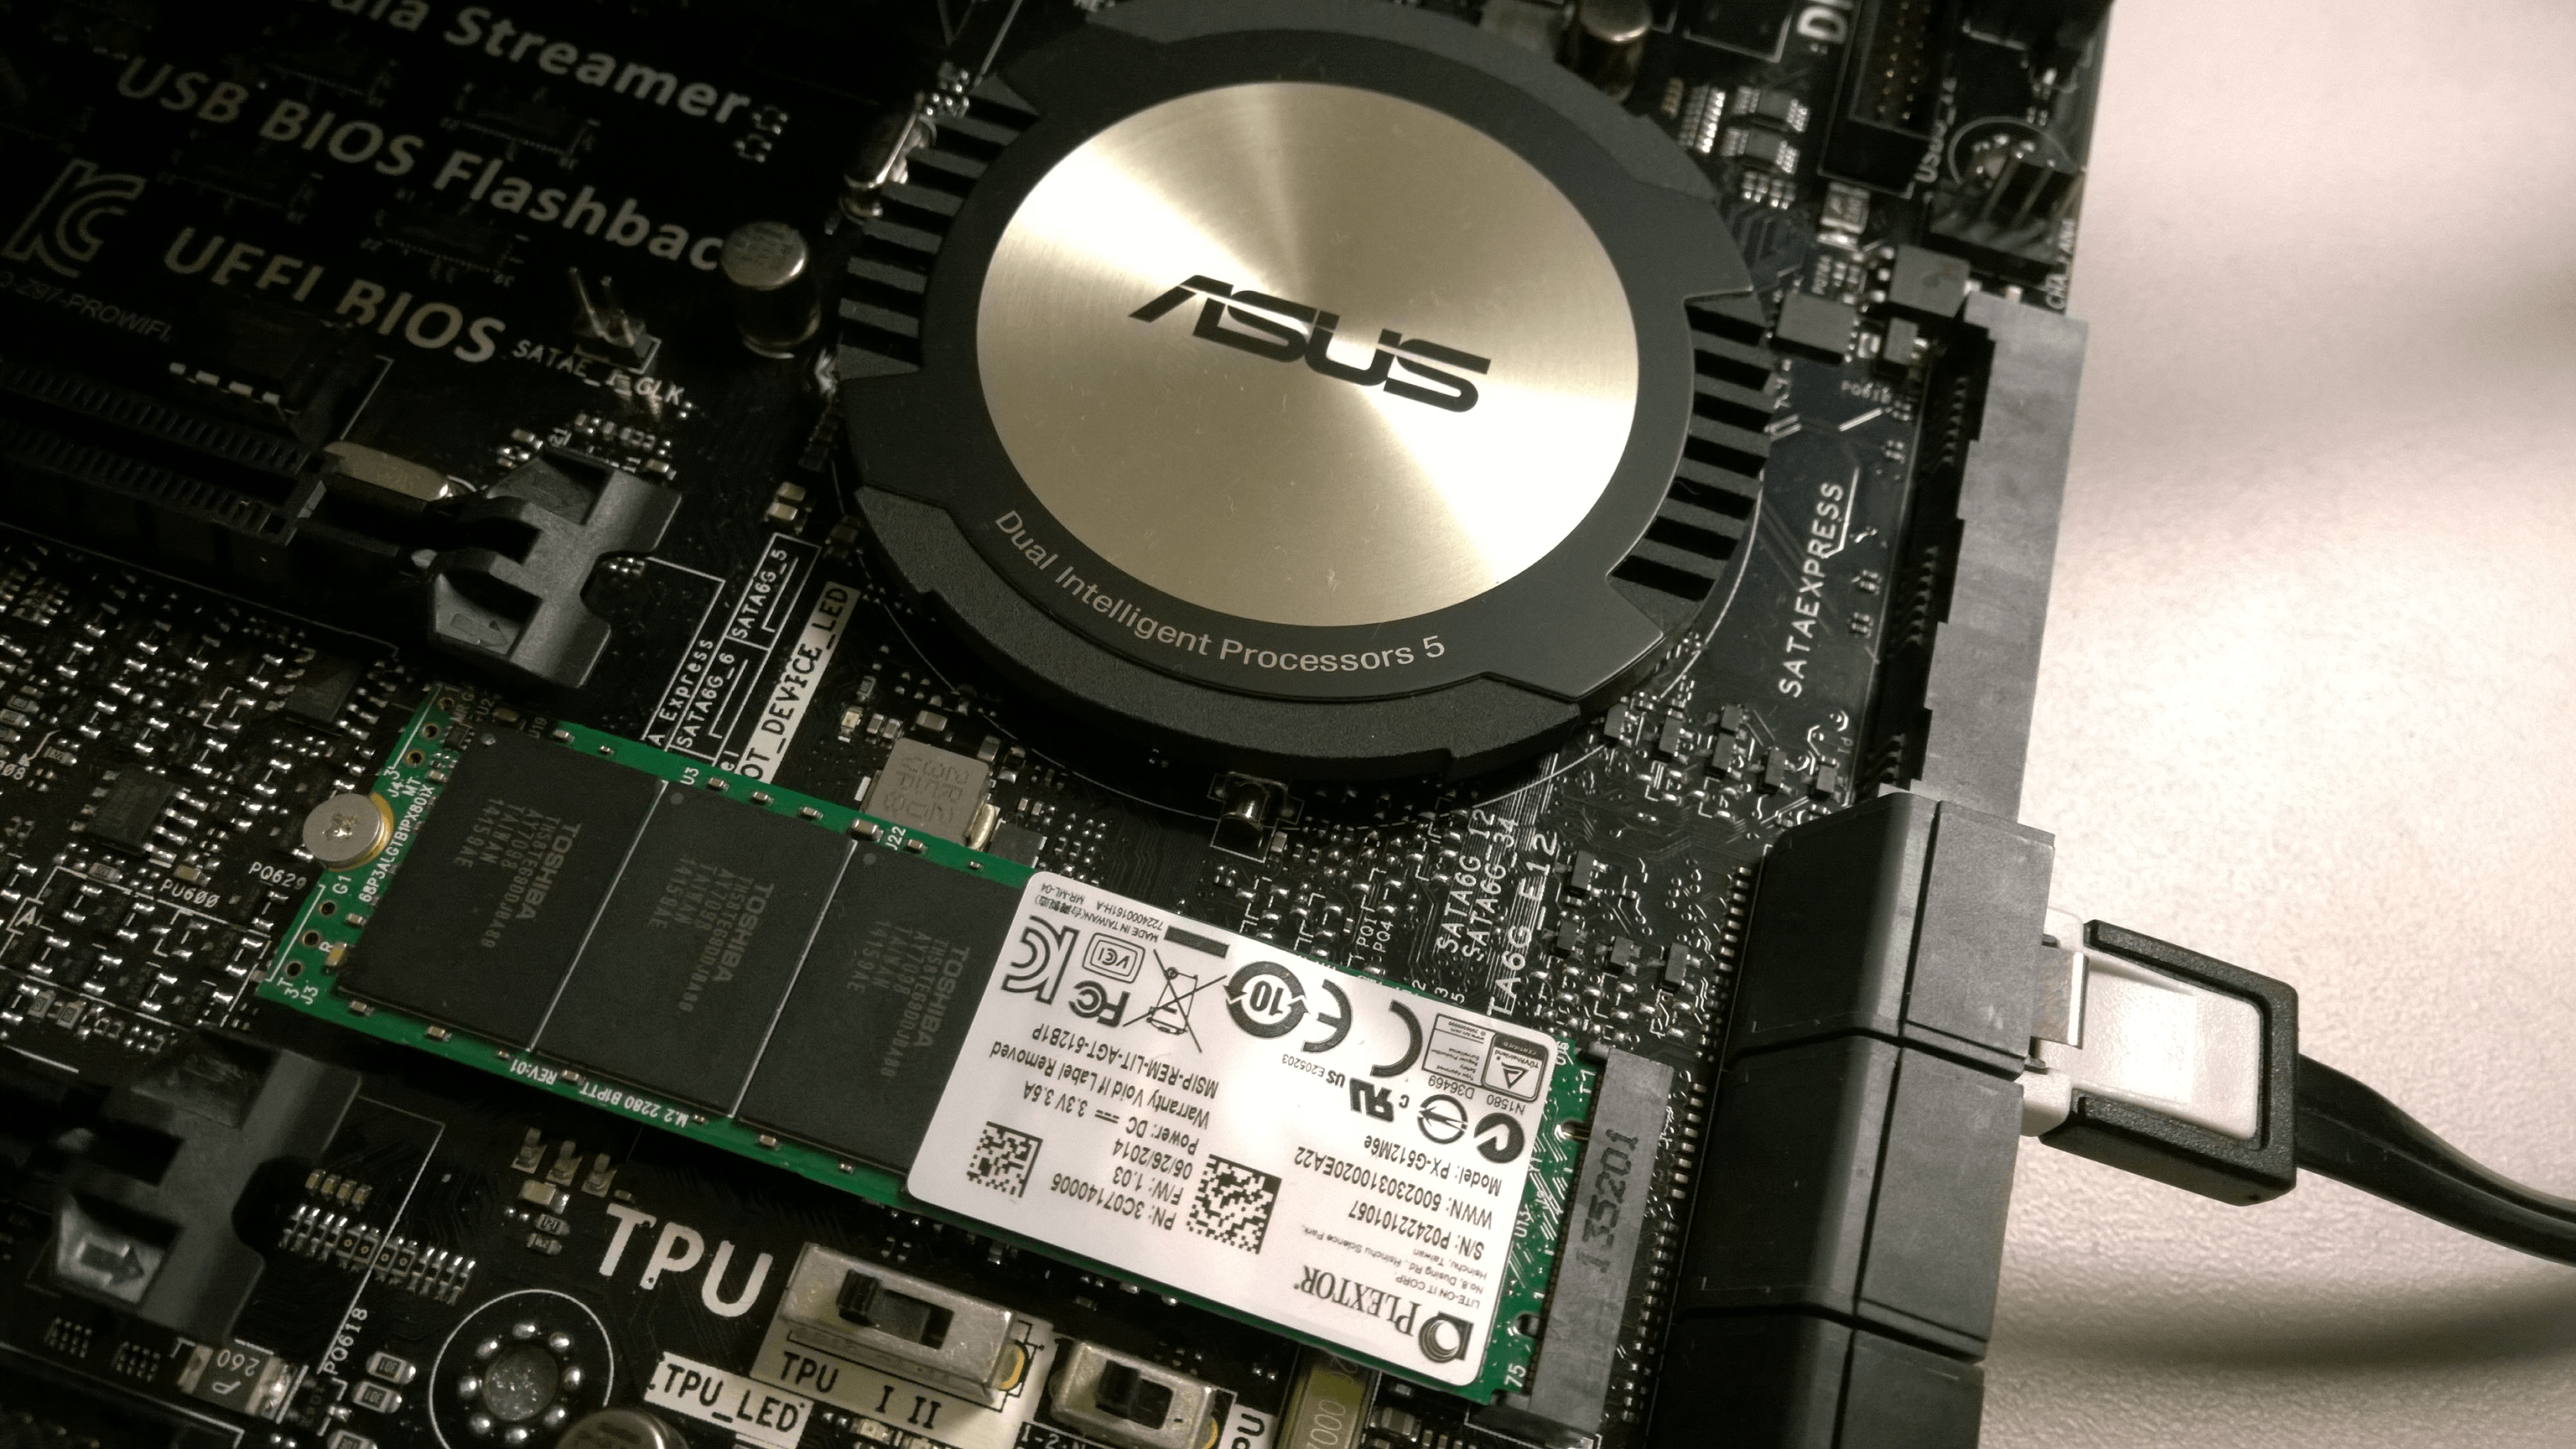
Step 2. Take out your HDD according to the method mentioned in Situation 1. The M.2 SSD slot is on the motherboard, you need to loosen the motherboard screws.
Step 3. Insert M.2 SSD on the motherboard and fasten it with a screwdriver. And retrace your steps to reassemble everything.
Migrate Data and System to SATA M.2 SSD
After you assemble it, restart your computer, download and install AOMEI Backupper. If you want to use the new M.2 SSD as your boot drive, you can use the Clone function to migrate your data and system to it. The specific operation steps are the same as those described in the previous situation, but you don't need to prepare the SATA-to-USB cable. Because the SSD is already installed in your computer.
Tips✍: If you only want to migrate the system on the original HDD to the M.2 SSD instead of the entire disk, please consider upgrading to the advanced version to use the System Clone function.
After Cloning
- When the migration is done, how to enable M.2 in BIOS of Asus X505ZA? You need to restart your computer and press a specific key (usually F2, F8, F12, Del) to enter BIOS Setup. In the BIOS settings screen, go to the Boot tab and set the new SSD as the first option. Save changes and let Windows boot from the M.2 SSD.

- If the cloned M.2 SSD has been used for a period of time without any problems, you can erase the data on the old disk to reuse it as a storage disk.
Conclusion
This article tells you how to perform Asus X505ZA SSD upgrade in 2 different situations. Whether you want to keep the old hard drive or not, it is recommended to use reliable disk cloning software to help you migrate your data and system to the new SSD.
The disk cloning software provided in this article can not only help you with data migration, but also help you back up, restore or synchronize files. For instance, you can use it to sync external hard drive. More functions are waiting for you to explore.

