5 Fixes to “Antimalware Service Executable High Disk Usage”
Have you also encountered the problem of Antimalware Service Executable high disk usage? This article will tell you why this software has a high disk usage, and how to fix it in 5 ways.
By Yuka Updated on August 16, 2024
How to Solve “Antimalware Service Executable 100% Disk Usage” Problem
“My computer has been upgraded to Windows 10, and Antimalware Service Executable runs at 100% disk usage (approximately 4 MB/s) almost all day. My computer is almost unusable. It takes more than 5 minutes even to just open Settings. How can I solve this problem?”
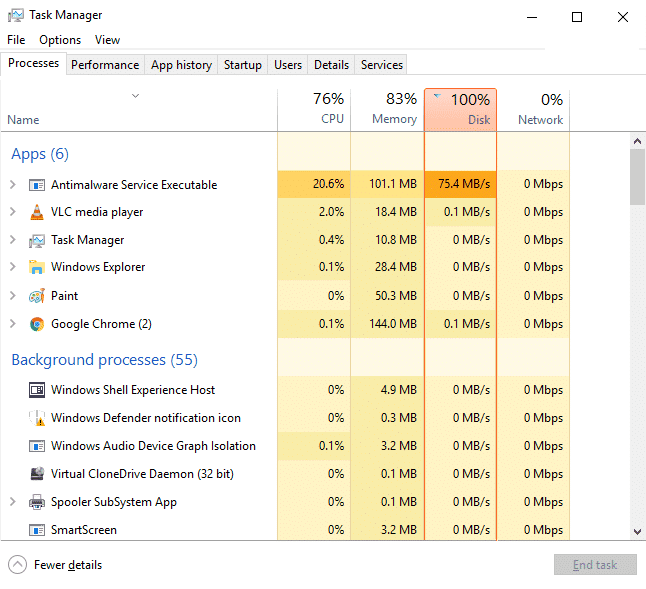
Just like the user above, Antimalware Service Executable almost exhausts the operating resources of the computer when it is running, especially after upgrading Windows 10. This will directly cause the computer to run very slowly. If you want to fix this problem, please continue reading this article.
What Is Antimalware Service Executable?
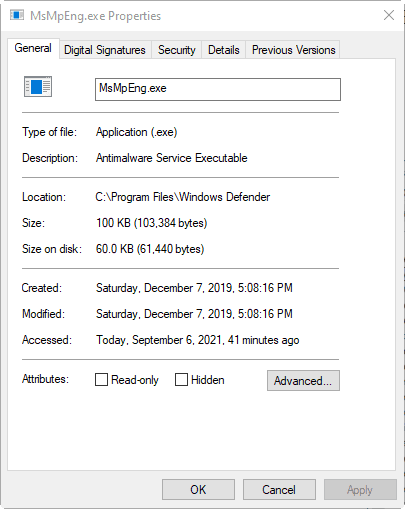
Antimalware Service Executable is a related system process of Windows Defender, the built-in anti-virus software of Windows 10. The detailed process name is MsMpEng.exe, whose path location is under C:\Program Files\Windows Defender. Its role is to remove, isolate and prevent spyware. When you are accessing malware or spyware, Antimalware Service Executable will run and scan these software immediately.
Why “Antimalware Service Executable High Disk Usage” Problem Occurs?
Antimalware Service Executable has a high disk usage rate at runtime, mainly because the process is scanning your computer in the background for malware. Also, like other antivirus software, it automatically scans your computer on a regular basis.
Antimalware Service Executable process can cause high disk, CPU, or memory usage problems when running or updating. Typically, it automatically performs update or scan tasks in the background during the idle time of your computer. Sometimes, however, even if you're using a computer, it uses CPU resources to scan everything. For example, when you open a large file, or when a new large memory removable device connects to your computer, Antimalware Service Executable may take extra time to perform a scan.
How to Fix “Antimalware Service Executable High Disk Usage” Problem – 5 Solutions
When Antimalware Service Executable is running, it may cause problems such as high disk, CPU or memory usage, computer freezes, etc. which will seriously affect our use of computers. If you are also experiencing this problem, do not worry. Here are 5 simple solutions for you to deal with “Antimalware Service Executable High Disk Usage” problem in Windows 10.
👉 Solution 1: Change Windows Defender's Scheduling Options
👉 Solution 2: Disable Real-Time Protection
👉 Solution 3: Disable Windows Defender with Group Policy
👉 Solution 4: Disable Windows Defender in Registry
👉 Solution 5: Update all Available Device Drivers
Before disabling Windows Defender, it is recommended that you make a file backup or disk backup of your computer's data to avoid data loss. Because Windows Defender is the built-in antivirus software of Windows 10, if you disable it, it will leave your computer in an unprotected state, and it will be vulnerable to malware or viruses.
Solution 1: Change Windows Defender's Scheduling Options
Changing Windows Defender's scheduling options is one of the effective methods. Please follow the detailed steps below.
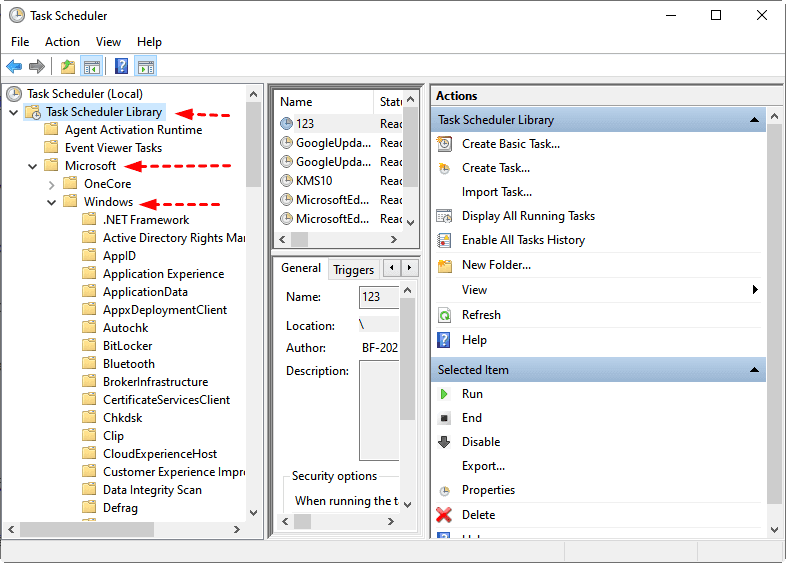
- Press Win + R together to open the Run window, type taskschd.msc, and then press Enter to open the Task Scheduler.
- Expand Task Scheduler Library -> Microsoft -> Windows in the left menu.
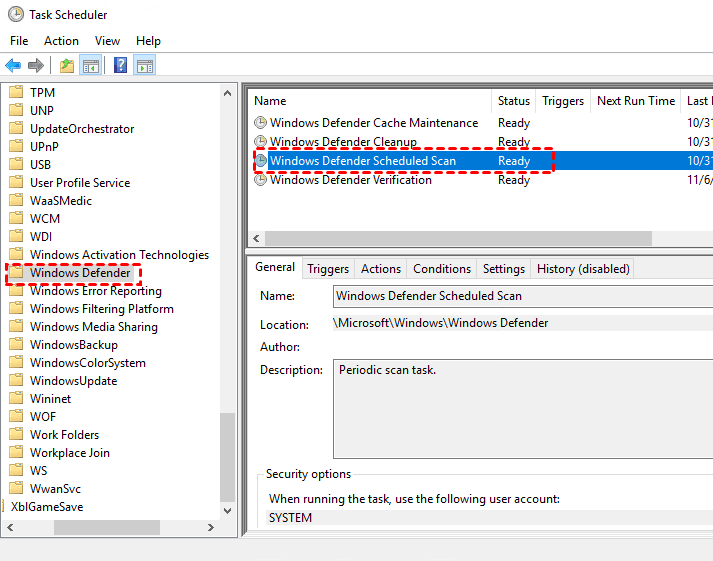
- Under Windows options, find Windows Defender and click on it. Then double-click the Windows Defender Scheduled Scan option in the middle of the interface.
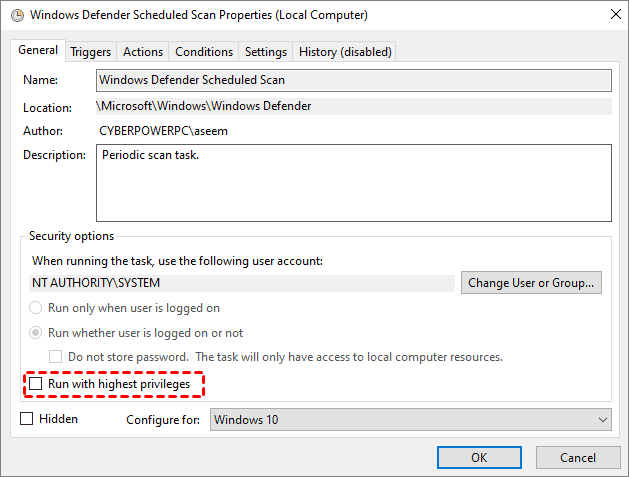
- In the pop-up window, uncheck Run with highest privileges.
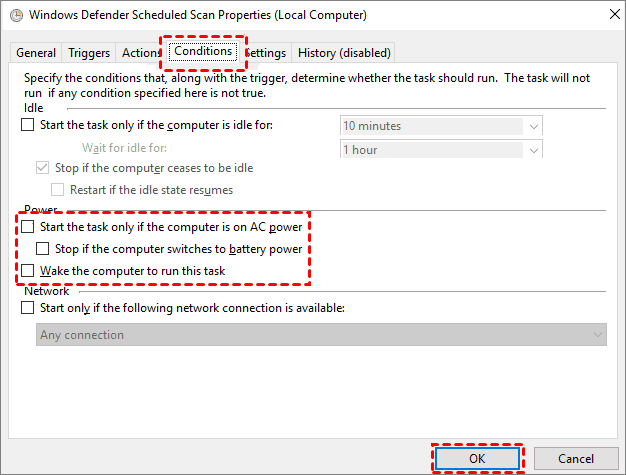
- Then go to the Conditions tab and uncheck all options to clear the scheduled scan. Then click OK.
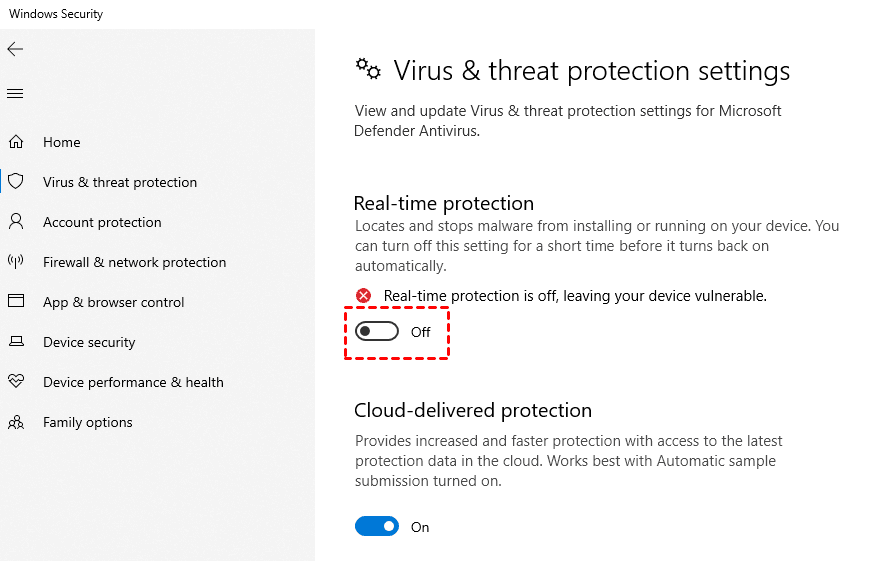
Solution 2: Disable Real-Time Protection
You may not want to turn off Windows Defender permanently, but only temporarily disable it. At this point you need to visit the Windows Security center.
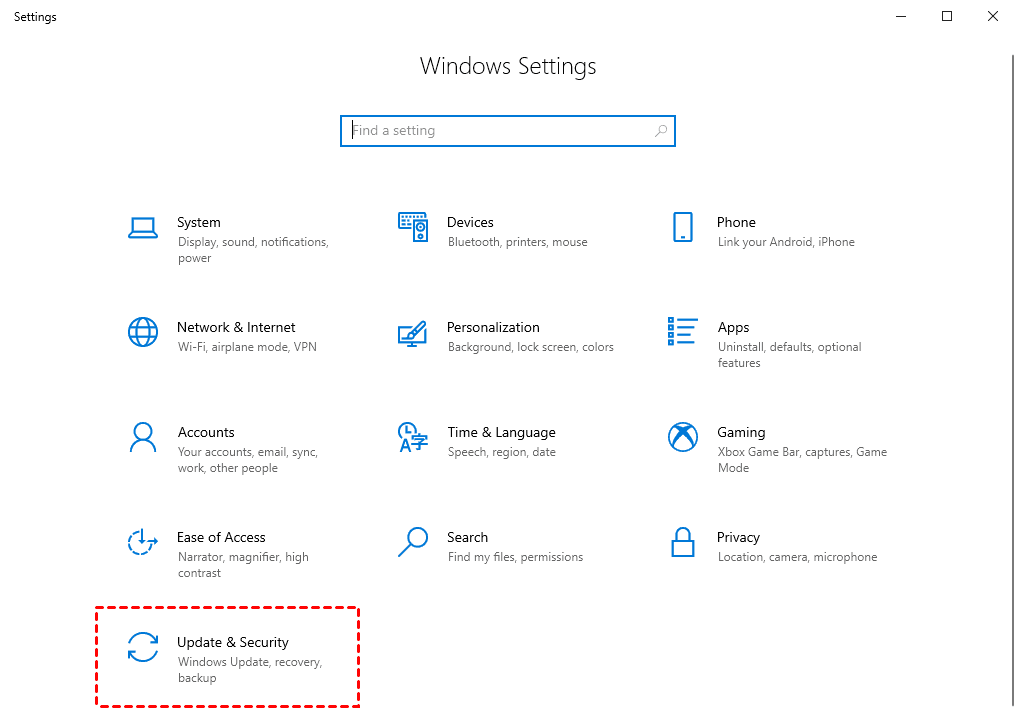
- Press Win + I together to open the Settings interface, and then select Update & Security.
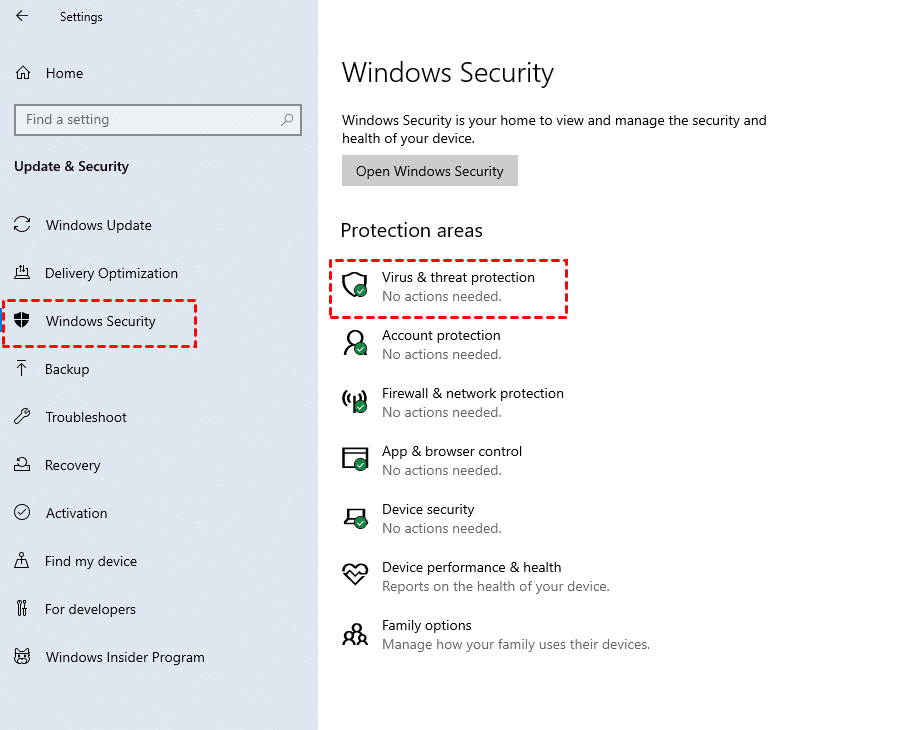
- Select Windows Security in the left panel and then click Virus & threat protection in the left menu.
- In the new pop-up window, select Firewall & network protection -> Manage settings.

- Turn off the Real-time protection button.
Solution 3: Disable Windows Defender with Group Policy
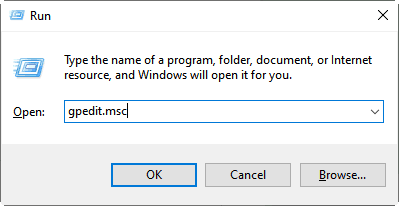
- Press Win + R together to open the Run window, type gpedit.msc, and then press Enter.
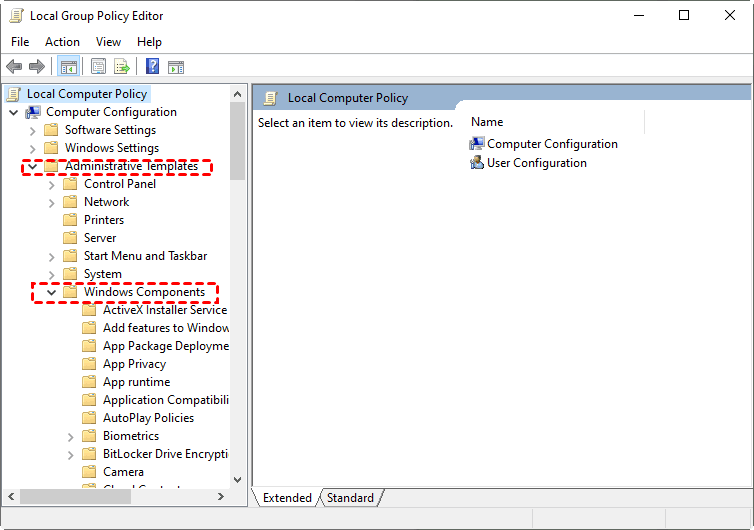
- The Local Group Policy Editor window will open. Select and expand Administrative Templates -> Windows Components in its left panel.
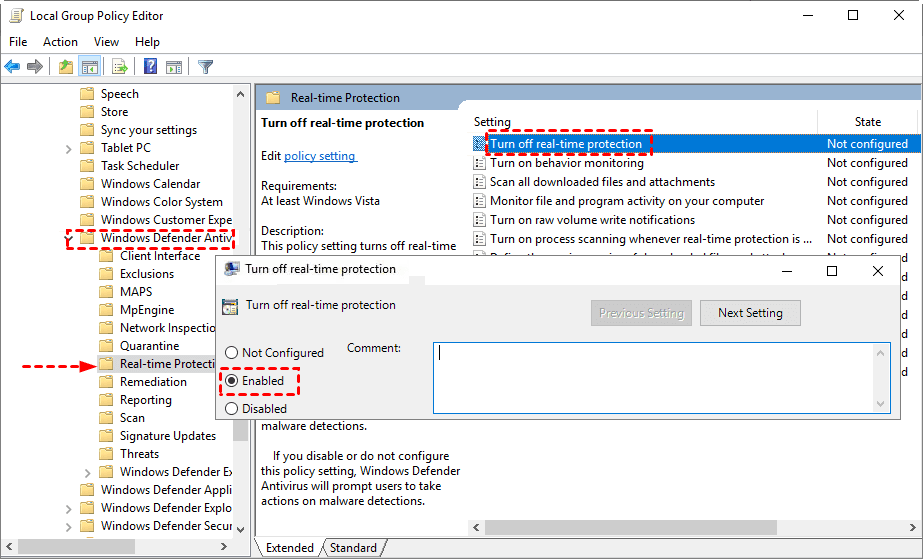
- Select Real-time protection under Windows Defender Antivirus. In the right interface, double-click Turn off real-time protection, and finally select Enabled.
Solution 4: Disable Windows Defender in Registry
- Press Win + R together to open the Run window, type regedit and then press Enter to open Registry Editor.
- In the Registry Editor window, locate the following registry key.
▶ HKEY_LOCAL_MACHINE\SOFTWARE\Policies\Microsoft\Windows Defender
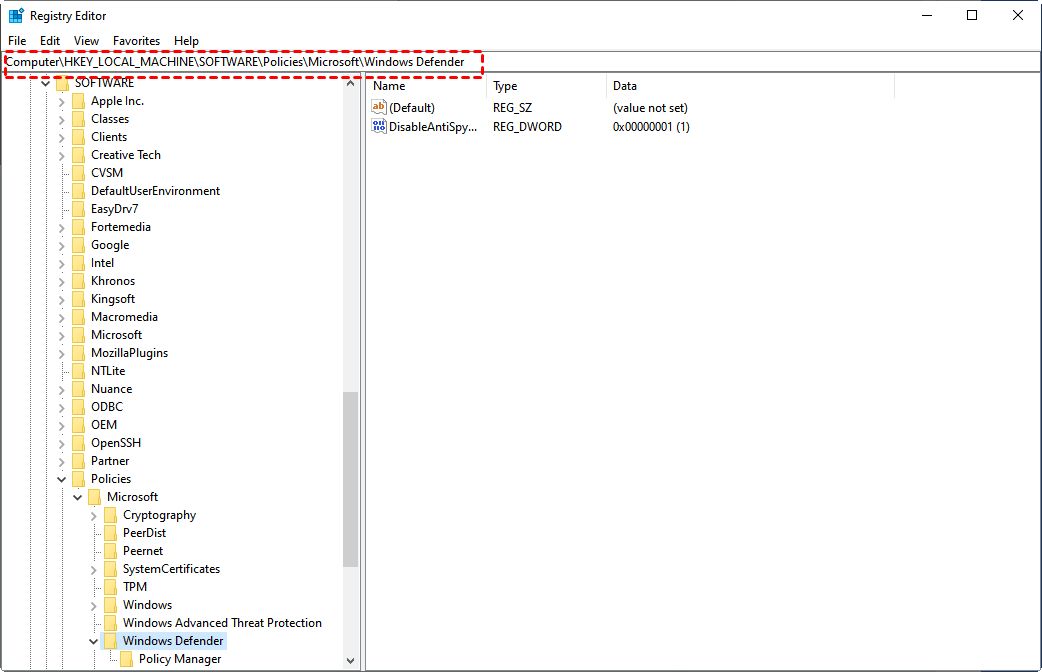
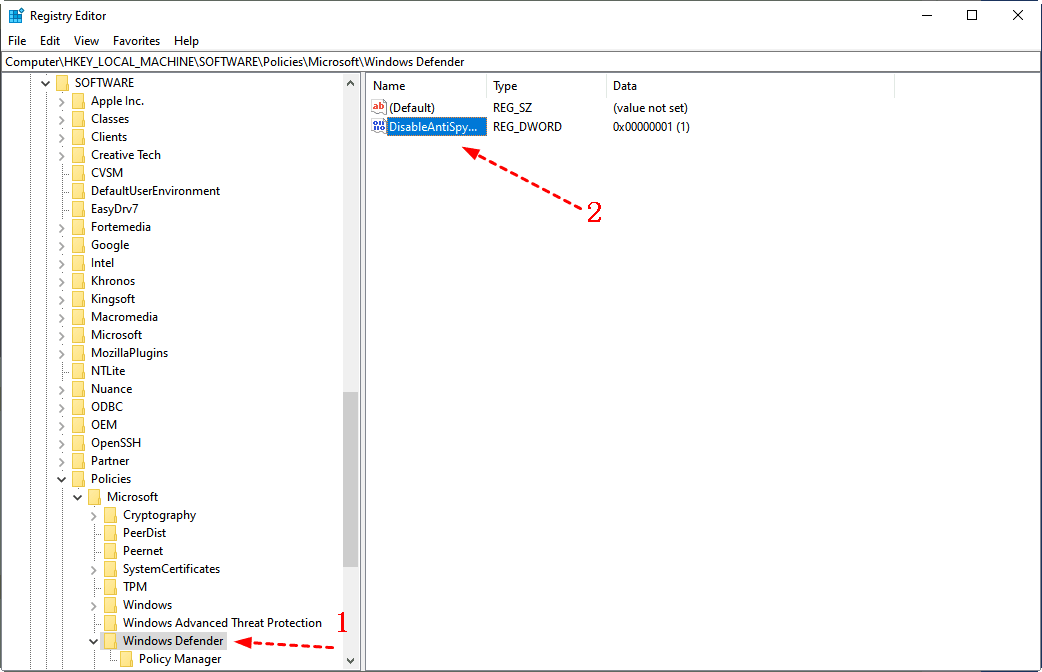
- In the Windows Defender folder, find the DisableAntiSpyware item, and then double-click it.
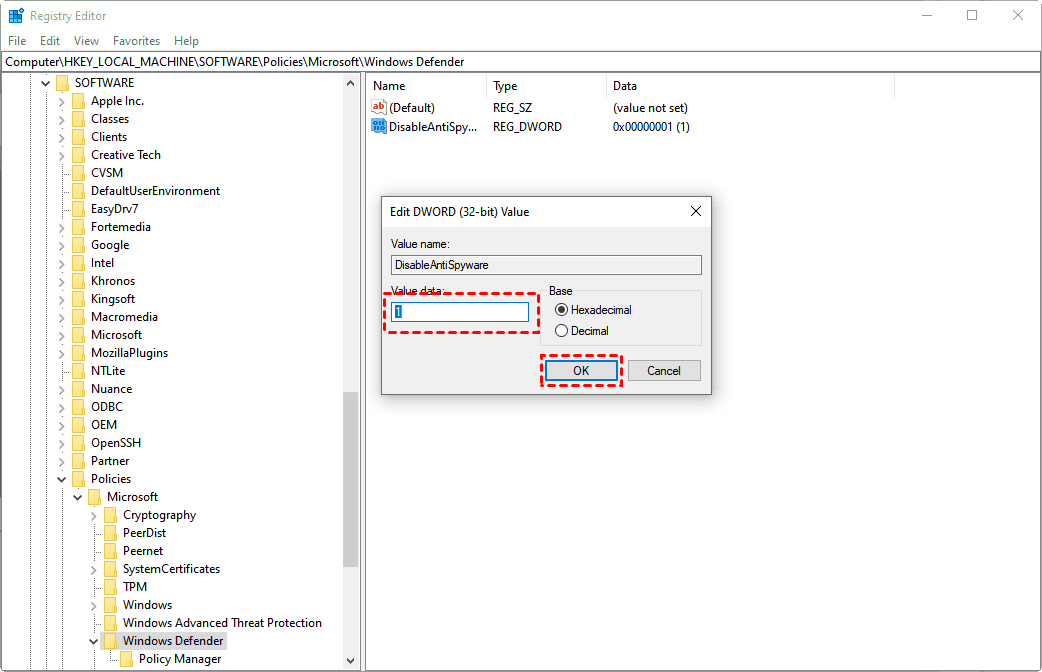
- In the pop-up window, change the value to 1, and click OK.
Solution 5: Update all Available Device Drivers
If after trying the above solutions, the problem that Antimalware Service Executable high disk usage still occurs, you can try to update all available device drivers to the latest. The latest driver can also make your computer run stably and quickly.
If Windows cannot find a new driver, you can find a driver on the manufacturer’s website and follow its instructions.
Backup Important Data to Prevent Data Loss
Before disabling Windows Defender, it is recommended that you use AOMEI Backupper Standard in advance to back up important data in your computer. Because disabling Windows Defender will make your computer system very vulnerable to malware attacks and cause data loss.
AOMEI Backupper Standard is a free professional backup software, which is suitable for running under Windows 11/10/8.1/8/7.
❅ It can back up the system, disks, partitions, files and folders on your computer to protect your important data.
❅ You can schedule backup according to different times. It provides you with Full Backup, Incremental and Differential Backup.
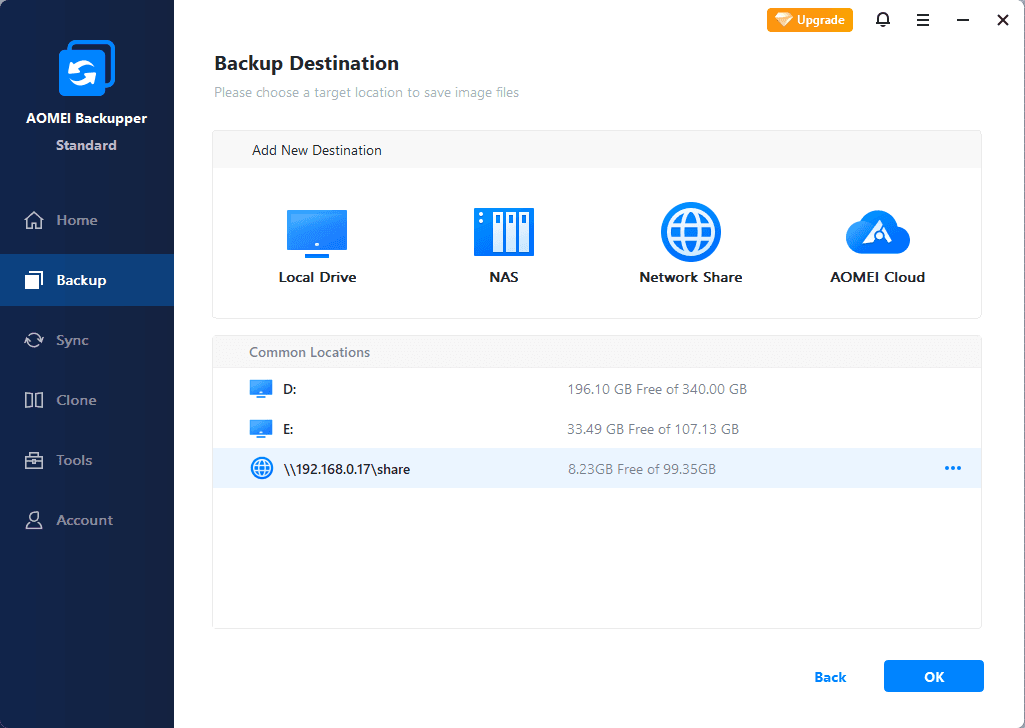
❅ In addition, you can also back up data to local disks, external devices (USB, HDD, SSD, etc.), NAS or network shared folders, and cloud drives.
Before you perform the backup task, please download AOMEI Backupper Standard first, and then perform the backup task according to the following instructions.
Step-by-step Guide to Backing Up Files
Step 1. Launch AOMEI Backupper, select Backup in the left menu. And then click File Backup in the interface.

Step 2. Select Add Folder or Add File. You can add single or multiple files/folders in this step.

Step 3. After adding files/folders, select the backup destination under the arrow. Finally click Start Backup.
Tips✍: Before performing the backup, you can also set according to your needs in the 3 options at the bottom left.
◉ Options: It provides you with the function of compressing or splitting the backup. And you can receive email notification when the backup is complete. You can also encrypt your backup here (available in AOMEI Backupper Professional).
◉ Schedule: You can schedule backups according to different time intervals of daily, weekly, and monthly to ensure that all data can be backed up regularly.
◉ Scheme: 3 backup methods are provided: Full Backup, Incremental Backup, and Differential Backup. In incremental and differential backup, you can manually set the backup interval. When they reach the interval you set, a full backup will be performed automatically. In addition, in the advanced version, there is a function to automatically clean up backups.
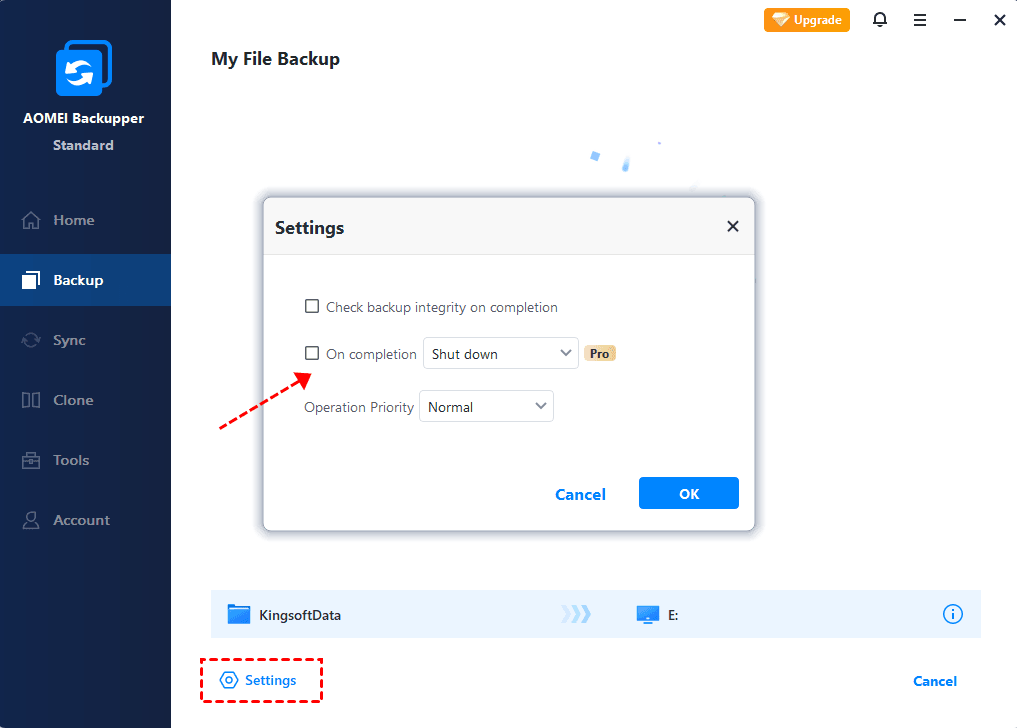
Step 4. When running the backup, you can set the computer to Shut down/Restart/Hibernate/Sleep after the backup is completed in the settings at the bottom left.
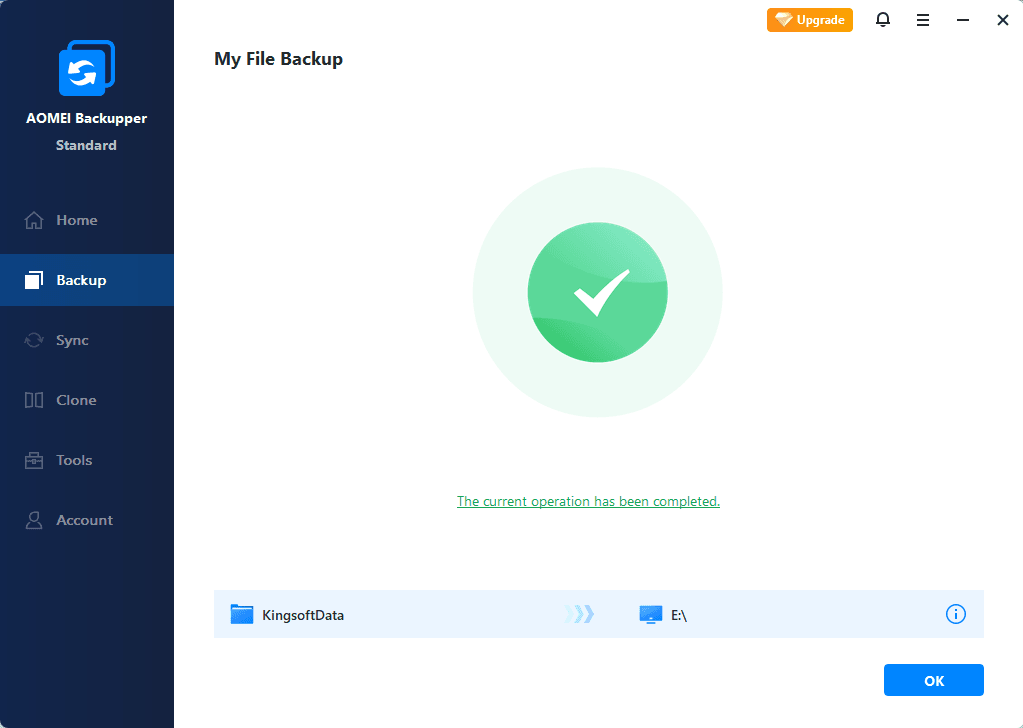
Step 5. After the backup is complete, click Finish.
Notes:
- The software can also perform disk cloning, partition cloning. What’s more, it also provides you with some useful tools to create bootable media, create recovery environment, perform disk erasing, etc.
- In order to prevent hard drive damage or lack of storage space, AOMEI Backupper also provides you with a homemade cloud drive. You can backup your files to AOMEI Cloud, which gives you 1TB of free storage space for 15 days after you sign up for an AOMEI account.

To Sum Up
You already know why the “Antimalware Service Executable High Disk Usage” problem occurs and 5 fixes to this problem. Hope these solutions will help you deal with this problem.
Turning off Windows Defender will make your computer lose its protection and become vulnerable to malware attacks, resulting in data loss. It is recommended that you use AOMEI Backupper Standard to back up important data in advance before disabling Windows Defender, which can effectively prevent data loss. If you encounter the BSoD error of Windows 10 Inaccessible Boot Device after clone, this software can also help you. Download and use it to protect your computer now!
Final Q & A: How to Get Rid of 100% Disk Usage
How to get rid of 100% disk usage? Please go directly to Windows Settings -> Update & Security-> Windows Security -> Virus & threat protection -> Firewall & network protection -> Manage settings, and then turn off real-time protection.

