How to Turn on System Restore in Windows 7?
To protect your computer well, you can turn on System Restore in Windows 7. Besides, you can create an image backup to get supplementary protection for your computer.
By Yuka Updated on October 28, 2022
Overview of System Restore in Windows 7
System Restore is a built-in feature in Microsoft Windows that allows the user to revert their computer's state (including system files, installed applications, Windows Registry, and system settings) to that of a previous point in time. It can be used to restore computer to earlier data if your computer runs into issues.
By default, System Restore is turned on in all versions of Windows 7 including Home Premium, Ultimate and Professional. However, you may encounter System Restore greyed out issue or something alike. In other words, System Restore is disabled and you cannot turn it on. To turn on System Restore in Windows 7, you have to fix this issue first.
How to fix System Restore greyed out in Windows 7
One of the possible reasons is that your system restore is disabled by your system administrator. You can try the methods below to solve this issue.
Turn on system restore Windows 7 via Group Policy Editor
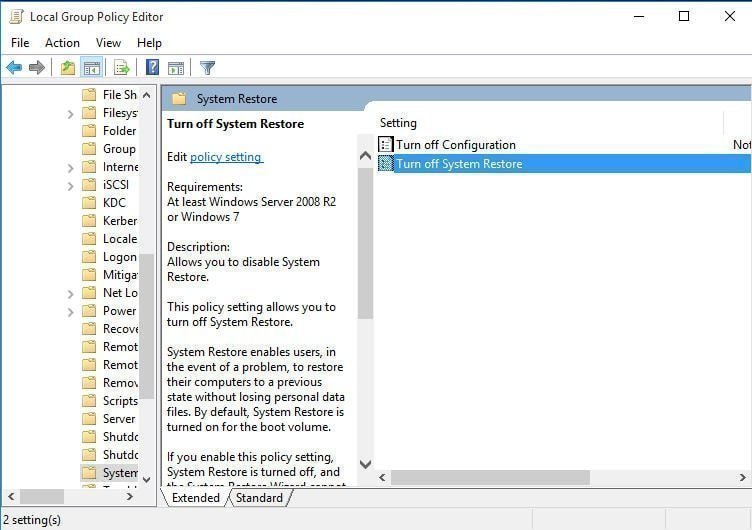
1. Type gpedit.msc at Search Box and press Enter. This will open the Group Policy Editor. Then navigate to the following setting:
- Computer Configuration > Administrative Templates > System > System Restore.
2. Look “Turn Off System Restore” setting. Double-click on it and set it to Not configured or Disabled.
3. Click on Apply and exit.
4. Restart and you will find the System Restore has been enabled.
Turn on system restore Windows 7 via Registry Editor
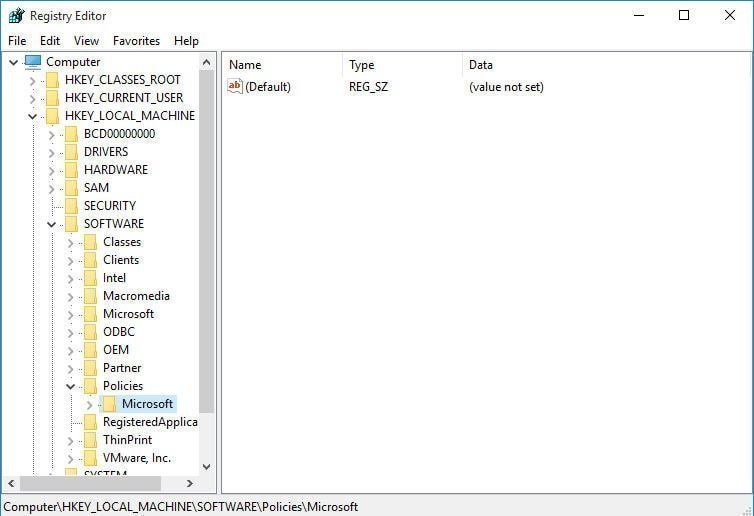
1. Press Win + R to bring up the ‘Run’ dialog box. In it, type regedit.exe and hit Enter.
2. Then, navigate to the following key in the left pane of the Registry Editor window:
- HKEY_LOCAL_MACHINE \ Software \ Policies \ Microsoft \ Windows NT \ SystemRestore.
3. Delete the value DisableConfig and DisableSR.
How to turn on System Restore in Windows 7?
After fixing System Restore will not turn on in Windows 7 issue, you can go to see if you can enable system restore in Windows 7.
1. Go to the Control Panel, click System and then choose System Protection.
2. Here comes to System Properties interface. Click the System Protection tab.
3. Click Configure, and select “Turn on system protection”. Then Click OK.

🎇 Note: As restore points are created regularly, it will take a large amount of space on your computer. To prevent low disk space issue, it is a good idea to adjust the maximum disk space used for system protection. As space fills up, the older restore points will be deleted automatically to make room for new ones.
How to turn on System Restore Windows 7 via command line
You can also enable system restore from Windows command line by modifying the relevant registry keys.
-
To turn on System Restore from command line, run the command: sc config srservice start= Auto
-
To disable System Restore Windows 7 via command line, run the command: sc config srservice start= disabled
Supplementary protection for your computer
Actually, to have a comprehensive protection for your computer, simply turning on System Restore in Windows 7 is not enough. As you know, System Restore will not restore your personal files and other data, so it cannot be regarded as data backup. Besides, as restore points are saved on the corresponding volume, you will lose all your restore points if the volume corrupted. What’s more, system protection can only be turned on for drives that are formatted using the NTFS file system.
Therefore, to have supplementary protect for your computer, you should create a full system image backup.
AOMEI Backupper Standard is a free backup and restore software which allows you to create a full system image backup. The image backup will protect everything on C drive including your personal files and other data. It supports you to backup system to a safer place like external hard drive, NAS, cloud drive, etc. And it will protect any File System detected by Windows instead of only NTFS.
With AOMEI Backupper, you can create incremental backups or differential backups to always keep your data backup updated without taking much disk space. With its user-friendly interface, you will not feel any difficulty during the operation even you are a green hand. You can follow these steps to create an image backup to get supplementary protection for your computer.
Step 1. Free download, install and run AOMEI Backupper. At the main interface, click System Backup under Backup tab.

Step 2. For system image backup, it will automatically choose the source path for you, and you only need to choose a destination path.

Step 3. You can click Option to enable encryption and email notification, and set the compression level for your backup. You can also click Schedule to set automatic backup.

Step 4. After all this done, Click Start Backup.

After creating system backup, you can click Restore at the main interface of AOMEI Backupper to restore your system to the previous state if there is any problem with your system. If you want to deploy your system image to multiple computers within LAN, you will need the image deployment software AOMEI Image Deploy (AID).
Conclusion
To make a summary, turning on System Restore in Windows 7 is not enough to protect your computer, you still need supplementary protection. AOMEI Backupper is a perfect choice. With system image backup created by AOMEI Backupper, you can easily restore your computer to a previous state even when your computer is unbootable.
Besides system backup, you can have other flexible backup choices like disk backup, partition backup, file backup. If you want to protect your whole disk, you can choose to create disk backup.

