How to Fix Missing Recovery Partition on Windows 11 (Top 2 Ways)
You will learn 2 useful ways to solve missing recovery partition in Windows 11, including use WinRe.wim File and the professional third-party tool can help you.
By Miya Updated on October 11, 2024
Overview of Missing Recovery Partition on Windows 11
When cloning a larger hard disk to a smaller one, there is a possibility of missing recovery partition on Windows. While Windows can still function without the recovery partition, having it can be beneficial in case of errors or issues that require restoring the PC to a functional state.
To clarify the process regarding the recovery partition: if the partition is intact, it can be deactivated and saved as a file. However, if the partition is unexpectedly lost during the cloning process, it can be recovered using the Windows setup media.
This article will use two methods to fix the missing recovery partition on Windows 11. If you are looking for a simple and convenient method, then you can focus on the second method.
How to Fix Missing Recovery Partition on Windows 11 with 2 Ways
This section will introduce 2 useful ways to solve missing recovery partition in Windows 11, including using WinRe.wim file and specialized third-party tools. These methods also apply to recovery partition missing on Windows 10.
1. Use WinRe.wim File to Create Recovery Partition
- Copy and Unload the WinRe.wim File from Windows Installation Media
In the absence of the recovery partition, the relevant content is typically stored in the file path: c:\windows\system32\Recovery\WinRe.wim. To populate the recovery partition with the WinRe.wim file, you can utilize the command prompt and execute the command: reagentc /enable. Conversely, if you wish to save the contents of the recovery partition to a file, you can use the command: reagentc /disable.
In scenarios where both the recovery partition and the WinRe.wim file are missing, you have the option to copy the file from the Windows setup media as a viable solution. Regrettably, the Winre.wim file is not readily accessible on the setup media; instead, it is concealed within the install.wim file.
Step 1. To access and utilize the contents of this file, we can employ the dism command along with the mount-wim parameter.
- c:\> mkdir c:\temp
- c:\> dism /mount-wim /wimfile:"d:\sources\install.wim" /index:1 /mountdir:"c:\temp" /readonly
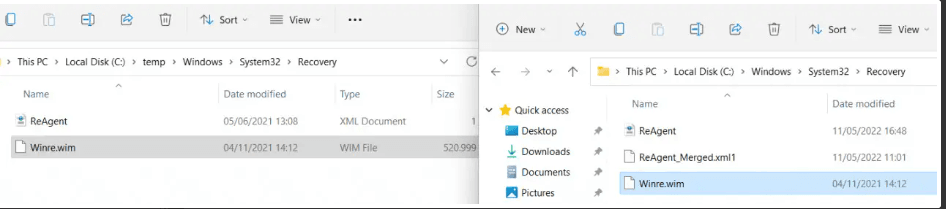
Step 2. Once the file has been successfully loaded, the Winre.wim can be found within the designated c:\temp folder, specifically at c:\temp\Windows\System32\Recovery.

Step 3. Subsequently, you can proceed to copy the file to the following location within the Windows folder: C:\windows\system32\Recovery\winre.wim.
Step 4. After copying the file, to unload the WIM (Windows Imaging Format) file, the following command should be used:
c:> DISM /unmount-Wim /MountDir:"c:\temp" /discard
- Create Recovery Partition by winre.wim File
To restore the recovery partition when the winre.wim file is available, follow the steps below:
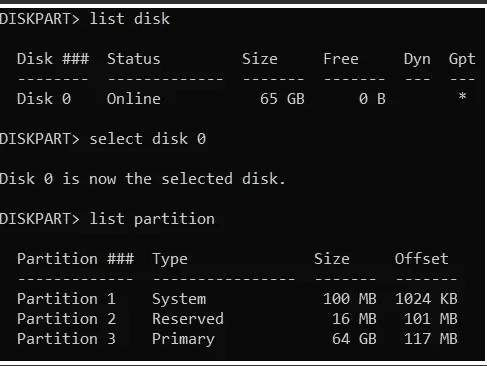
Step 1. Open the command prompt and enter diskpart to access the DiskPart utility. Within DiskPart, run the command list disk to view the list of disks. And use the command select disk followed by the DiskNumber from the list to choose the relevant disk.
Step 2. Run list partition to display the partitions on the selected disk. And use the command select partition followed by the Partitions Number from Drive C: to select the desired partition.
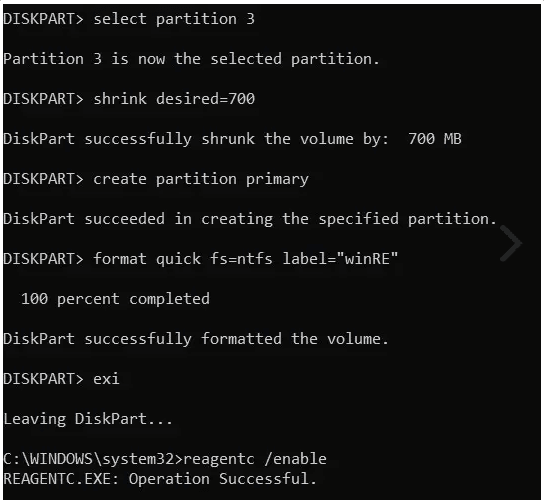
Step 3. Execute shrink desired=700 to shrink the partition to the desired size (e.g., 700 MB).
Step 4. Run create partition primary to create a new primary partition. Execute format quick fs=ntfs label="winRE" to quickly format the new partition as NTFS with the label "winRE."
Step 5. Use the command set id=de94bba4-06d1-4d40-a16a-bfd50179d6ac to change the partition type to Recovery.
Note: Recovery partitions have the ID: de94bba4-06d1-4d40-a16a-bfd50179d6ac
Step 6. Exit DiskPart by typing exit. Finally, in the command prompt, run reagentc /enable to enable the recovery partition. The output should indicate that the operation was successful.
By following these steps, the recovery partition will be restored with the winre.wim file. When initiating the recovery partition through the Recovery or Advanced startup options, the reboot process may take slightly longer than usual. You can try this method to solve the missing recovery partition in Windows 11, if this method doesn't work, you can move on to try the next method.
2. Create Recovery Partition in Windows 11 using Professional Tool
The alternative approach involves utilizing the OneKey Recovery feature of a third-party tool to solve missing recovery partition in Windows 11 issues. While many computer manufacturers offer their own built-in system backup and recovery programs, such as Lenovo and Dell, these functionalities are typically limited to their respective branded computers.
However, there's no need to worry as you can opt for professional third-party software like AOMEI OneKey Recovery, which supports all computer brands (including Windows PCs and servers) and offers several advantages:
☎Onekey System Backup: This software creates a dedicated partition where the system backup and recovery files are securely stored. The partition doesn't have a disk letter, ensuring it won't be accidentally deleted, providing maximum data protection.
☎Onekey System Recovery: Once you've created a backup using this software, you'll have a convenient one-click restore option on your computer. In the event of a system crash or error messages like "Boot Failure" or "Operating System not Found," you can easily access the software interface using the shortcut keys "F11" or "A" to initiate the restoration process.
☎Scheduler: This feature allows you to schedule backups, including additional items you've added after the initial factory settings, such as applications. It automatically retains only the latest backup version, optimizing disk space usage.
☎Boot Menu: After creating the backup, a boot menu becomes available, eliminating the need to access BIOS settings to modify the boot order.
☎Compression Level: You can adjust the backup compression level according to your preferences.
☎Encryption: For enhanced backup security, the software provides the option to encrypt backups with a password.
To create a recovery partition in Windows 11 using AOMEI OneKey Recovery, follow the steps below:
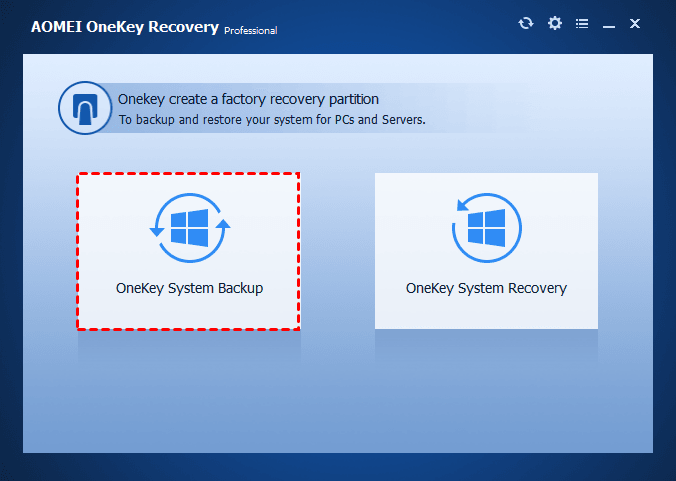
Step 1. Download and install AOMEI OneKey Recovery, then launch the software. Select the Onekey System Backup option.
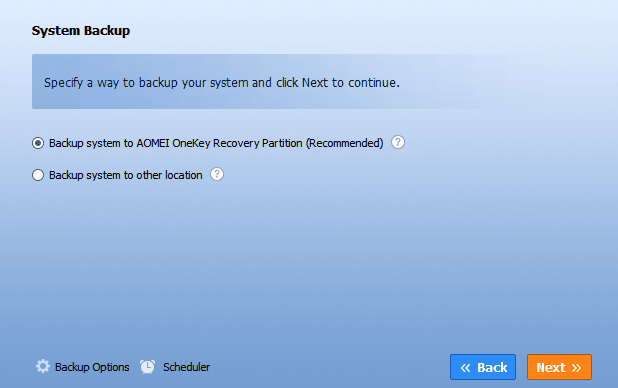
Step 2. Select the Backup system to AOMEI OneKey Recovery Partition (Recommended) option and click on the Next button.
Tips:
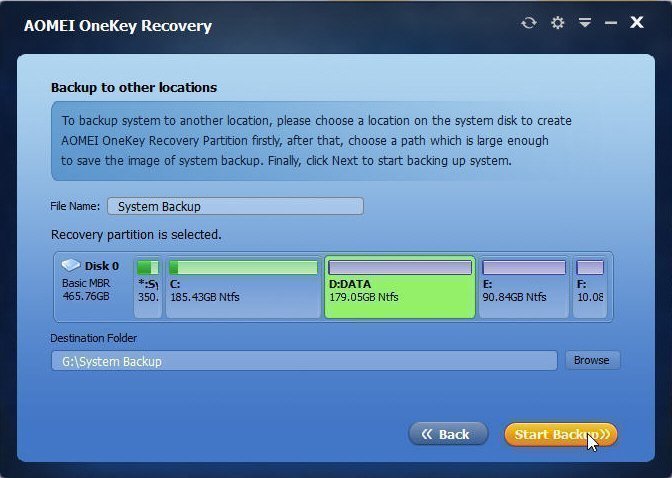
♨ If your system disk doesn't have enough free space to store the partitions, you can opt for the Backup your system to another location option, which effectively prevents running out of disk space.
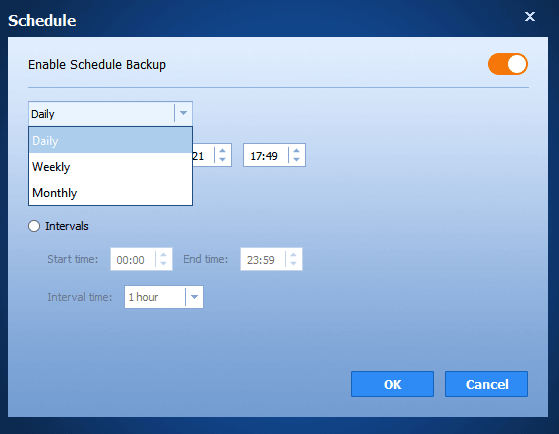
♨ To schedule regular backups, you can utilize the Scheduler feature. Enabling the Schedule Backup function in OneKey Recovery allows the software to automatically perform backups at the specified scheduled time.
Step 3. Click on the Advanced option to preview the partition layout and verify all the operations. Once you have confirmed the details, click on Start Backup to initiate the process. After the completion of the process, you will have both a system image backup and a recovery partition.
Tip: When choosing the Backup system to AOMEI OneKey Recovery Partition option, both the recovery partition and system backup will be stored on your computer's current disk.
✍Restore Recovery Partition in Windows 11 with AOMEI OneKey Recovery
If you encounter issues with your computer, AOMEI OneKey Recovery can effortlessly restore your system to a functional state. Here are the step-by-step instructions:
Step 1. Open AOMEI OneKey Recovery once more and choose OneKey System Recovery. If your computer is experiencing problems, you'll need to boot it first. When prompted, press F11or A to access the software and initiate the system restoration process.
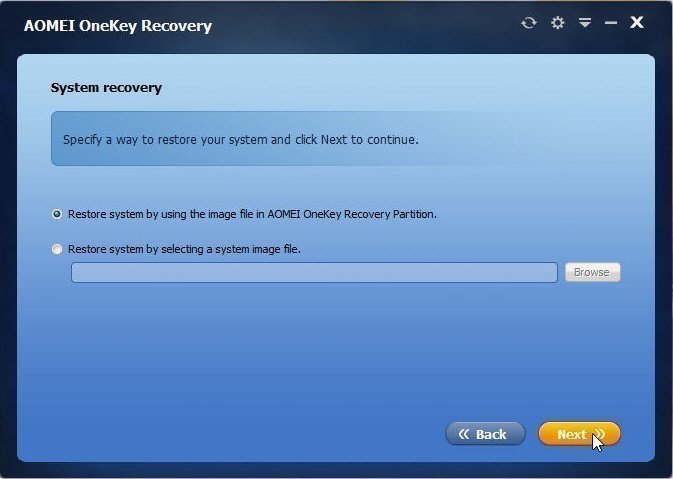
Step 2. Select Restore system by using the image file in AOMEI OneKey Recovery Partition and click on Next.
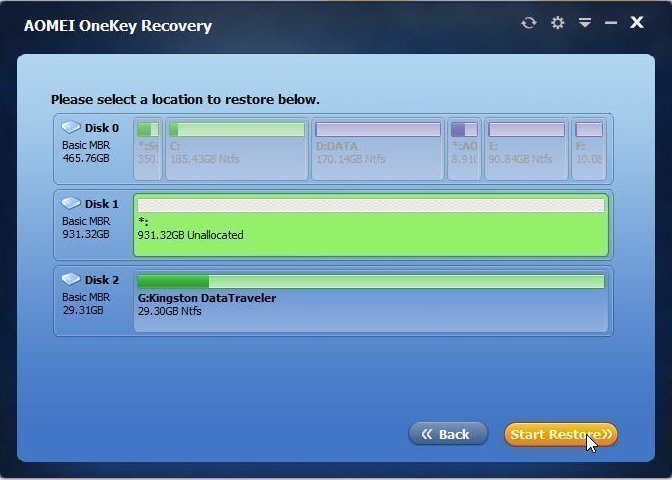
Step 3. Verify your operations and then click on Start Restore to initiate the restoration process for the recovery partition in Windows 11.
Summary
Creating a recovery partition in Windows 11 is a valuable measure to enable computer repairs in case of unexpected issues. This article presents two methods for accomplishing this task to solve missing recovery partition in Windows 11 issue, and I personally recommend utilizing the professional third-party tool AOMEI OneKey Recovery. This software offers the advantage of creating both the recovery partition and system image, simplifying the restoration process.
Additionally, the created recovery partition is universally compatible, allowing its use across various computer brands and operating systems, enhancing convenience. Feel free to download this software to discover its array of useful features and further explore its capabilities.

