Easiest: Transferring Installed Programs from One Computer to Another in Windows 11
You can learn why and how to transfer installed programs from one computer to another in Windows 11 with 2 easy ways, including the easiest one. Keep reading for more detailed information.
By Clytze Updated on October 21, 2022
Why Transferring Installed Programs from One Computer to Another in Windows 11?
With the development of technology, there are more and more new computers. Users also have more options. When you need to replace the computer to a new one, how to transfer the programs installed on the original computer to the new computer becomes an important issue.

Because a large number of important programs and file data are stored on the original computer, transferring to a new computer can avoid data loss and reinstallation. At this time, you will need to transfer programs from one computer to another in Windows 11. You can read on to learn how to achieve your goals.
How to Transferring Installed Programs from One Computer to Another
After understanding the reasons, next, you can learn two methods to transfer installed programs from one computer to another in Windows 11. One method is to achieve the goal through USB, and the other is to use professional third-party software to help you transfer all the installed programs from the old computer to the new computer with one click. Each method contains detailed steps, read on for more details.
Method 1. Use the USB to Transfer Programs
Most programs are non-portable applications and therefore cannot be transferred to another computer with a simple copy-paste. But for some simple, removable programs, you can try to copy and transfer to another computer by using a removable USB stick. You need to make some preparations:
- Prepare a USB drive and make sure it has enough storage space.
- Find the setup file and .exe file that can be transferred.
- Back up the activation key in advance.
Follow the steps below after completing the preparations.
Step 1. Connect the USB drive to the source computer and make sure it is recognized by the computer.
Step 2. Find and copy the program you want to transfer and paste it to your USB drive.
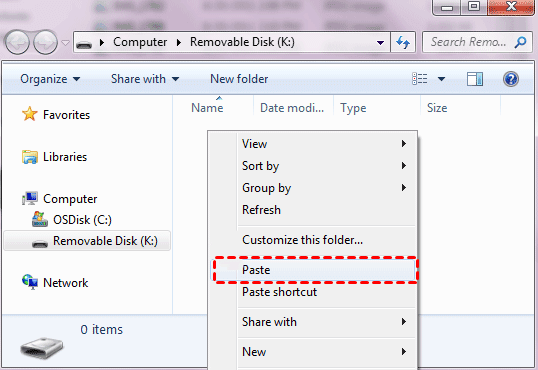
Step 3. Safely eject the USB drive from the source computer.
Step 4. Connect the USB drive to the new PC and copy the program to the new PC's hard drive.
Step 5. Adjust your program settings and reactivate the software.
Note: If the program does not work properly on the new computer, then you need to find the original installer and install it.
If you want to know how do I transfer licensed software to a new computer or even transfer the whole system including the installed program, licensed software and other data to a new computer, you can go to the next method.
Method 2. Use the Professional Software to Transfer Programs (Easiest)
The easiest way to transfer all installed programs to another computer is to use the professional third-party software AOMEI Backupper Professional to help you easily achieve your goals. Not just programs, its Universal Restore feature can help you transfer your entire system to another computer without losing any data. Before starting the transfer, you need to finish some preparation work:
- Download AOMEI Backupper Professional and install it on the source computer and create a system image based on this computer.
- If the new computer won't boot, you'll also need to create a bootable disk as well.
- This software also needs to be installed on the new computer, so that the subsequent restore procedure from the source computer to the new computer can be completed in Windows 11.
Then you can follow the graphic tutorial below and in just a few steps you can know how to transfer a program from one computer to another without CD/DVD/USB in Windows 11.
Step 1. Insert the disk containing system image and bootable disk into the new computer. Then, restart the new computer and boot from the bootable disk.
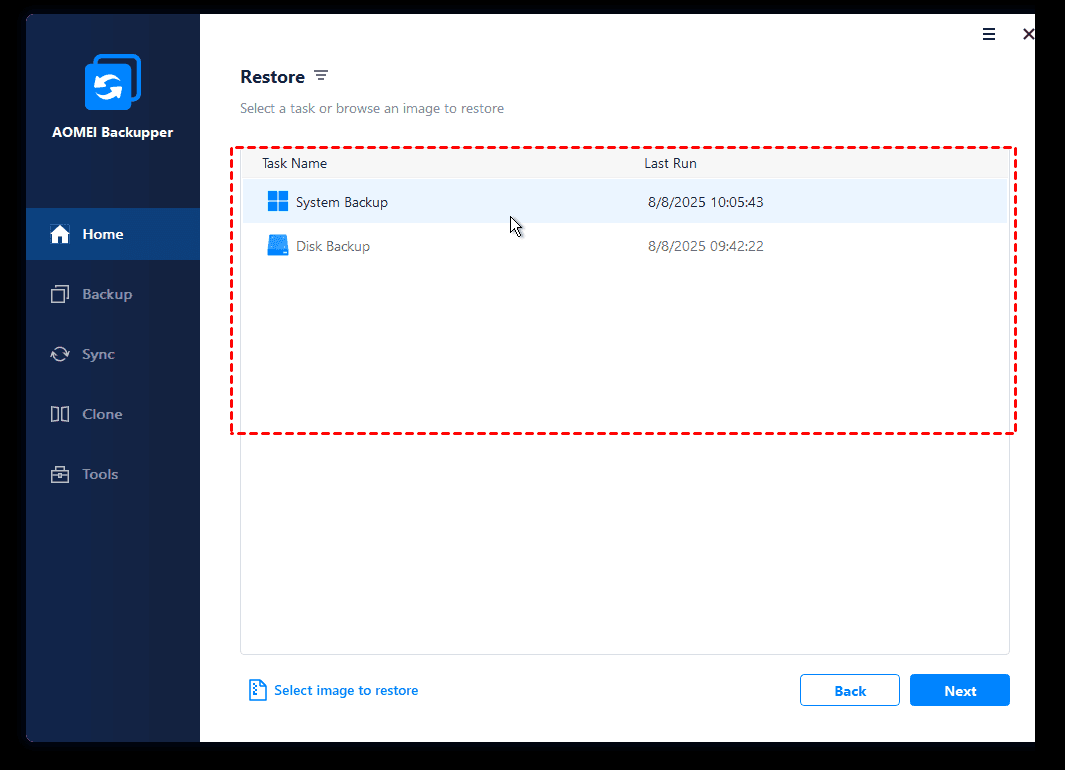
Step 2. When the software interface appears, click Restore > Select Task to locate the system image file. If there is no image detected, click Select Image File to navigate manually to the image file location.
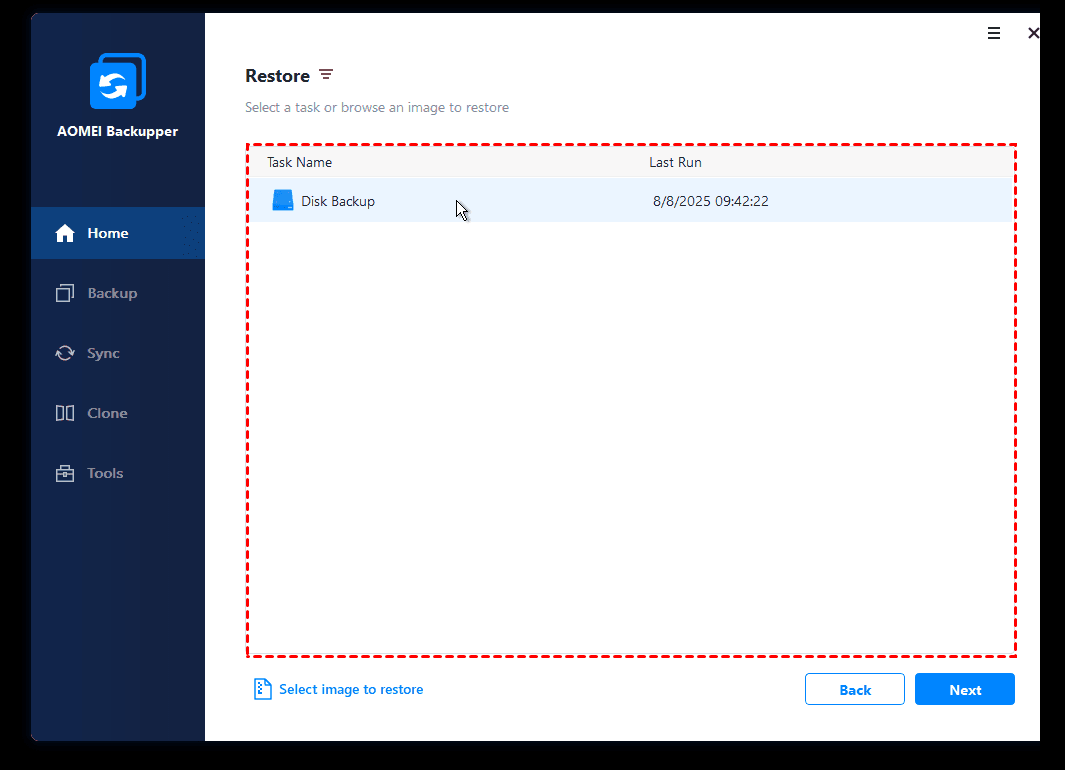
Step 3. Select the backup image you want to restore and click Next.
Step 4. Select a restore path to receive the system image and click Next to continue.
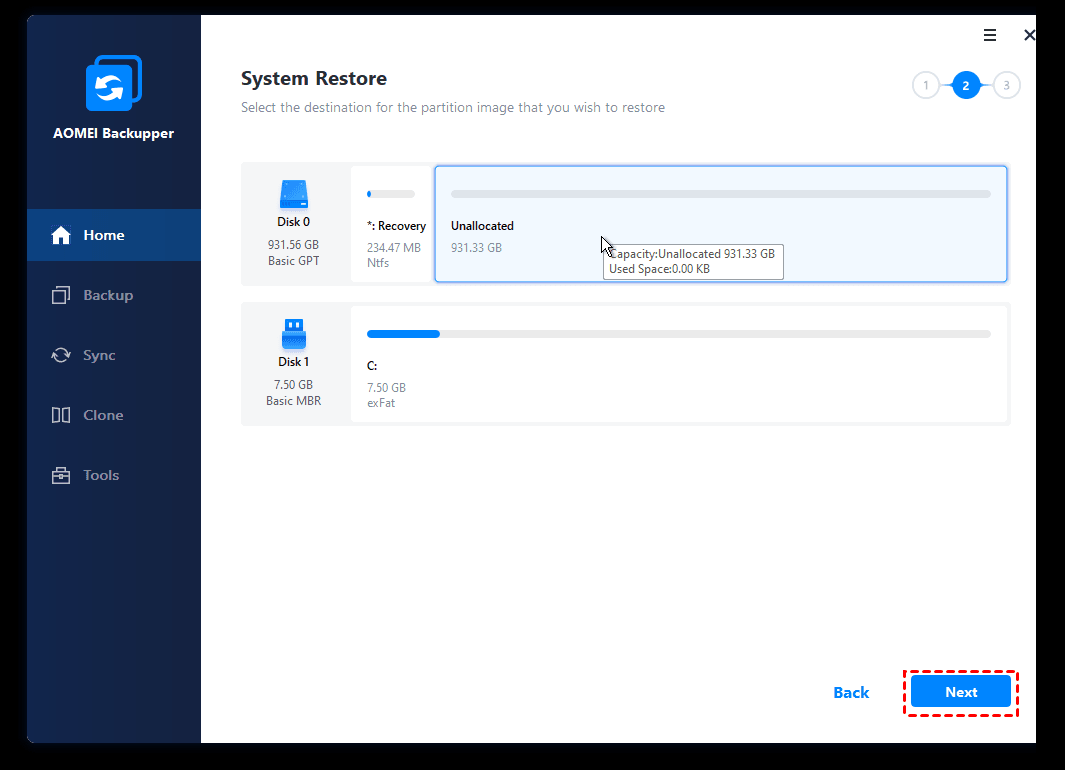
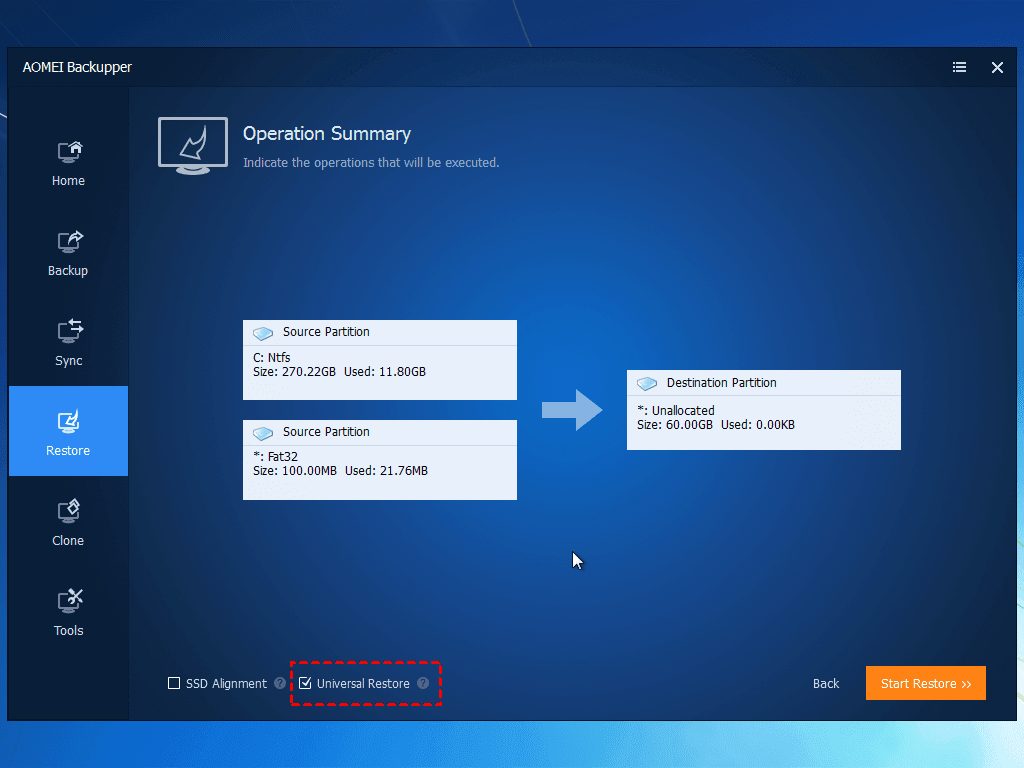
Step 5. Since your computer hardware is different from the previous one, this software will recognize and automatically select the Universal Restore function. You just need to click Start Restore.
Summary
This article describes how to transfer installed programs from one computer to another in Windows 11, using either USB or the professional third-party software AOMEI Backupper can help you. But it is more recommended to choose the latter, because USB can only help you to transfer some portable programs, while AOMEI Backupper can backup the whole system and restore it to another computer without any data loss.
Besides, it is also an excellent cloning software, which provides System Clone, Disk Clone and Partition Clone functions. You can download this software to explore more features.