Robocopy on Windows 11: How to Use It & Best Alternative
In this article, you can learn how to use robocopy on Windows 11 to transfer and copy files and get the best robocopy alternative to complete the task of file movement.
By Miya Updated on June 8, 2023
User Case: How do I use robocopy to move files?
“Hi, I need to move files with robocopy on Winodws 11, but I don’t know how to use this tool. Does anyone have any information on using robocopy to transfer files on Windows 11? ”
There I will tell you what is Robocopy and how to use the powerful tool Robocopy to transfer files on Windows 11. Then recommend you a powerful free file transfer software- AOMEI Backupper. If you are interested, please read the following below carefully.
What is Windows 11 robocopy?
Robocopy (robust file copy) is a Windows 11 built-in tool that lets users synchronize and copy files from one location to another. It was first introduced with Windows Resource Kit NT 4.0 and has become a standard feature in Windows since Windows Vista and Windows Server 2008.
The Robocopy is designed to mirror and copy folders or directories more efficiently than standard file copy command tools included in Windows, such as Xcopy. It offers many useful features and switches:
★Copy files over the network with the option to resume operations in the event of a network failure.
★Copy files from point A to point B on the same PC.
★Copy the file in backup mode to override the file permission settings.
★Synchronize the two folders.
How to use robocopy to move files fast over network on Windows 11
Now we know what robocopy is, let's follow the steps below to move and copy files using robocopy on Windows 11.
The copy process consists of two steps. You first need to set up a file share on the source computer and then transfer the files using Robocopy on the destination computer.
How to set up a file share
Step 1. Open File Explorer and locate the folder that contains the files that you want to move.
Step 2. Right-click the folder, and then choose Properties.

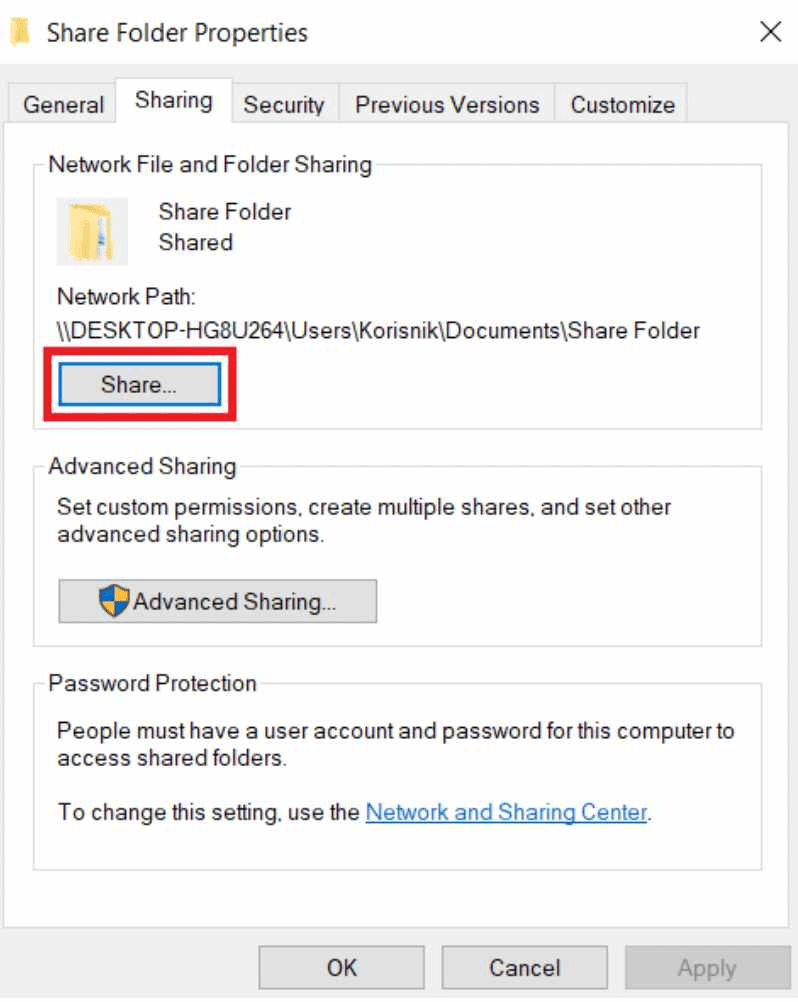
Step 3. Open the Sharing Folder Properties and click Share.
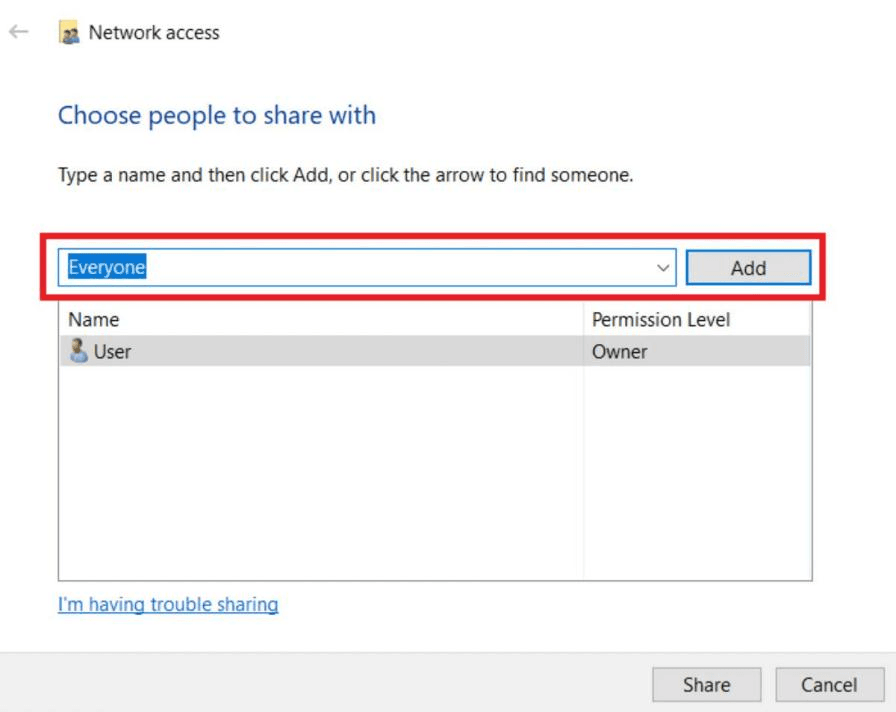
Step 4. Select the specific users you want to share the folder with, or select Everyone and click Add on Choose people to share with page.
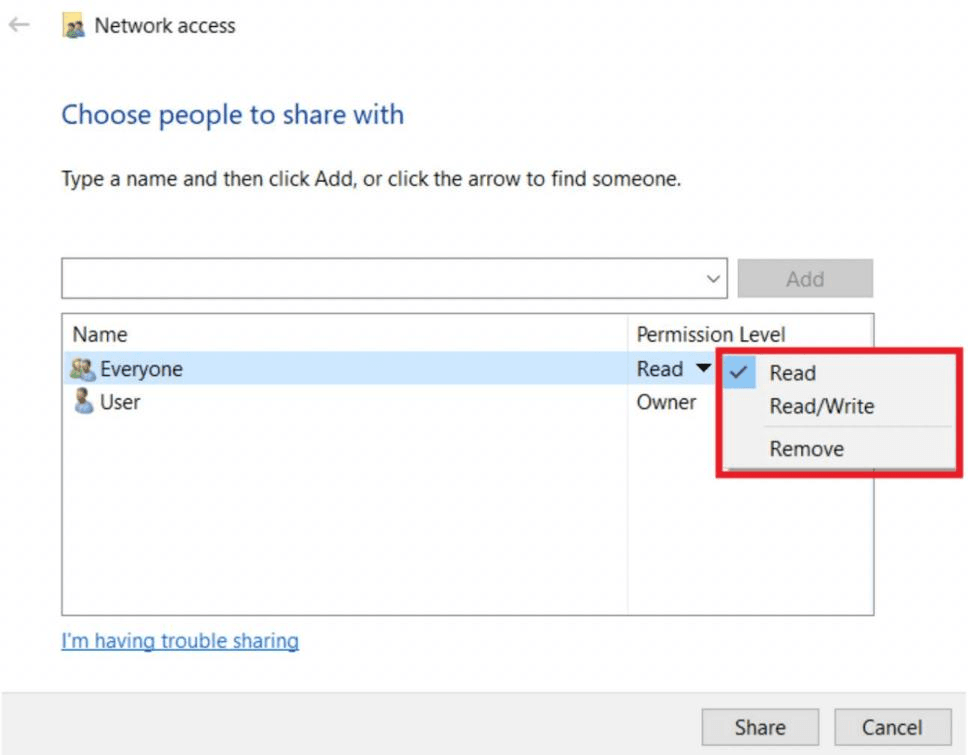
Step 5. Under Permission level, select the type of permission you want other users to have. For example, if you only want users to be able to open and view files, select Read (default). Or, if you want to allow users to read and modify the contents of the shared folder, select Read/Write. And click Share.
Step 6. Remember the network path of the shared folder, and then click Done.
Before proceeding to the next step, make sure that you rememeber the IP address of the source computer. You can do this by opening the Settings > Network & Internet >Wi-Fi and clicking on the Connection to view the information.
Transfer the files using robocopy on Windows 11
After you configure the file share on the source computer, you can use the Robocopy command-line tool to copy the files from the destination computer. To quickly transfer files over the network with Robocopy on Windows 11, use the following steps:
Step 1. Open Start and search Command Prompt, right-click on the topmost result, and select the Run as administrator option.
Step 2. Type the following command to add a network user and password to Windows 11, and then press Enter:
cmdkey/add:COMPUTER-OR-DOMAIN/user:COMPUTER-OR-DOMAIN\USERNAME/pass:PASSWORD
In the command, replace COMPUTER-OR-DOMAIN with the target computer, IP address, or domain, COMPUTER-OR-DOMAIN\USERNAME with the target device and user name, and PASSWORD with the account password.
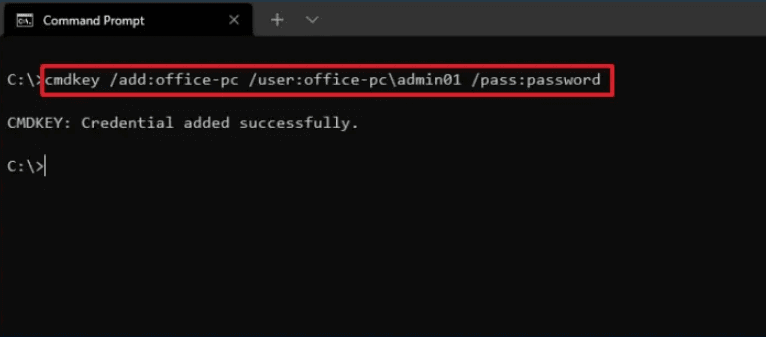
This example adds an entry in Credential Manager for the "admin01" user available on the source computer that Robocopy can use to access the shared folder:
cmdkey /add:office-pc /user:office-pc\admin01 /pass: password
Step 3. Type the following command to copy the file over the network and press Enter:
robocopy \\source-device-ip\path\to\sharefolder C:\destination-device\path\to\storefiles /E /Z /ZB /R:5 /W:5 /TBD /NP /V /MT:16 Copy code/compression
This example accelerates file copying between two computers on a network:
robocopy\\10.1.4.181\Users\USER\OneDrive\Desktop\MyShareFiles C:\Users\USER\Documents /E /Z /ZB /R:5 /W:5 /TBD /NP /V /MT:16 /compress

In the above command, make sure to change the source and destination paths using your configuration.
Use best robocopy alternative to move files on Windows 11
After understanding the above steps to use robocopy, it is not difficult to see that it is more complicated for novices who are not familiar with computer technology, so is there a simpler robocopy alternative to complete the task of file movement, I will now recommend you the best free robocopy alternative to transfer files on Windows 11---AOMEI Backupper.
AOMEI Backupper Standard is a free software with multiple features such as restore, clone, backup, etc. It has the feature of Basic Sync that allows you to sync folders to other locations, such as external hard drives, NAS, removable USB flash drives, etc. For basic sync, it's like Window's "copy" feature, no image files are created after the sync process is completed, so you can view the content at any time.
Below are detailed steps on how to set up Basic Sync. Please download the free file synchronization software AOMEI Backup Standard first, and then install it on your computer.
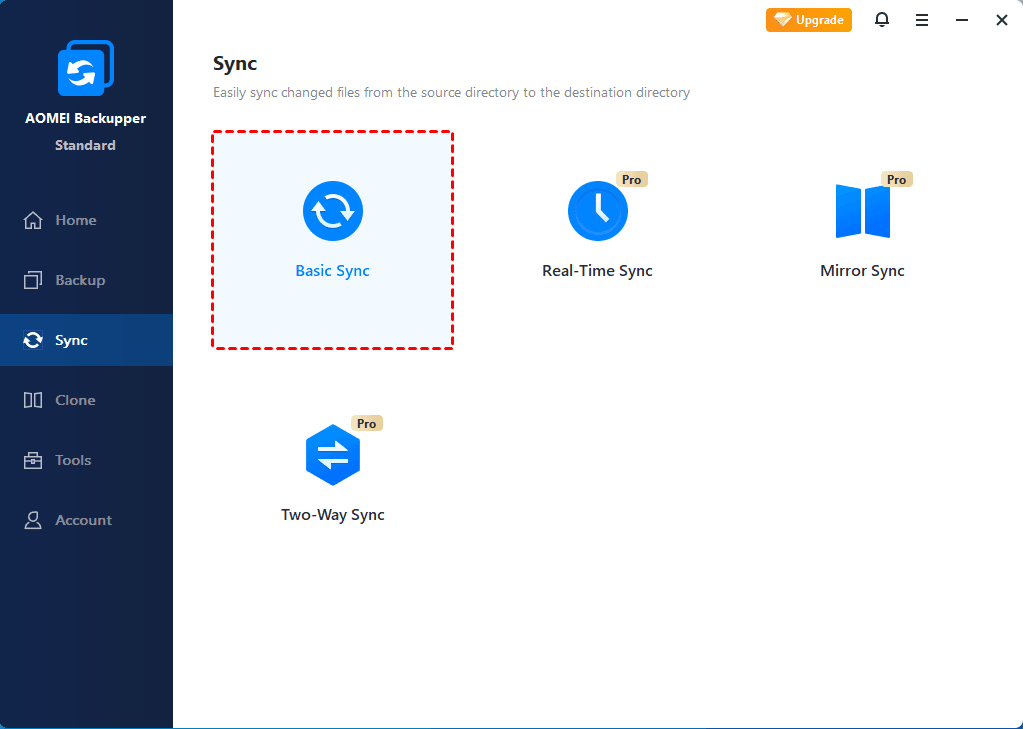
Step 1. Click the Sync tab on the left and select Basic Sync.
Note: There are three other sync methods (Mirror Sync, Real-time Sync, Two-Way Sync) available when upgrading to the Professional version.
Step 2. You can you can change the task name to help you distinguish it from other synchronization tasks. Click Add Folder to select the folder you want to sync. You can click the plus icon to add more folders to sync.
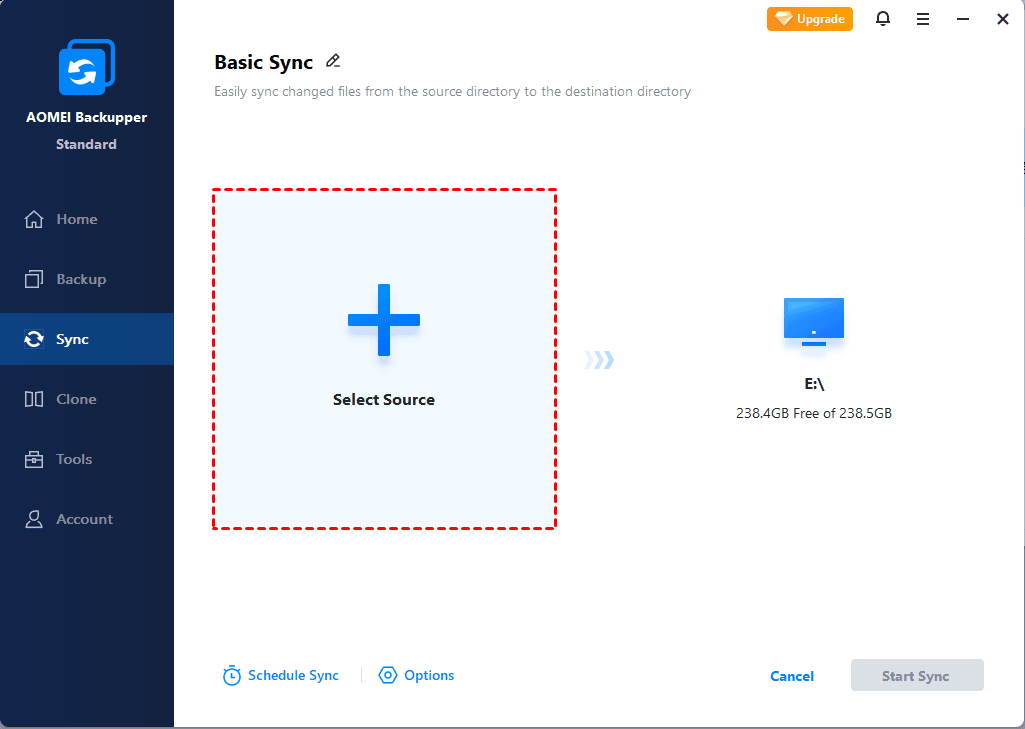
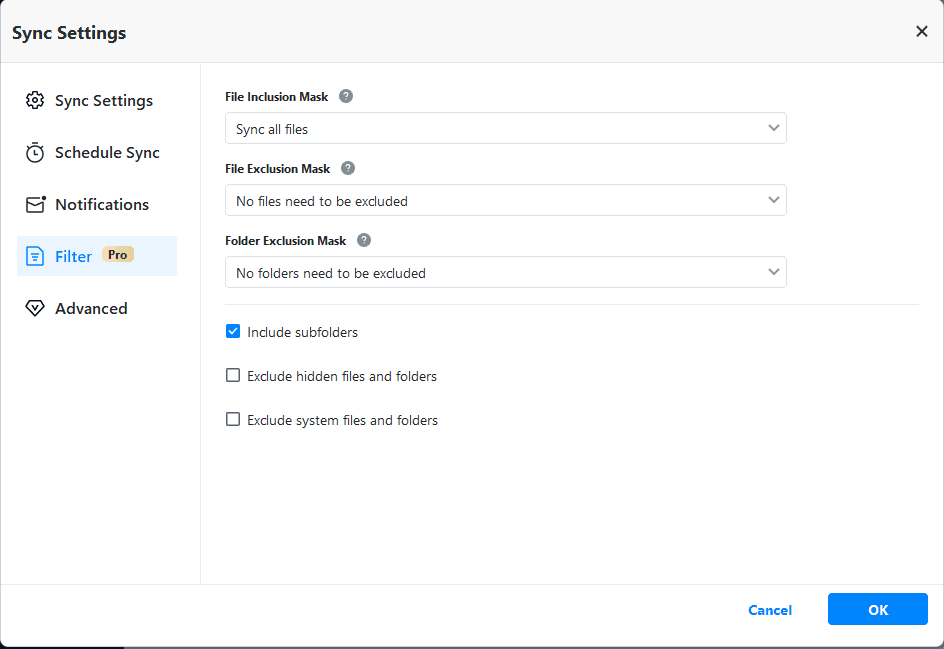
☀ When you need to filter files after adding folders, you can click the funnel icon to open Filter Settings. (Paid version only)

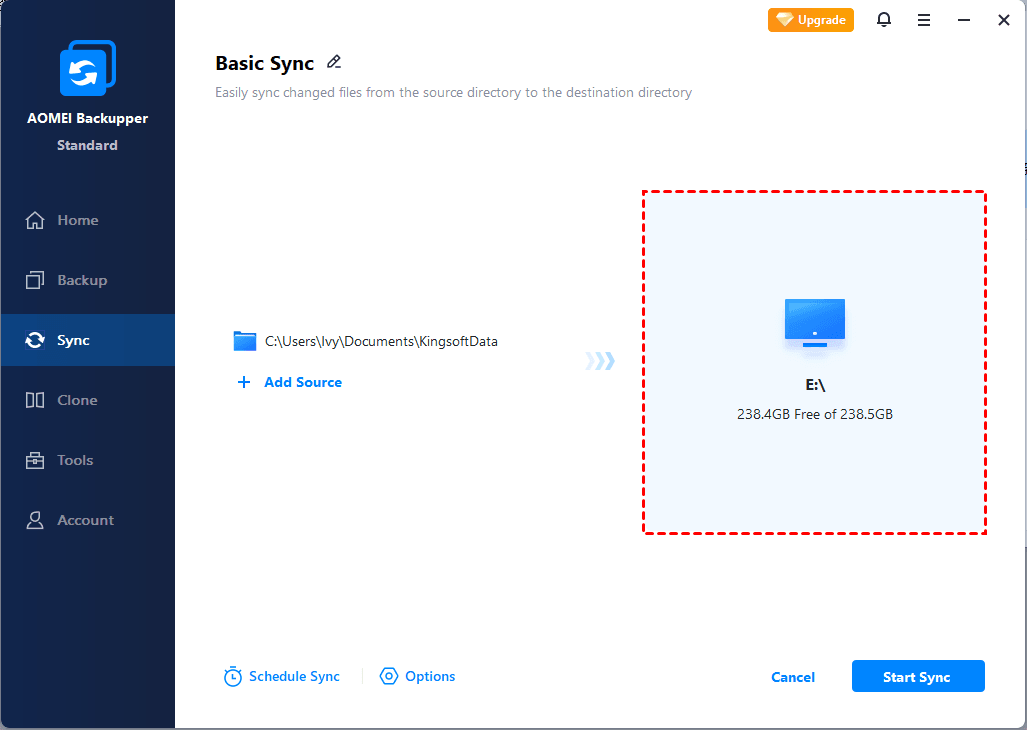
Step 3. Select a destination location to store the folder, then click Start Sync to perform the operation.
When the sync is running, you can click the icon in the lower left corner to set the computer to Shut down/Restart/Hibernate/Sleep after the sync is completed.
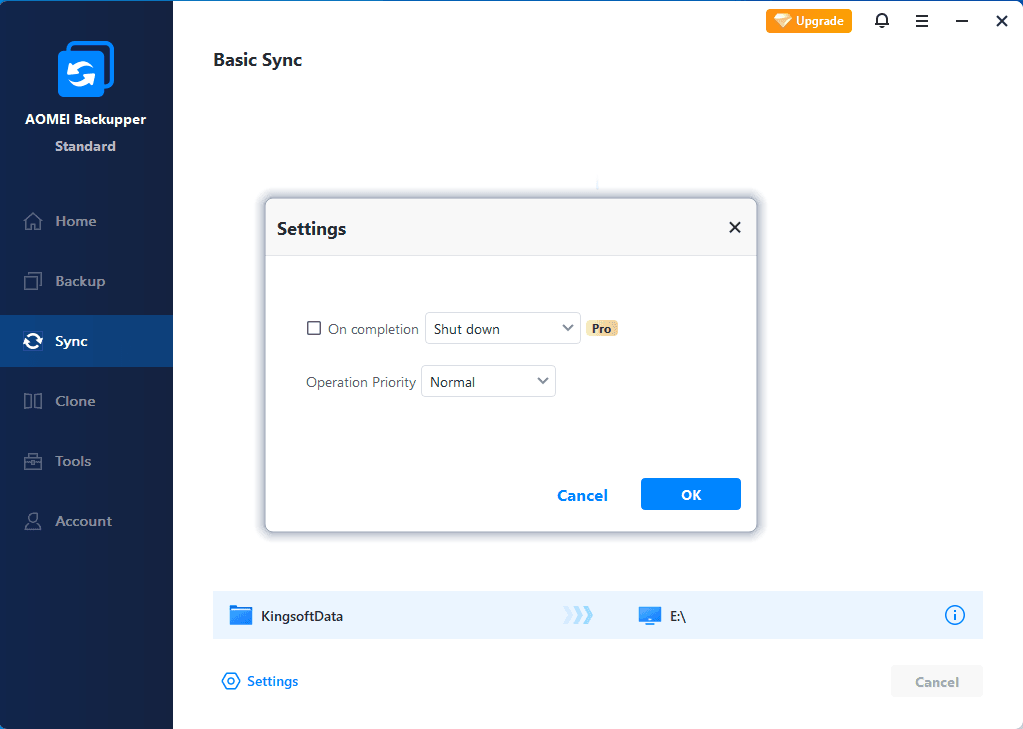
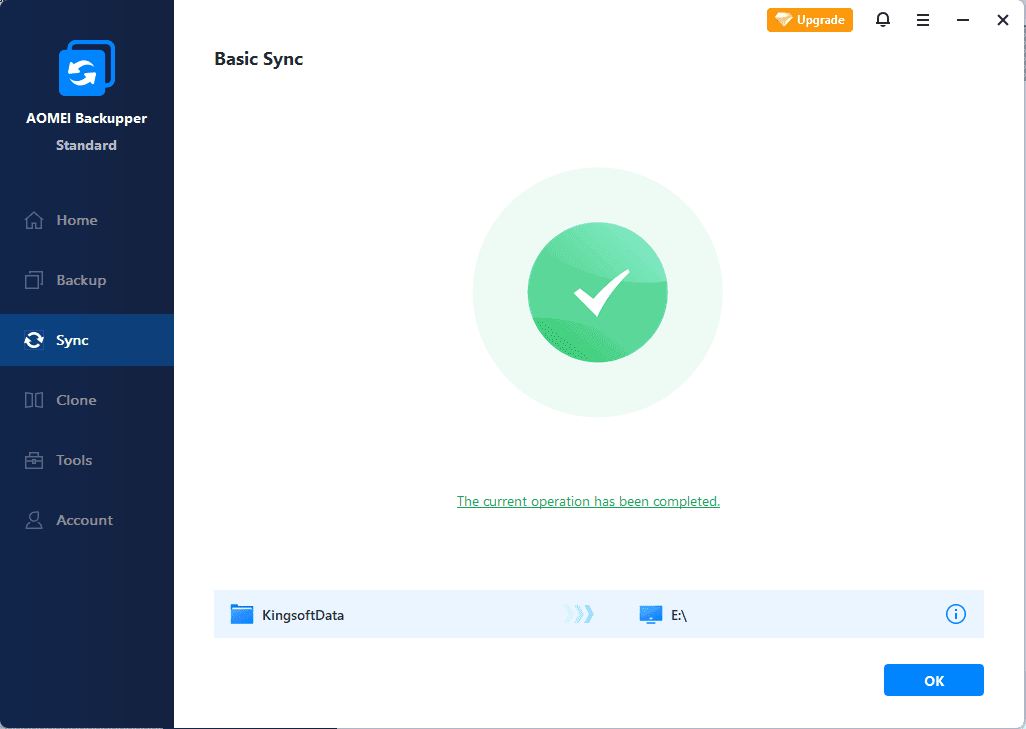
While the sync is running, you can also click the underlined sentence to examine the sync process in detail. And, please wait for the sync process to finish and click the Finish button.
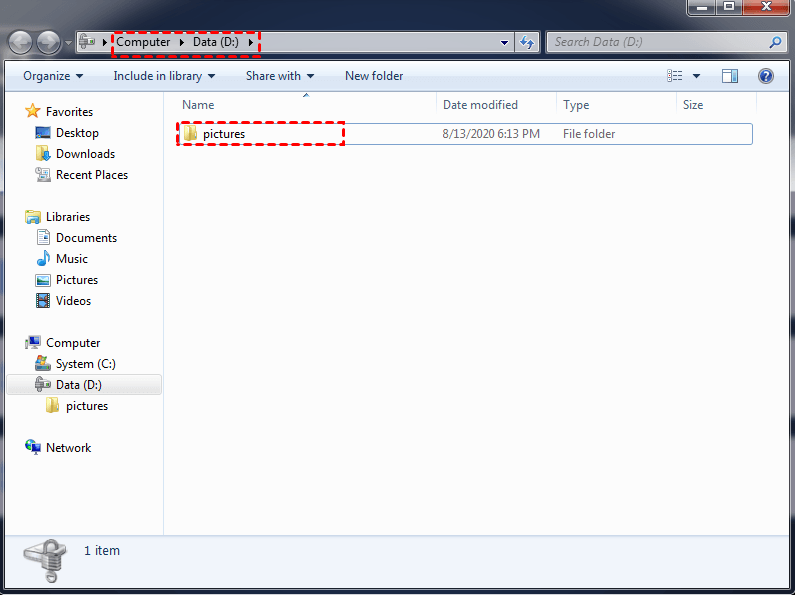
Step 4. Thus, you can view the data directly at the destination location.
When you run the Basic Sync task again, the data added and changed in the source directory is synchronized to the target. If you need to delete files from the destination location when deleting them from the source folder, tick the Sync the deletions in the source directory to destination option under Options - > General.
Tips: Some robocopy examples you can learn about
☞Basic copy operation: robocopy C:\source_directory D:\destination_directory /E
☞Copy only new or changed files: robocopy C:\source_directory D:\destination_directory /E /XO
☞Mirror a directory: robocopy C:\source_directory D:\destination_directory /MIR
☞Copy files in backup mode: robocopy C:\source_directory D:\destination_directory /B /SEC
☞Copy files with a maximum size limit: robocopy C:\source_directory D:\destination_directory /MAX:1024
Summary
This article explains how to use Robocopy on Windows 11 to copy files and tells what robocopy is, in addition to recommending a free and easy-to-use software, AOMEI Backupper Standard. It has powerful functions like: clone, backup, restore Windows 11 from boot, etc. Finally, we show some commonly used robocopy examples, and we sincerely hope that this article will help you.

