Top 4 Ways to Fix Mouse Lagging on Windows 11
If you encounter mouse lagging on your Windows 11 system, try out the below several ways!
By Maggie Updated on December 12, 2024
For the past few months (more specifically, since Windows 11 2H22), I've been getting some extreme stuttering with my bluetooth mouse (MX Anywhere 3). Certain times, I would move my mouse from one side of the screen to another, it would freeze for a millisecond, and this would be extremely frustrating when performing operations such as a copy-paste.
Cause of Windows 11 Mouse Lagging
Mouse lag is a widespread problem in Windows 11, and several factors can lead to it. Issues like recent driver updates, incorrect mouse settings, or a low battery in a wireless mouse can all contribute to this problem.
The quickest way to fix mouse lag is to begin with the hardware, focusing on the mouse. Then, systematically check each component and application that contributes to your mouse's functionality.
Fast Tips for Troubleshooting mouse lagging Windows 11:
☎Restart your computer
☎If you are using a wired mouse, try connecting it to a different USB port.
☎If you are using a Bluetooth mouse, consider changing its battery.
How to solve mouse lagging on Windows 11
Here are 4 proven efficient ways to fix Bluetooth mouse lagging on Windows 11
Method 1. Download & install all Windows updates
Windows updates usually come with bug fixes and bring new features. When you encounter any issues on Windows, try installing Windows updates. This may be the best shot you can take without much troubleshooting. Follow the steps below to do so.
Step 1. Press Windows + I simultaneously to open Settings.
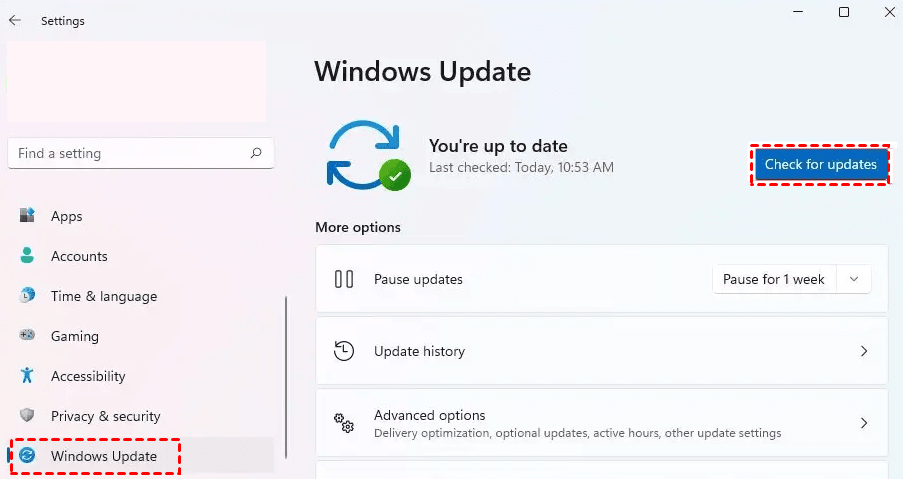
Step 2. Then navigate to System and then click Windows Update.
Step 3. Click on Check for updates. If updates are available, Windows will start downloading them automatically.
Step 4. Once the download and installation process is complete, click on Restart now to restart your PC immediately. Or you can make a schedule to the restart.
After restarting your computer, test your mouse to see if the problem still persists. If the issue remains unresolved, proceed to the next troubleshooting step.
Method 2. Disable mouse trails
A mouse with a trail is a feature called pointer trail, designed for accessibility to help track the mouse pointer's movement. However, some users have encountered issues like mouse lag and stuttering when this feature is enabled. Disabling mouse trails might not completely solve the problem, but it can improve the situation. Here's how you can disable mouse trails:
Step 1. In the search bar, type Control Panel and open it.
Step 2. In the Control Panel, navigate to Hardware and Sound and click on Mouse.
Step 3. Then in the Mouse Properties window, go to Pointer Options tab.
Step 4. Under the Visibility section, uncheck the box next to Display pointer trails to disable Printer Trails.
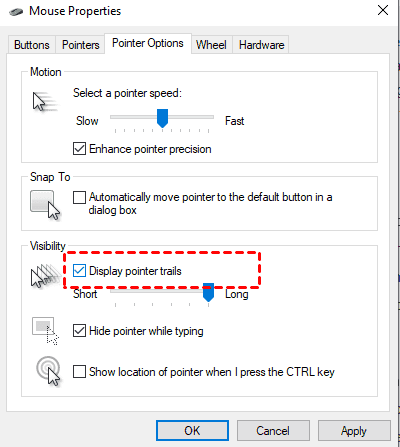
Step 5. Then click on Apply and OK to save the changes.
Now restart your Windows PC and check if your problem is solved.
Method 3. Enable/ Disable Scroll Inactive
Activating or deactivating the "Scroll Inactive Windows" feature can impact how your mouse behaves. You can test it to see if it stops mouse lagging on Windows 11.
Step 1. Open Settings by pressing Windows + I simultaneously.
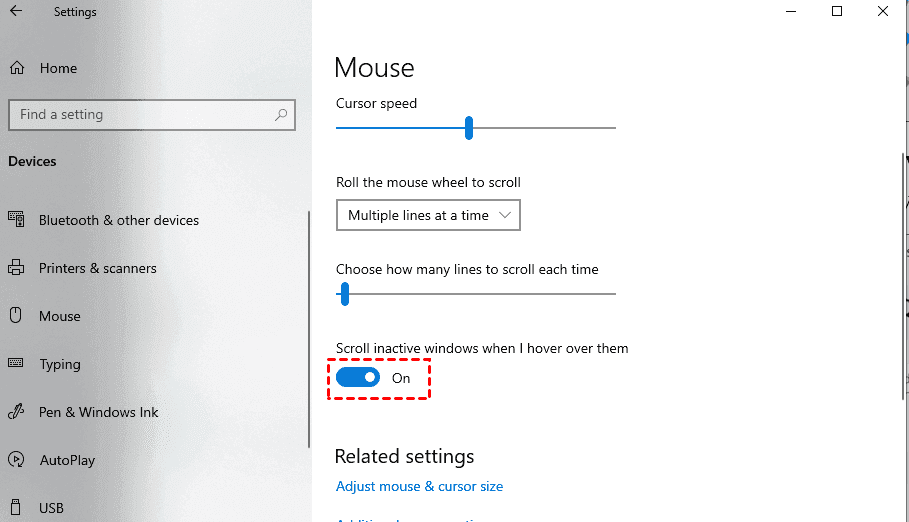
Step 2. Then go to Devices > Mouse.
Step 3. Now drag on and off the for a few times.
If this doesn’t work for you, proceed to the next fix.
Method 4. Disable Adaptive Sync Settings
If you’re using a monitor that supports NVIDIA Adaptive Sync, you may be more likely to encounter these lagging and stuttering issues. It’s available for users who have 10 series NVIDIA graphics cards and above that’s capable of supporting G-Sync. But enabling this feature would just trigger some errors. To locate your problems, you should try disabling Adaptive Sync settings. Below is how you can do this.
Step 1. In the search box, type or paste NVIDIA Control Panel, then click on it from the search results.
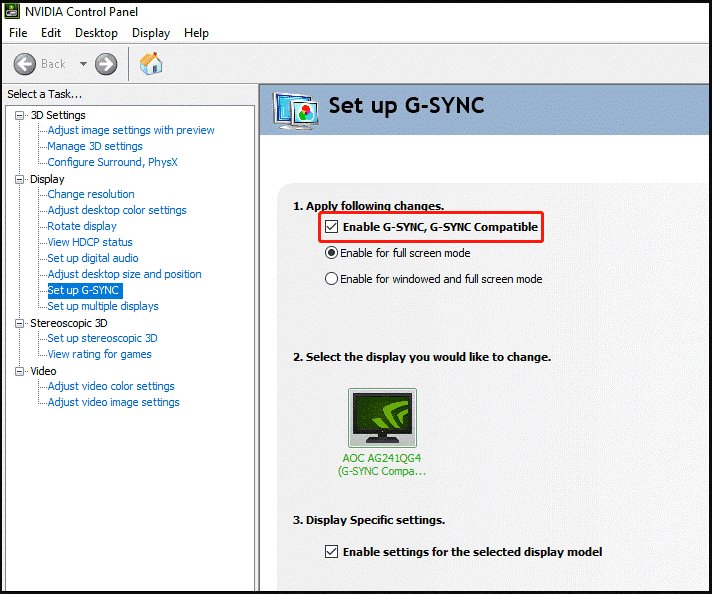
Step 2. Go to the Display tab and click on Set up G-SYNC. Then, uncheck the options for Enable G-SYNC and G-SYNC Compatible.
Restart your PC to ensure that the changes take full effect.
Extra tip: backup Windows 11 to an SSD for disaster recovery
Before executing the above steps, it’s always recommended you to backup your data in advance. Why? Mouse freezes Windows 11 or careless operation can always lead to unexpected issues like hardware breakdown and other computer problems. This time, you will care about whether your computer data is safe or not. So I suggest backup your computer in advance in case of data loss. If you don’t want to spend on much time on the back issue, I suggest you to choose one backup software to save you from laborious and complex jobs.
Here I highly recommend you use the best backup freeware – AOMEI Backupper Standard to backup your Windows 11 operating system. This freeware has the following prominent features:
✨ You can schedule Windows 11 backups at regular intervals (daily, weekly, monthly, event triggers and USB plug in mode). It offers options for both full and incremental backups. Additionally, upgrading to the Pro version allows you to enjoy the benefits of differential backup.
✨ This software provides various backup types to cater to different needs. You can opt for System Backup, Disk Backup, Partition Backup, or File Backup based on your specific requirements.
✨ It enables you to back up your data to a variety of storage devices, including USB flash drives, HDDs, SSDs, internal, and external hard drives, ensuring flexibility and convenience in your backup options.
✨ It is compatible with a wide range of operating systems, including Windows 7, 8, 8.1, 10, 11, XP, and Vista, ensuring its usability across various Windows platforms.
You can download this free software to your PC and back up Windows 11 to an SSD, follow the straightforward instructions to complete this task effortlessly.
Step1. Launch AOMEI Backupper and click Backup in the left panel and then choose System Backup.

Step 2. Then the system-related partitions will be selected by default. Then choose a destination to store your data, here tick the triangle icon to add the SSD as the destination. Apart from SSD, you can also backup computer to Network Drive or NAS .

Step 3. Confirm your settings and click Start Backup to start backing up the computer.

Summary
This article offers 4 useful ways to troubleshoot mouse lagging Windows 11. It’s better to try out one by one.
What’s more, we recommend you to make a regular backup of your computer. And AOMEI Backupper Standard is the ideal one for you. This software is comprehensive-featured. You can sync your files to Google Drive to get easier access to your data.
FQA

