Top 4 Ways to Enable Hibernate Mode in Windows 11 Easily
Read this detailed post to learn a step-by-step tutorial of how to enable hibernate mode in Windows 11 with 4 easy methods as well as master the best way to protect Windows 11 from any severe issues.
By Clytze Updated on December 12, 2024
User case: hibernate missing from the control panel
“unable to set hibernate. no such option is available after upgrading to Win 11 sometimes Surface Laptop 3 goes to sleep and I can resume back to work immediately by opening the lip sometimes it shuts off. ”
– Answers.Microsoft
What is hibernate mode & file in Windows 11?
- Hibernate Mode in Windows 11 is a power-saving feature that saves the current state of your computer, including open files and running programs. It allows you to power off your computer while preserving your work session.
- The Hibernate file (hiberfil.sys) is a hidden system file where Windows stores the contents of your computer's RAM when you activate Hibernate Mode. It enables your computer to quickly restore its previous state, including all open files and running programs, when you power it back on.
💡 Why there is no hibernate option in Windows 11?
There are several reasons why the hibernate option might be missing when you install Windows 11: The feature could be disabled in your system settings, your system might not support hibernation, or certain power settings could be configured to hide the option. To enable it, you may need to access the Control Panel, navigate to Power Options, and adjust the settings to show hibernate. Additionally, ensuring that your system drivers are up-to-date and checking BIOS settings might also help.
When your computer is almost out of power, or you need to shut it down temporarily, hibernate mode can help you protect your precious data and let you continue working from where you left off when you turn it on again.
To prevent data loss accidentally, we recommend you back up your Windows 11 regularly with the best backup software -AOMEI Backupper Standard.
Hibernate vs sleep mode: what are the differences?
Hibernate mode is similar to sleep mode as both are designed to suspend your activity so you can return to where you left off. However, while sleep mode saves your session to RAM and uses a small amount of power, hibernate mode saves your session to the hard drive and uses no power. The hibernate option might be missing in Windows 11 due to system settings, lack of support, or specific power configurations, which can be adjusted in the Control Panel under Power Options.
⭐Save location: In hibernate mode, all your opened applications and files will be saved on your hard drive instead of RAM.
⭐Energy-saving: Hibernate mode is more energy-saving because it will store all your data in the hiberfil.sys file on your hard drive and then shut down the computer completely. Therefore, even without power, whenever you turn on your computer next time, you can go back to where you left off.
⭐Startup speed: Hibernate mode will be very fast when the next time you start your computer, while sleep mode will take longer to boot.
How to enable or disable hibernate mode in Windows 11
As we can see from the above, hibernation mode protects our data better, is more energy-efficient, and has a faster boot speed. Next, this article will introduce you to four useful ways to enable Windows 11 hibernate mode in turn. You can follow the graphic tutorials below to operate.
|
🎯 Method 1. Control Panel |
Click the Search icon on the Taskbar and type “control panel”…Full steps |
|
💻 Method 2. Command Prompt |
Open the search box and type “cmd.exe”. When its icon appears…Full steps |
|
📑 Method 3. Registry Editor |
Press Win+R to open the Run interface, and type “regedit”…Full steps |
|
📂 Method 4. Group Policy |
On your domain controller, launch the Group Policy Management…Full steps |
Method 1. Enable Windows 11 hibernate settings with control panel (recommended)
Based on the survey, this method is widely utilized by Windows 11 users to enable hibernate mode, provided here for your reference. Here are the specific steps:
Step 1. Click the Search icon on the Taskbar and type control panel in the Search box, then select the app.

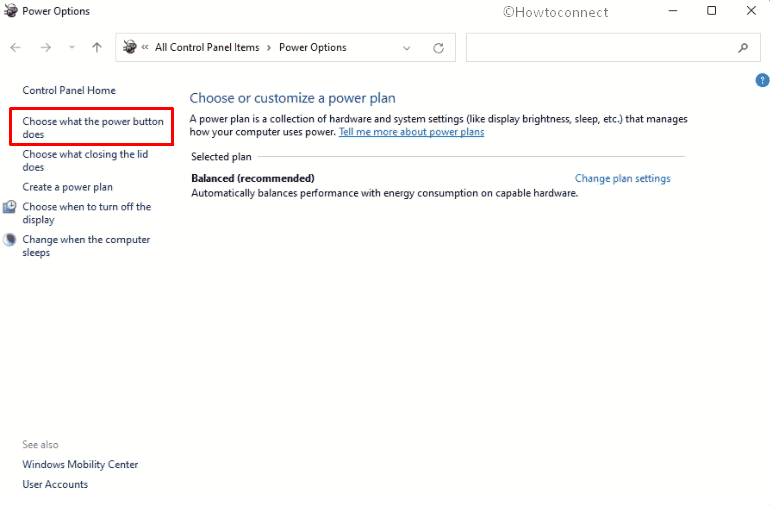
Step 2. When you are in the Control Panel window, select System and Security > Power Options.

Step 3. Click Choose what the power button does.
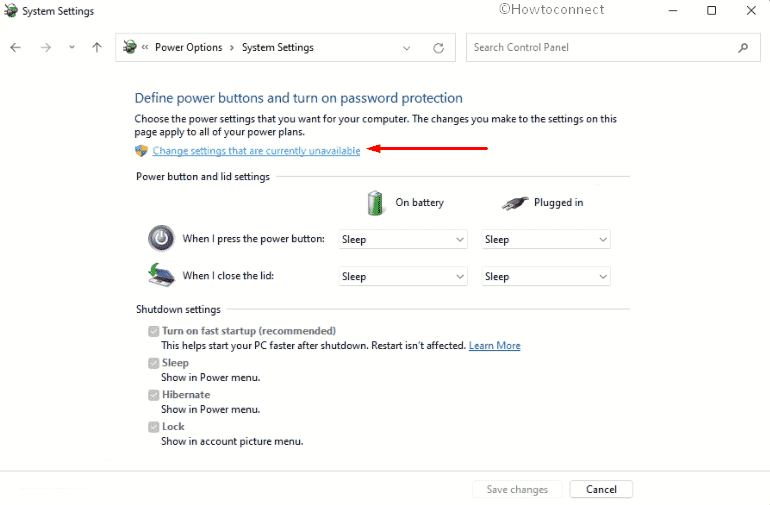
Step 4. Then click Change settings that are currently unavailable to access the Shutdown settings.
Step 5. The Shutdown settings section will show up. Tick the Hibernate option and click Save Changes.
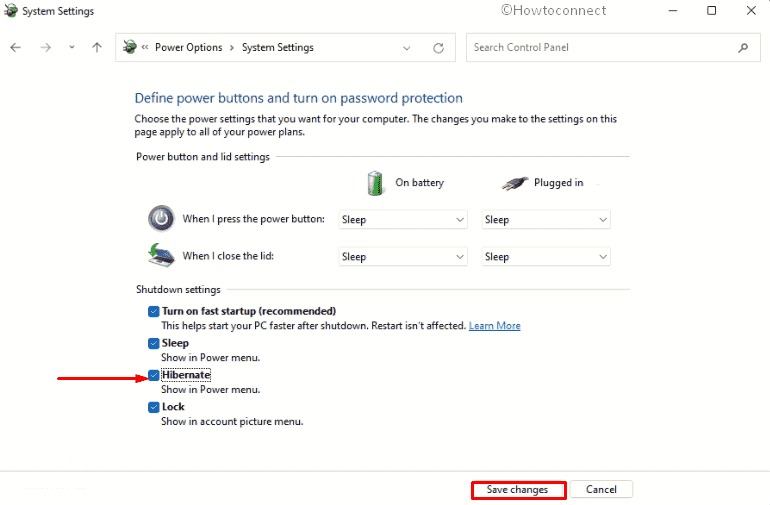
💡 Tip: If you want to disable the hibernate mode later, you can follow the previous steps to find the Shutdown settings page and then uncheck the Hibernate option and click Save Changes.
Method 2. Enable hibernate mode in Windows 11 with the command prompt
In addition to the first method, you can also use the Command Prompt to enable hibernate mode in Windows 11. Open Command Prompt as an administrator. Please follow the graphic tutorial below. This will enable hibernate mode on your system, making it available for use.
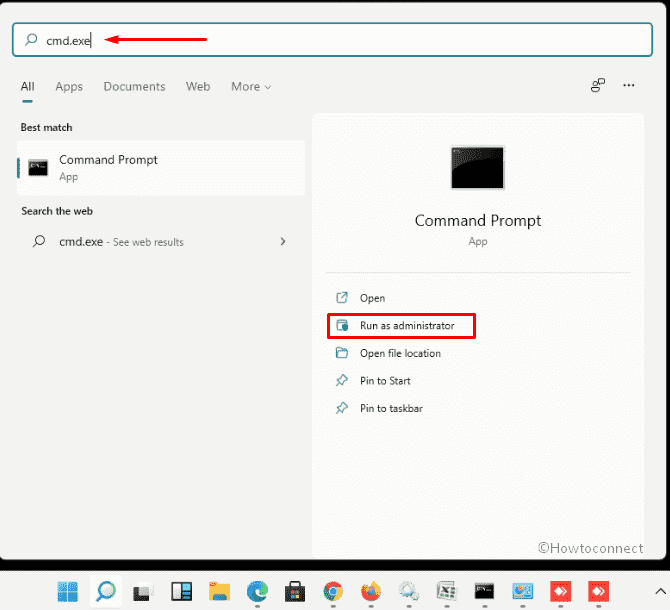
Step 1. Open the search box as before and type cmd.exe. When its icon appears, click Run as Administrator. If you’re prompted by the User Account Control, click Yes to grant administrative privileges.
Step 2. In the command prompt window, type powercfg.exe /hibernate on and press Enter.

💡 Tip: If you want to disable hibernate mode in Windows 11, you can run the command line powercfg.exe /hibernate off.
Method 3. Enable hibernate mode in Windows 11 with the registry editor
If you don't want to use the two previously mentioned methods, you have another option which is to enable Windows 11 hibernation mode with the Registry Editor.
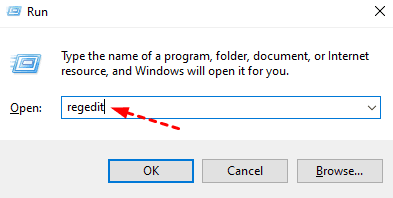
Step 1. Press win+R to open the Run interface, and type regedit to open the registry.
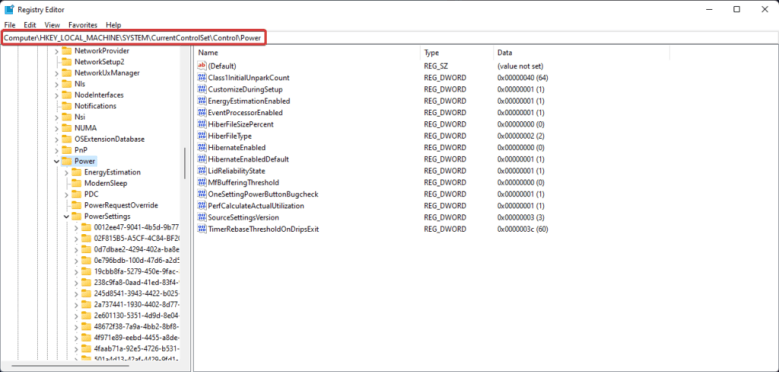
Step 2. Navigate to the HKEY_LOCAL_MACHINE\SYSTEM\CurrentControlSet\Control\Power folder location.
Step 3. Then double-click on the Hibernate Enable Default file type 1 in Value data and click OK.
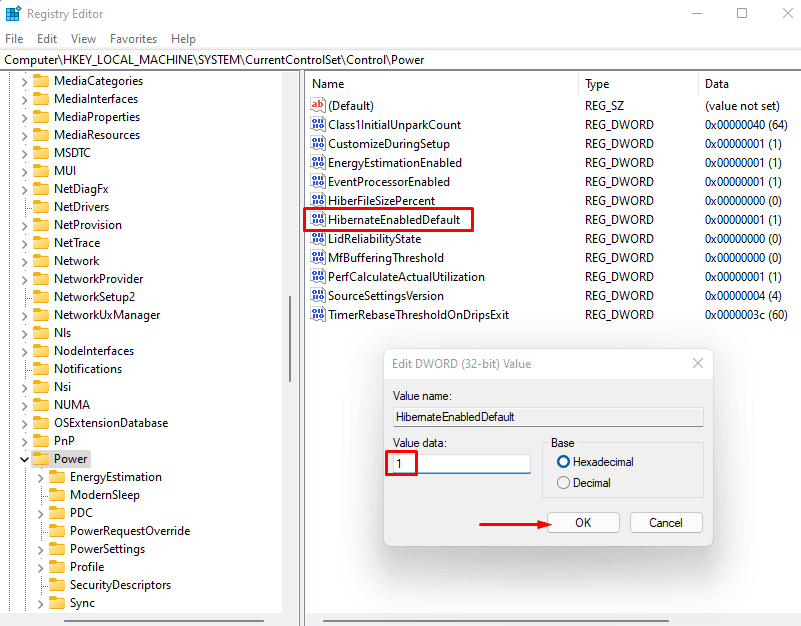
💡 Tip: If you want to disable hibernate mode in Windows 11, you can type 0 in Value data and click OK.
Method 4. Enable Windows 11 hibernate mode using group policy
Group Policy is an effective way to configure Hibernate on multiple PCs. When you want to turn on hibernate mode for multiple Windows 11 PCs, GPO is the best choice for administrators.
Step 1. On your domain controller, launch the Group Policy Management console.
Step 2. Create a new Group Policy Object and name it “Enable Hibernate Mode“.
Step 3. Right-click on “Enable Hibernate Mode” and select Edit. This will bring up the Group Policy Management Editor.
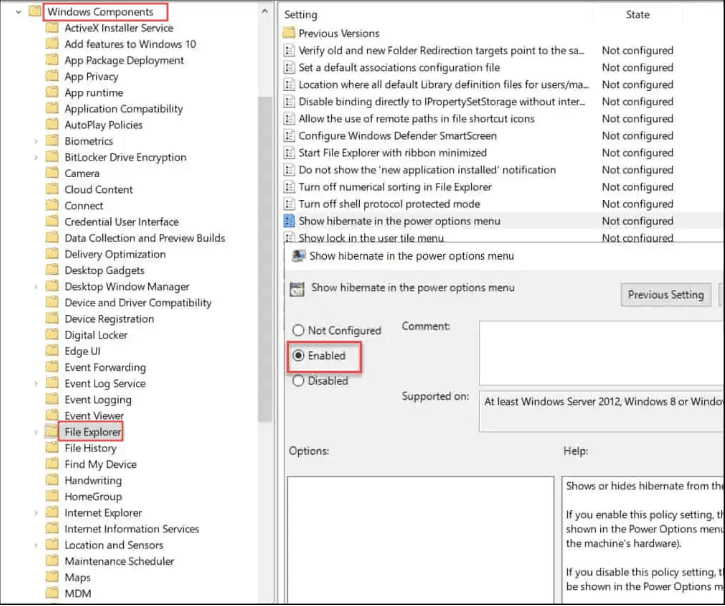
Step 4. Navigate to Computer Configuration > Administrator Templates > Windows Components > File Explorer.
Step 5. On the right pane, double-click the setting “Show hibernate in the power options menu” and set it to Enabled.
💡 Tips:
· Ensure the GPO is linked to an OU (organizational unit) or you may link it to the entire domain to apply the settings for all computers.
· If you want to disable the hibernate mode later, double-click the setting “Show hibernate in the power options menu” and set it to Disabled.
Safeguard your data by regularly backing up Windows 11
When your computer is almost out of power, or you need to shut it down temporarily, hibernate mode can help you protect your precious data and let you continue working from where you left off when you turn it on again.
To better protect data, we recommend you backup Windows 11 regularly with the best backup software -AOMEI Backupper Standard. As a professional backup software, it has the following advantages.

- Multiple destinations: Backup to USB drives, internal/external HDDs, SSDs, NAS, etc.
- Scheduled backups: Set intervals (daily, weekly, monthly) for automated backups.
- Incremental backup: Save disk space and time by backing up only changed files.
- Customizable settings: Choose backup modes (intelligent sector or exact) and compression levels (high/normal/low).
- Compatibility: Supports various OS including Windows 11/10/8.1/8/7.
Follow the steps below to backup your Windows 11 with ease:
Step 1. Download AOMEI Backupper Standard, install it, and launch it. Then click Backup > System Backup.

Step 2. It will select the Windows 11 system partition and boot-related partitions automatically. And you just need to select a destination.

Step 3. Click Start Backup to back up Windows 11.

✍ You can customize your backup task with more advanced settings:
- Options: It allows you to enable email notifications as well as choose the compression level for your system backup.
- Schedule Backup: You can choose the frequency of your backup, such as daily, weekly, monthly, event triggers, and USB plug-ins.
- Backup Scheme: You can enable automatic backup cleanup to solve the disk full issue in a long-term backup task. It can delete old backup images automatically. (Enjoy it in AOMEI Backupper Professional).
You may also want to know: how to enable hibernate Windows 10
To enable hibernate Windows 10, you can follow these steps:
- Click on the Start button located in the bottom left corner of the screen.
- Click on the Power icon, which usually resembles a circle with a vertical line.
- A menu will appear with various power options. Press and hold the Shift key on your keyboard.
- While holding the Shift key, click on the "Hibernate" option that appears in the power menu.
- Your computer will then enter hibernation mode, saving the current state and powering off.
- Notes:✎...
- The availability of the hibernate option may depend on your computer's hardware and power settings. If you don't see the hibernate option, you may need to enable it in the power settings. You can do this by going to the Control Panel, selecting "Hardware and Sound," then "Power Options," and finally "Choose what the power buttons do." From there, you can enable the hibernate option and save the changes.
FAQs about enabling hibernate mode in Windows 11
Summary
By now, you should have learned how to enable hibernation mode in Windows 11 using the methods mentioned in this article. To ensure enhanced data protection, consider utilizing the free and reliable backup software, AOMEI Backupper Standard, to regularly back up your Windows 11 system.
This system backup will come in handy for restoring your OS in case of any issues. Moreover, the advanced versions of the software offer Universal Restore, allowing you to restore your system to a computer with different hardware configurations.
Besides, it is a professional cloning software that provides Disk Clone and Partition Clone features, which allows you to clone NVMe to larger NVMe without booting issues. Now download AOMEI Backupper and discover more on your own!