How to transfer data between iPhone and computers through FoneTool?
With FoneTool, you can effortlessly transfer photos, music, and videos between your iPhone and computer.
Please note that the "iPhone to PC" and "PC to iPhone" features allow free users to transfer up to 30 files per day. If you wish to enjoy unlimited data transfer between your PC and iPhone, we recommend upgrading to the Pro edition.
Transfer to iPhone
Prerequisites for transferring to iPhone:
Download and install FoneTool app in App Store to your iPhone.
Download and install FoneTool on your windows computer (currently only supports windows system).
Connect the iOS device to your computer through a USB cable.
The following are the detailed steps:
Step 1. Launch FoneTool on your computer.
Step 2. Click "Phone Transfer", mouse over the "PC to iPhone" icon and click "Start Transfer".

Step 3. Click the blue folder icon to add Photos, Music, Videos or folders on this computer. Or, you can directly drag Photos, Music, Videos or folders to the interface.
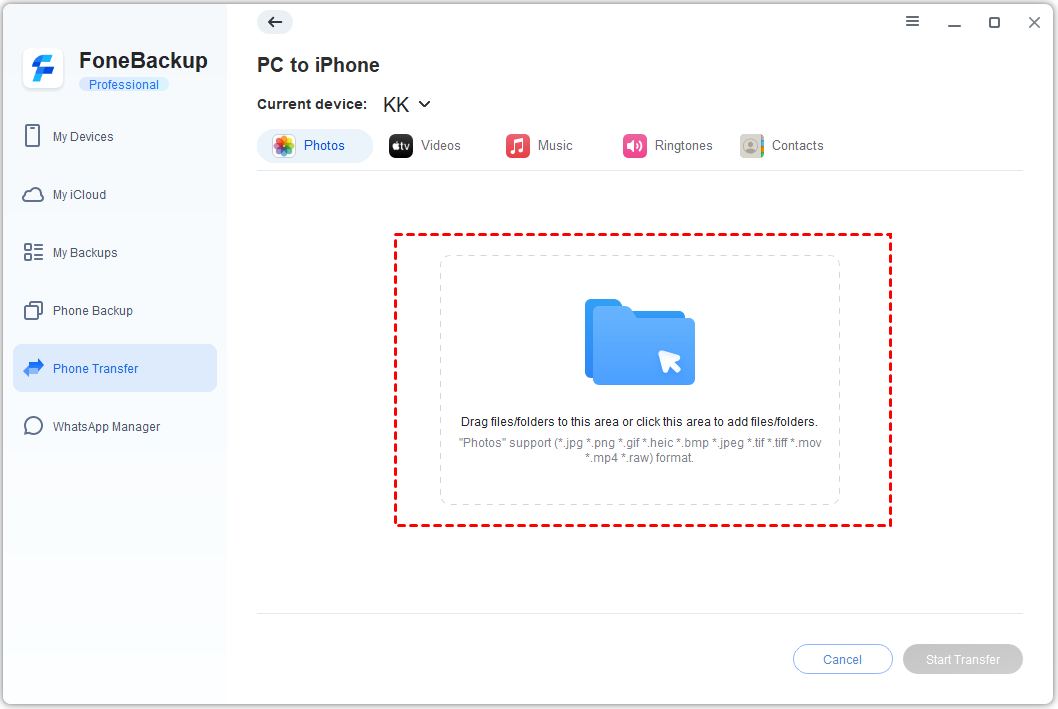
Tips: Only the following file types are supported:
Pictures: .jpg .png .gif .heic .bmp .jpeg .tif .tiff .raf .crw .cr2 .cr3 .kdc .mrw .nef .orf .dng .ptx .pef .arw .x3f .rw2.
Videos: .mov .mp4 .m4v.
Music: .mp3 .wav .m4r .m4a .m4b .m4p .m4b .aac .aif .aiff .flac.
Step 4. Launch the FoneTool app on your iOS device. If you haven't installed the app yet, you will be prompted to download and install it. You can find it on the App Store or simply scan the QR code displayed in the prompt window to download or update the app.
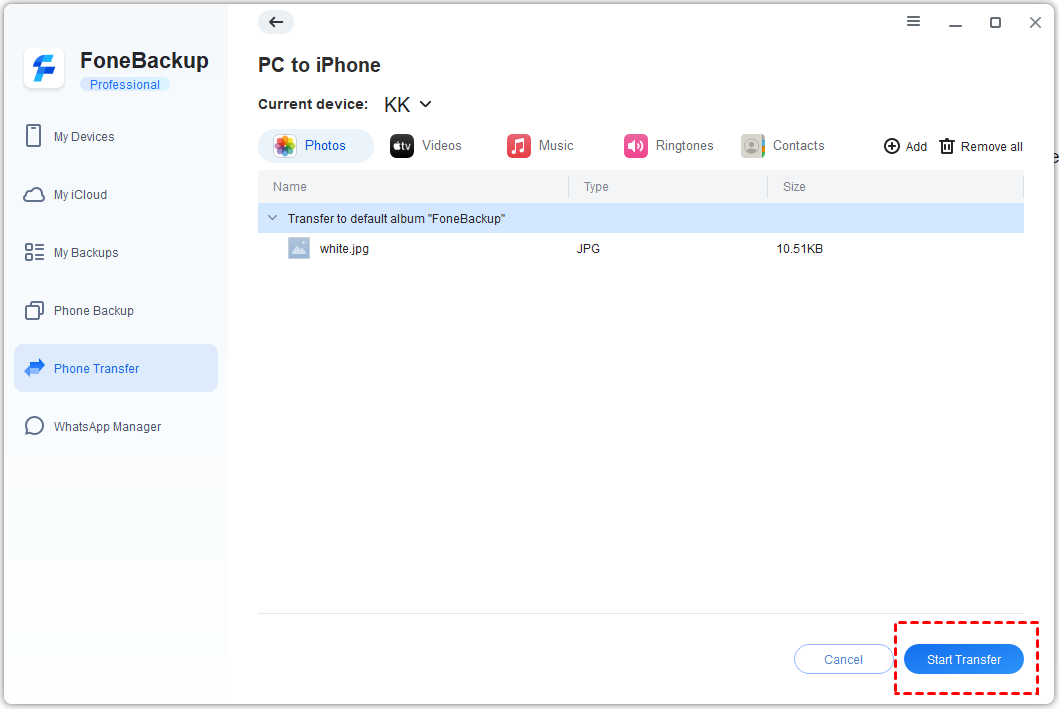
Step 5. Click "Start Transfer" to begin the process.
Notes:
Music transferred to iOS devices using FoneTool will be stored in the library>downloaded directory of the Apple Music app by default.
When using FoneTool to transfer videos to iOS devices, you can choose to transfer the videos to the “Photos” app and the “Videos” app. If you transfer to iPhone's "Photos", the video will be stored in the Recents directory of the iPhone album. If you're streaming to the "Videos" app, the video will be stored in the app's movie category.
Pictures transferred to iOS devices using FoneTool will be stored in the album "FoneTool" created by FoneTool by default. If you need to transfer photos to a specified album directory, please refer to this tutorial: Transfer to Designated Album
Transfer to Computer
Step 1. Connect the iOS device to your computer through a USB cable, launch start FoneTool.
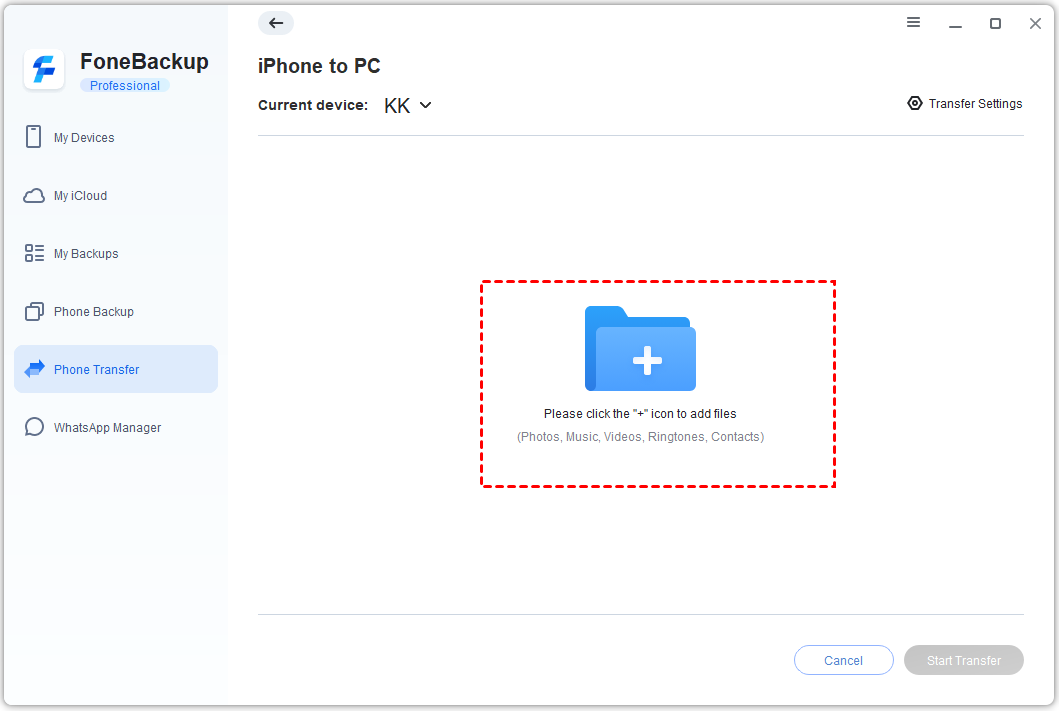
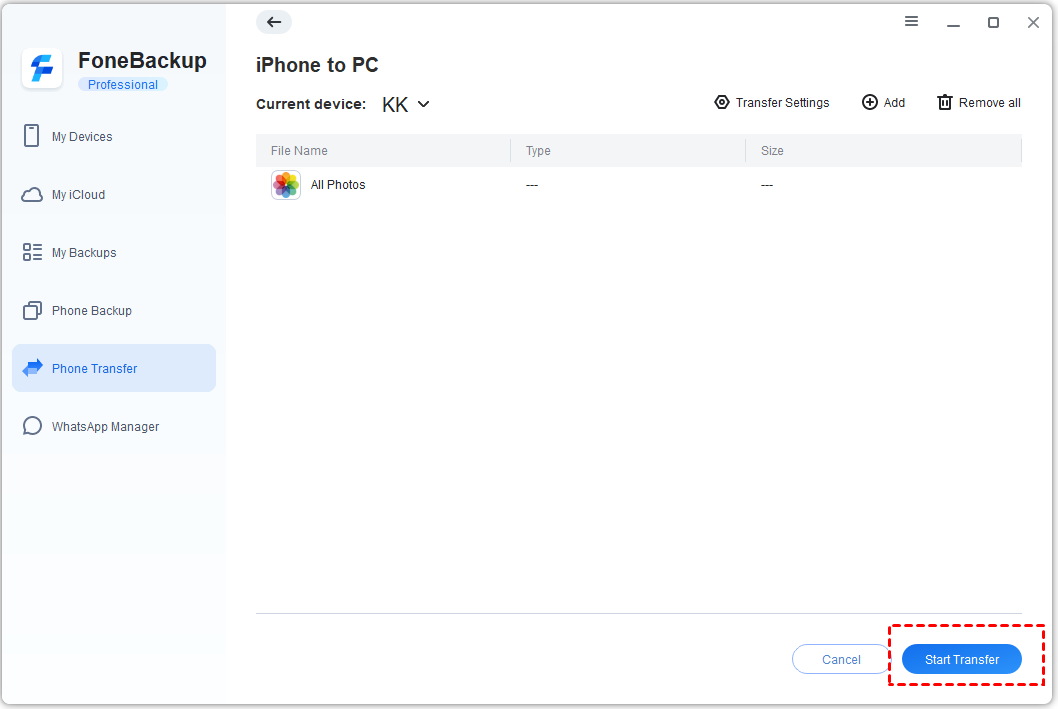
Step 2. Click "Phone Transfer", mouse over the "iPhone to PC" icon and click "Start Transfer".
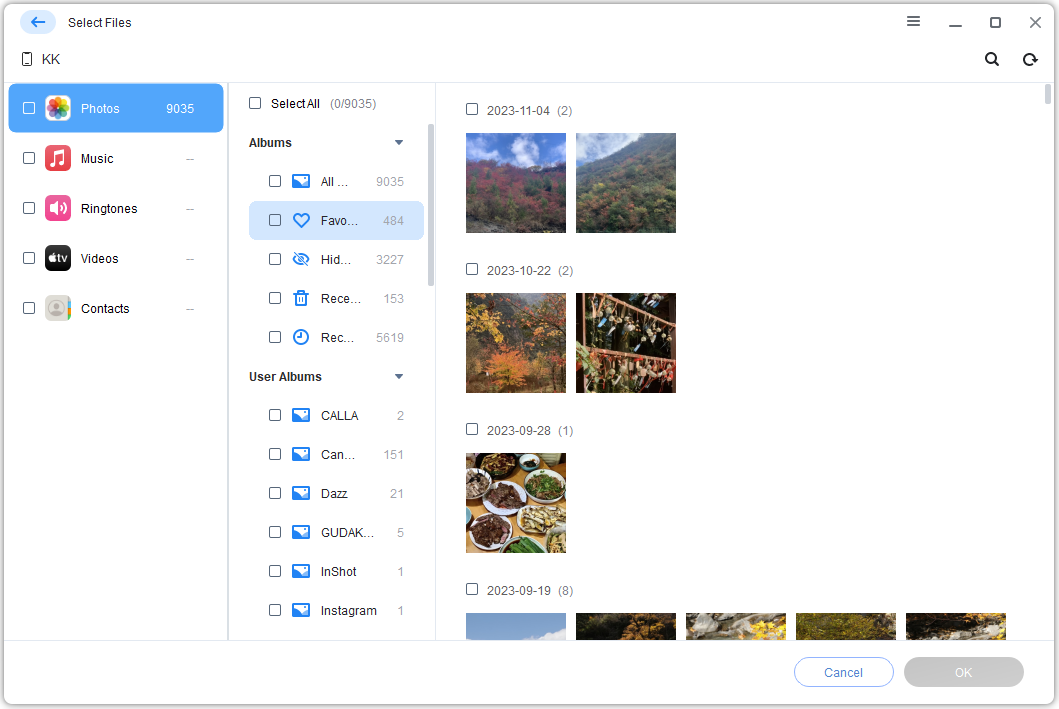
Step 3. Click the blue folder icon to add Photos, Music, Videos in your iPhone.
You can select all Photos, Music or Videos based on file types (such as .jpg). Or, you can directly custom select single files.
Step 4. Click "Transfer Settings" to set the storage path and some other settings, and then click "Start Transfer" to start the transfer process.
Note:
Photos stored in your iCloud cannot be transferred directly using FoneTool. You need to download the photos from iCloud to the local album of your iOS device before you can transfer them.
Conclusion:
Above is the detailed introduction to the transfer function. When you need to backup or transfer photos, videos, and music, FoneTool will be a great tool to help you achieve your goals.
FoneBackup Runs Perfectly on
Supported Devices
- iPhone 4/5/6/SE/7/8/X/11/12/13/14/15/16(all iPhone versions)
- iPad /iPad mini/iPad Air/iPad Pro
- iPod touch 1/2/3/4/5/6/7
iOS Versions
- iOS 18/17/16/15/14/13/12/11 and former
- iPadOS 18/17/16/15/14/13/12/11 and former