


Step by Step: Install Windows Server 2016 on Virtual Machine
Do you know how to install Windows Server 2016 on VMware or Hyper-V virtual machine? In this article, I will show you the specific steps to take this.
By Crystal / Updated on July 19, 2024
Prerequisites for Windows Server 2016 installation
Virtual machines are arguably the heart of the IT industry today. Using hypervisors IT staff can run multiple operating systems on a single computer through application windows.
Do you know how to create a virtual machine with specific operating systems? In this article I will demonstrate how to install Windows Server 2016 on VMware Workstation, VMware ESXi or Hyper-V virtual machine as an example.
Before you start install Windows Server 2016 on virtual machine, please prepare a hypervisor and Windows Server 2016 iso file. You can download from official site, or create a disk image from existing windows server 2016.
If you want to install other versions like Windows Server 2019 on virtual machine, the steps are basically the same.
Windows Server 2016 editions
Datacenter: Highly virtualized, enterprise network and cloud environment.
Standard: Datacenter edition supports less virtual servers than Datacenter edition.
Essential: Up to 25 users and 50 devices, suitable for small businesses.
How to install Windows Server 2016 on VMware Workstation
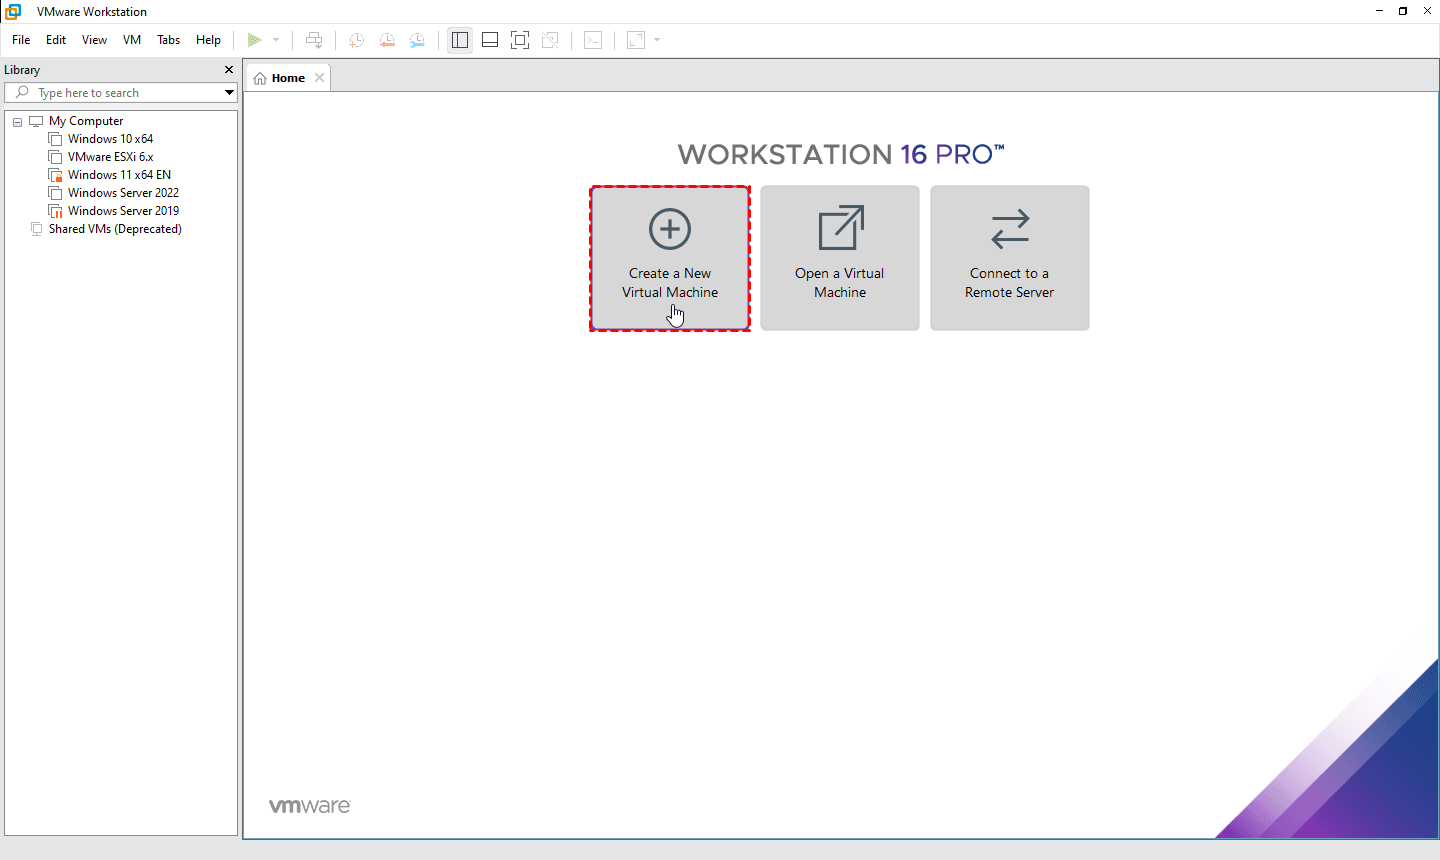
1. Launch VMware Workstation, click Create a New Virtual Machine to open the wizard.
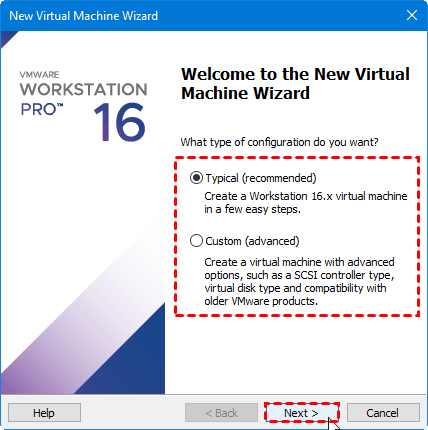
2. Select the type of configuration as Typical (recommended) or Custom (advanced). Click Next.
By selecting Custom, you will create a virtual machine with advanced options, such as a SCSI controller type, virtual disk type and compatibility with older VMware products. Here I select Typical as demonstration.
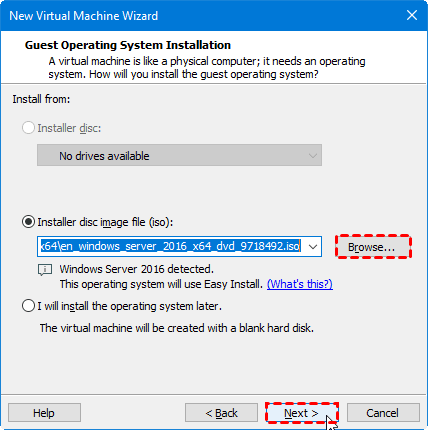
3. Select to install from Installer disc image file (iso) and click Browse… to select the iso file you prepared. Click Next.
You can also select I will install the operating system later option to create a VM with blank hard disk.
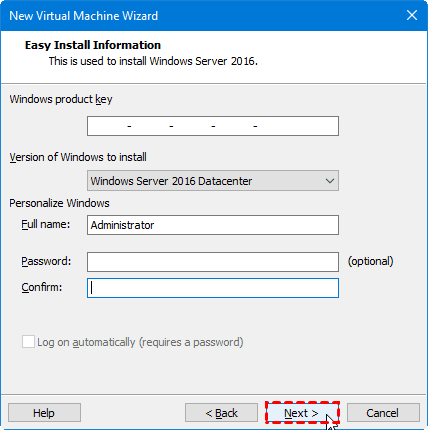
4. Provide the following easy install information for Windows Server 2016 installation.
- (Optional) Windows product key
- Version of Windows to install
- Full name
- (Optional) Password
- (Optional) Log on automatically (requires a password)
Click Next.
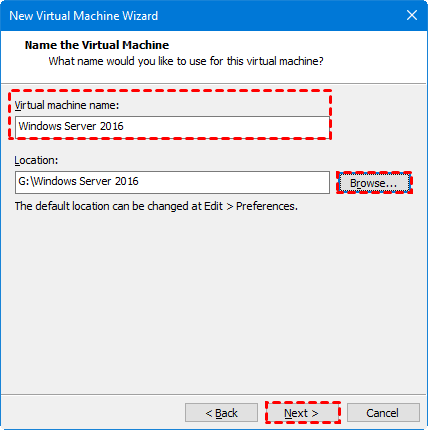
5. Provide a name for the new virtual machine, and click Browse… to specify a location to store the VM files. Click Next.
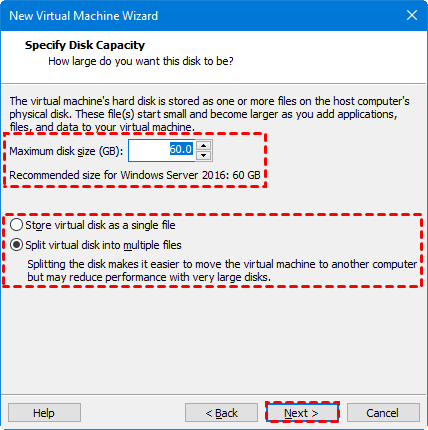
6. Specify Disk Capacity, and select to Store virtual disk as a single file, or Split virtual disk into multiple files. Click Next.
Tip:
1. The recommended size for Windows Server 2016 is 40 GB.
2. It is recommended by VMware to split virtual disk into multiple 2GB files:
Advantages of split disks:
a. Free diskspace required to merge a snapshot, shrink, or defragment the disk is limited to 2 GB, while monolithic disks require up to 950 GB.
b. Easy to copy, move or backup. Some file systems do not support such large files like monolithic disks.
c. Create external descriptor files that can be manually edited by a simple text editor, allowing users to easily fix simple errors.
Disadvantages of split disks:
a. Not favorable for management.
b. Not easy for encryption.
You can also merge VMDK files into one later if necessary.
7. Review the settings, and click Finish to create the virtual machine.
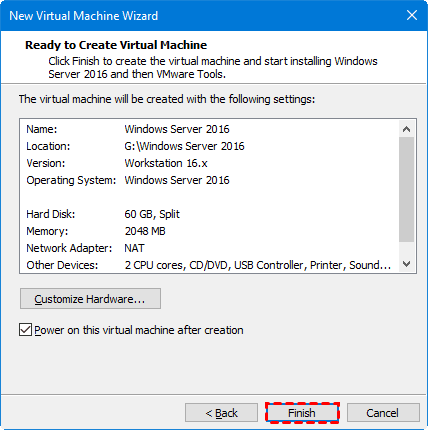
8. Power on the new virtual machine, and then VMware Easy Install will install Windows Server 2016 and VMware Tools automatically.
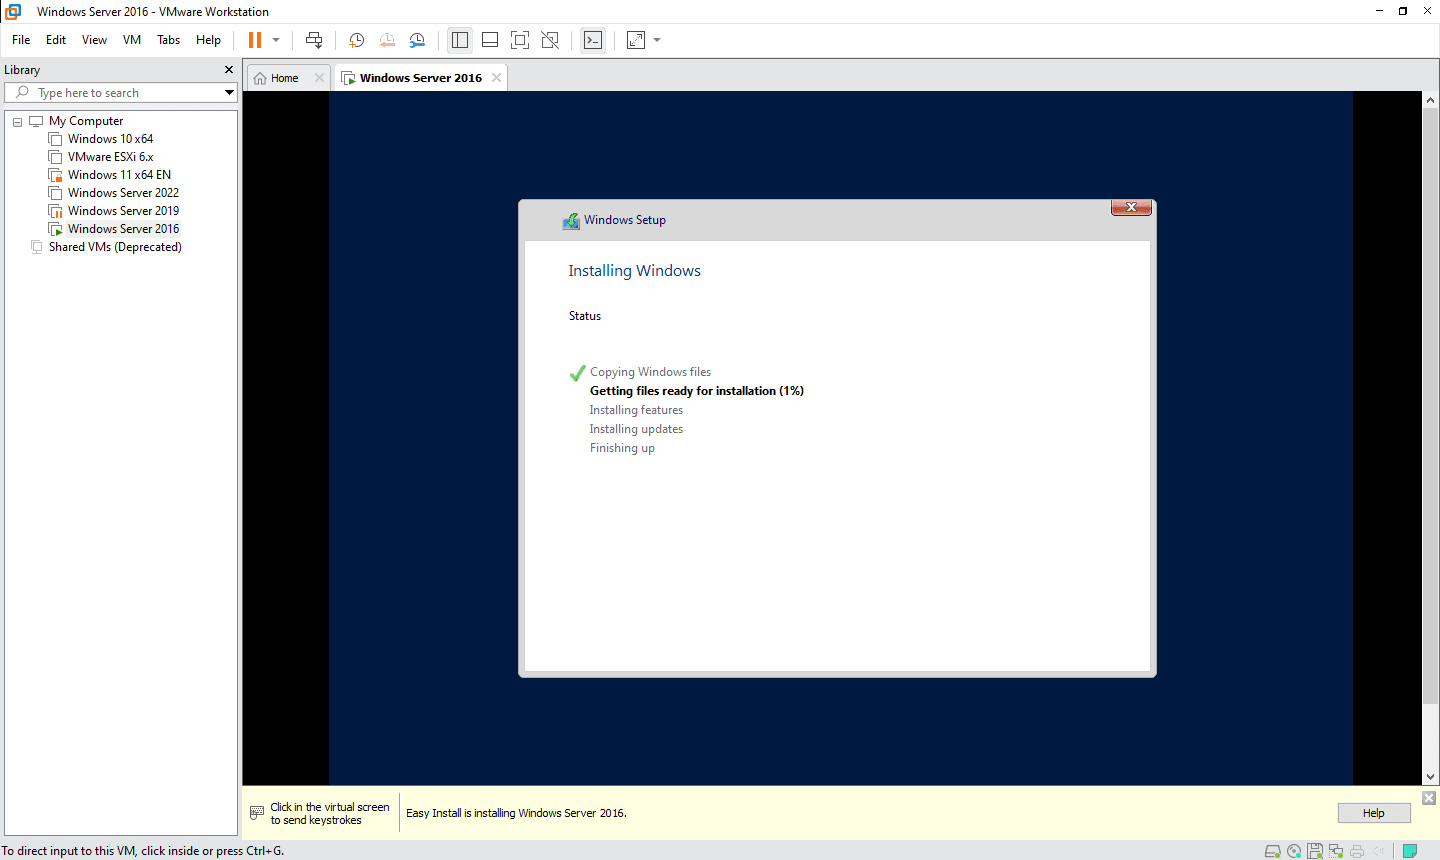
Now you’ve successfully installed Windows Server 2016 on a VMware Workstation virtual machine. You can then configure this local server by following the Server Manager steps.
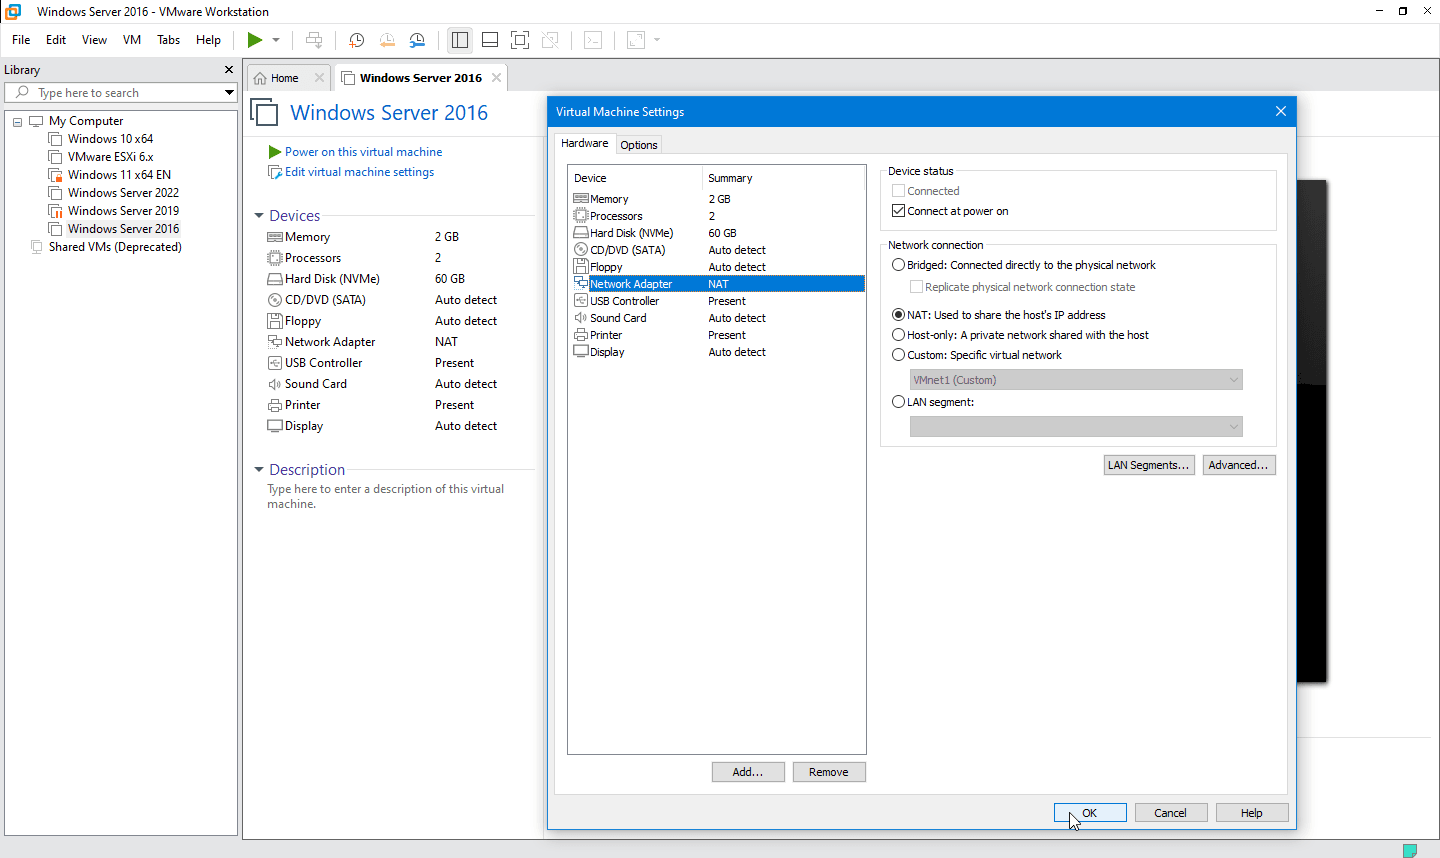
Power off the virtual machine and click Edit virtual machine settings you can change the basic settings.
How to install Windows Server 2016 on VMware ESXi
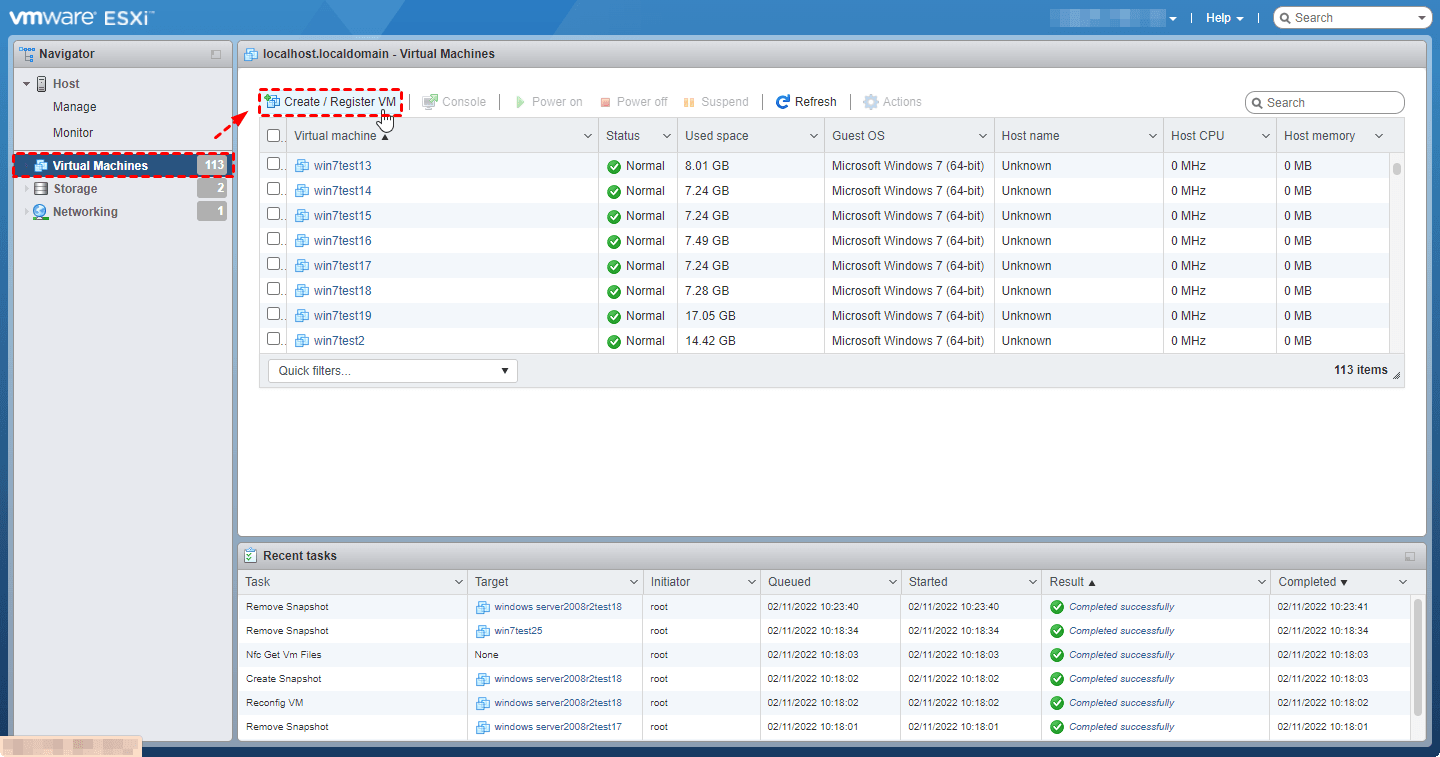
1. Access to VMware ESXi web client, navigate to Virtual Machines > Create / Register VM to open the wizard.
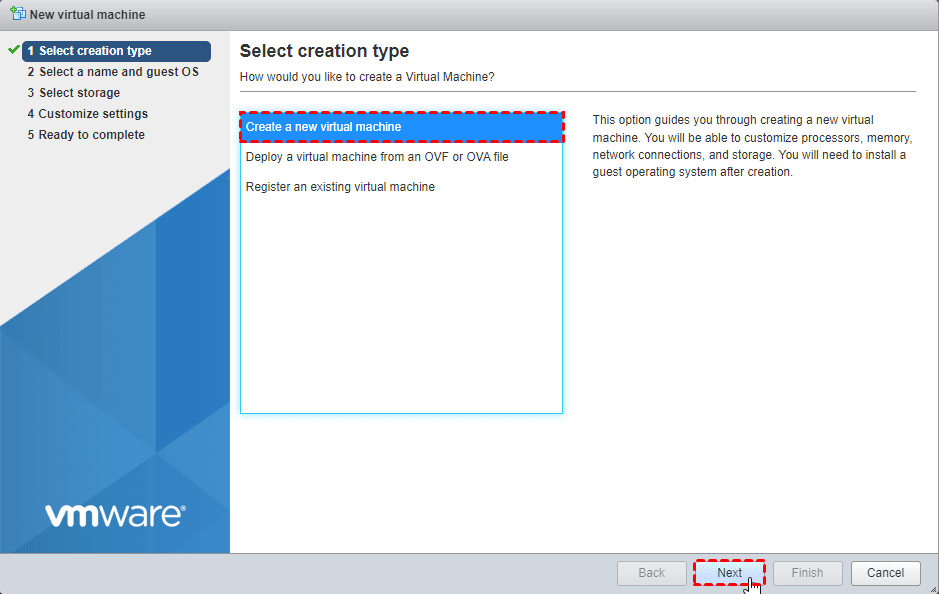
2. Select creation type as Create a new virtual machine. Click Next.
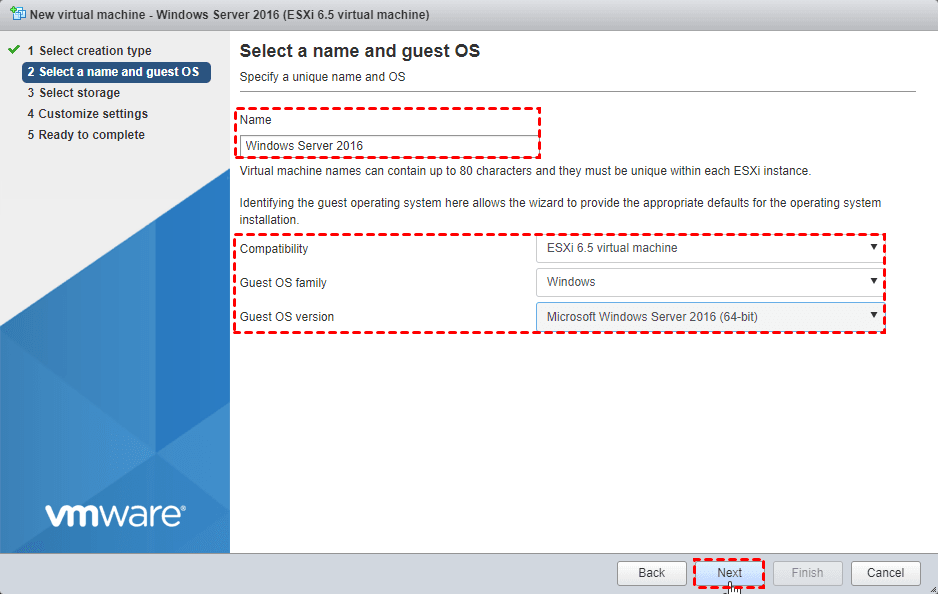
3. Provide a Name and identify the guest operation system Compatibility information. Click Next.
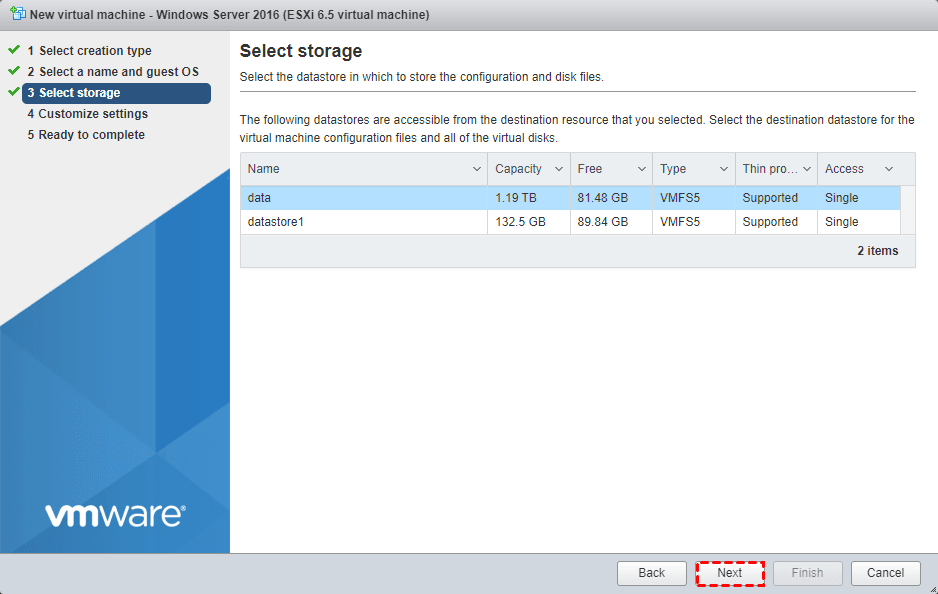
4. Select a datastore to store the VM files. Click Next.
Tip: You can also migrate or backup VM to another datastore on VMware ESXi.
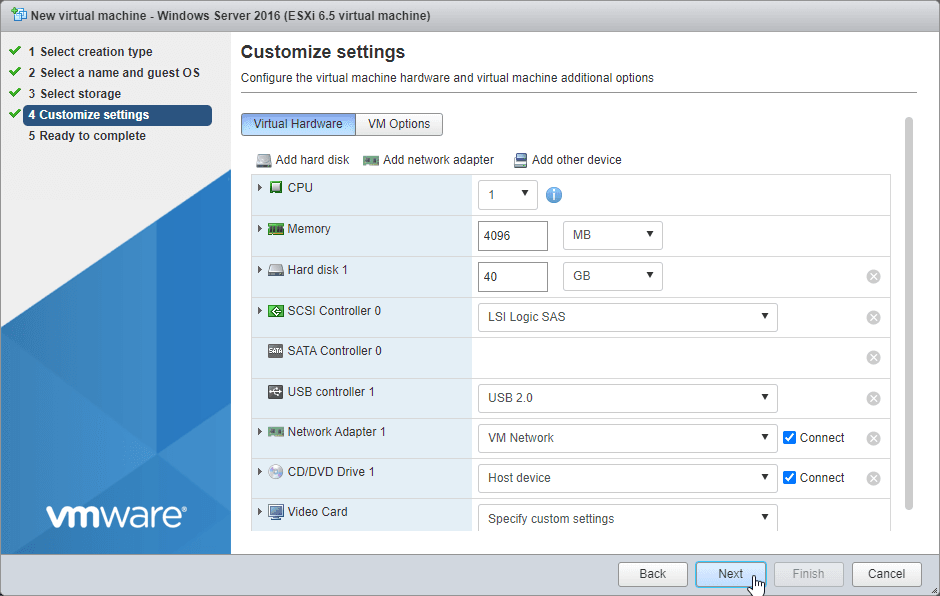
5. Configure the virtual machine hardware and virtual machine additional options. Click Next.
6. Review the settings and click Finish to create the virtual machine.

7. Power on the newly created virtual machine and Launch remote console.

8. Click VM > Settings on the toolbar to open the settings window.

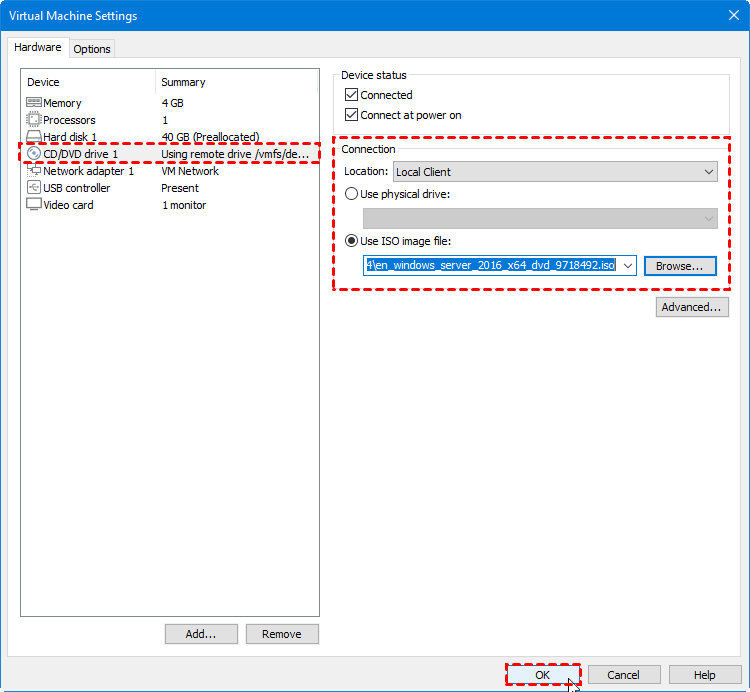
9. Navigate to CD/DVD drive 1 from the left inventory, select Location as Local Client, and select Use ISO image file option, click Browse… to specify the iso file. Then click OK and press Enter to continue.
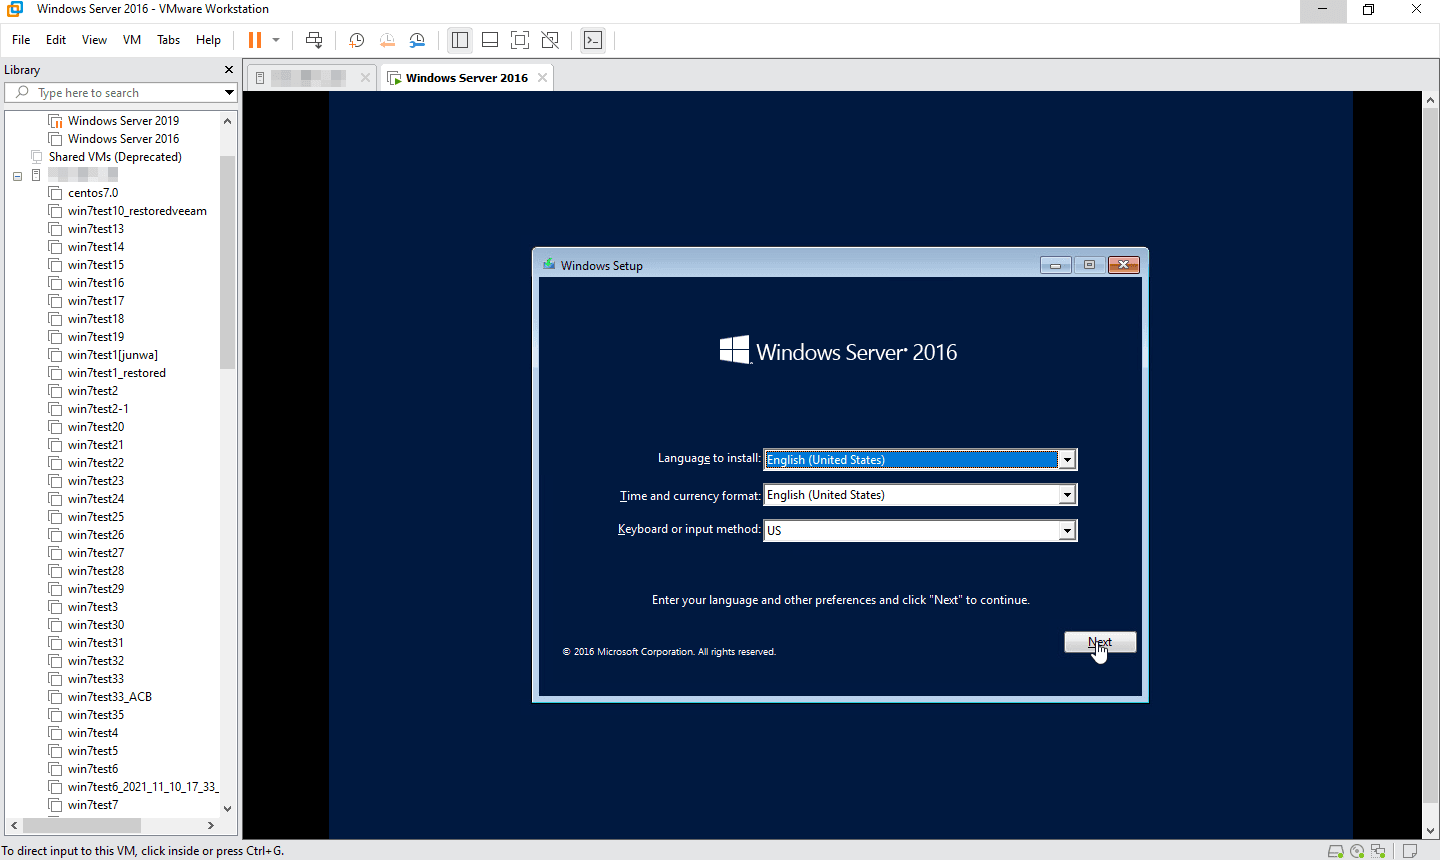
10. Now you can install Windows Server 2016 normally. Click Next to continue.
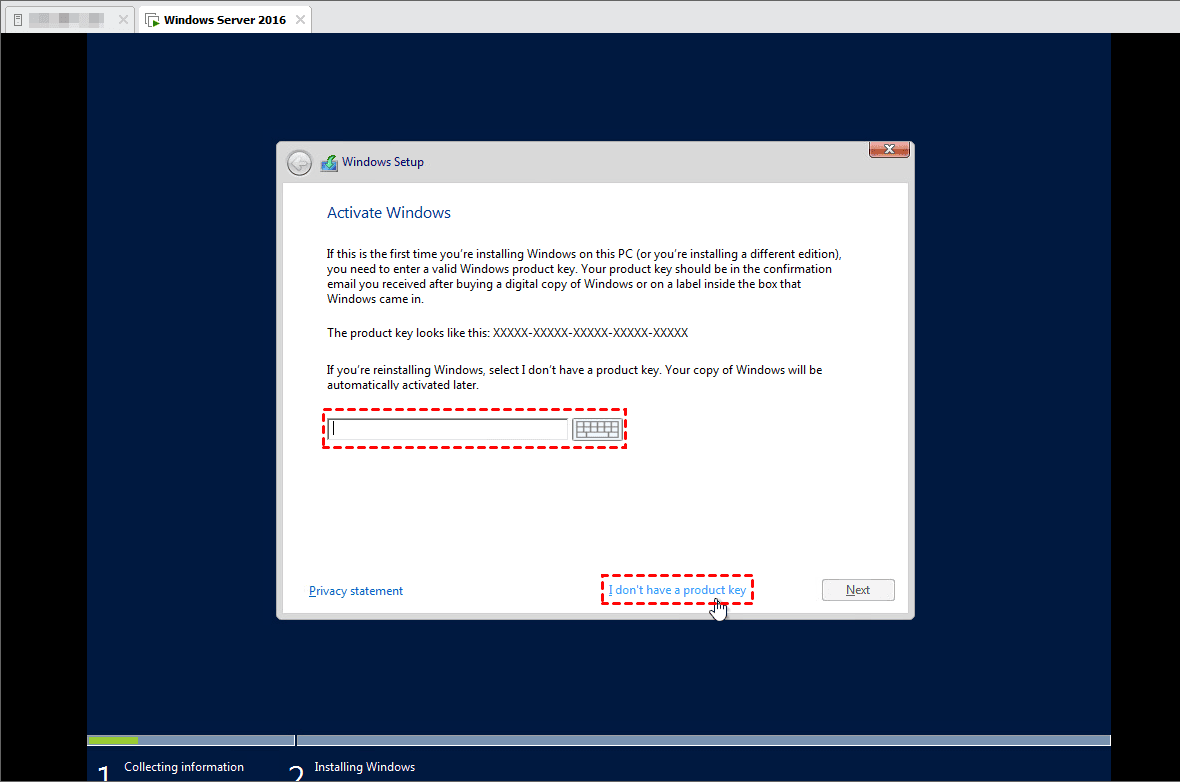
11. Provide a product key to activate windows. If you don’t have one, click I don’t have a product key.
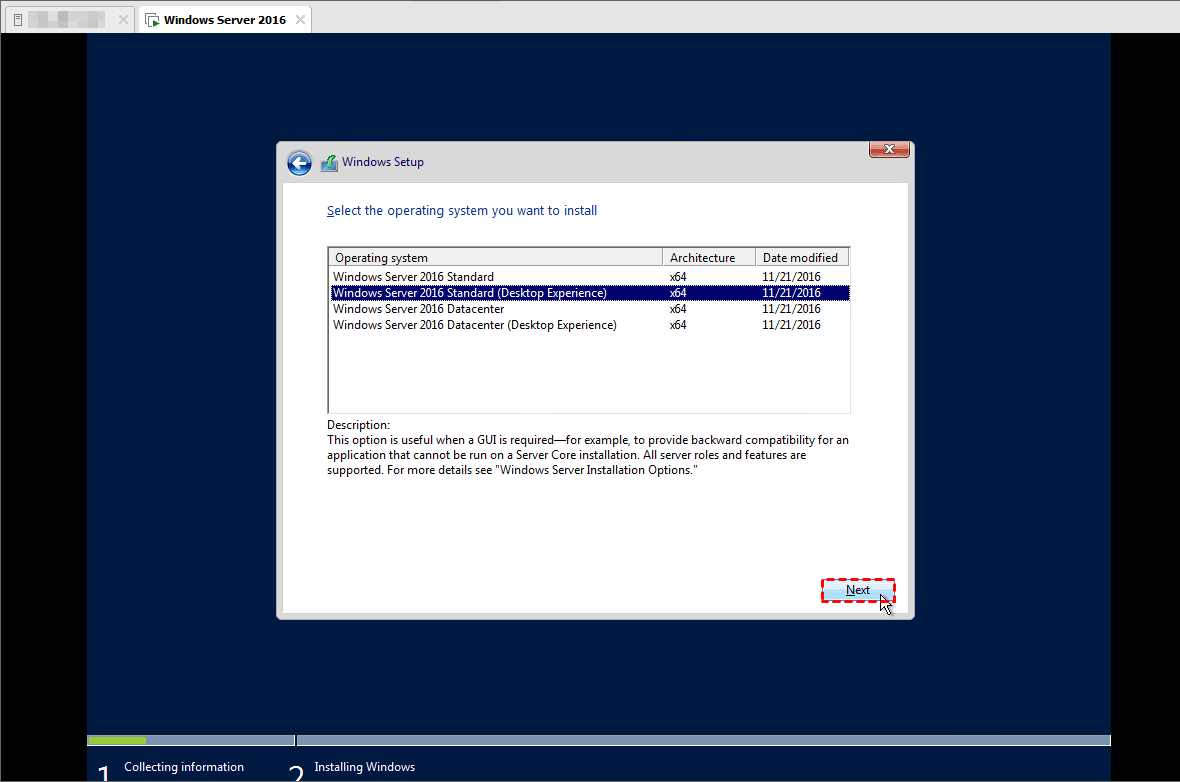
12. Select a Windows Server 2016 edition you want to install.
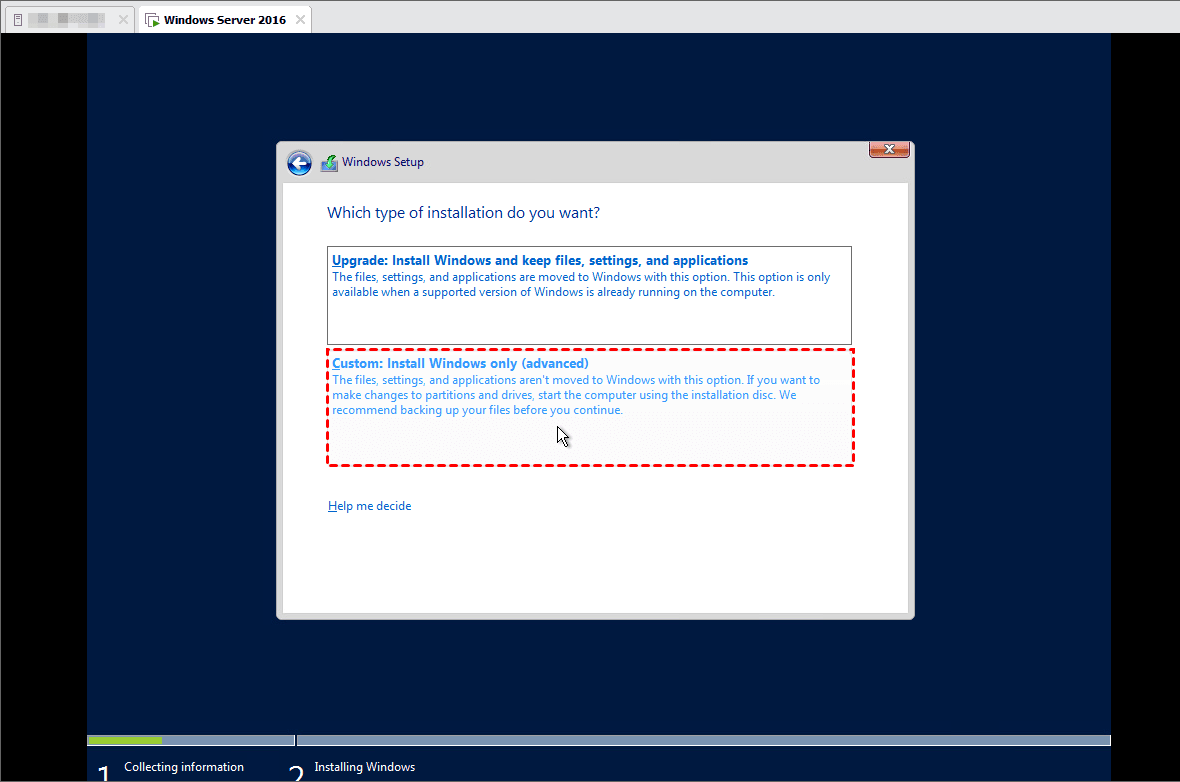
13. Select installation type as Custom: Install Windows only (advanced).
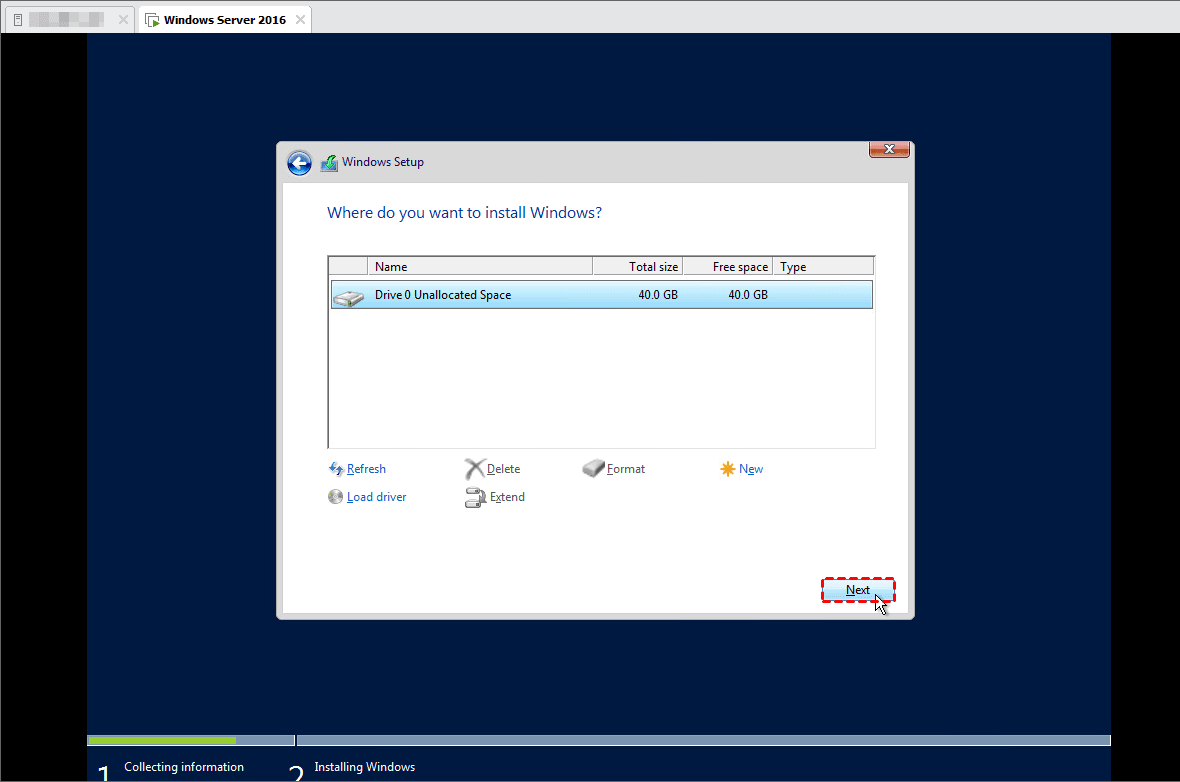
14. Specify a drive to install Windows Server 2016. Click Next.
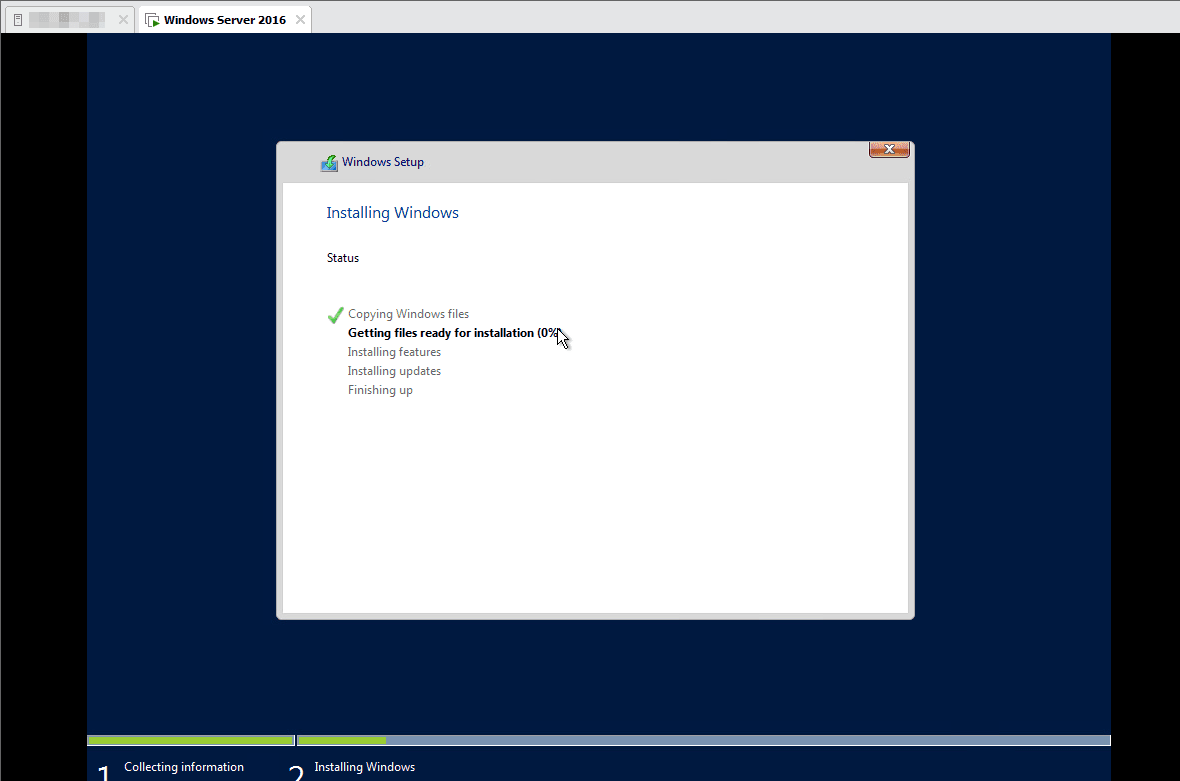
15. Now Windows Server 2016 is installing on this virtual machine. Wait for the process completed and then provide administrator information, you are free to use Windows Server 2016 on VMware ESXi virtual machine.
How to install Windows Server 2016 on Hyper-V virtual machine
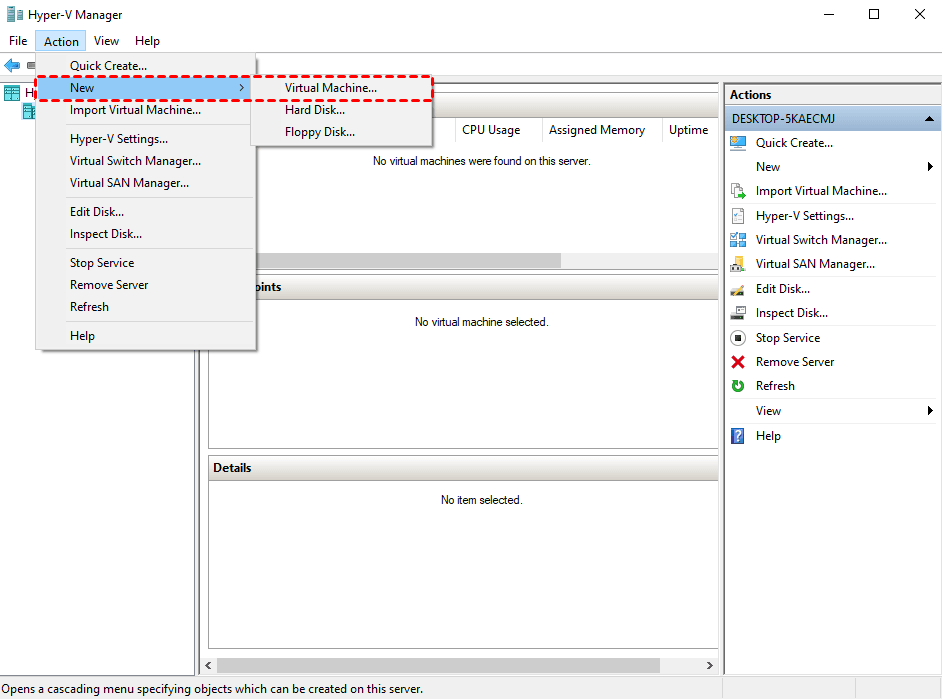
1. Launch Hyper-V Manager, click Action > New >Virtual Machine… to open the wizard. Click Next to continue.
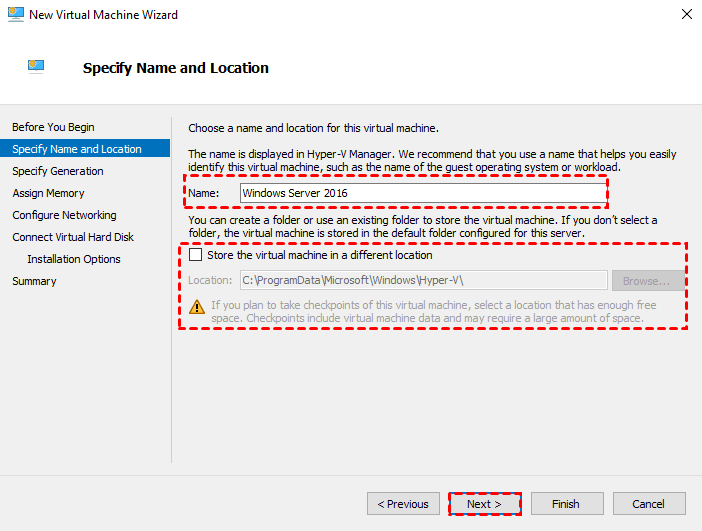
2. Specify a Name for the virtual machine. And by checking Store the virtual machine in a different location option you can change the default storage. Click Next.
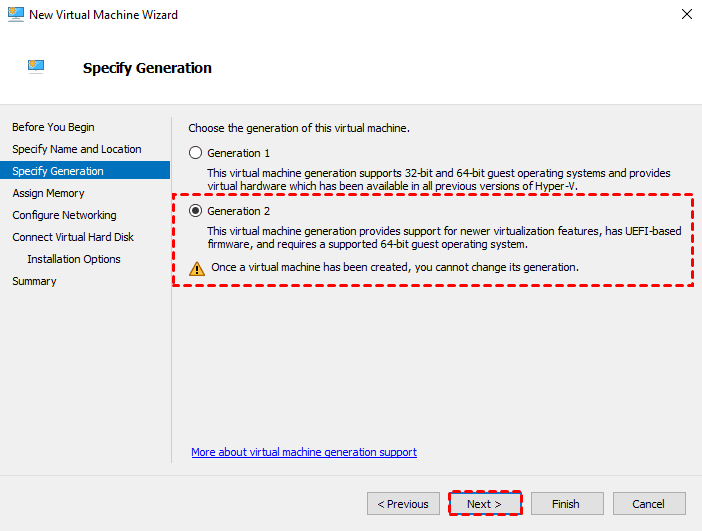
3. Specify the generation of the new virtual machine as Generation 2. Click Next.
Tip:
It is recommended to create a Generation 2 VM to install Windows Server 2016 for the following reasons:
a. Higher security with UEFI Secure Boot and Trusted Platform Module
b. Larger boot volume that up to 64 TB (up to 2 TB on Generation 1 VM)
c. Higher performance provided by higher CPU and maximum memory
d. More boot options such as PXE boot with synthetic network adapter, and boot from SCSI disk
Actually, if you are installing a 64-bit operation system, it is better to select Generation 2.
However, under the following cases you need to select Generation 1.
a. Running 32-bit operating systems (not supported by Generation 2)
b. Need to use COM ports and virtual floppy disks
c. Need to migrate or backup virtual machines to Azure, Windows Server 2008 or 2012 host.
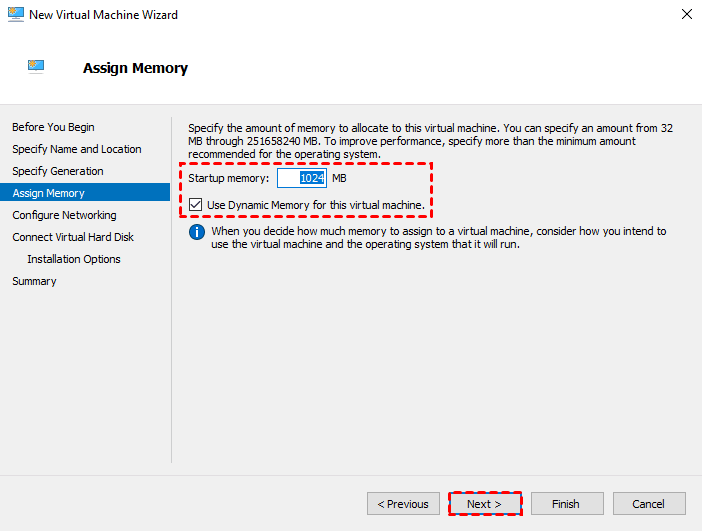
4. Assign memory for the virtual machine. By checking Use Dynamic Memory for this virtual machine option, Hyper-V will automatically reassign RAM of virtual machines as demand changes. Click Next.
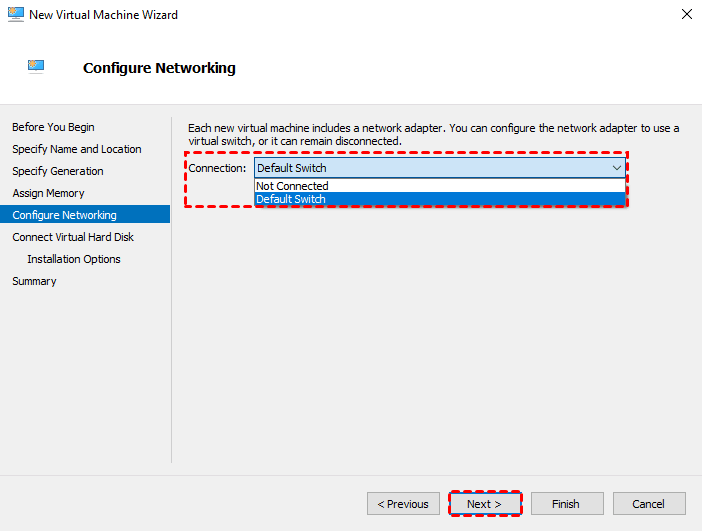
5. Configure networking for this virtual machine. Click Next.
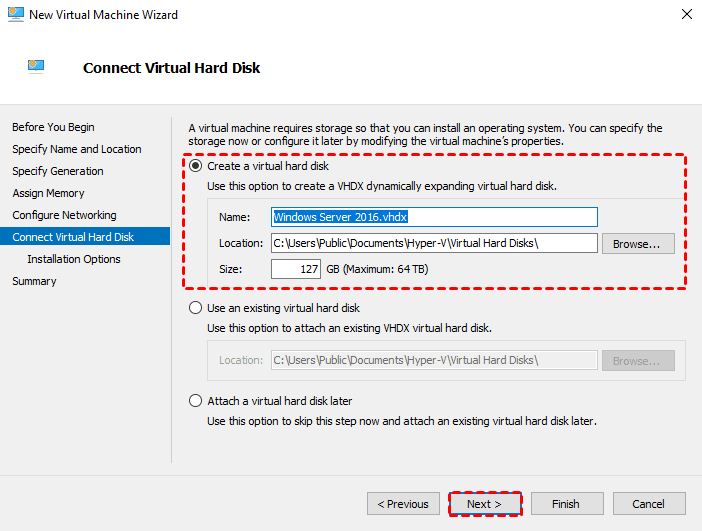
6. Select Create a virtual hard disk option and specify a Name, Location, and Size for the disk. Click Next.
Note: By default, Hyper-V creates thin-provisioned disks that of lower performance than thick disks. If you want to create a thick disk you can select Attach a virtual hard disk later option.
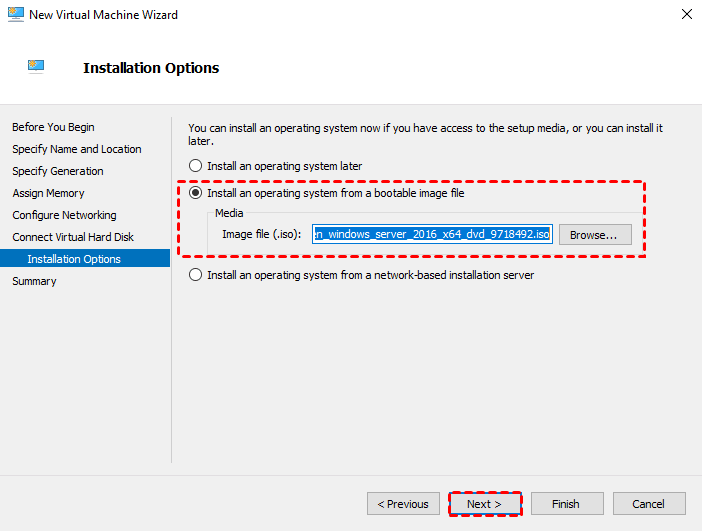
7. Select Install an operation system from a bootable image file option and click Browse… to specify the iso file you prepared. Click Next.
8. Review the settings and click Finish to create the virtual machine.
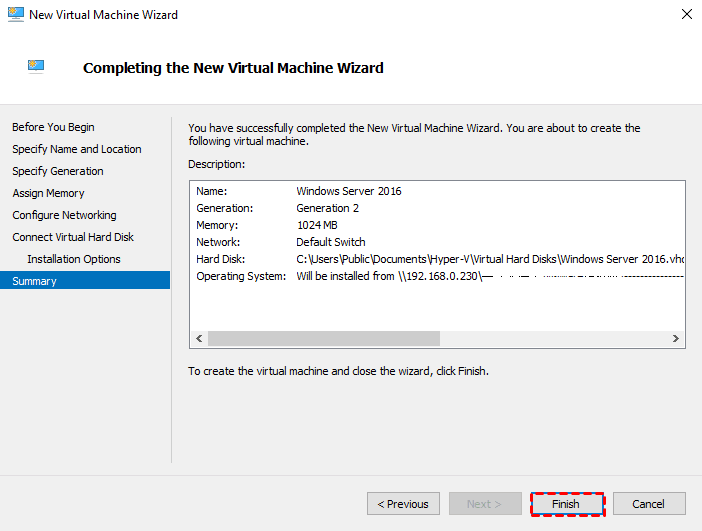
Now the virtual machine is successfully created. Right-click on the VM name and select Start you can install Windows Server 2016 on this Hyper-V virtual machine.
Later on, if you want to switch your VM environment between Hyper-V and VMware, but find it laborious to recreate a new VM from scratch, you can also convert Hyper-V to VMware, or vice versa.
Backing up your virtual machines to ensure data security (Free)
After successfully install Windows Server 2016 on virtual machine, the next thing you need to do is backing up your virtual machines to ensure data security. Except for backing up once, scheduling a regular backup strategy can ensure that backups are updated timely and retain as many restore points as possible.
Here I introduce you 2 professional and free virtual machine backup software - AOMEI Cyber Backup & AOMEI Backupper.
Way 1. Use AOMEI Cyber Backup to create a centralized VM backup
AOMEI's agentless VM backup has been transformative for the struggling traditional backup tools. It seamlessly and reliably secures your vital data, all managed effortlessly through a centralized console. Even in the face of potential IT system hiccups during working, your critical data remains unscathed. It can not only provide secure VM backup, but also the Microsoft SQL database backup and Windows Server backup.
✦ Easy-to-use VMs Backup: with 3 easy steps you can create a complete backup task of VMs on the host.
✦ Flexible Schedule: create backup task with a flexible schedule to autorun it daily, weekly, monthly.
✦ Restore Entire VM: restore the entire VM from any history backup versions easily and securely.
✦ Supported Versions: VMware ESXi 6.0 and all later versions, Windows Server 2012 and all later versions.
✦ Role Assignment: allows one administrator to create sub-accounts with limited privileges, effectively avoid errors caused by others’ mis-operations.
Next I will demonstrate how to quickly backup VMs using AOMEI Cyber Backup. You can click the following button to download the perpetual free edition:
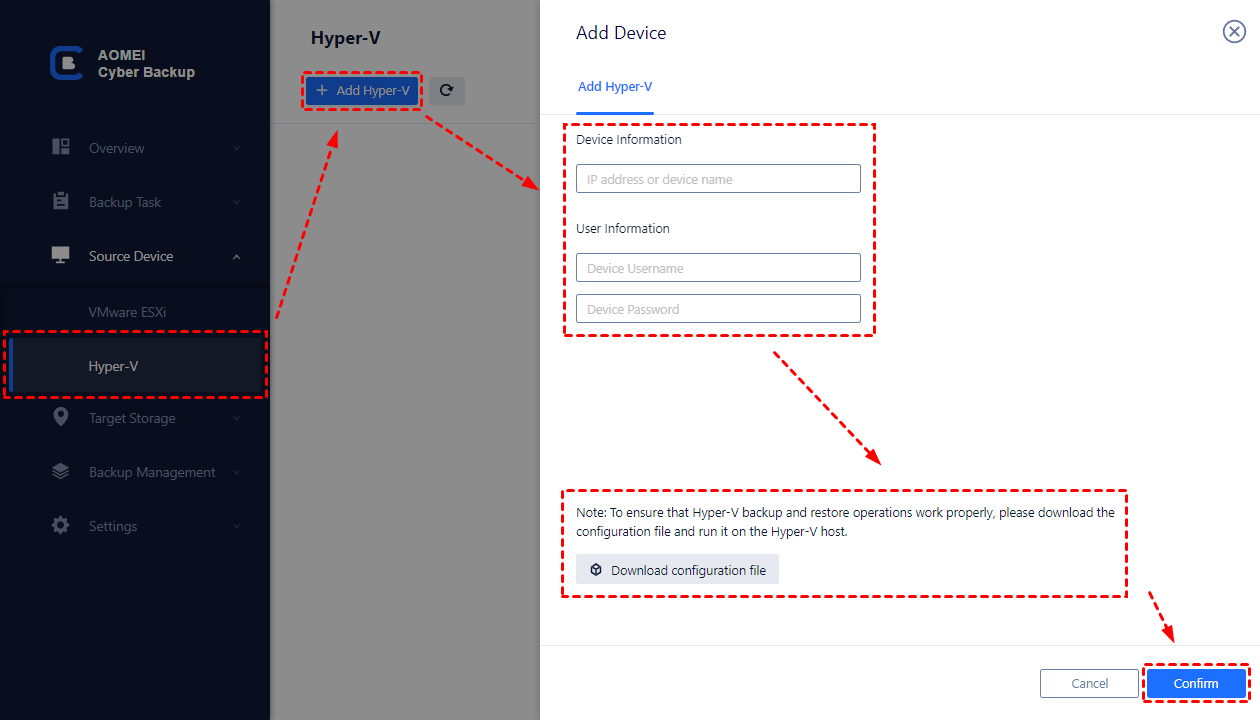
1. Bind devices: Access to AOMEI Cyber Backup web client, navigate to Source Device > Hyper-V > + Add Hyper-V to add a host. And then click … > Bind Device.
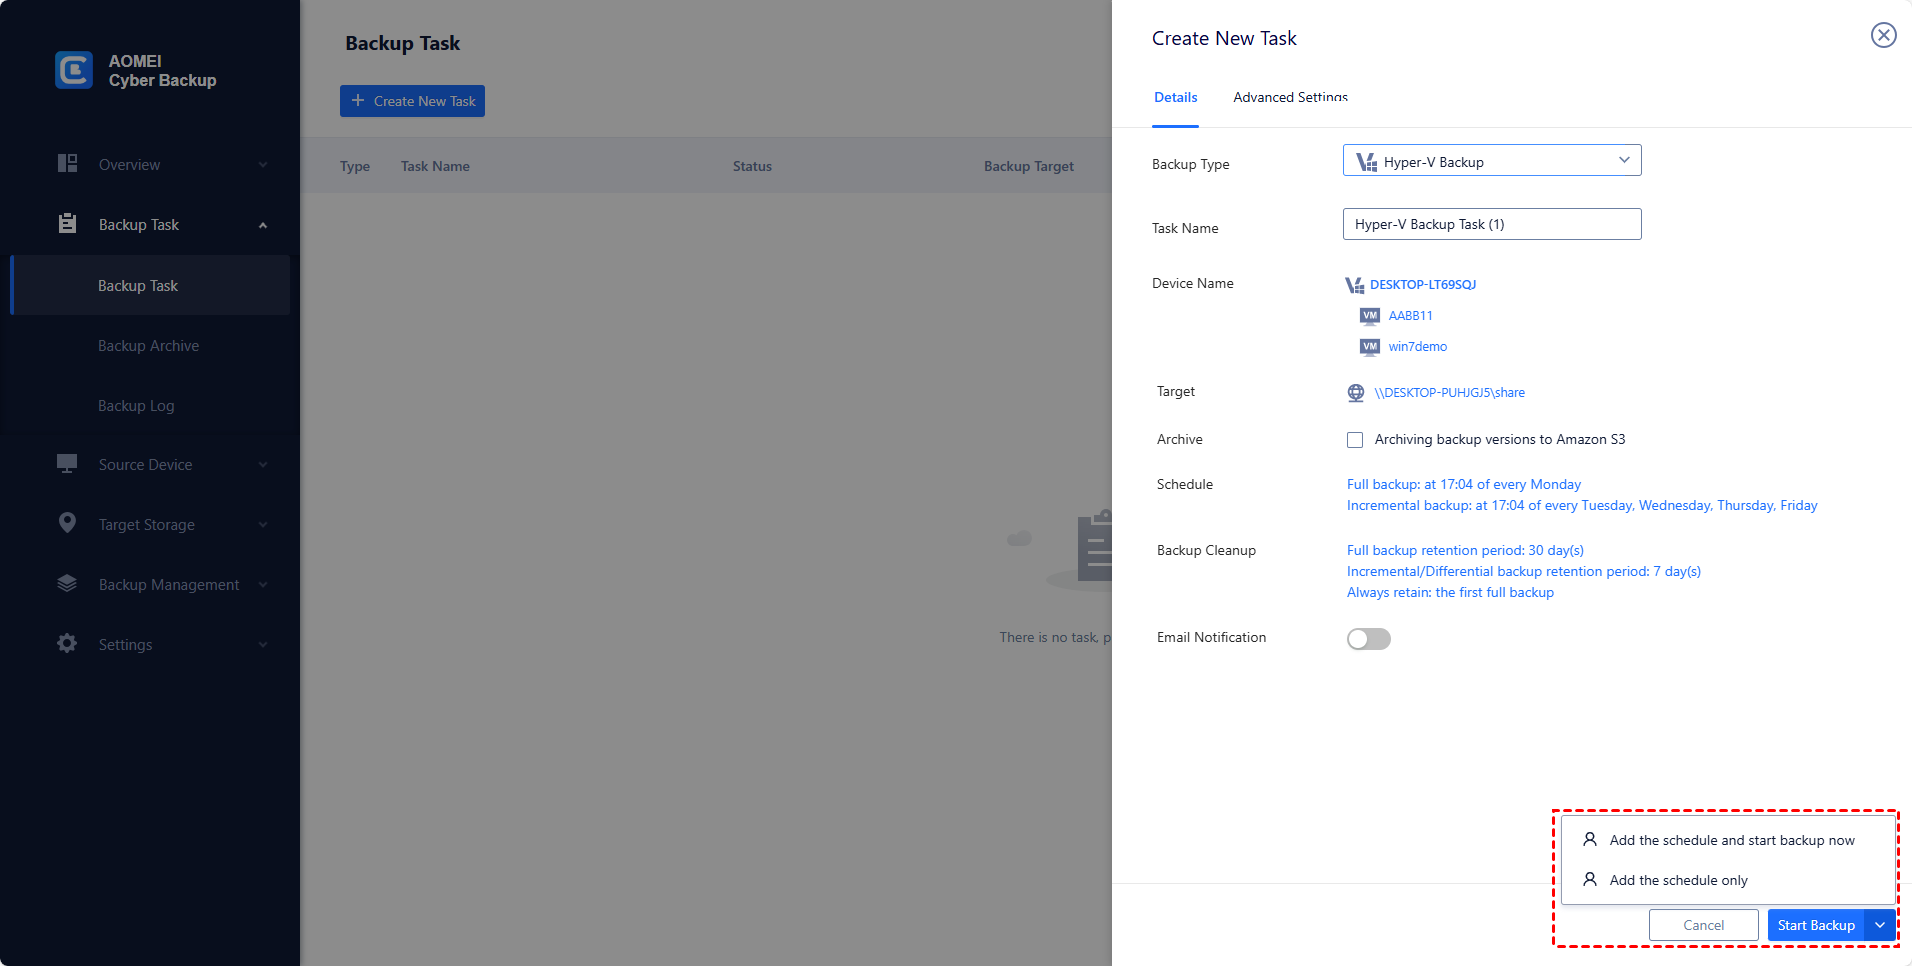
2. Create backup tasks: Navigate to Backup Task > + Create New Task, and set Task Name, Backup Type, Device, Target, Schedule.
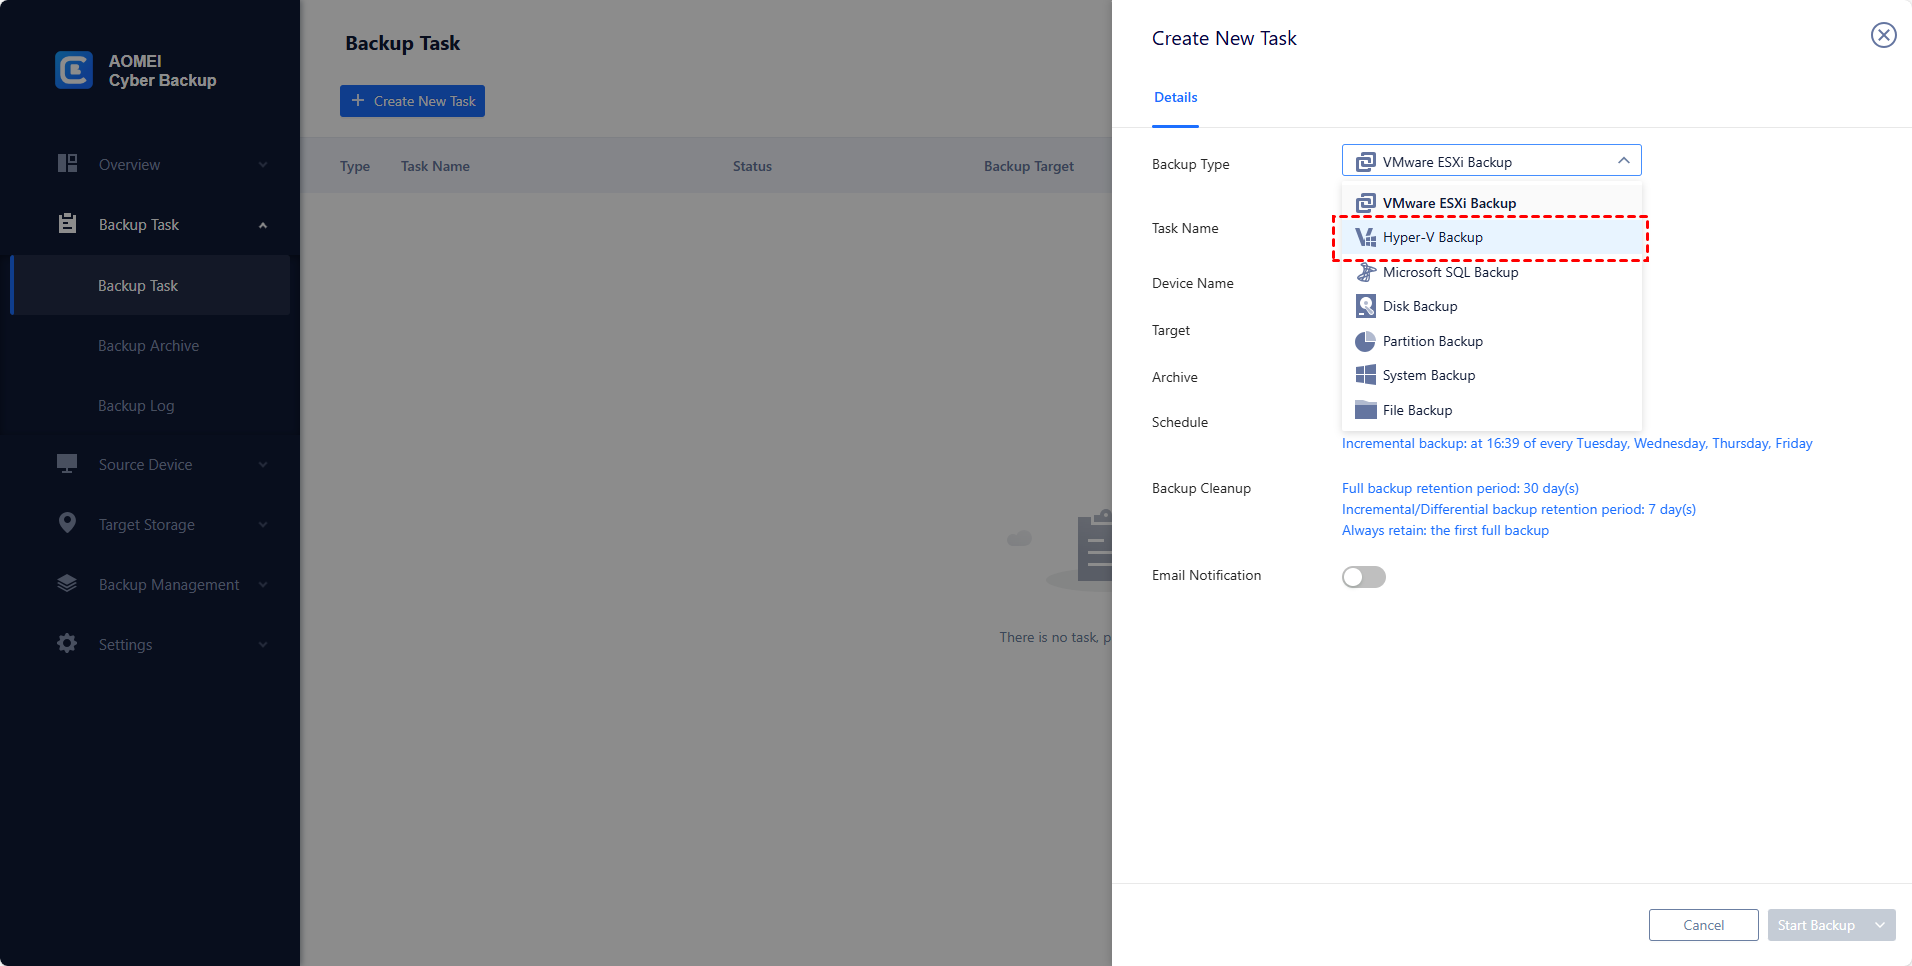
- Device: select the VMs on the host to backup.
- Target: selecting to back up to a local path, or to a network path. Used paths will be saved in Favorite Storage for handy selection.
- Schedule: choosing to perform full or incremental backup, and automate execution daily, weekly or monthly according to the frequency you specified.
- Cleanup*: specifying a retention period, and the old backup files that exceed the period will be automatically deleted. This is an advance feature which you can upgrade to enjoy.
3. Start Backup: You can select Add the schedule and start backup now, or Add the schedule only.
Way 2. Use AOMEI Backupper for free VM backup
AOMEI Backupper Standard can be installed on a virtual machine to back up the operating system, configuration files, installed programs, personal data, etc. With it, you can backup disk to physical computer or other computers via network. Also, you can backup virtual machine to external hard drive, such as, USB flash drive, HDD, or SSD.
You can use AOMEI Backupperto backup your VMs as physical machine or backup the VMDK files. For example, we are going to create a File Backup of your virtual machine.
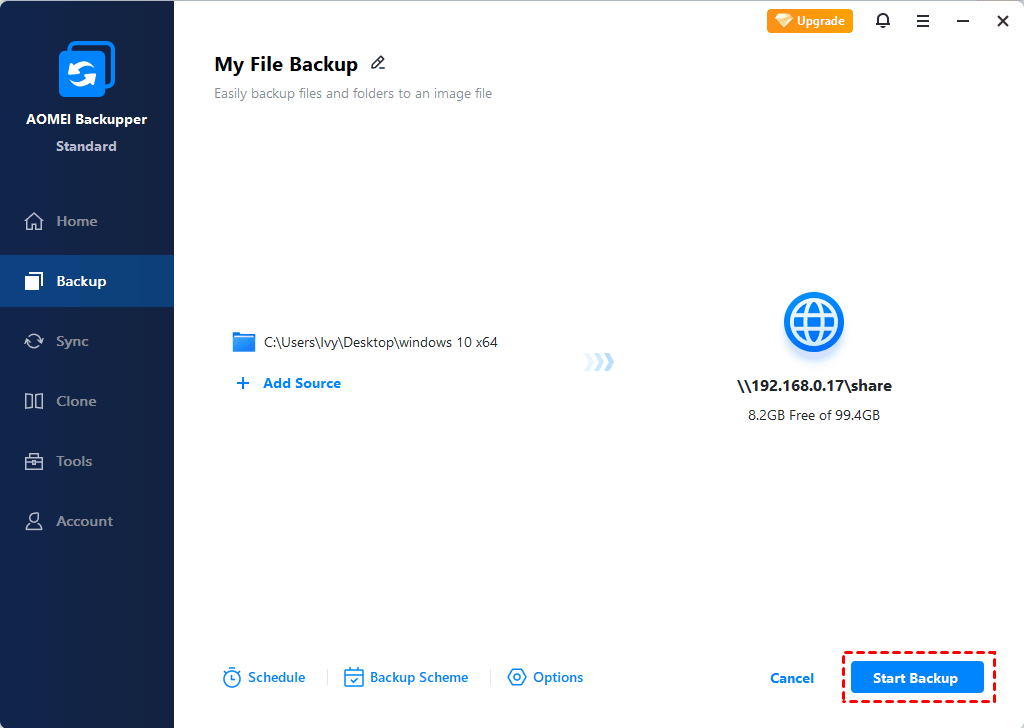
1. Launch AOMEI Backupper Standard. Then, click Backup and File Backup in turn.

Step 2. Click Add Folder to select the folder contains all items of your virtual machine.

Step 3. Select a destination path for your VM files. It can be any detected storage in Windows.
Step 4. Set schedule backup and click Start Backup.
Summary
Using virtual machines, you can run multiple different operating systems in application windows. In this article I introduced how to install Windows Server 2016 on virtual machine step by step. The same steps also apply to other versions such as Windows Server 2019 installation, or Windows Server 2022 installation.
After the installation, now you can work with Windows Server 2016 freely. But please remember to perform virtual machine backups regularly if you don’t want to lose your data.

