


How to Boot VM From ISO In Hyper-V and VMware
In Hyper-V or VMware environment, do you know how to fast install guest operating system and boot a virtual machine from ISO image file? By following the steps outlined in this guide, you can ensure a smooth and successful setup in VMware and Hyper-V.
By Crystal / Updated on July 30, 2024
Boot virtual machine from ISO image file
ISO image file is an archive file format which contains an exact copy of all the contents available on a disc. It is similar to a .ZIP file but without file compression. When you create a virtual machine, it’s easy to install the operating system by connecting to ISO image file. So this article will describe how to boot VM from ISO in Hyper-V and VMware Workstation. Meanwhile, it offers you solutions of unable booting VM from ISO.

How to boot Hyper-V VM from ISO
To boot VM from ISO in Hyper-V, try the following steps:
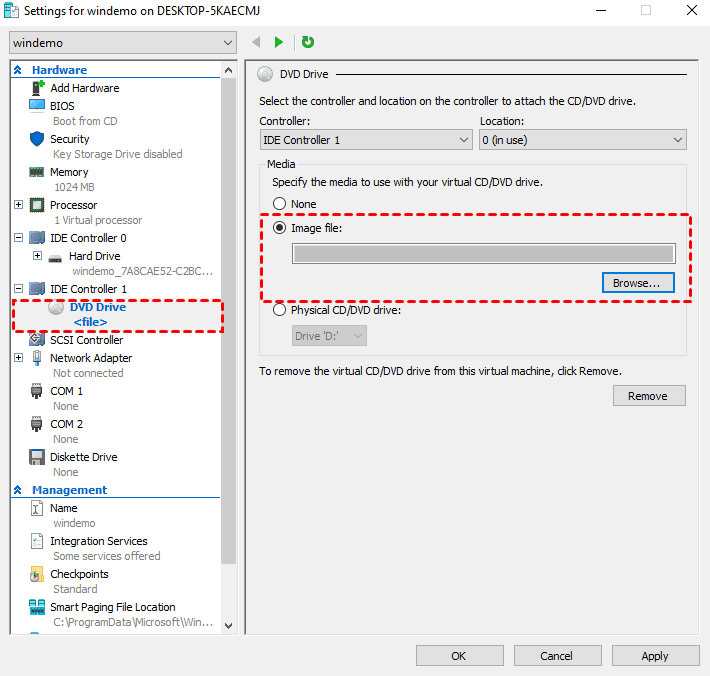
1. Right-click the virtual machine >> Settings.
2. Access to Hardware >> DVD Drive. On the right side, under Media pane, select Image file. Then click Browse to locate the .iso file and click Apply.
For the Generation 2 Hyper-V virtual machine, it’s possible to fail to boot VM from ISO file, which can be caused by various factors.
1. The ISO file has been modified (for example to inject drivers), so ISO doesn't have the EFI boot loader.
2. The ISO file is stored in a shared folder. You can try moving the ISO file to a local physical drive on the host machine, and note the permissions of this folder or file.
3. Try disabling EUFI in the BIOS settings (UEFI boot issue).
Navigate to Hardware, then deselect Secure Boot. Then change Boot order. Finally, go to create a new SCSI controller with DVD drive.

4. If none of the above solutions can boot Hyper-V VM from ISO, it’s recommended to you to redownload copy of the ISO again.
How to boot VMware Workstation VM from ISO image
This part will introduce how to boot a VM from ISO image in VMware Workstation:
1. Download ISO image file and save it at the location accessible to your host.
Tips: For best performance, placing this image on the host computer's hard drive. However, to make the ISO image accessible to multiple users, you can also place the ISO image on a network share drive (Windows) or exported filesystem (Linux). If your OS install spans multiple discs, you need to use an ISO image of each disc and place them all of them in a location accessible to the host.
2. Open VMware Workstation, click File >> New Virtual Machine.
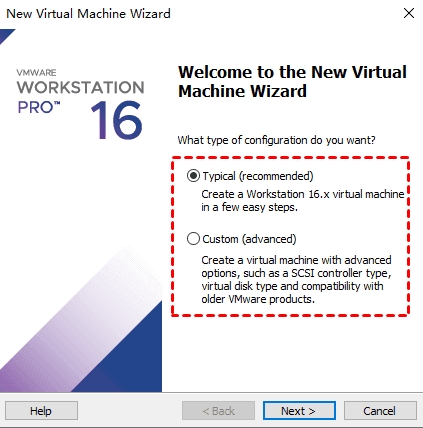
3. Select the type of configuration such as Typical or Custom.
Typical: accept the recommended configurations such as processors, RAM, and disk controller type.
Custom: configure these options by yourself.
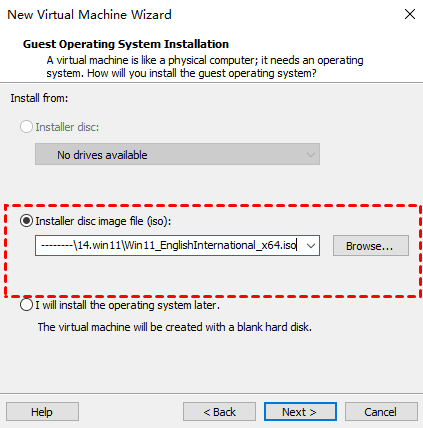
4. On the Guest Operating System Installation window, select Installer disc image file(iso), then click Browse to find the ISO image file at your location.
5. After configuration, review the information and deselect Power on this virtual machine after creation. Click Finish to close the window.
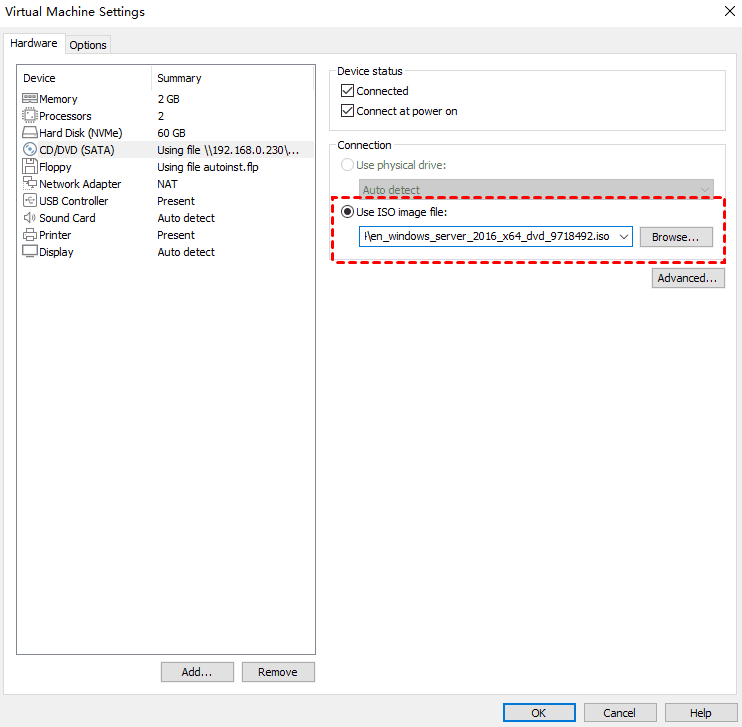
6. Go to edit the settings of the virtual machine so that its virtual CD/DVD device is configured to use the ISO image instead of the physical CD/DVD drive:
- VM >> Settings >> Hardware >> CD/DVD drive.
- On the right side, select Connected, Connect at power on and Use ISO image file, then click Browse to locate the file.
- Click OK.
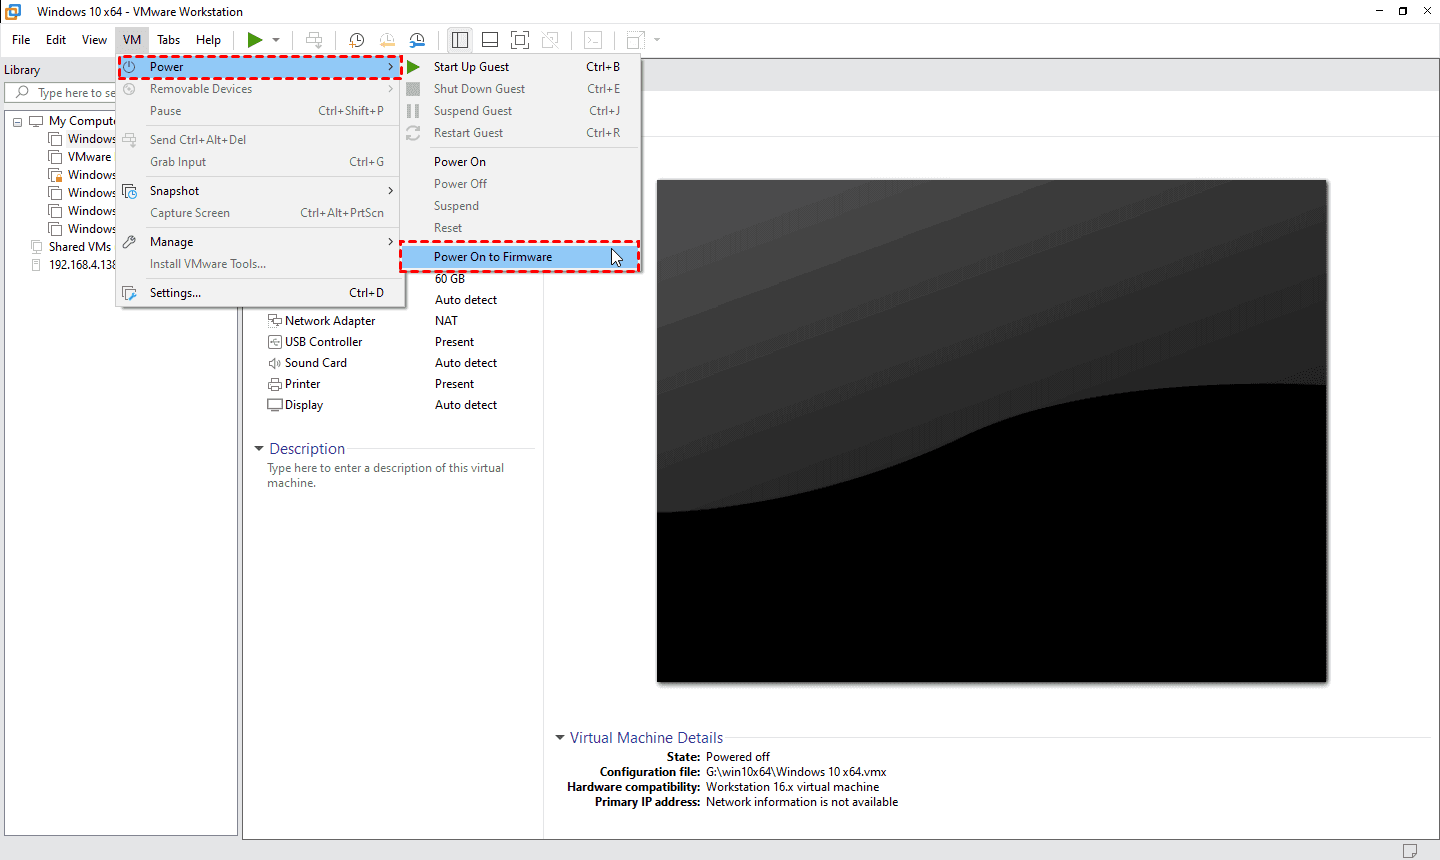
7. Back to VM >> Power >> Power On to Firmware that allows you to boot a virtual machine into BIOS settings.
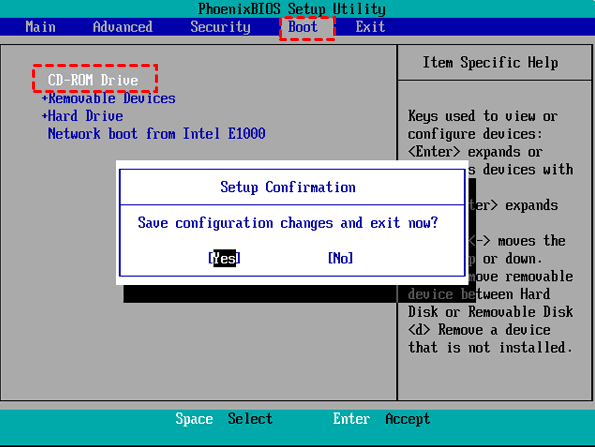
8. On the opened BIOS screen, select Boot >> CD-ROM Drive, press F10 and Enter to save the configuration changes.
This is how to boot VMware VM from ISO. Although it is very convenient to change the settings, you should know what you are doing before making any big change. Otherwise, you will end up corrupting your guest OS. So backup your important data before changing the settings.
Security tips: Back up your VMs before major operations
When running a virtual machine, you cannot predict what will happen next, especially when you are modifying the important settings, which may lead to serious system crashes or data loss due to accidental human errors. This situation will cause huge financial losses that cannot be estimated.
For example, when you boot VM from ISO, you need to change the configuration settings in BIOS, which is risky for the system. So, in order to protect VM data and business security, backup is necessary.
Here I will introduce a free virtual machine backup solution, AOMEI Cyber Backup. It offers you a quick and reliable data insurance. With it, you can benefit from:
Secure VMware & Hyper-V Backup: support both paid and free versions of VMware ESXi 6.0 and Hyper-V host (2012 and above) and seamlessly protect the whole VM and reduce business risk.
Automatic Backup: schedule automated backups based flexible backup methods (full/incremental/differential) and frequency (daily/weekly/monthly).
Fast Disaster Recovery: one-click to restore entire VM from any backed up points without any complicated reinstallation or configuration.
Centralized Backup: add multiple virtual machines on VMware / Hyper-V host to a central console, and back them up at once.
You can download the perpetual free edition and proceed with the VMware/Hyper-V VM backup:
*You can choose to install this VM backup software on either Windows or Linux system.
Free backup for VMware and Hyper-V virtual machines
1. Download and install the freeware, click Add Devices to add Hyper-V, vCenter or Standalone ESXi host to your central console.
Tips: The following steps are based on VMware ESXi device.

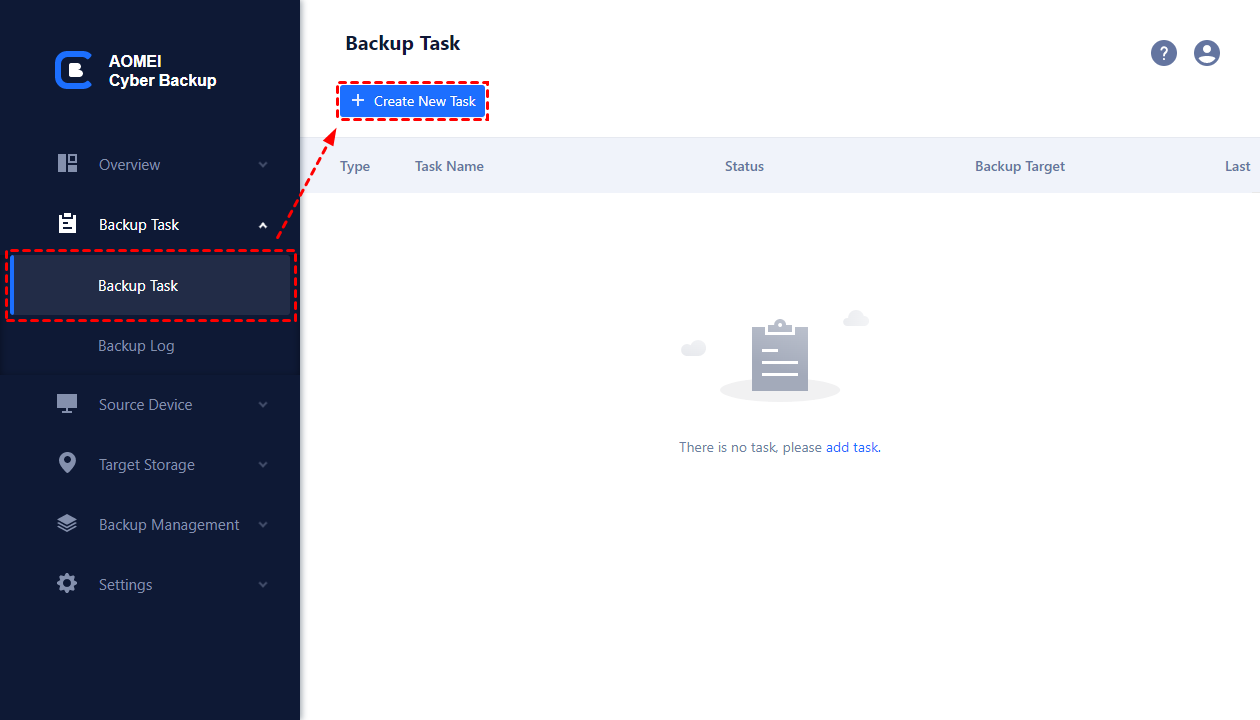
2. Click Backup Task >> Create New Task.
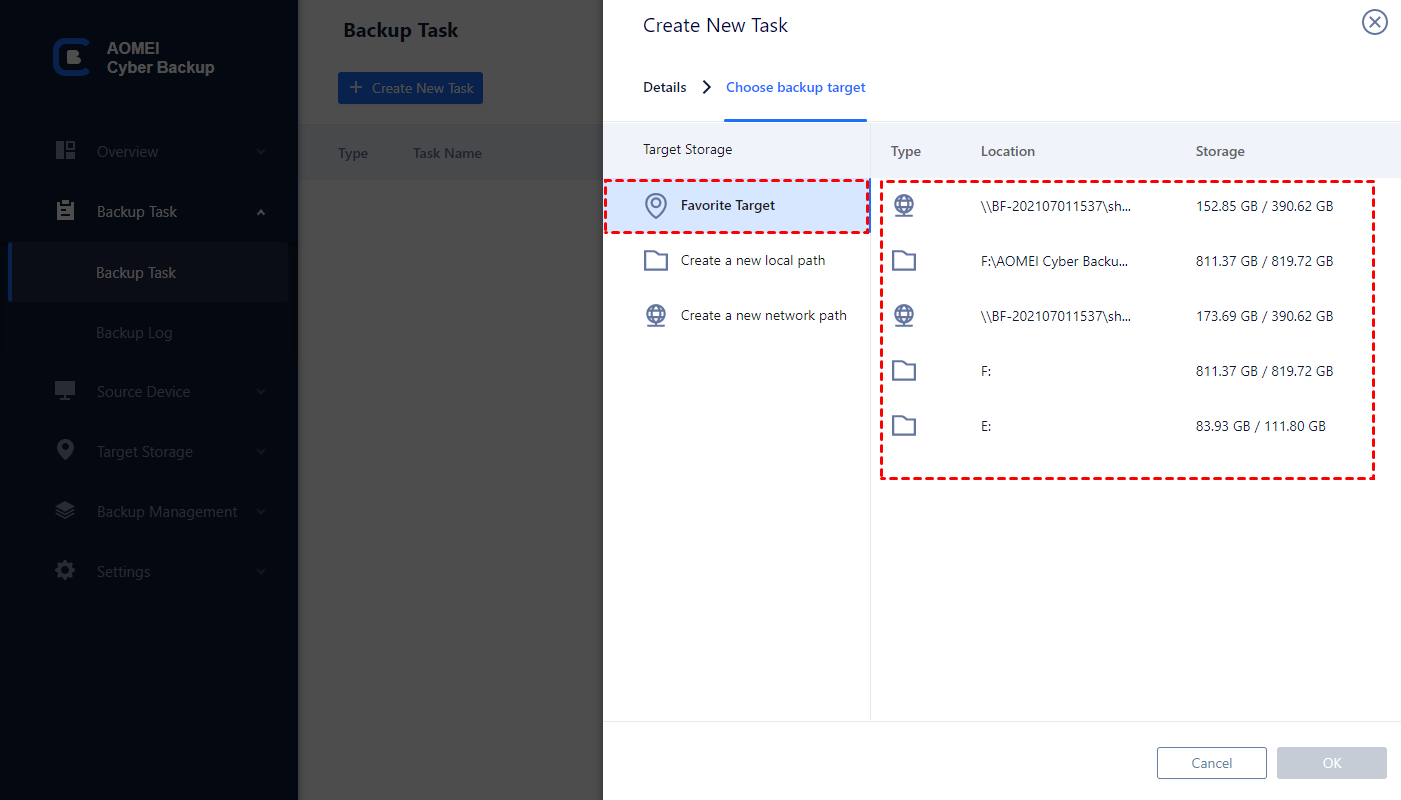
◈ In the opened wizard, select virtual machines you want to backup and specify a location to store the VM backup files such as local or network.
Tip: If you also want to save backups on a Cloud storage, AOMEI Cyber Backup currently supports archiving backup to Amazon S3. You can check "Archiving backup to Amazon S3" on the task creation interface and add your S3 storage.
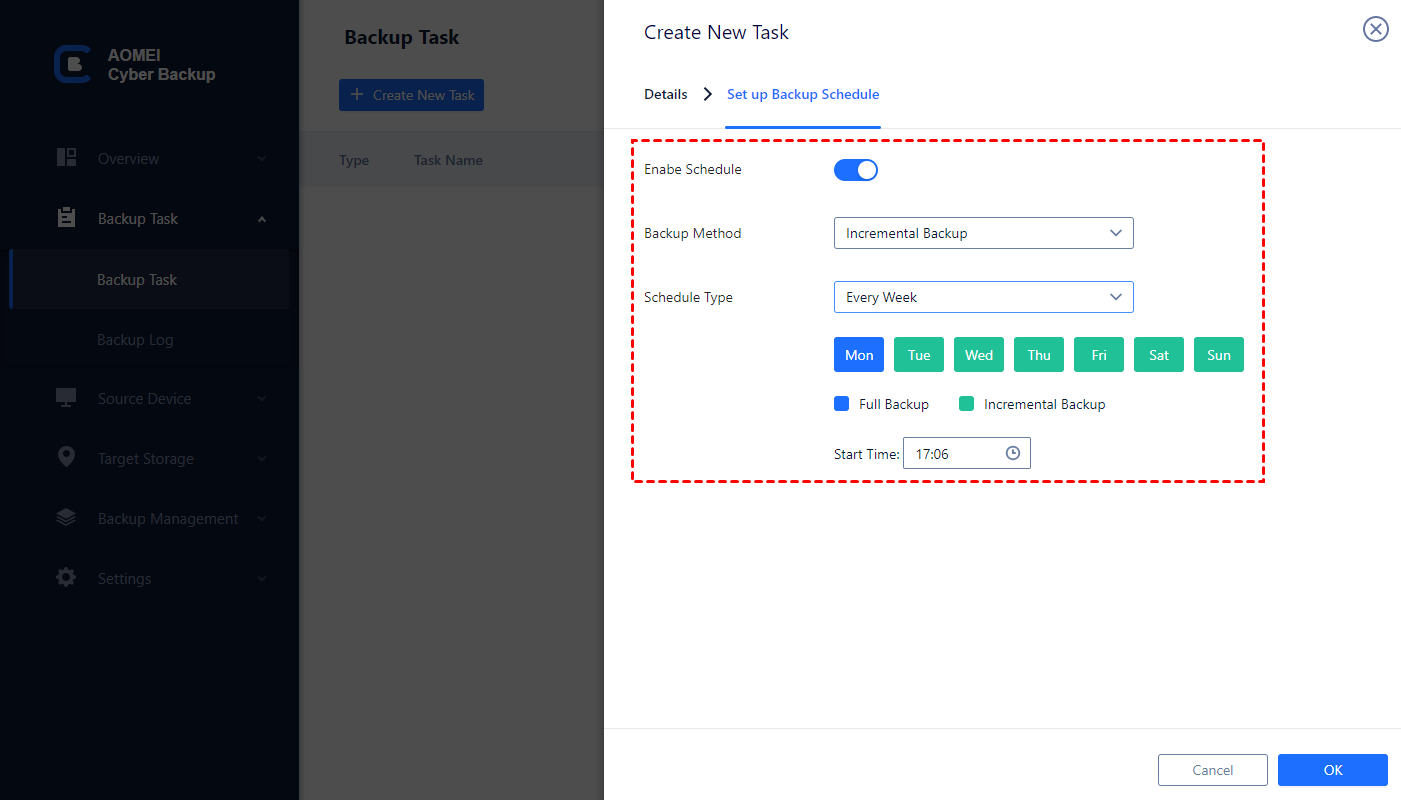
◈ On Schedule, set up backup method (full / incremental / differential backup) and type (daily / weekly / monthly).
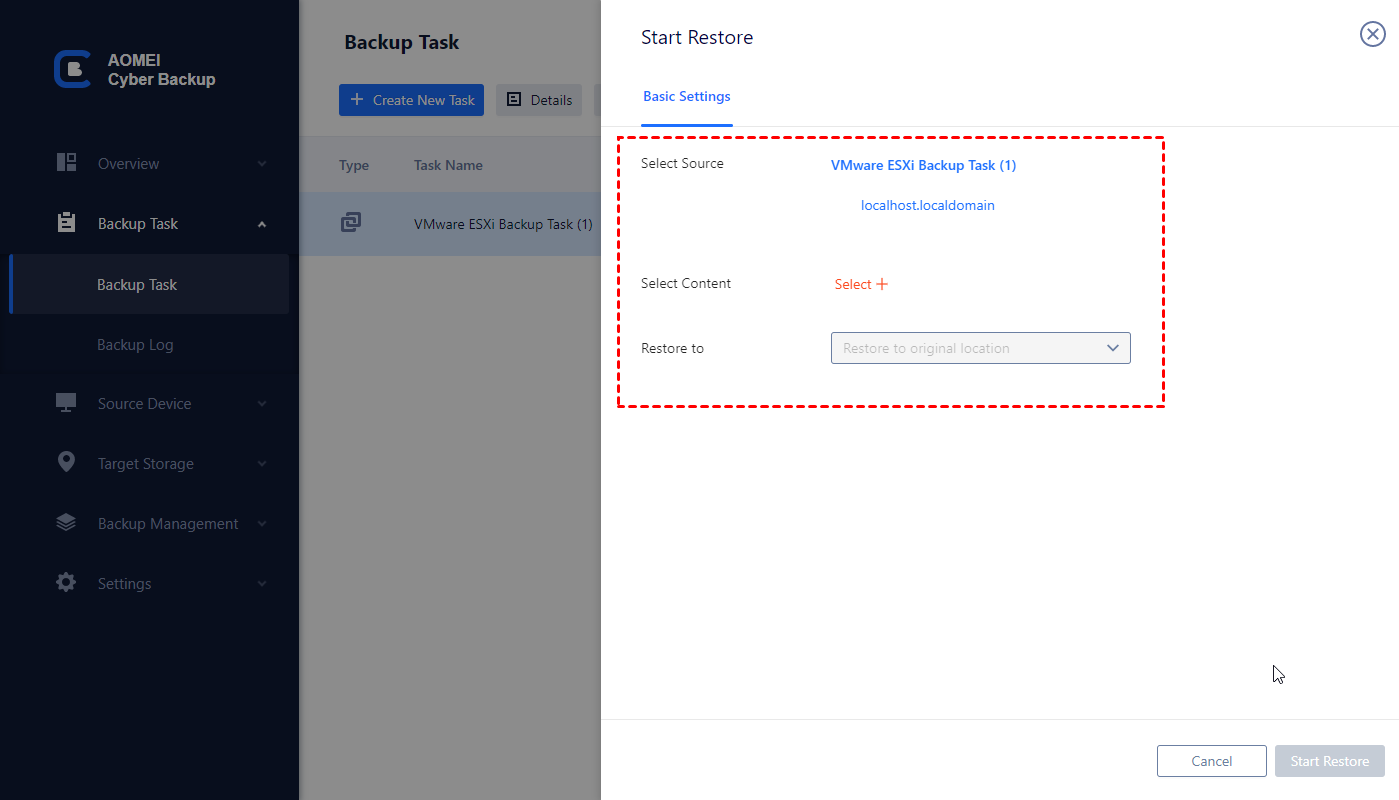
3. Restore: click Restore. It allows you to restore from any backed up point and quickly restore the entire VM to usable state.
✨While the Free Edition has covered most VM backup needs, you can also upgrade to enjoy:
Batch VM backup: Directly backup large numbers of VMs managed by vCenter Server or on standalone ESXi hosts.
Backup cleanup: Set up a retention policy to delete the old files automatically, thus save your storage space and extra hardware costs.
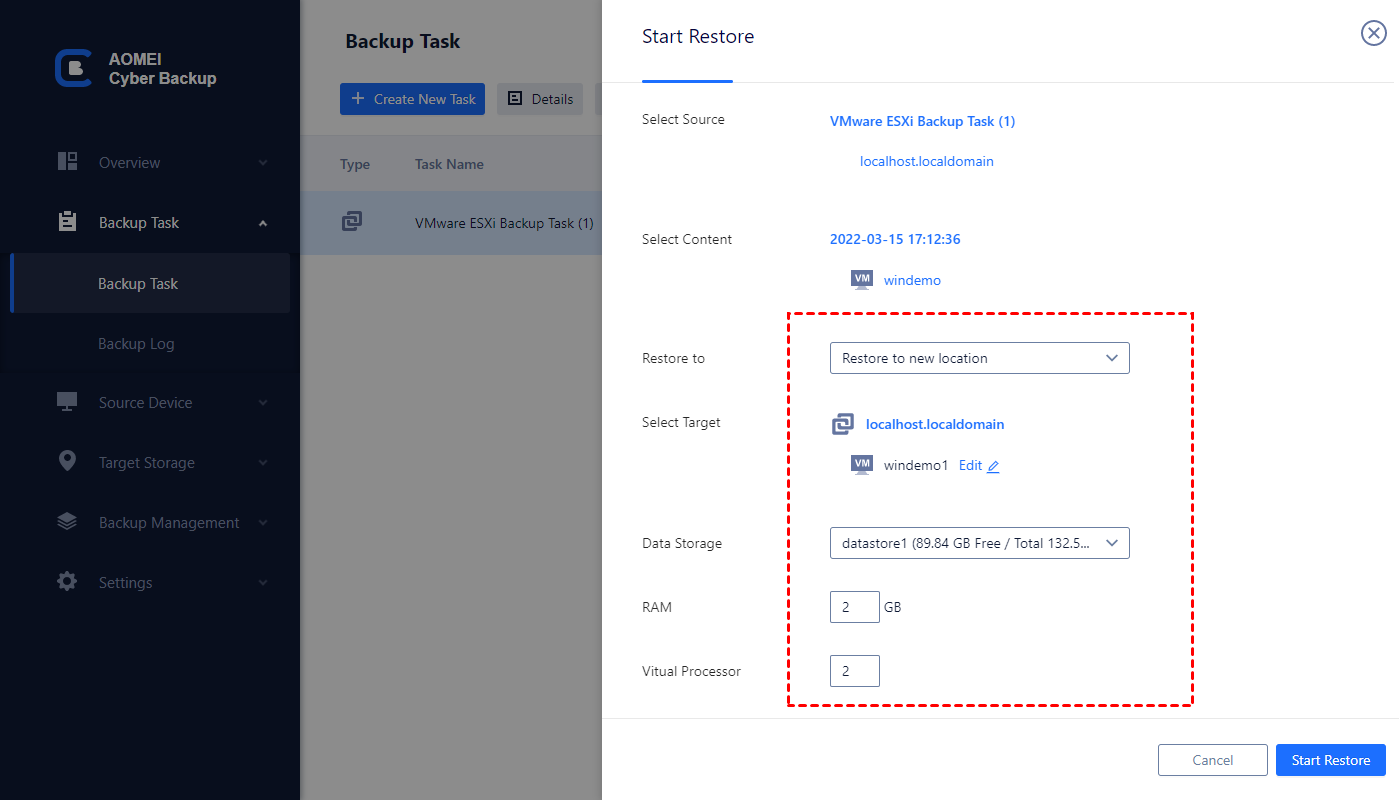
Restore to new location: Create an identical new VM directly from the backup. You can use this to clone the VM in the same or another datastore/host without complicated configuration.
Summary
Booting a VM from an ISO file is a straightforward and efficient way to install operating systems and deploy applications. This article introduces how to boot VM from ISO in VMware and Hyper-V. When changing the settings, please pay much attention to system and data security.

