


2 Efficient Ways to Compact VHDX in Hyper-V
If you are using Hyper-V dynamically expanding disks, you may need to compact VHDX to free space. In this article, I will introduce 2 efficient ways to do this.
By Crystal / Updated on June 4, 2026
Why compact VHDX file?
It is recognized that Hyper-V dynamically expanding disks are convenient for they can grow as needed. Compares to fixed virtual hard disks, it provides better space utilization, however at the same time, more disk fragmentation.
In fact, once the dynamically expanding disks have grown, they will never free up any space unless you manually compact or shrink it. If you delete files from a dynamically expanding disk, you are only freeing up space within the virtual hard drive, instead of the physical VHDX file.
Therefore, to better work with Hyper-V dynamically expanding disks, here I will introduce 2 efficient ways for Hyper-V compact VHDX files. Before you start, to avoid unexpected data loss, please remember to back up Hyper-V VMs in advance.
Note: You cannot compact fixed virtual hard disks.
What is the difference between compact and shrink VHDX
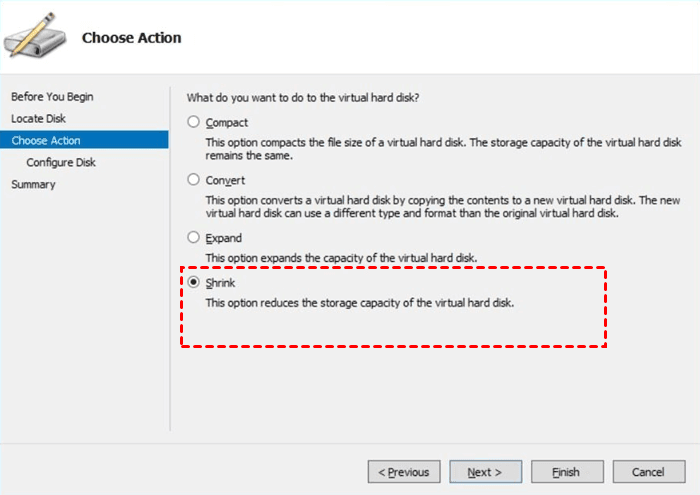
If your VM storage capacity is not enough, you can expand Hyper-V disks. But when a virtual hard disk expands to its maximum size, thus consuming a lot of physical storage space, there are 2 common options to choose from: Compact and Shrink.
● Compact VHDX: Reduces the physical size, but not the logical size of the VHDX file. It only compacts the file size of a VHDX.
● Shrink VHDX: Reduces the logical size of the VHDX file. It reduces the total storage capacity of the VHDX.
You should open the Edit Disk wizard in Hyper-V Manager to shrink a virtual disk in Hyper-V.
Important: backup Hyper-V VMs to avoid accidental data loss
Before you start cleaning the virtual machine, taking backups of your VM data is a reliable insurance to avoid unexpected data loss.
Here I introduce you to a free Hyper-V backup software -- AOMEI Cyber Backup. It offers you the following benefits.
✦ Agentless Backup: create complete and independent image-level backup for Hyper-V VMs.
✦ Multiple Storage Destinations: backup to local or network share destinations.
✦ Automated Execution: create backup schedules to automate virtual machine protection.
✦ Perpetual Free: you can use AOMEI Cyber Backup Free Edition with no time limit.
AOMEI Cyber Backup supports Hyper-V in Windows 8/8.1/10/11, Windows Server/Microsoft Hyper-V Server 2012 R2 and later versions.
Next, I will show how to quickly create a Hyper-V VM backup task. You can click the following button to download the freeware.
*You can choose to install this VM backup software on either Windows or Linux system.
2 easy steps to backup Hyper-V VM
Note: The first time you use AOMEI Cyber Backup to back up VMs on a Hyper-V host, you will need to Bind Device for authentication.
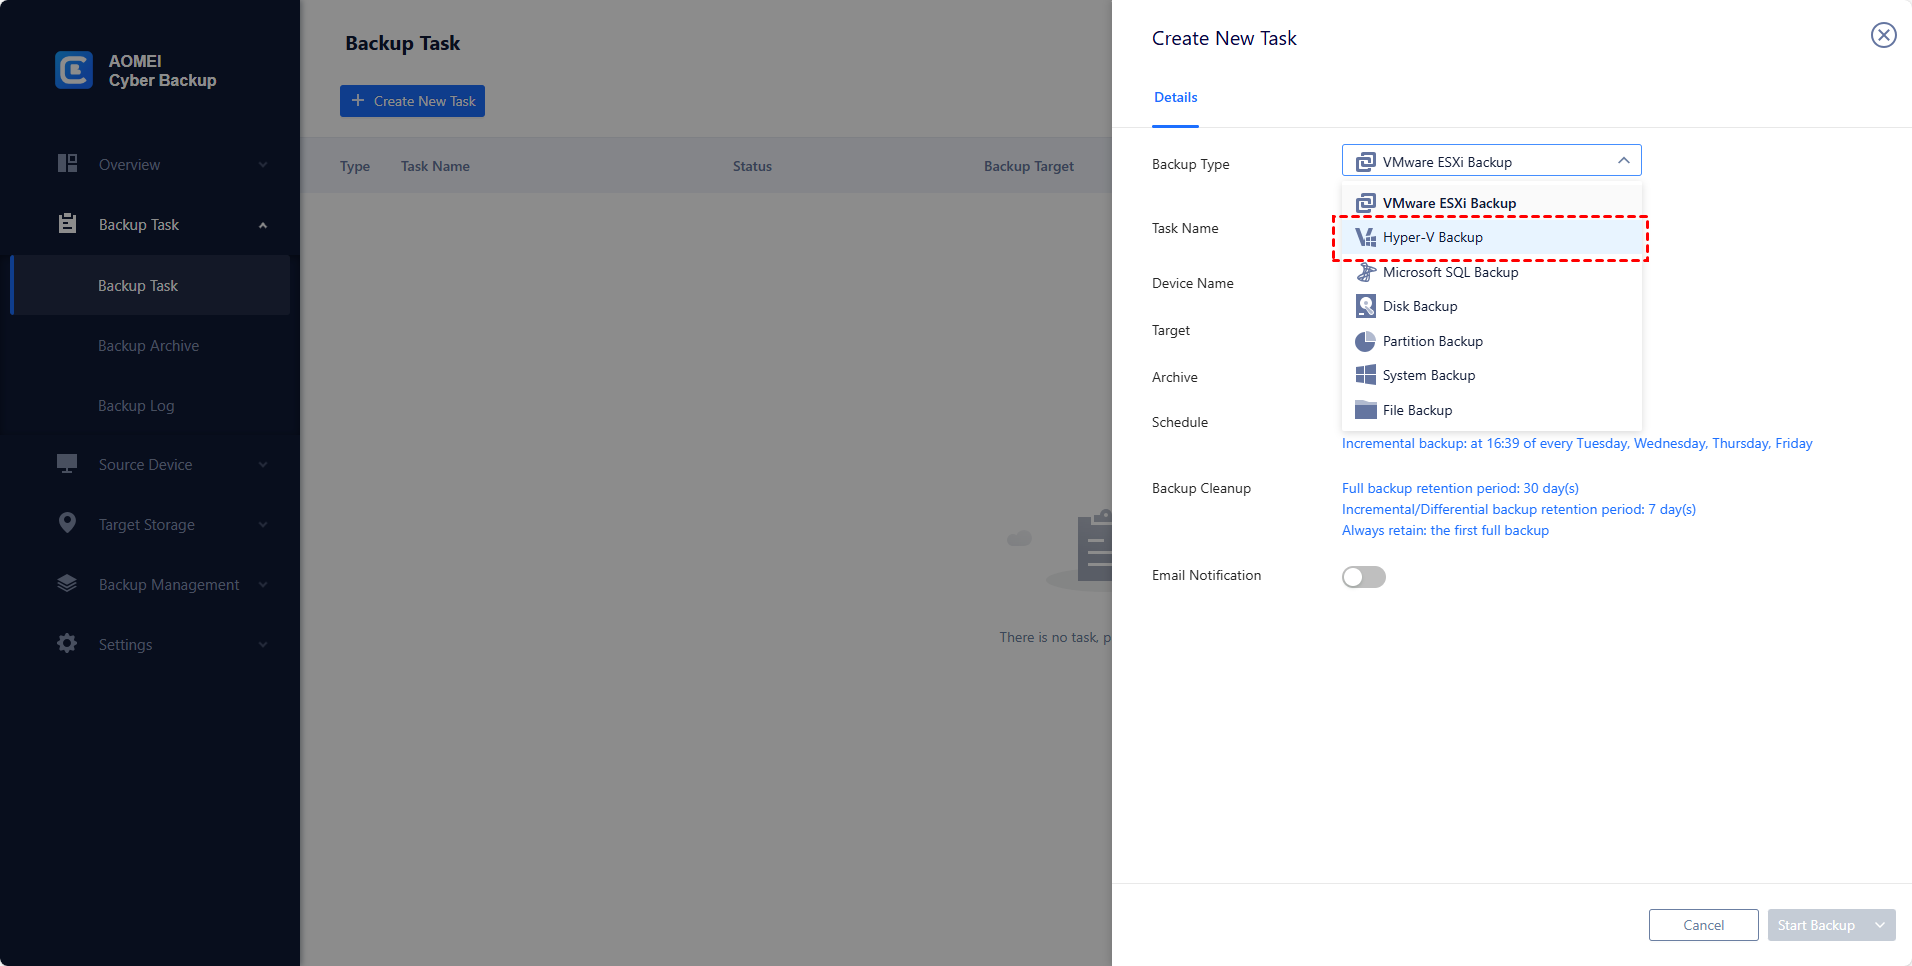
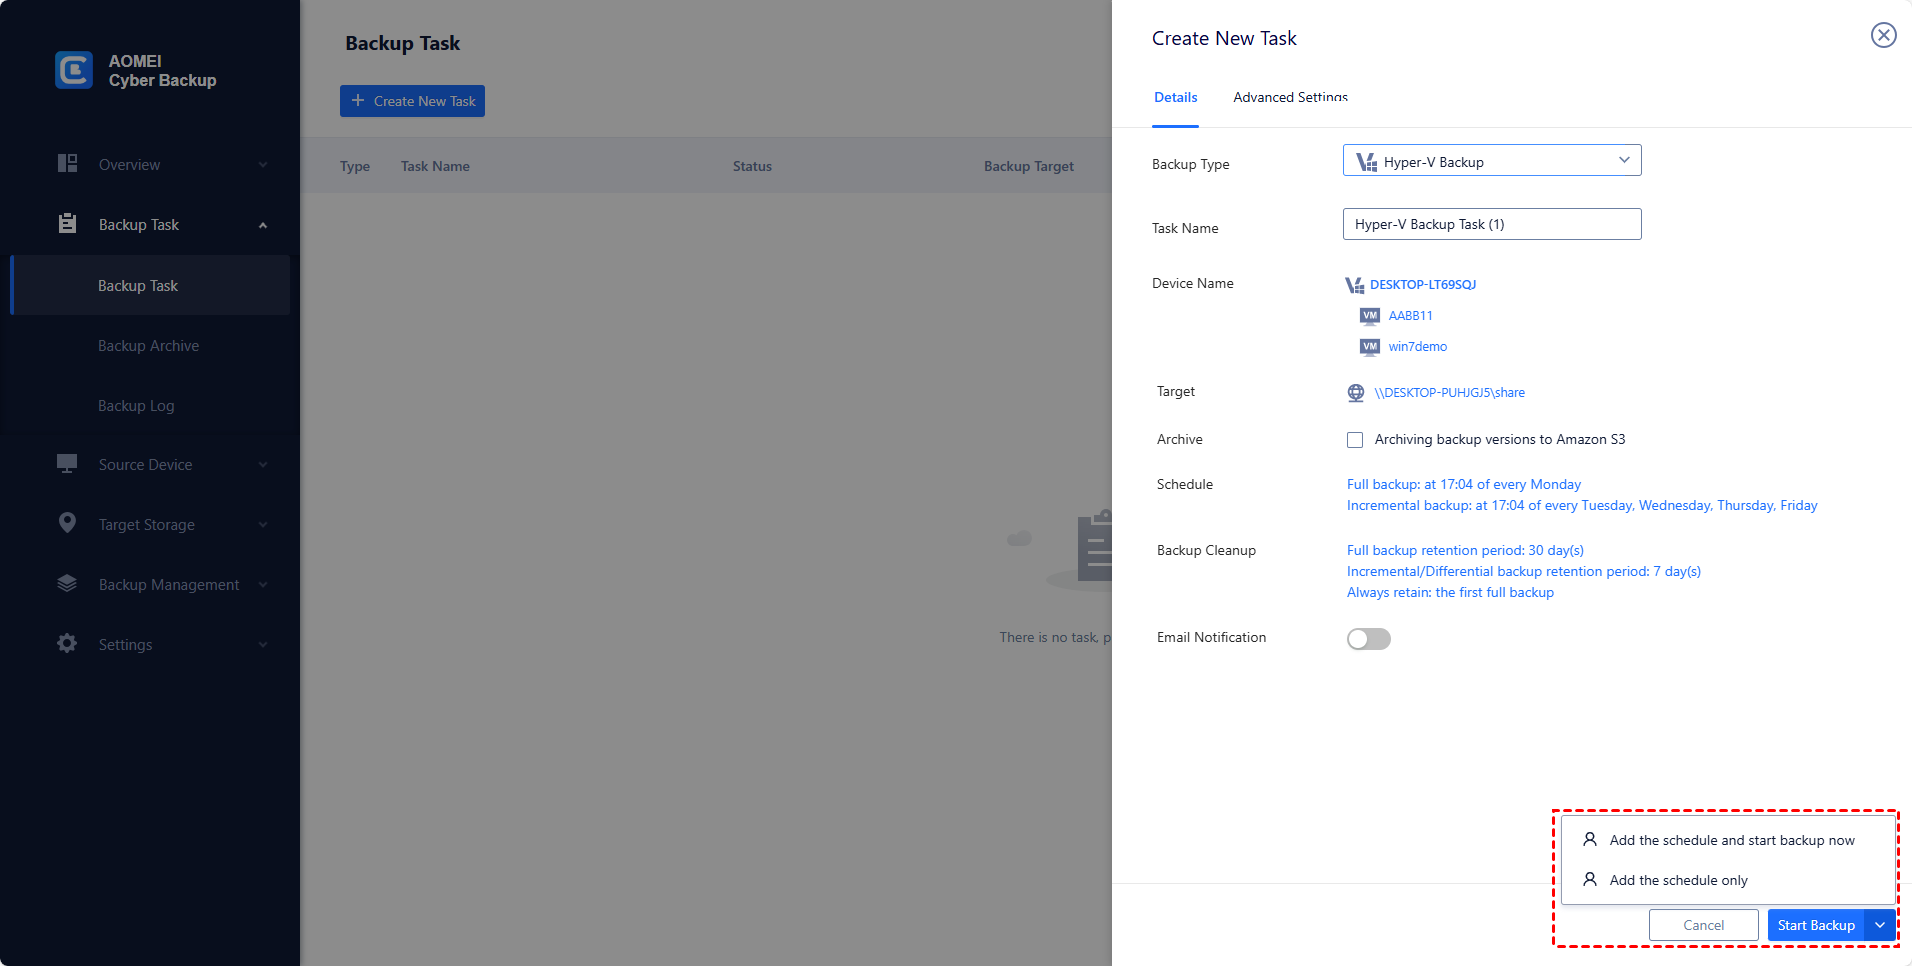
1. Launch AOMEI Cyber Backup, navigate to Backup Task and click + Create New Task. Set the Task Name, Device, Target, and Schedule as needed.
2. Now you can click Start Backup and select Add the schedule and start backup now, or Add the schedule only.
While the Free Edition covers most of VM backup needs, you can also upgrade to Premium Edition to enjoy:
▶ Batch VM Backup: Batch backup large numbers of VMs managed by vCenter Server or standalone ESXi hosts.
▶ Backup cleanup: Configure a retention policy to auto delete old backup files and save storage space.
▶ Restore to new location: Create a new VM in the same or another datastore/host directly from the backup, saves the trouble of re-configuring the new VM.

How to compact VHDX file via Hyper-V Manager GUI
Note: Emptying the Recycle Bin and defragmenting the disk will increase the efficiency of compression.
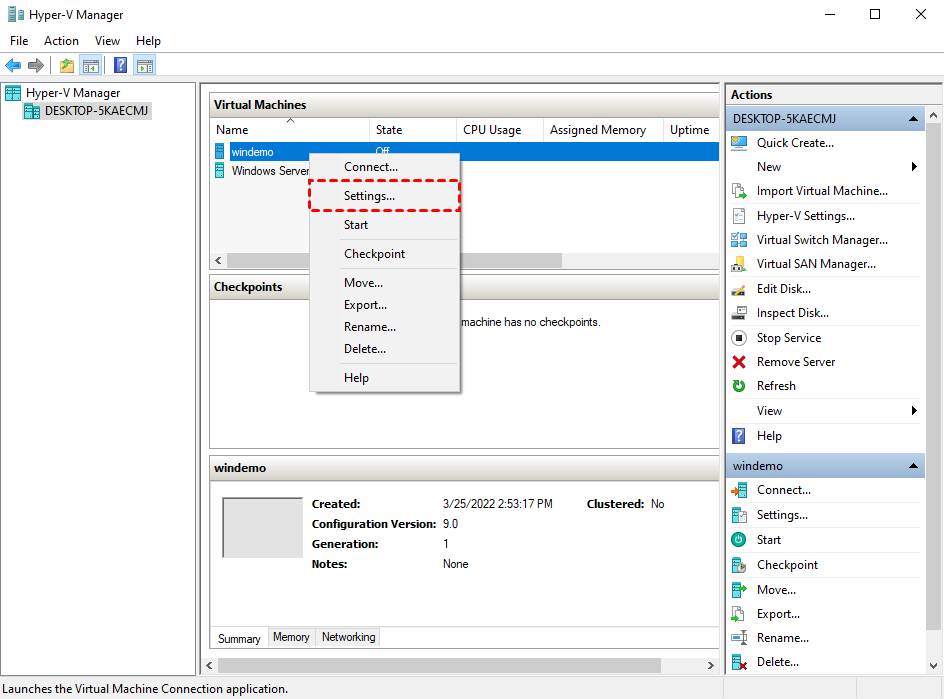
1. Launch Hyper-V Manager, power off the target VM and right-click on its name, select Settings.
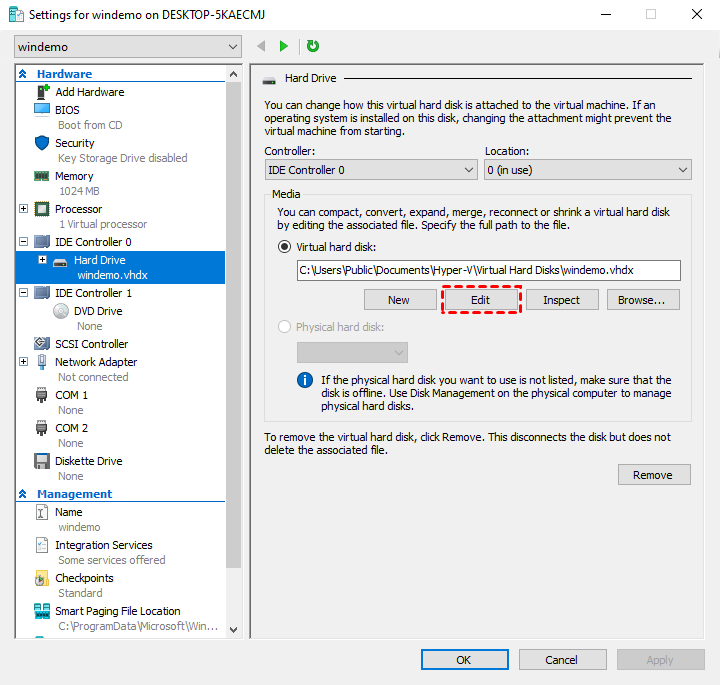
2. Navigate to Hard Drive from the left inventory, Click Edit button to open an Edit Virtual Hard Disk Wizard.
Note: You can click Inspect to get the size information about this disk.
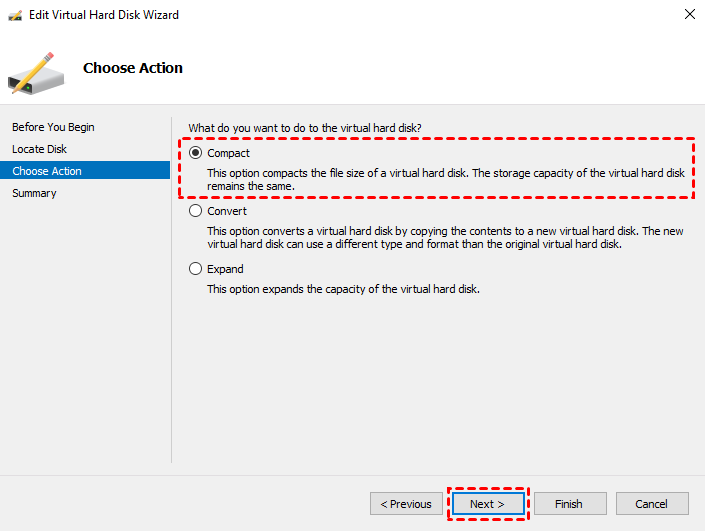
3. Click Next to skip the previous steps and go to the Choose Action tab, select Compact option and click Next to continue.
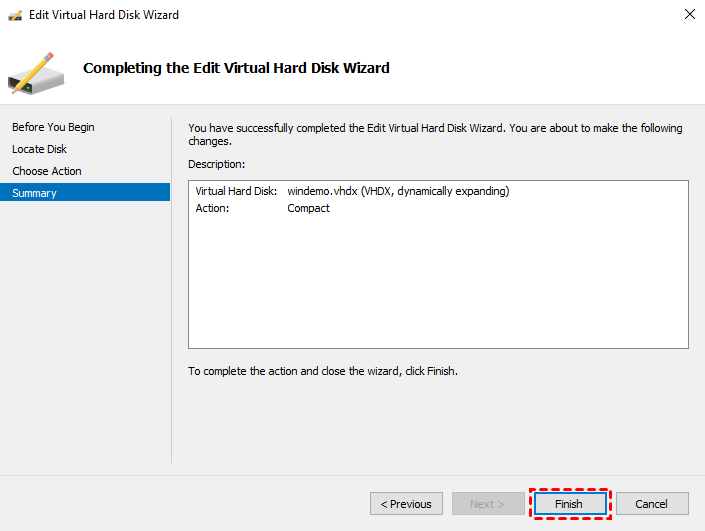
4. Review the Summary and click Finish to close the wizard.
How to compact VHDX file via PowerShell
Note: You need to install Hyper-V PowerShell module in advance to run cmdlets for compact VHDX PowerShell.
Power off the target Hyper-V VM, launch Windows PowerShell, and run the following commands to compact VHDX:
Mount-VHD -Path ‘vhdx folderpath\vhdxname.vhdx’ -ReadOnly
Optimize-VHD -Path ‘vhdx folderpath\vhdxname.vhdx’ -Mode Full
Dismount-VHD ‘vhdx folderpath\vhdxname.vhdx’

Summary
Compact VHDX is a common way to free up space while using Hyper-V dynamically expanding disks. In this article, I introduced how to compact VHDX via Hyper-V Manager GUI and PowerShell in detail. Meanwhile, in Hyper-V VM, shrinking a disk is also efficient to save storage space.
When deleting files or cleaning disks, even just optimize VHD, there is always a risk of data loss. Therefore, a proper backup schedule is of great importance, especially for enterprises. Here I recommend you the free software AOMEI Cyber Backup, which allows you to assign sub-accounts with limited privileges, effectively avoids mis-operations.

