


Tutorial for Creating Hyper-V Virtual Floppy Drive Image
For most users, floppy disks are outdated. At least physical floppy disks above 3.5 inches have disappeared from public view, but virtual floppy disks are still useful in VMs. In this article, I will introduce how to create and use virtual floppy disk images on Hyper-V.
By Crystal / Updated on June 4, 2026
What is virtual floppy disk
Virtual floppy disk is a virtualized disk file that simulates a traditional floppy disk. The biggest difference between them is the physical existence. While traditional floppy disks exist as physical disks, the virtual floppy disks are created by copying physical floppy disks to image files, thus exist as disk images.
As traditional floppy disks are outdated, but virtual floppy disks are still be using for these features:
- Open certain applications such as a Linux virtual router or a firewall on the floppy.
- Transfer files freely between two systems.
- Easy to manage and will not cause damage or loss of the physical disk.

In this article, I will introduce how to create a Hyper-V virtual floppy drive image, and how to use it to transfer files.
Important: Before you start, please note that Hyper-V VMs of Generation 2 do not support virtual floppy drive (diskette drive option). Therefore, you can only perform the following operations on Generation 1 Hyper-V VMs. If you only have generation 2 Hyper-V VMs, you may need to convert generation 2 to generation 1 before start.
How to create virtual floppy disk image in Hyper-V
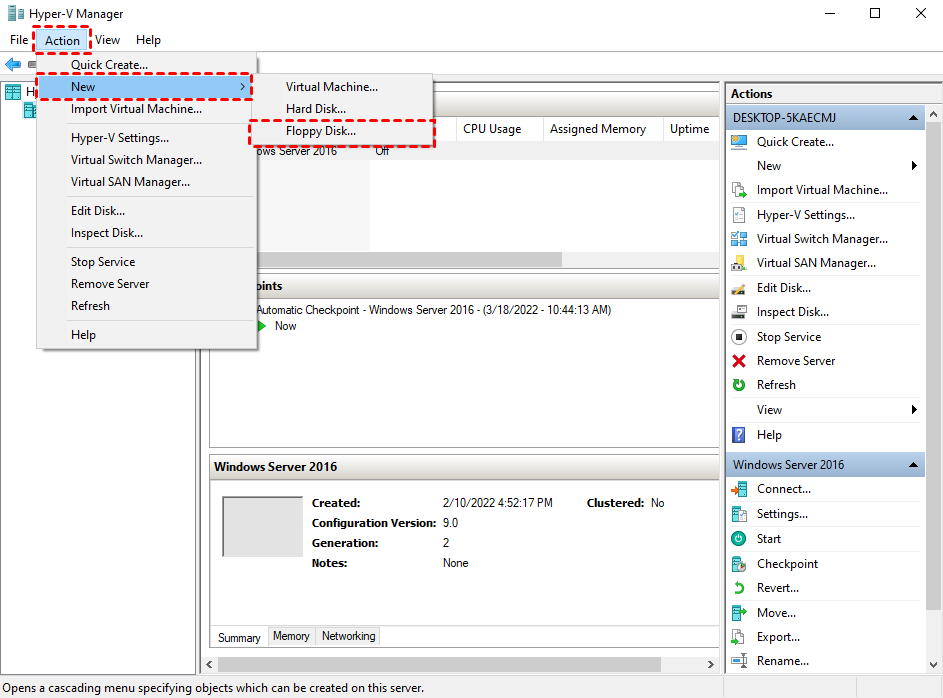
1. Launch Hyper-V Manager, select the target VM and click Action > New > Floppy Disk…
2. In the pop-up window, provide a name for the floppy disk file and specify a destination storage.
3. Click Create to start.
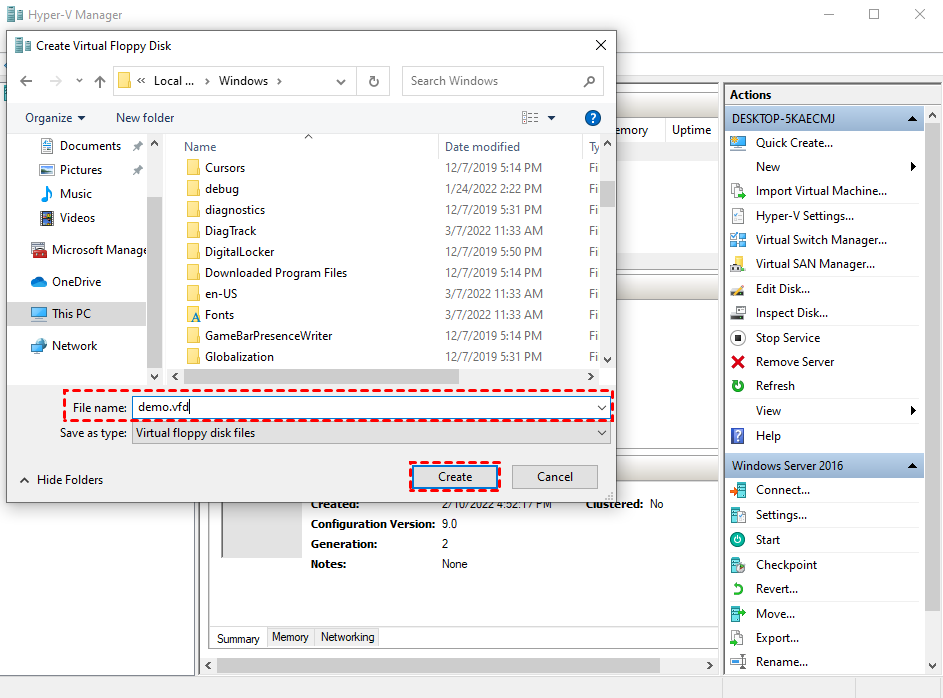
Now you have created a Hyper-V virtual floppy disk file .vfd file you can attach to any Hyper-V, Virtual Server, or Virtual PC VM.
How to attach virtual floppy drive to a Hyper-V VM
1. Launch Hyper-V Manager, right-click on the VM name and select Settings.

2. Navigate to Diskette Drive tab, select Virtual floppy disk (.vfd) file option, and click Browse… to specify the .vfd file you want to attach. Click OK to save.

3. Then you can power on your Hyper-V VM. The first time you mount the floppy, you will be asked for format it.
How to remove virtual floppy drive from a Hyper-V VM
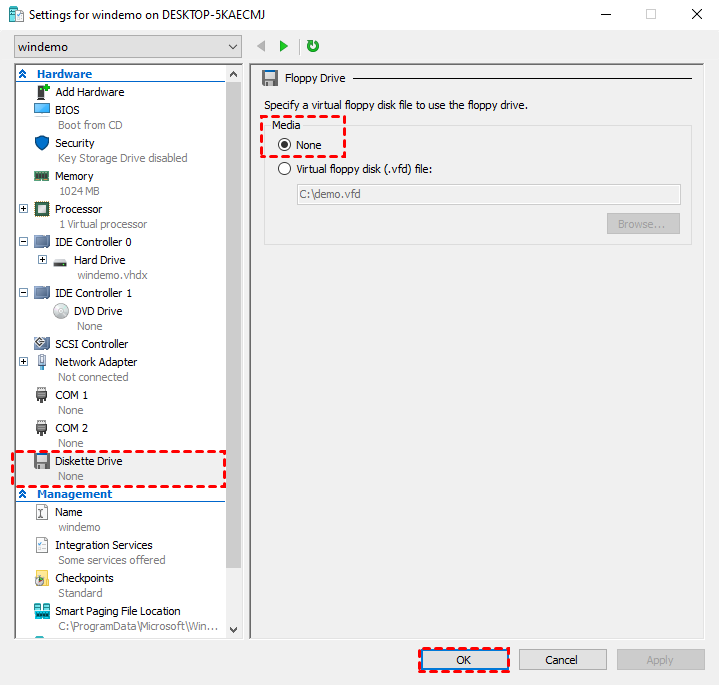
1. Launch Hyper-V Manager, right-click on the VM name and select Settings.
2. Navigate to Diskette Drive tab, select None option, and click OK to save.
Tip: By copying data to the virtual floppy drive (A:), removing the disk from the source VM and attaching it to another VM, you can transfer files among VMs.
A more efficient way to transfer files between Hyper-V VMs
Although Hyper-V virtual floppy drive image can be a convenient way to transfer files between Hyper-V VMs, but it is limited in small amount due to its own limit.
Therefore, if you want to transfer a lot of data among VMs, here I recommend you a more efficient software, AOMEI Centralized Backupper.
By installing an agent on the physical or virtual machines, you can backup and restore the files on your VM as it is a physical machine, and perform Hyper-V physical to virtual migrations. In addition, AOMEI Centralized Backupper is a professional backup software that enables File, System, Disk, Partition, and SQL Server Backup.
Next, I will show you how to perform transfer files among VMs via AOMEI Centralized Backupper. You can click the following button to start a free trial.
How to transfer files among VMs via AOMEI Centralized Backupper
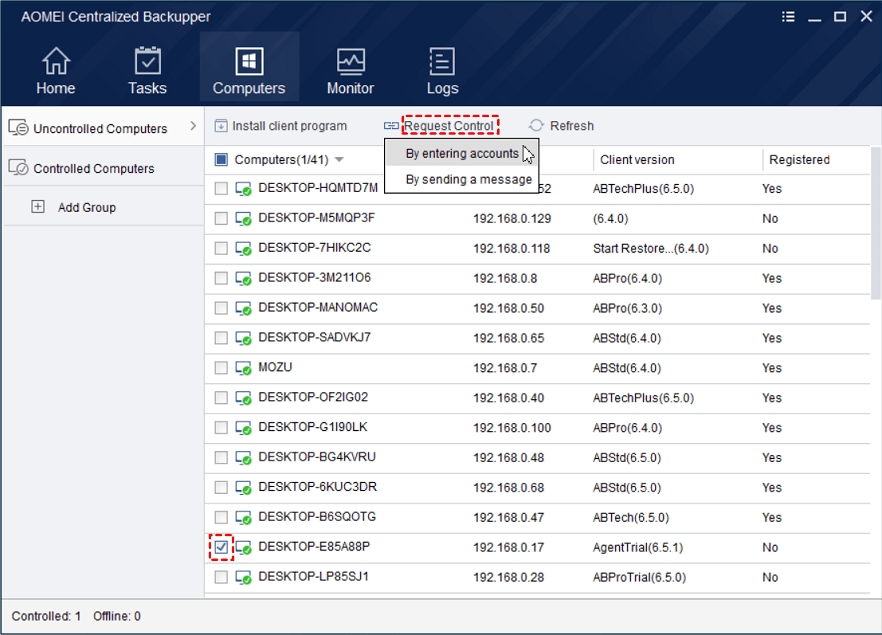
1. Launch AOMEI Centralized Backupper, navigate to Computers > Uncontrolled Computers. Check your physical or virtual machines (with a static IP) from the Computers list, and click Request Control.
It will pop up a request window on these machines, once you are authorized you can backup and restore files to them whenever you like.
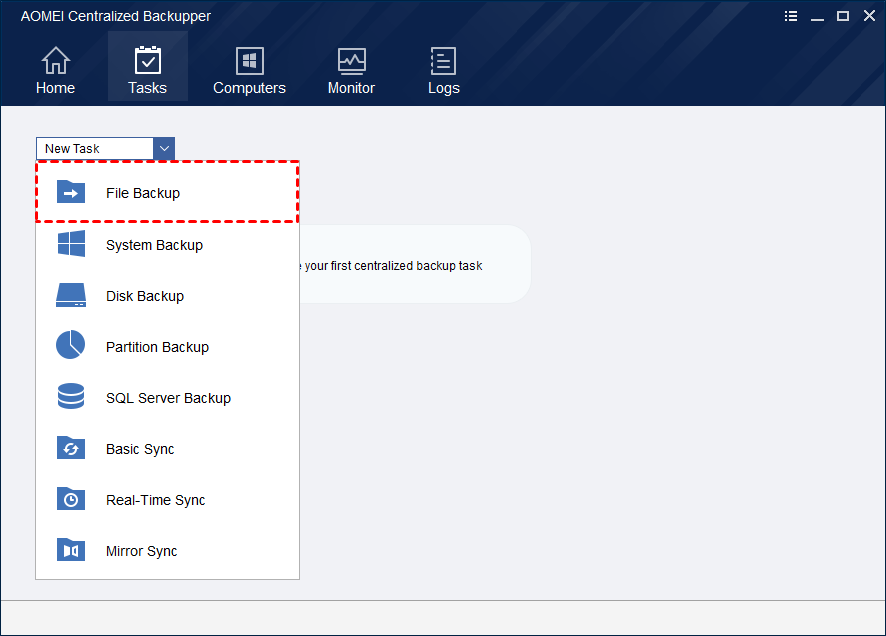
2. Navigate to Tasks > New Task > File Backup.
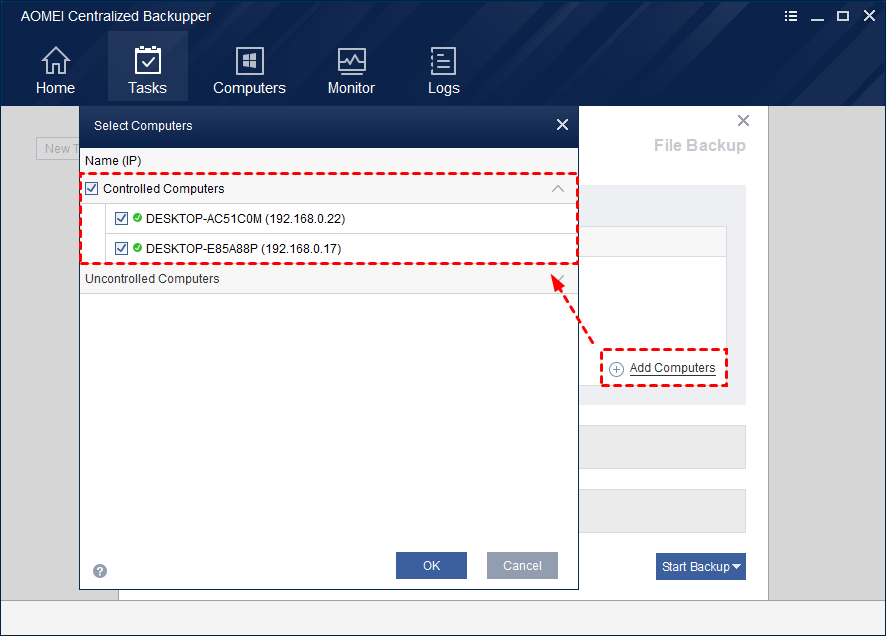
3. Click + Add Computers to specify the source machine, click OK to confirm.
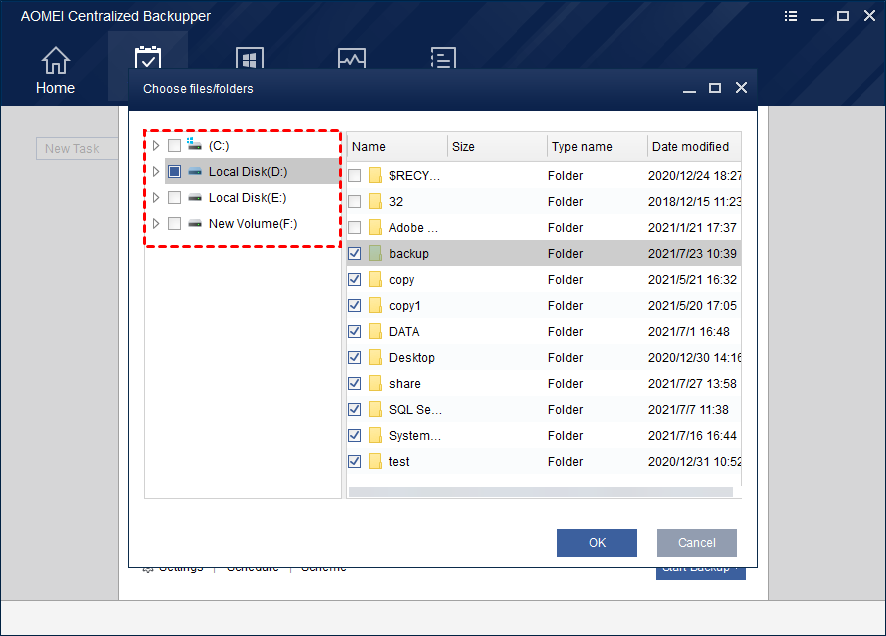
4. Click Steps 2 to specify the data you want to backup.
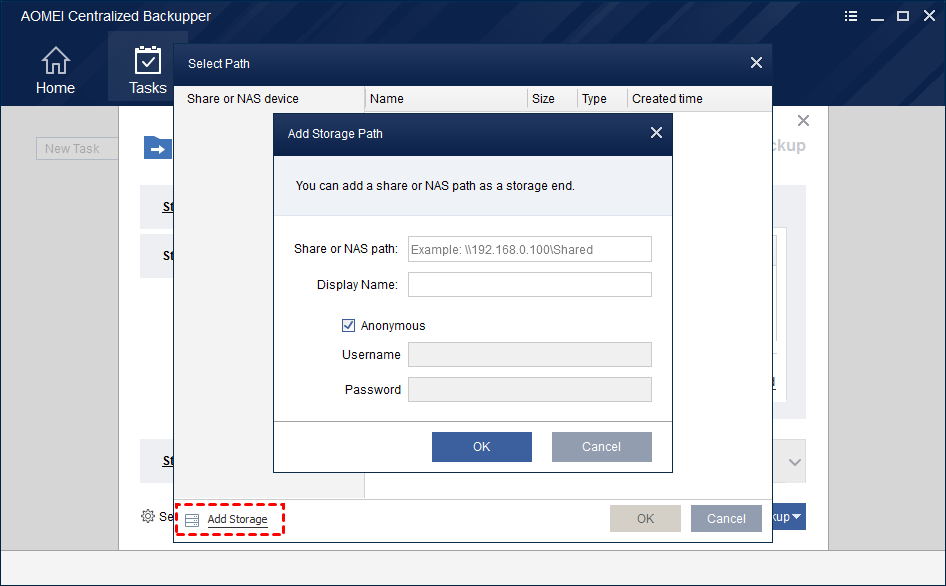
5. Click Step 3 to specify a Share or NAS device to store the backup, and then click Start Backup.
6. The created task will be listed separately in Tasks. Click Advanced > Restore on the right top of the task.

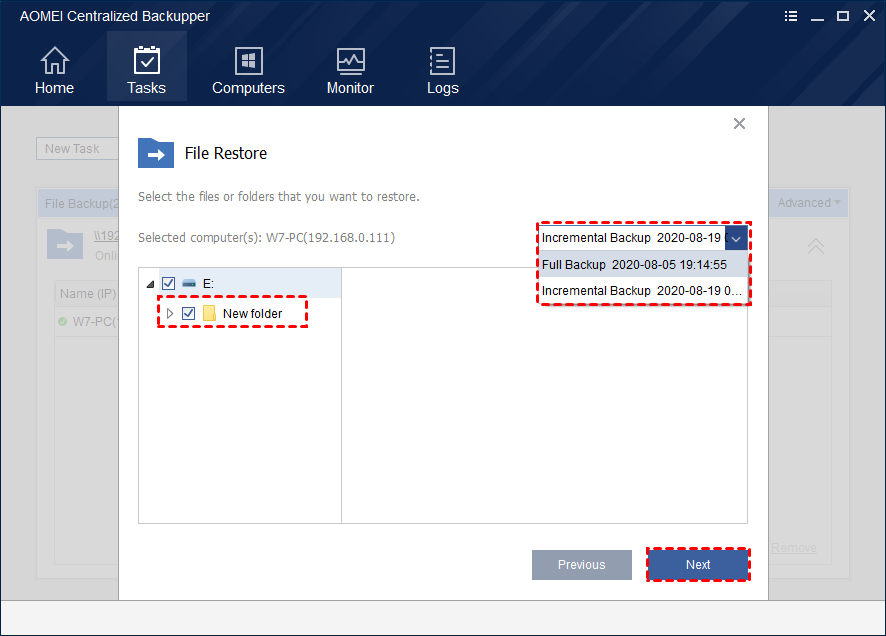
7. Specify the backup as the restore source, click Next to continue.
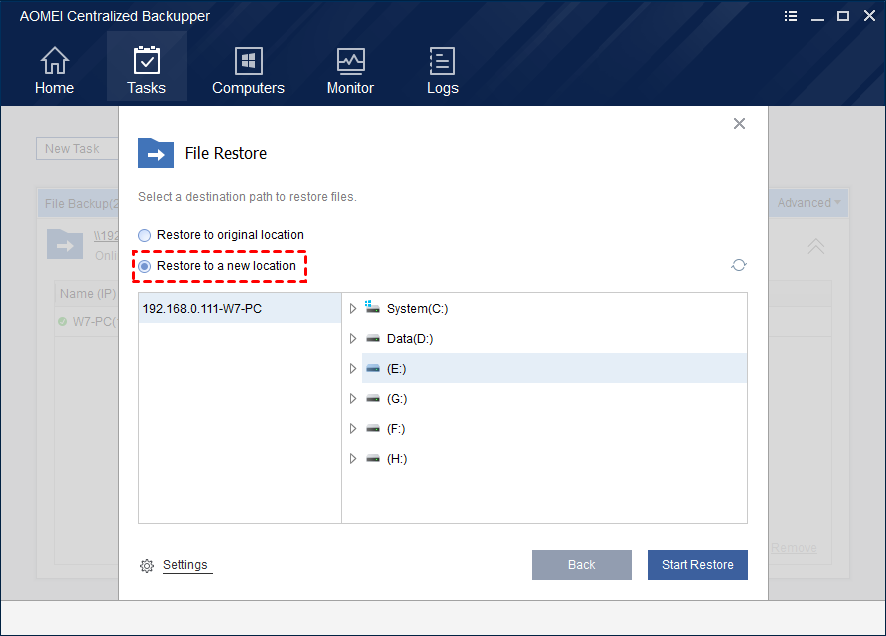
8. Select to Restore to a new location option and specify the destination VM. Click Start Restore.
Summary
While the traditional physical floppy disk is long gone for most users, virtual floppy disks are still in use as a method of transferring files between two VMs. In addition, if your VM doesn’t recognize its virtual CD-ROM drive or the SCSI system and you don’t want to power it off to add a virtual IDE VHD, the virtual floppy drive can be very helpful.
In this article, I introduced how to create a Hyper-V virtual floppy drive image, how to attach it to a VM and remove it. It is also a convenient way to transfer small amount to data between VMs. However, if you want a more efficient way to transfer a lot of data to another VM, for example, Hyper-V copy file to VM, I recommend you AOMEI Centralized Backupper.

