How to Create Windows Recovery Environment USB | 2 Ways
Windows Recovery Environment USB can be used to repair Windows when a serious error occurs. If you are unfamiliar with it, read this article carefully.
By Lily Updated on September 1, 2025
Why do you need Windows Recovery Environment USB?
Windows Recovery Environment (WinRE) is a recovery environment that can repair common causes of unbootable operating systems. Generally, if Windows fails to start normally twice in a row, it will automatically enter WinRE on the third restart and load the advanced startup options.
If Windows can’t bring up the recovery options automatically, a Windows Recovery Environment USB is needed. With a Windows recovery USB, you can:
-
Install or reinstall Windows.
-
Recover Windows from a serious error with the tools it offers, such as Startup Repair, System Restore, etc.
Now you know the usage of Windows recovery USB. Then, how to use it exactly?
How to use Windows Recovery Environment USB in Windows 10
First, you should create Windows 10 repair USB. Then, you can use it to reinstall or recover Windows.
👉 Create Windows 10 repair USB
👉 Recover from Windows 10 recovery USB
👉 An easier way to create Windows recovery USB🔥
Create Windows 10 repair USB
Fortunately, Windows 10 has a built-in feature to create Windows Recovery Environment USB. Bear in mind that the USB drive will be overwritten during the process, so backup files on the USB drive before you start. Then, follow the instructions below:
1. Connect the USB drive to your computer. Type “recovery drive” in the search box and select Create a recovery drive from the listed results.
2. In the pop-out window, check the option Back up system files to the recovery drive and hit Next.
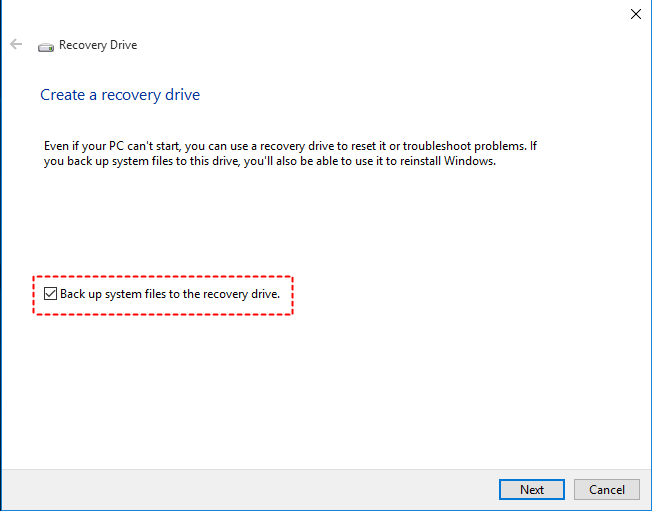
Note: The "Back up system files to the recovery drive" option gives you a chance to reinstall Windows 10 when you cannot troubleshoot your computer with other recovery tools, such as System Restore, Startup Repair, Command Prompt, etc.
3. Select the USB flash drive you have connected, and click Next to continue.
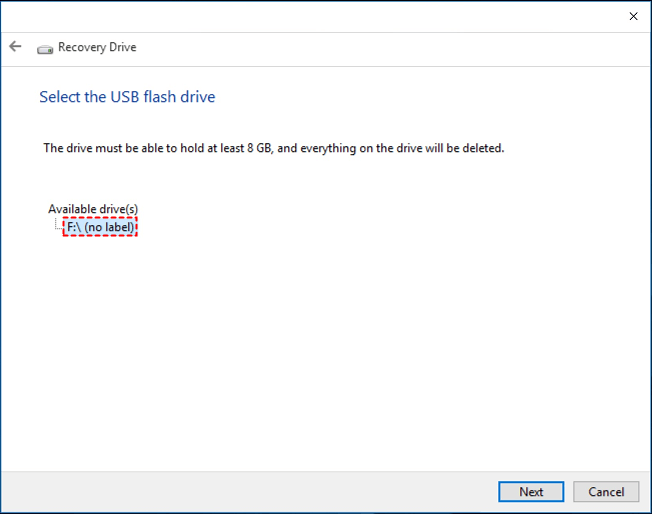
Tips: The USB drive should be as large as the capacity shown in the prompt. Here it should be at least 8 GB.
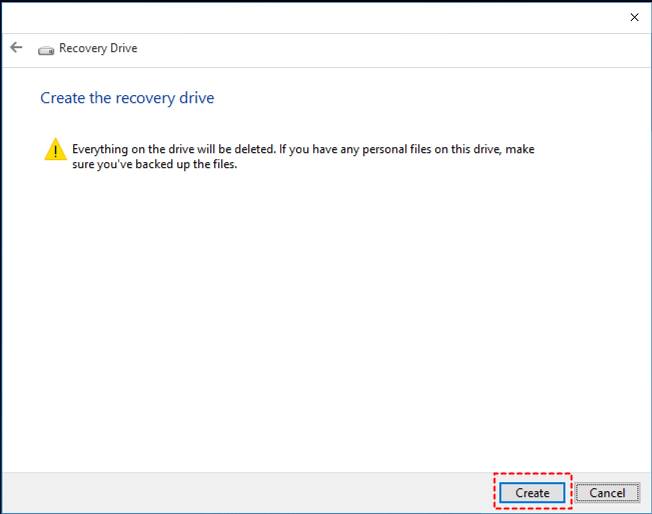
4. On the next screen, click Create to begin creating the recovery drive.
5. Click Finish when the recovery drive is ready. Safely disconnect your USB drive.
Note: If you are running Windows 7, learn how to create Windows 7 recovery environment USB here.
Recover from Windows 10 recovery USB
When a serious error occurs, you can reinstall or recover Windows 10 from the recovery drive. If you choose to reinstall Windows 10, all your files and apps will be removed. So do backup your important files elsewhere before reinstallation. Learn how to reinstall Windows 10 using Windows Recovery Environment USB thereinafter:
1. Insert Windows 10 recovery USB you have created and boot your computer from it.
2. Choose your keyboard layout.
3. Select Troubleshoot > Recover from a drive successively. Things will now start getting ready.
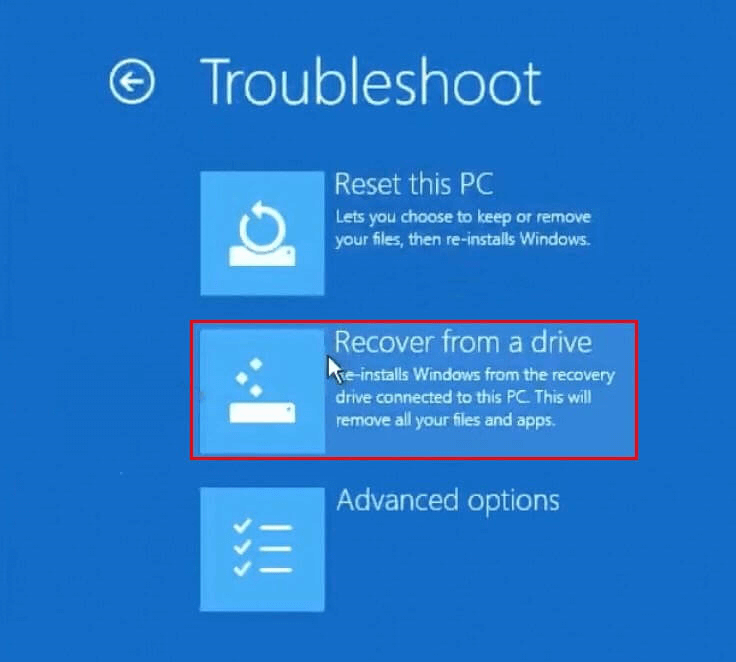
Tips: If you didn’t check Back up system files to the recovery drive when you created your recovery drive, Reset this PC and Recover from a drive won’t be available.
4. Click on either Just remove my files or Clean the drive fully for how you want to clean your drive.
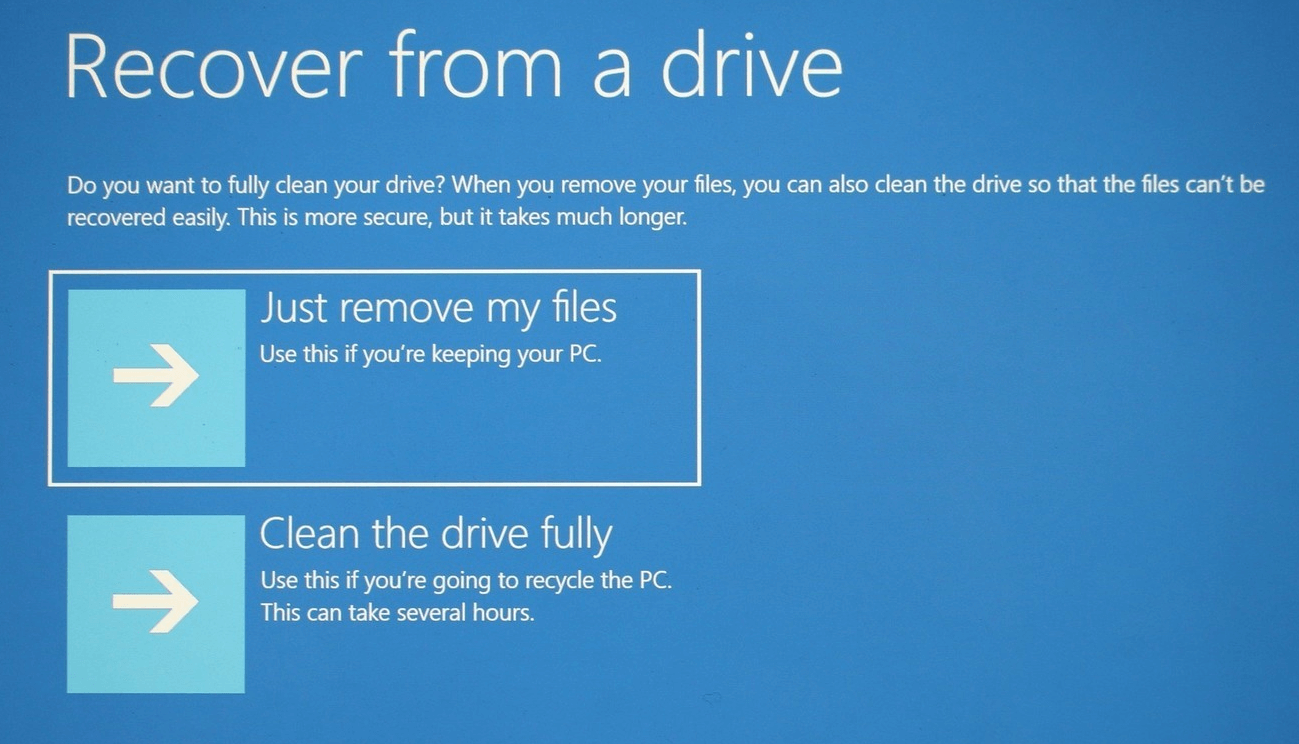
Tips: The first option performs a quick format, thus taking less time. The second option performs a secure erase so that your files can’t be easily recovered.
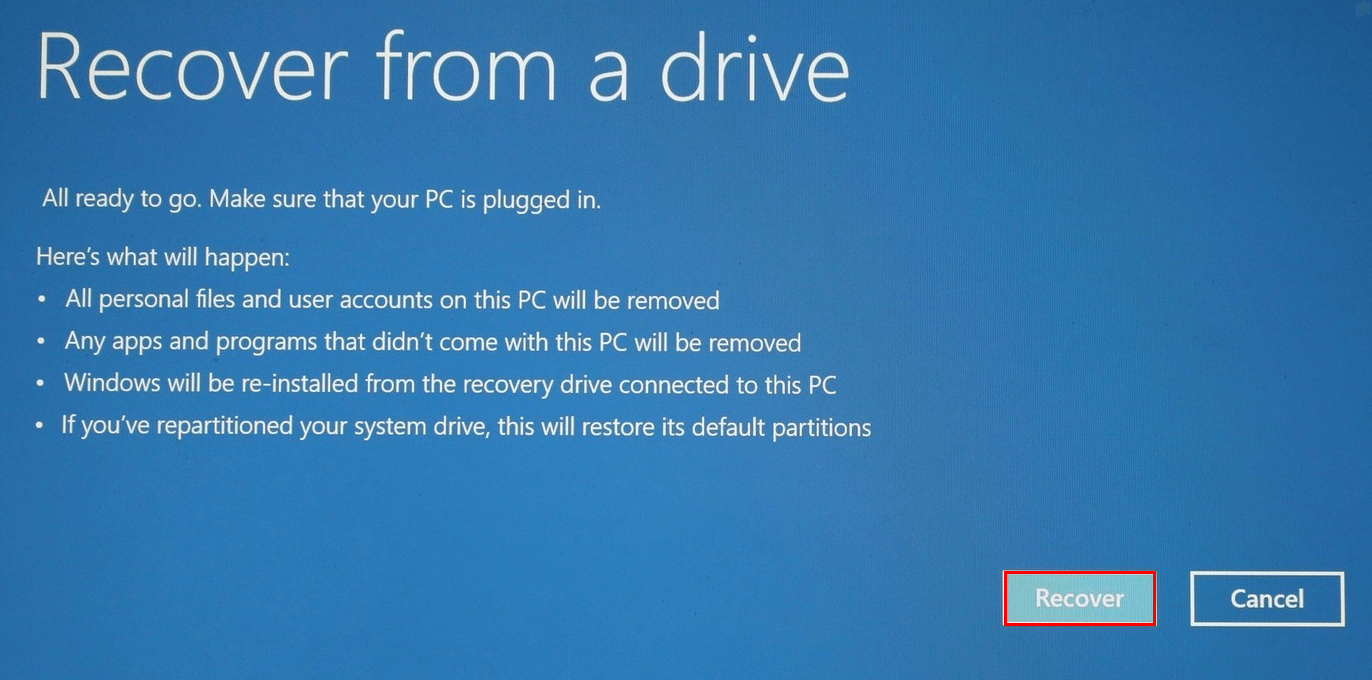
5. Click on Recover to begin. This will take a while to finish, and your PC will restart a few times during the process.
6. When finished, setup Windows 10 from scratch.
Note: If you want to recover Windows 10 instead of reinstalling it, you can go to Troubleshoot > Advanced options in Step 3 and use the recovery options offered there.
An easier way to create Windows recovery USB🔥
In addition to Windows built-in feature, you can create Windows recovery USB via a handy freeware—AOMEI Backupper Standard. It enables you to make a bootable USB drive in all Windows PC operating systems including Windows 11/10/8.1/8/7. Besides USB drives, you can also create bootable media with CDs.
Download this free bootable USB creator now! Then follow the steps below to create Windows Recovery Environment USB via AOMEI Backupper:
Step 1. Connect a USB drive to your computer. Download, install and launch AOMEI Backupper. Click "Tools" and select “Create Bootable Media”.

Step 2. Select “USB Boot Device” and click “Create”. You will receive a prompt to format your USB drive. Click “OK” to start creating bootable media.

Note: You should also perform system backup regularly so that you can restore system from the Windows recovery USB when serious problems occur.
🌟Bonus: Create a recovery USB to fix the blue screen caused by CrowdStrike issue
Microsoft has identified an issue impacting Windows endpoints that are running the CrowdStrike Falcon agent. These endpoints might encounter error messages 0x50 or 0x7E on a blue screen and experience a continual restarting state. If you encounter this error on your computer, you can use the new recovery tool released by Microsoft to recover from WinPE:
1. On a working computer, download the signed Microsoft Recovery Tool from the Microsoft Download Center. Then run the PowerShell script to create a recovery USB drive.
2. Insert the USB key into an impacted device.
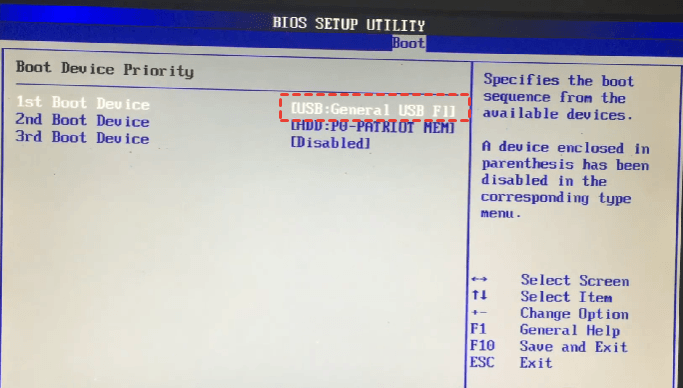
3. Reboot the device. During restart, press F12 (or follow manufacturer-specific instructions for booting to BIOS).
4. From the BIOS boot menu, choose Boot from USB and continue. The tool will run.
5. If BitLocker is enabled, the user will be prompted for the BitLocker recovery key including the dashes. The recovery key options are provided here. For third-party device encryption solutions, follow any steps provided by the vendor to gain access to the drive.
6. The tool will run the issue-remediation scripts as recommended by CrowdStrike.
7. Once complete, remove the USB drive and reboot the device normally.
👉For more details, please visit this page from Microsoft.
Wrapping things up
This page provides a complete guide to Windows Recovery Environment USB including the usage, creation and recovery process of it. AOMEI Backupper Standard supports creating bootable USB drives on all Windows PC operating systems. If you want to create bootable USB for Server 2019/2016/2012, etc., you may pick AOMEI Backupper Server.

